In this tutorial, we have explained the workings of global variables. Global variables are variables or controls in LabVIEW that can be used globally, i.e., throughout the program, including the main VI and all its respective subVIs. Firstly, a brief introduction to global variables is given, along with a comparison with text-based programming languages. After that, the use of global variables is explained with the help of a VI, and we tried to explain the working of global variables under different scenarios. At the end of the tutorial, we have provided an exercise to do on your own, and in the next tutorials, we will assume that you have done those exercises, and we will not explain the concept regarding them.
Introduction to Global Variables in LabVIEW
A variable with global scope, which means that it will be visible and accessible throughout the program, including all its classes or subroutines unless shadowed, is known as a global variable in computer programming. The global environment, or global state, is simply a set of global variables. Global variables are generally static variables in compiler languages, whose extent is the entire runtime of the program, including all its subroutines; in interpreted languages, global variables are generally dynamically allocated when declared since they are not known ahead of time.
In some programming languages, by default, all variables are global; however, variables have limited scope in many of the modern programming languages; generally, lexical scope is the requirement for global variables. Global variables don’t exist in some programming languages. Modular programming is the basic cause of the existence of global variables. It is modules, classes, or subroutine-based object-oriented programming that enforces class structure.

In LabVIEW, global variables are the same as those in other text-based or pictorial programming languages. This is the only factor so far that has the same name in LabVIEW as in other programming languages. It has the same working principle as a simple global variable. Defining a global variable in the main VI can result in its calling and use in any of its subVIs. It is explained in depth in the program given below.
Example of Using Global Variables in LabVIEW
Firstly, create a VI as discussed in Tutorial 1 and save it for future use, as we have done in all the previous tutorials.
Right-click on the block diagram, and from the Function Palette, select Structures, and then select Global Variables, as shown in the figure below.

Global Variable Block
Select this global variable and place it in the block diagram window. The global variable block is shown in the figure below.

Double-click on this block, and it will display another front panel as shown in the figure below.

A global variable only has a front panel. It is similar to a subVI with only a front panel and no block diagram.
Save this global variable VI as a separate “.vi” file, as we saved a simple VI in previous tutorials. Right-click inside the global variable and place a numeric constant; it has the same Control Palette as a simple VI’s front panel. Refer to the figure below.

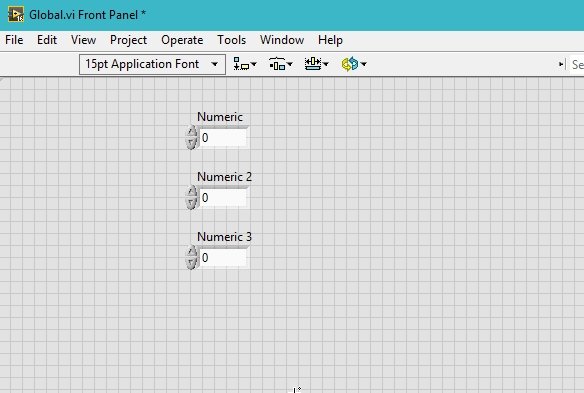
Multiple Numeric Controls
We can place as many numeric constants in one global variable as we want, and all these controls can be accessed from the block of the global variable in the block diagram of the main VI in LabVIEW. Refer to the figure below.
Now, go to the main block diagram of the VI and click on the global variable block. All the numeric controls that we have placed inside the global variables front panel will appear. Now, select the required control to access (see the figure below).

When we hover over the global variable, we can see that it only has a pin on the input side, i.e., no pin to read the data already stored in the global variable. What does one do when one wants to read the variables already stored in the global variable? Right-click on the global variable and select Change To Read, as shown in the figure below.

This will also change the pin of the global variable from the input side to the output side, as shown in the figure below.

Right-click on the pin and create an indicator at the output of the variable, as shown in the figure below.

Indicators for Variables
Copy this complete block diagram and paste it twice in the same block diagram, and change the global variables of the other 2 global variables to Numeric 2 and Numeric 3, as shown in the figure below.

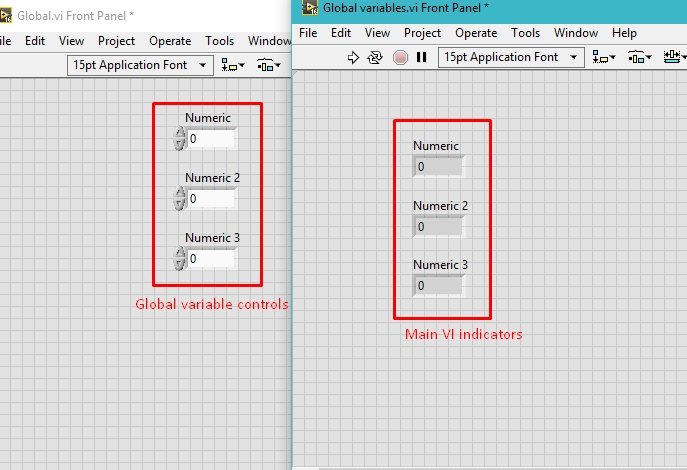
Now if we see the main front panel of the main VI, we can see all the indicators. These indicators are of the controls placed inside the global variables, as shown in the figure below.
Output
Set the global controls to any desired values and run the main VI. The values we gave to the control inside global variables will appear on the main front panel’s indicator as shown in the figure below.

Let’s try some other properties of the global variables. Open the global variable front panel and delete any of the indicators. Let’s suppose I delete Numeric 2 from the global variable. The global variable block displaying the value of the numeric 2 control will change its color from orange (float control) to black, as shown in the figure below.

We can also place more than one data type in one global variable. Only the indicator type will change in this case; all the operations will remain the same. See the figure below.

Place three global variables in the block diagram and set the control of the remaining two to Boolean and string, as shown in the figure below.

Place an indicator at the output of each of them, as shown in the figure below.

At last, we update the values in the global variables and run the main VI to see the results in the front panel of the main VI. See the figure below, which displays the output of the global variable containing different data types.

Exercise
- Do the temperature conversion exercise by defining all the constants in subVI in the main VI, i.e., using global variables. Constants are 5, 9, and 32.
Conclusion
In conclusion, this tutorial has provided a comprehensive overview of global variables in LabVIEW. We have explored the concept of global variables and how they differ from text-based programming languages. Additionally, we have discussed the step-by-step process of creating and using global variables in LabVIEW through a practical example. The tutorial has also highlighted the importance of indicators and demonstrated how to work with different data types within global variables. By completing the exercise and practicing the concepts presented in this tutorial, readers can gain a strong understanding of global variables and their applications in LabVIEW programming. Remember, should any difficulties arise, the comment section is always available for further assistance.
You may also like to read:
- HC-05 Bluetooth Interfacing with TM4C123G Tiva C Launchpad – Keil uvision
- SEPIC Converter Proteus Simulation
- Telegram Control ESP32 and ESP8266 GPIOs and LEDs using Arduino IDE
- Displaying Images in ESP32 and ESP8266 Web Server
- Get Epoch/Unix time with ESP32 through NTP server using Arduino IDE
This concludes today’s article. If you face any issues or difficulties, let us know in the comment section below.