In this tutorial, we will learn how to use Thonny Integrated Development Environment to write programs for ESP32 and ESP8266 using MicroPython firmware. By the end of this guide, you will be able to install Thonny IDE in Windows, Linux, and Mac operating systems. Moreover, we will also look through its built-in features, write and run a simple microPython code for ESP32/ESP8266 and have a general overview of the environment.
We have a similar guide for Raspberry Pi Pico:
Thonny IDE Introduction
Thonny is an open-source IDE which is used to write and upload MicroPython programs to different development boards such as ESP32 and ESP8266. It is extremely interactive and easy to learn IDE as much as it is known as the beginner friendly IDE for new programmers. With the help of Thonny, it becomes very easy to code in Micropython as it has a built-in debugger that helps to find any error in the program by debugging script line by line.
You can realize the popularity of Thonny IDE from this new that it comes pre-installed in Raspian OS which is an operating system for a Raspberry Pi. It is available to install on r Windows, Linux, and Mac OS.
Prerequisites
Before installing Thonny IDE on your Windows, Linux and Mac based PCs make sure you have the latest version of Python3 downloaded and installed. In case you do not have it, you can take a look at our previous article: Getting Started with MicroPython on ESP32 and ESP8266 to see how to install it easily.
Thonny IDE Installation Steps
In this section, we will list step by step instructions to download and install Thonny IDE on Windows, Linux and Mac OS based computers.
Installing Thonny IDE in Windows Operating System
We will show you how to download and install Thonny in Windows operating system. By Clicking here, you will be redirected to the official page of Thonny IDE. You can download the latest version of the IDE. The window shown below will be displayed. Click on download version 3.3.6 for Windows.

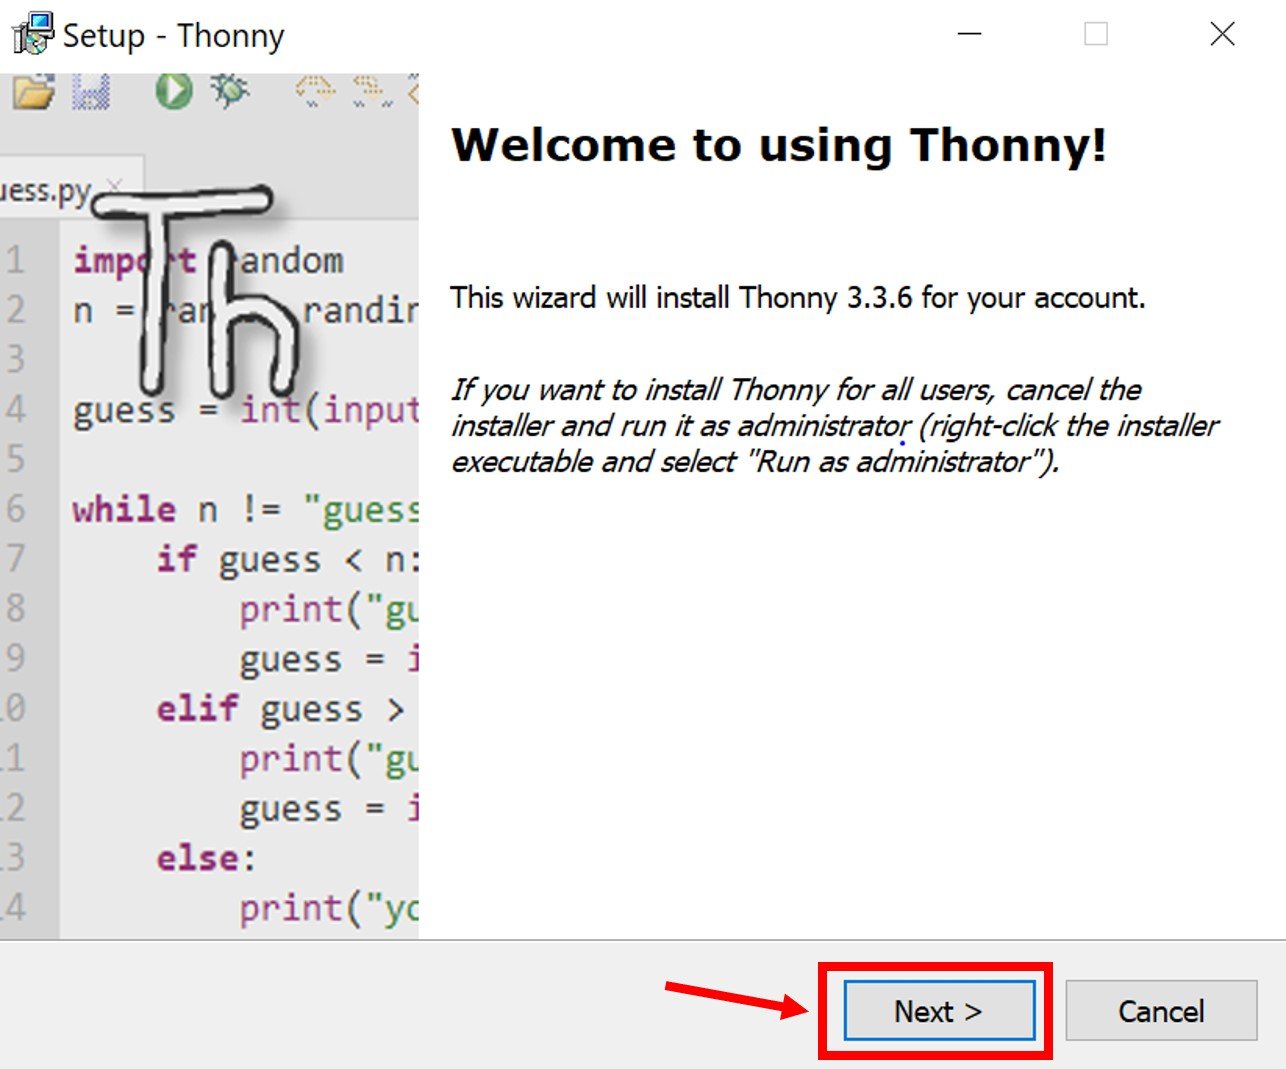
To start the installation process, run the .exe file and the Thonny Setup window opens. Click Next to proceed.
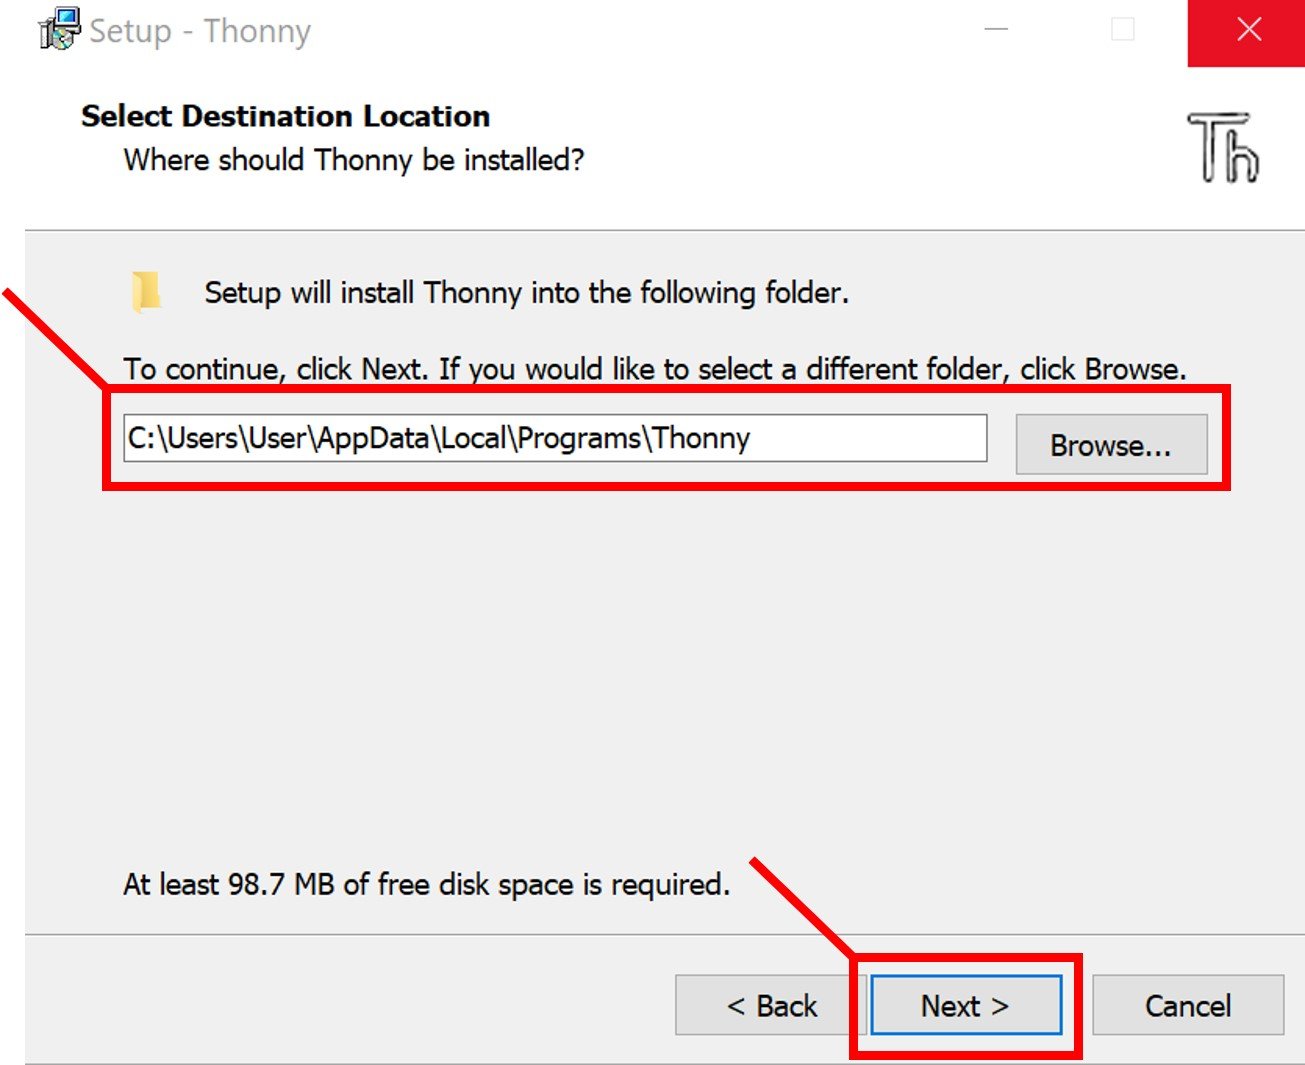
You can set the directory where the installation file should save by clicking on browse button. After specifying the location, click Next.
After that follow the instruction and as soon as the installation process finishes, the following window will open up. We have successfully installed Thonny IDE in Windows.
Installing Thonny IDE in Mac OS X
Thonny IDE is not available as a verified application on App Store. that is why Mac OS X blocks its installation. In order to work in this IDE in our Mac, we will need to unblock it and perform some additional security steps.
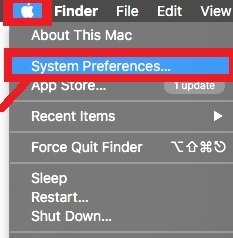
- In the menu, click System Preferences
- Inside it, Click on Security & Privacy

- The following dialog box appears. Click on the lock to make changes to your Security settings.
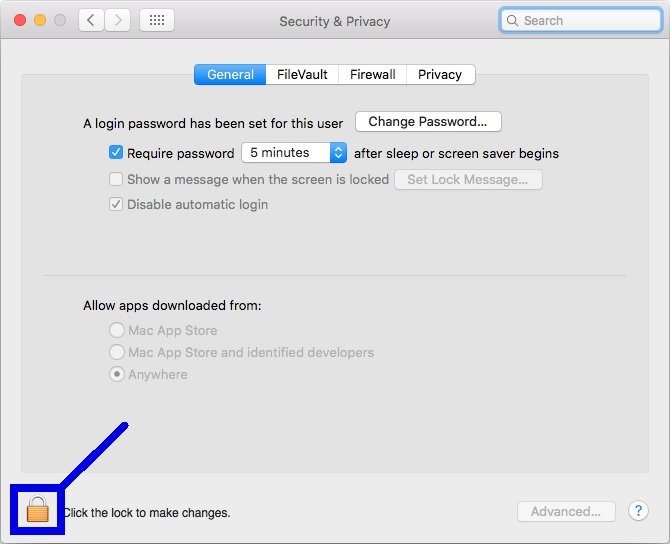
- You will have to enter your username and password and then click the Unlock button

- Click ‘Anywhere’ in allow apps to download from, after you have successfully entered your credentials and unlocked.

Now, we will be able to download Thonny just like we did for Windows OS. Now follow these steps to install Thonny IDE in Mac OS X.
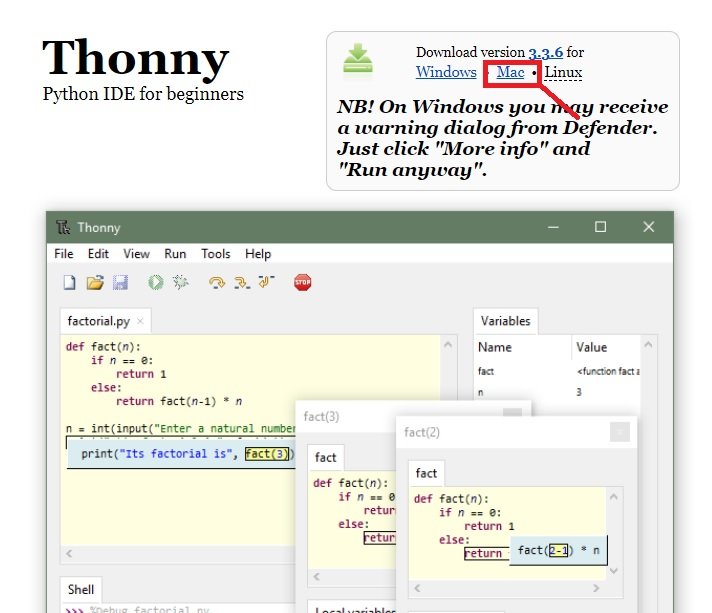
- Go to the following website (https://thonny.org/) to download and install the IDE. The following page will open. Click Download version 3.3.6 Mac.
- It will start downloading. After the process is completed, go to Downloads and click the .dmg file.

- We can bring the shortcut to the desktop by dragging it.
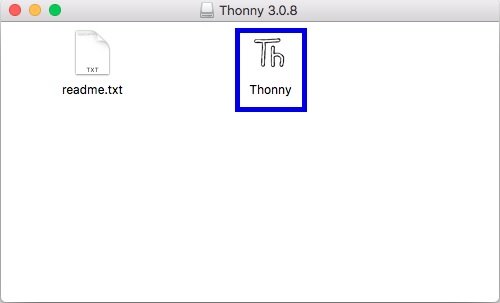
- After opening the IDE, the following window will be displayed.
After that follow the instruction and as soon as the installation process finishes, the following window will open up. We have successfully installed Thonny IDE in Mac OS X.
Installing Thonny IDE in Linux
In order to install Thonny IDE on Linux OS, you should first check the Linux distribution you are using and install Python dependencies accordingly.
For Linux OS, you should first install these Python dependencies to proceed to the next step:
- python3
- python3-pip
- python3-tk
This can be achieved in Ubuntu by typing in the following command in the terminal:
sudo apt install python3 python3-pip python3-tkPress Enter and type the following command to install the Thonny IDE
bash <(wget -O - https://thonny.org/installer-for-linux)We can also perform the installation via pip3 by giving the command:
sudo pip3 install thonnyIn Fedora distribution, use this command to install Thonny IDE:
sudo dnf install thonnyAfter the installation has completed, type Thonny in the terminal, and the following window will appear. (This is for the case if you used pip3 for installation)
thonnyWe have successfully installed the IDE in Linux.
Test Thonny IDE Installation with LED Blinking Example
Now, as we have installed our Thonny IDE for Windows, Linux, and Mac Operating Systems. But the procedure to use this IDE remains the same in all operating systems. Without any further details, let’s get started with Thonny IDE to write our first MicroPython Program.
Note: You can use any MicroPython supported developed board with Thonny IDE such as ESP32, ESP8266, Raspberry Pi Pico, etc. But in this tutorial, we will use EP32 or ESP8266 for demonstration purposes.
Running a Simple on-board LED
To start using Thonny IDE with ESP32 and ESP8266, connect the board with your computer through a USB cable.
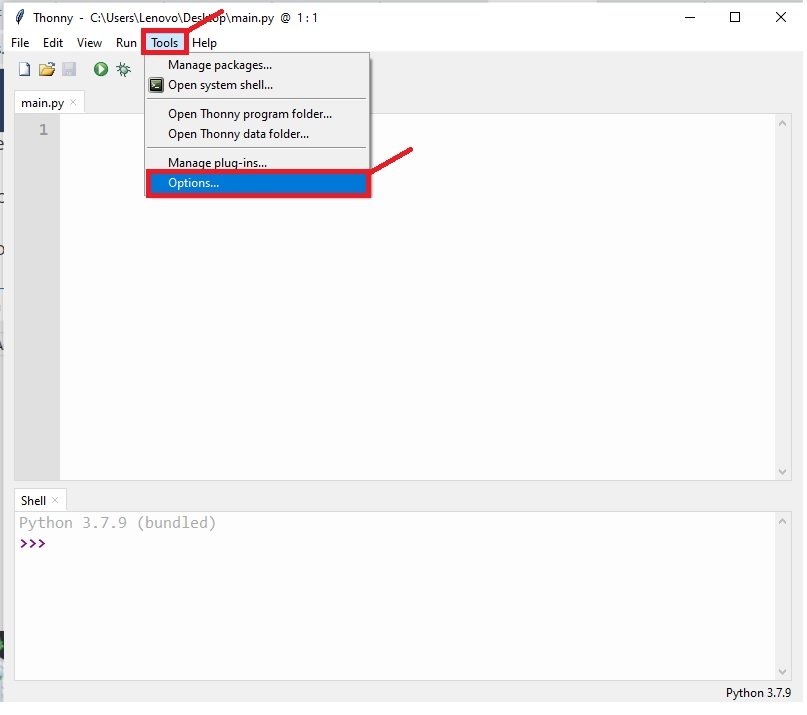
- After connecting our ESP board with our system, we will go to Tools>Options
Now, click on the Interpreter window. Go to the option: MicroPython. This will show you a list of supported boards available in Thonnny IDE. For example, we are using ESP32 in this tutorial. Therefore, select MicroPython(ESP32) option.
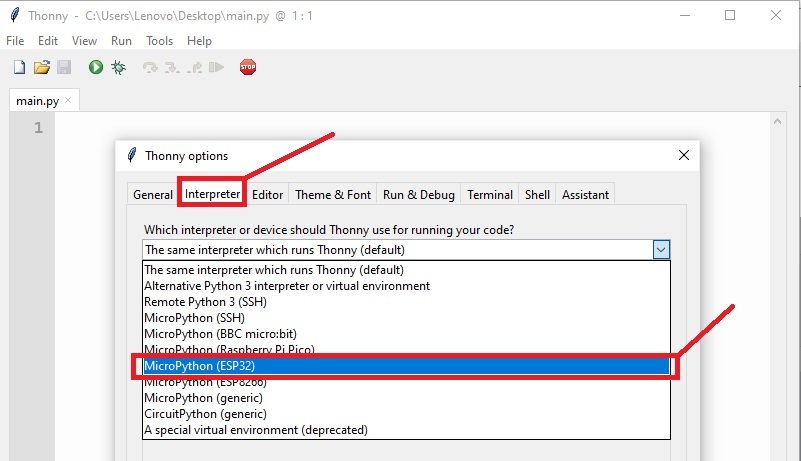
Note: Before using ESP32/ESP8266 boards with Thonny IDE, they should have MicroPython firmware installed on it.
After selecting MicroPython(ESP32) option, go to the details section and choose the following serial port.

The ‘Try to detect automatically’ option can only be used if we are only connecting a single development board.
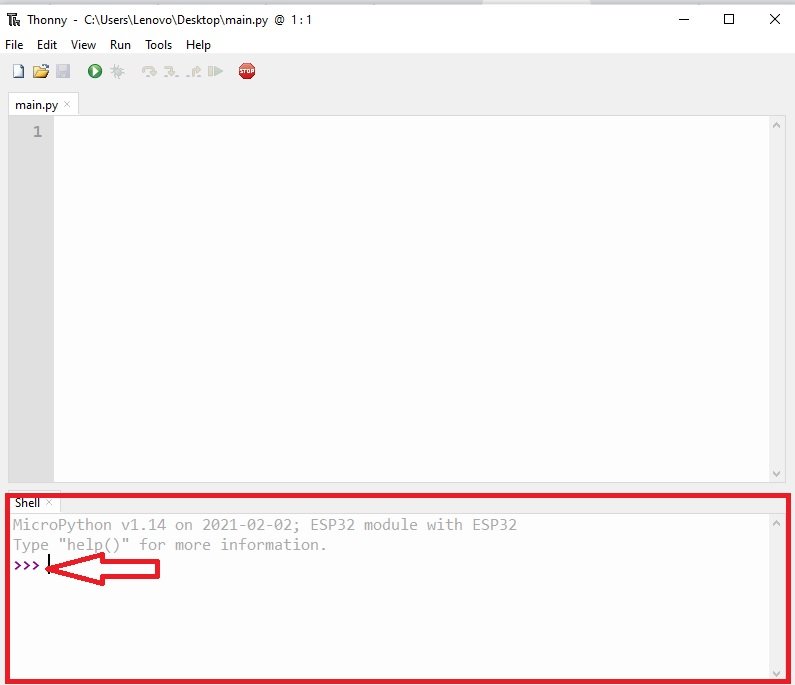
Now, your ESP32/ESP8266 board and the Thonny IDE are connected. This can be seen below in the window. We have connected ESP32 in this case. This can be seen by the prompt in the Shell window below.
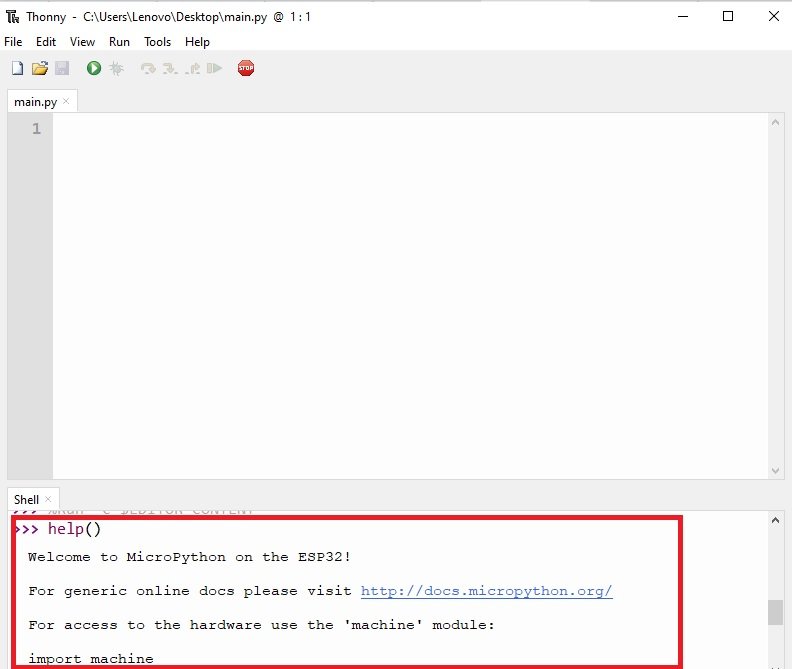
Now types help() in command prompt and if you get this response from ESP32 that means you have successfully installed and configured Thonny IDE for ESP32.
Testing ESP32 and ESP8266
Now let us light the built-in LED on our ESP32 board using MicroPython. Write down the following code in the Shell terminal. You will see the onboard LED of ESP32 will turn on.
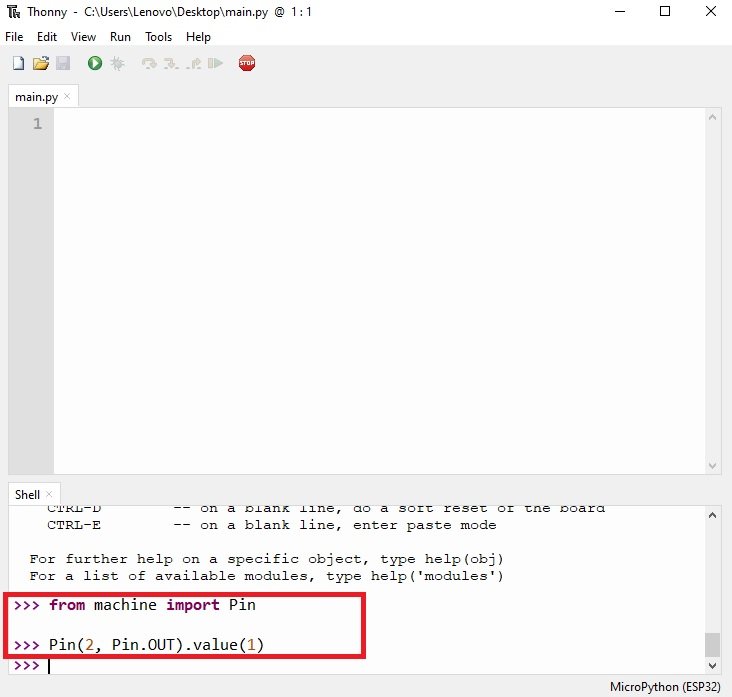
from machine import Pin
Pin(2, Pin.OUT).value(1)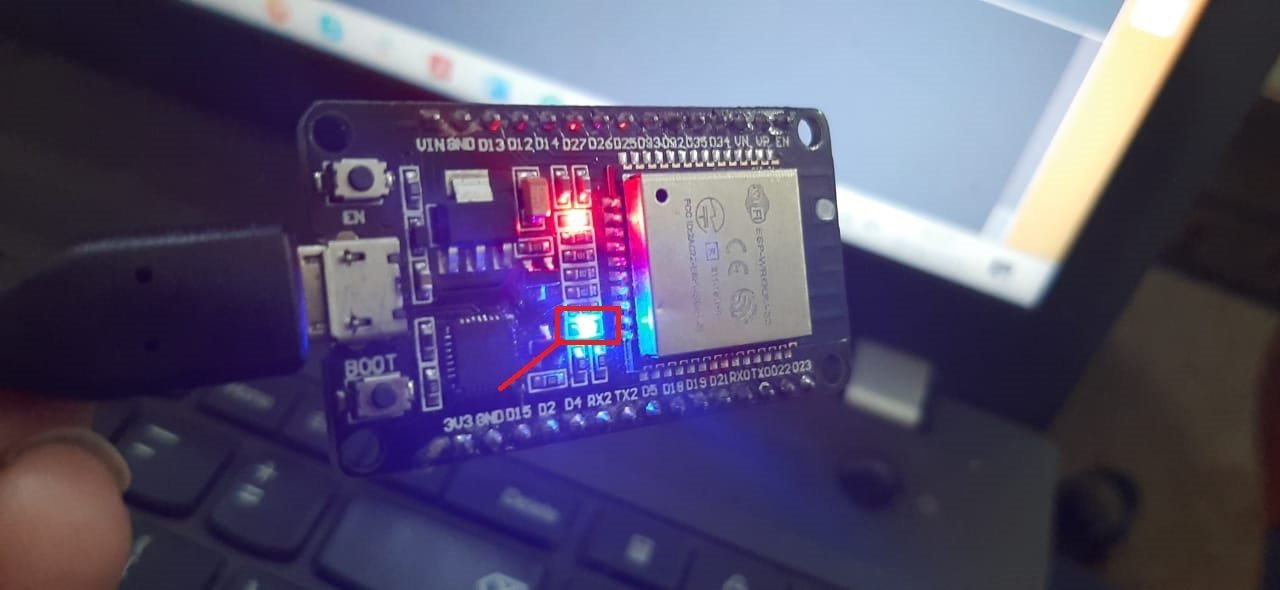
But if you are testing with ESP8266 NodeMCU, the logic to turn on LED of ESP8266 is active low. Therefore, you should send the following commands:
from machine import Pin
Pin(2, Pin.OUT).value(0)
Here we are importing the Pin class from the machine module as we have to set it as an output. The built-in led is connected through GPIO2 and configured as an output through the Pin() method. By accessing value (1) for ESP32 and value (0) for ESP8266, we are turning the LED On.
Similalry, we can turn the LED off by giving the following command in the shell terminal:
Pin(2, Pin.OUT).value(0) #For ESP32
Pin(2, Pin.OUT).value(1) #For ESP8266
After we are able to successfully turn the built-in LED on and off, we can be certain that the IDE is working perfectly with the ESP board.
Thonny IDE Overview
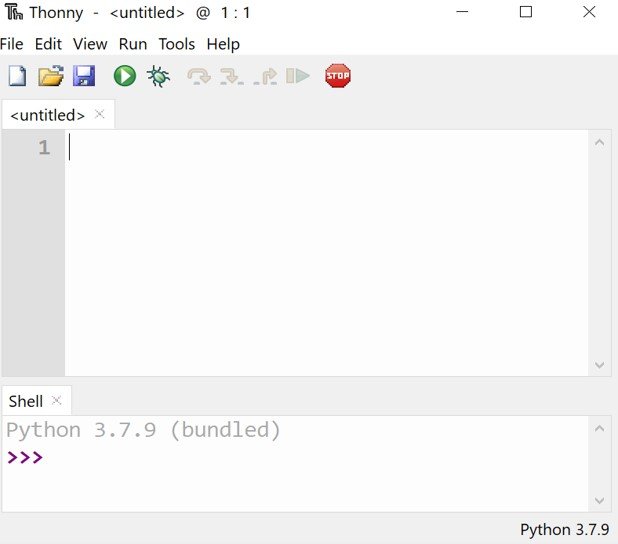
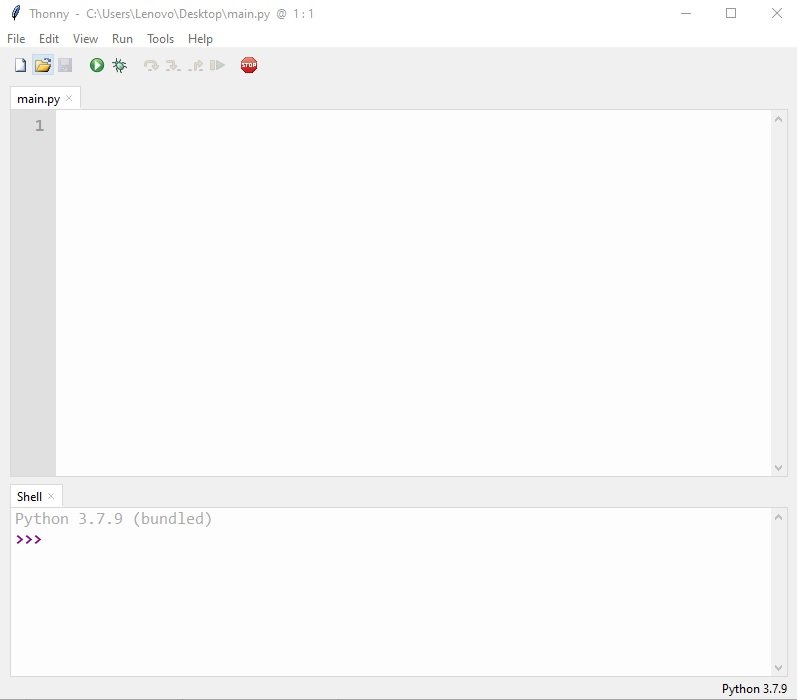
Now, let us take a look at the Thonny IDE in detail. Once we install our program and click to open it, the following window opens up. This has two sections:
- Editor Section
- Shell or Terminal Section
Editor Section
The Editor section is found at the top half of the screen. In this section, we create our .py files and can open several files at once and work on them.
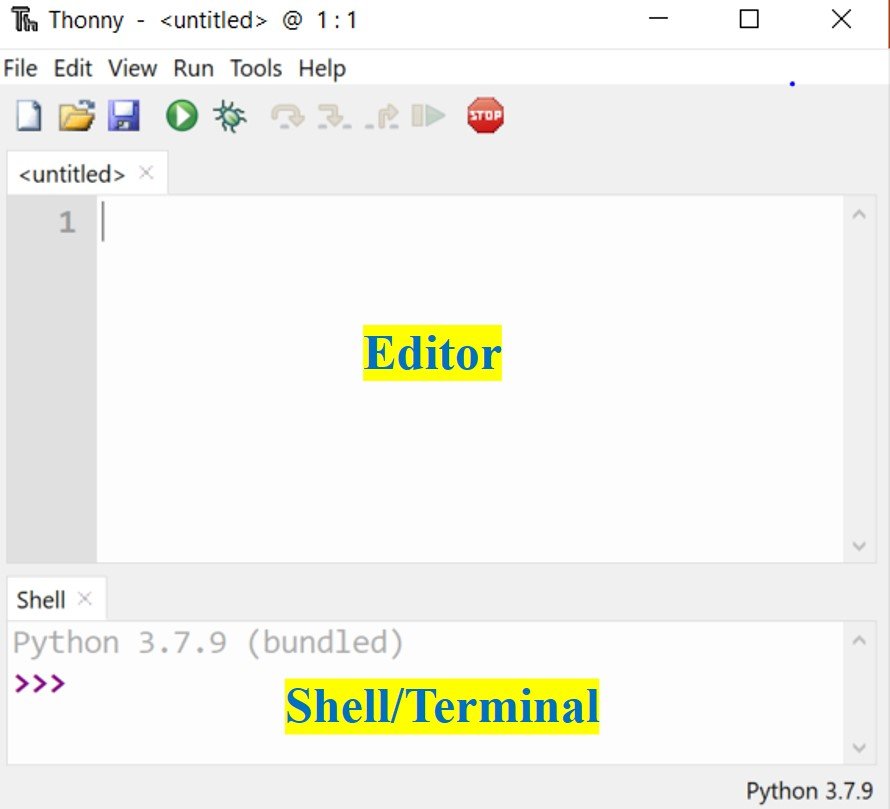
The Shell section is found at the bottom. Through this, we can give the command to the ESP board without (writing, saving, uploading) it in a separate file. Immediate execution is achieved through this. It also displays all the errors encountered in the code as well as the state of the connection clearly.
Tools Section

The tools section has several different tools with different functionalities. I will describe them in order of the numbers.
- The first icon which shows a paper is for creating a New File. By using this button, we can create several different files and work on them at once.
- This is the Open folder. It helps us in opening a file which was already saved in our PC.
- This is the save button. By clicking on this icon we can save our code in whatever step it is.
- This is the Run button. When we click on it the code runs and is executed.
- This button is used in debugging. This helps us in detecting errors whether they are syntax or logical
- This arrow button (Step Over) is used after the debug button. With this button, we can jump from one line or one block of code to another.
- This arrow button (Step Into) is used after the debug button. With this button, we take a smaller step than the previous button and work deeply.
- This arrow button (Step Out) is also used after the debug button. With this button, we can exit the debugging.
- This is the Resume button. It allows us to go back into play mode instead of debug mode.
- This is the Stop button. By clicking this, the program code halts whichever line it currently is.
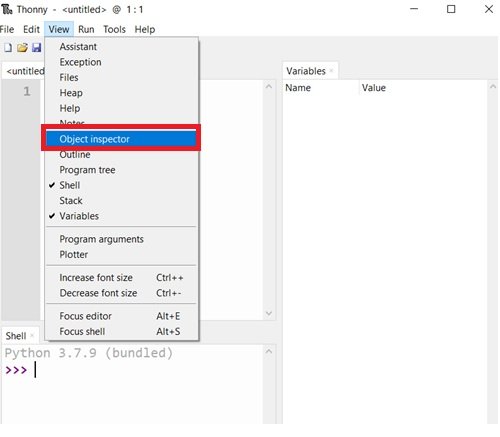
Features
Go to View and click on it. Several tabs can be seen. Click on any to customize your IDE according to your needs. You can tick all the tabs which you want to appear on your IDE.
Writing Your First MicroPython Script with Thonny IDE
In this section, we will see how to create a new MicroPython file and how to upload the script to ESP32/ESP8266 using Thonny IDE. For demonstration, we will perform a simple experiment of blinking onboard LED of ESP32 and ESP8266 by following all the necessary steps
Create MicroPython File in Thonny IDE
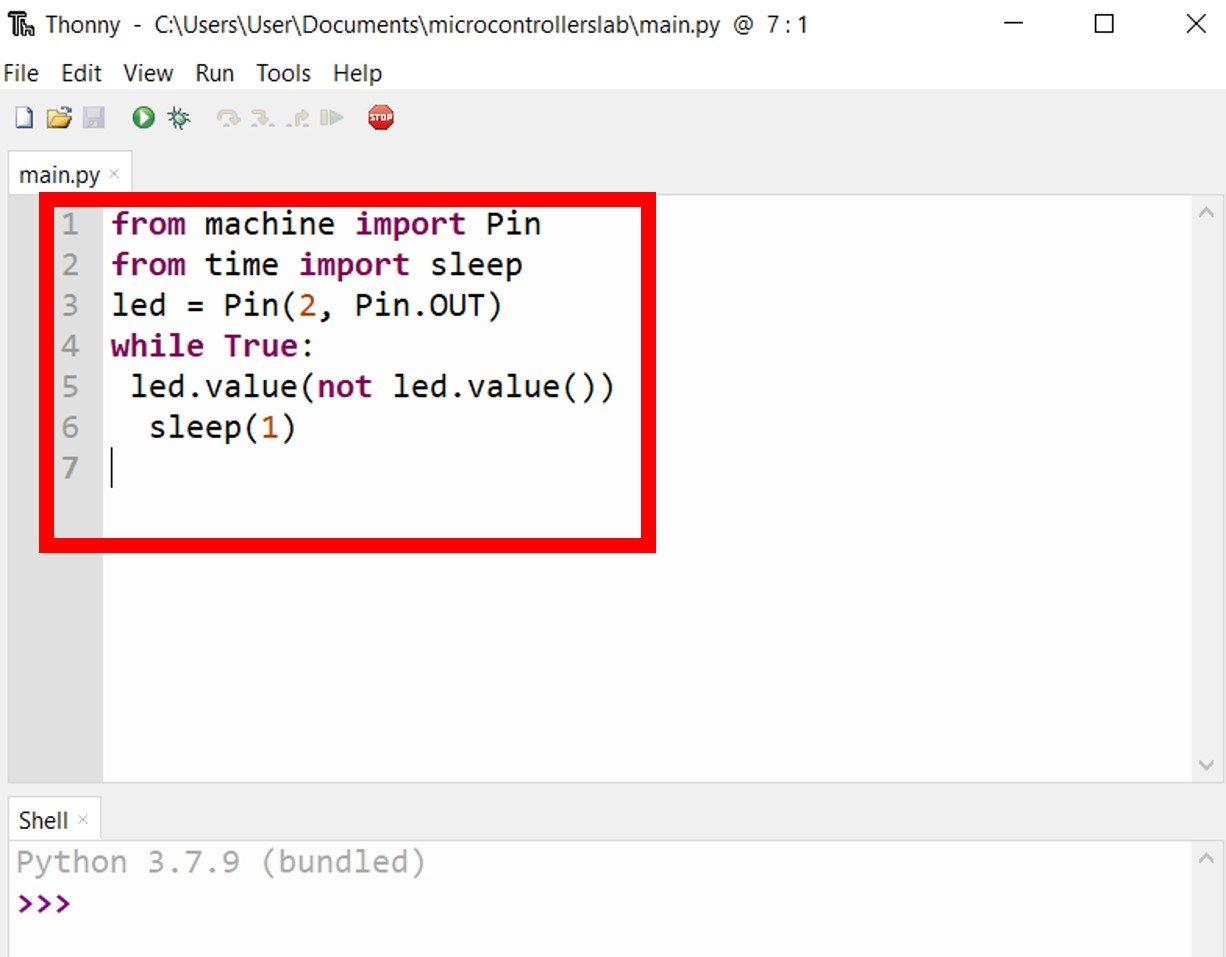
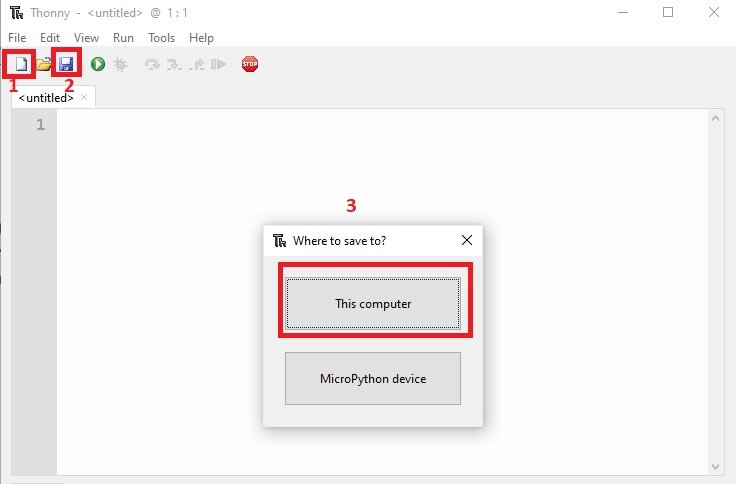
First, we need to create a main.py file that will contain our main program code which would be executed. To create a new file click on the new file icon (1). After that copy the following code in a new file and save it by clicking the save icon (2) with the name main.py.
from machine import Pin
from time import sleep
led = Pin(2, Pin.OUT)
while True:
 led.value(not led.value())
  sleep(1)
When you click on the save icon (2), this pop-up window will appear. This gives two options to save this file either to your computer or directly to your devices such as ESP32 or ESP8266. That means we can also directly upload files to a device. But for now, save it on your computer.
Uploading MicroPython Script
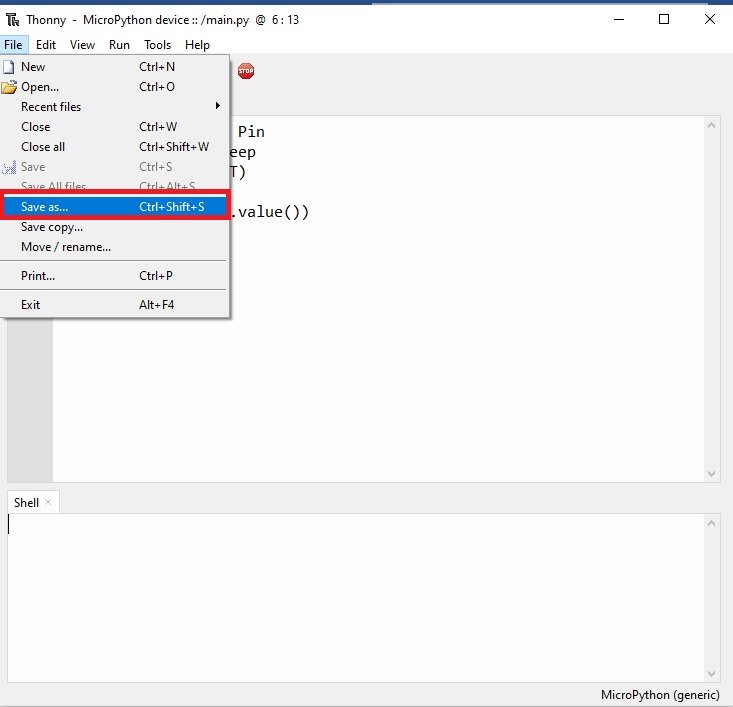
To upload MicroPython script to your device, go to Files and click on ‘Save as’.
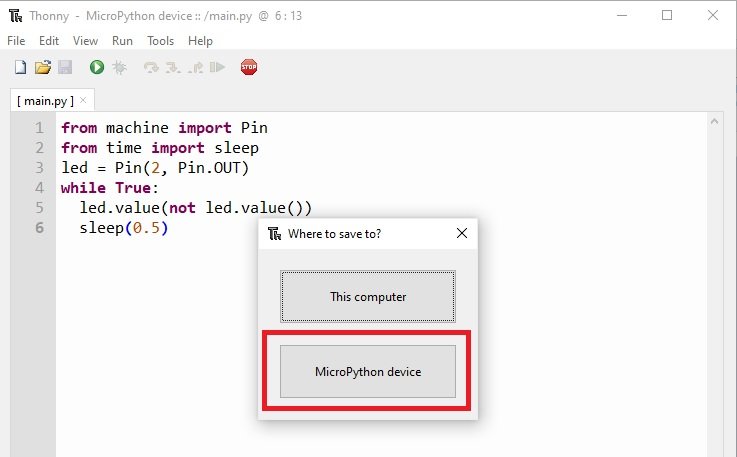
Now, select MicroPython device from “Where to save to” Window.
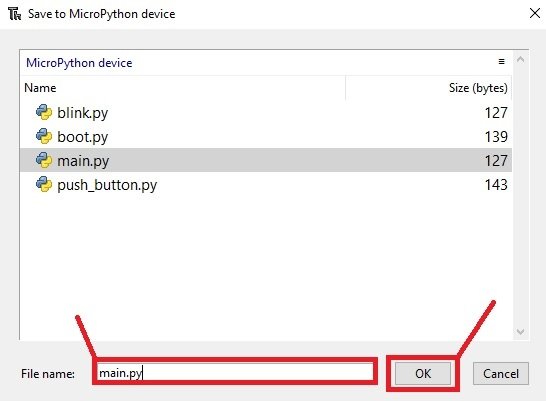
Type the file name and press “OK”. It will upload file to your device.
This would upload the code onto our ESP board. After the code is uploaded, press the Reset button on your ESP32/ESP8266.

The onboard led will turn on and off with a delay of 1 second.
Alternatively, you can also upload code to a device by using this command :
%upload 'Path_to_file\main.py' main.pyNow, we will look at some miscellaneous functions which we can perform inside Thonny.
Listing all the saved files
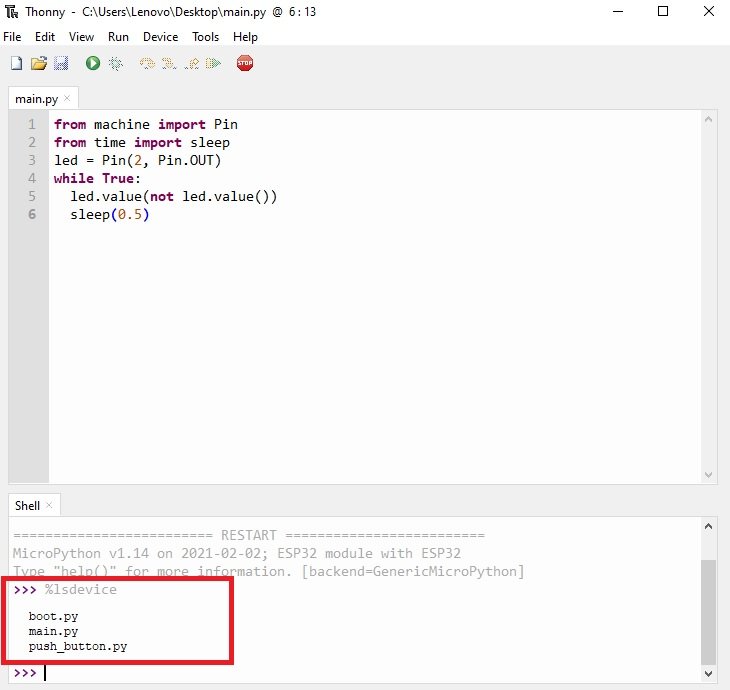
In order to list all the saved files on our ESP boards, we will type the command %lsdevice in the shell section. You will see all the files which were saved.
%lsdeviceThe following figure shows the files saved to my ESP32 board:
Displaying the file Content
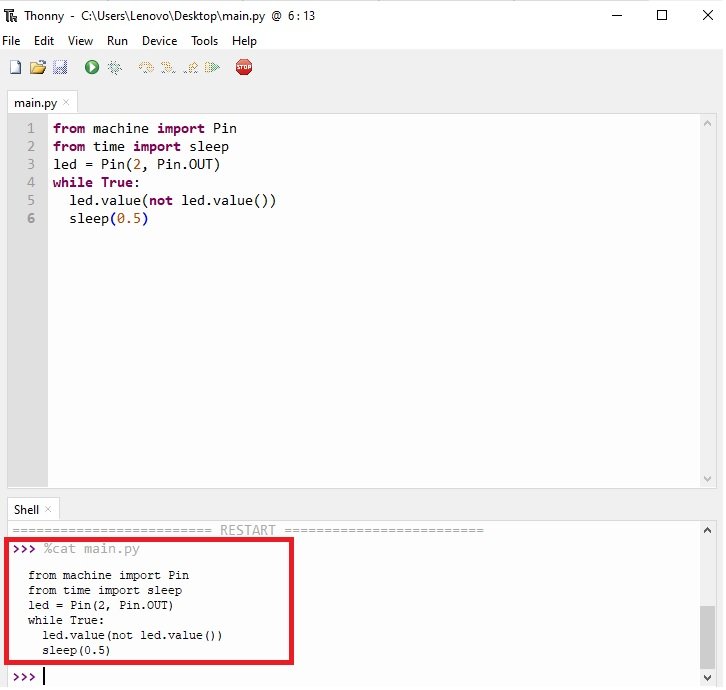
Without opening the file in the editor section, we can view all the contents on the file by typing in the shell section.
%cat /path nameFor example, %cat /main.py displays the content of above-given code:
Uploading libraries in Thonny IDE
I will give an example by using the Wi-Fi manager library (wifimgr). Open a new file, copy the library and save it as wifimgr.py
Next, go to the Device tab and click on Upload current script with the current name. The file is on the ESP board with the name wifimgr.py. We can also view the list of files stored on our ESP board as well as the contents of a particular file. All of this was seen above.
Deleting Files from Device
Currently, the Thonny IDE does not support any command for deleting files or libraries already uploaded on the ESP boards. This can only be achieved by re-flashing the ESP or uploading a blank file.
In this user guide, we took a look at another common IDE used with Micro-Python: Thonny. By the end of this article, you would be able to have a better understanding of how to program your ESP32/ESP8266 using Micro-Python with this interactive IDE.
In summmary:
Thonny IDE is easy to use IDE to write MicroPython programs for ESP32 and ESP8266 and it is compatible Windows, Linux, and Mac operating systems.
You may also like to check our tutorials on MicroPython with uPyCraft IDE and can also try same codes with Thonny IDE.
- Getting Started with MicroPython on ESP32 and ESP8266
- MicroPython: Interrupts with ESP32 and ESP8266 – PIR Sensor Interfacing Example
- ESP32 and ESP8266 GPIO Programming with MicroPython
- Push Button with ESP32 and ESP8266 using MicroPython
- MicroPython: PWM with ESP32 and ESP8266
- MicroPython: PWM with ESP32 and ESP8266
- MicroPython: Timers with ESP32 and ESP8266
You can also check web server tutorials with MicroPython firmware:
How to delete or replace device flashed program?
Excelent content!
Very well explained in a very clear structured format.
Now, I don’t have excuses to use my ESP32 and start building projects in other levels.
Thank you very much!
The commands %lsdevice and %cat are “unknown commands” on my installation of Thonny (4.0.1) on (Windows 10). Do you have any idea why? Commands like help() and the LED flashing commands work as expected. The blink example uploads as main.py and runs as expected, so it seems my installation is correct.
One thing I see, my installation of Thonny does NOT include a “Device” menu option. This is consistent with the screen shots you provide above. Except after the instructions for using ‘%lsdevice’, your screenshots show a “Device” menu item between Run and Tools.
Let us check these commands on our side and then we will come back to you.
Thanks