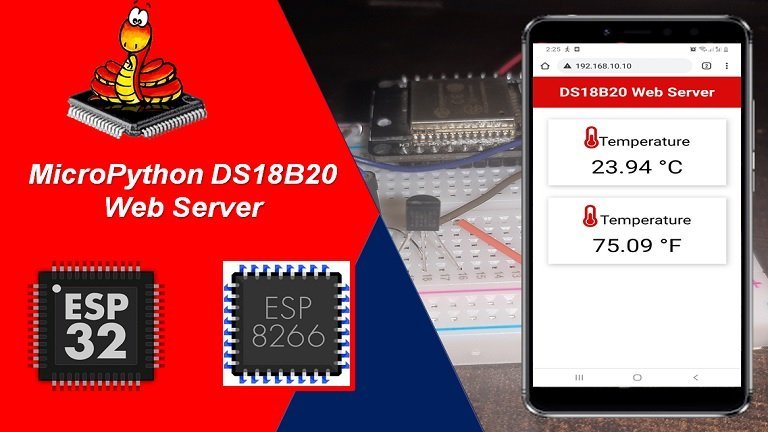
In this tutorial, we will learn to design a web server using a DS18B20 sensor with ESP32 /ESP8266 development boards and MicroPython which displays the values of temperature in Celsius and Fahrenheit units. It will act as a weather station as it will show temperature readings on the web page using MicroPython. We will use MicroPython firmware to build a responsive EP32/ESP8266 web server that can be accessed through any device which has a web browser, and the device should be connected to your local area network. That means the device should be connected to the same network to which the ESP32/ESP8266 board is connected.
Prerequisites
Before we start this lesson make sure you are familiar with and have the latest version of MicroPython firmware installed in your ESP boards and have a running Integrated Development Environment(IDE) in which we will be doing the programming. We will be using the same uPyCraft IDE as we have done previously when we learned how to blink and chase LEDs in microPython.
- Getting Started with MicroPython on ESP32 and ESP8266
- ESP32 and ESP8266 GPIO Programming with MicroPython – LED Blinking Example
If you are using Thonny IDE, you can check this getting started guide:

We will cover the following content in this MicroPython tutorial:
- How to create a DS18B20 web server using ESP32/ESP8266 and MicroPython
- Display Temperature reading from a web server with ESP32 and ESP8266
DS18B20 Introduction
DS18B20 is a temperature sensor which is single wire programmable in nature. It is widely used to measure temperature of chemical solutions and substances which are present in a hard environment. One of the advantages of using this sensor is that we only require a single pin of our ESP boards to transfer data. Thus, it is extremely convenient to use with the micro-controller as we can measure multiple temperatures by using the least number of pins on our development board.
The table below shows some key characteristics of ds18b120 sensor.
| Feature | Value |
|---|---|
| Operating Voltage | 3V-5V |
| Temperature Range | -55°C to +125°C |
| Accuracy | ±0.5°C |
| Output Resolution | 9bit to 12bit |
Pinout Diagram
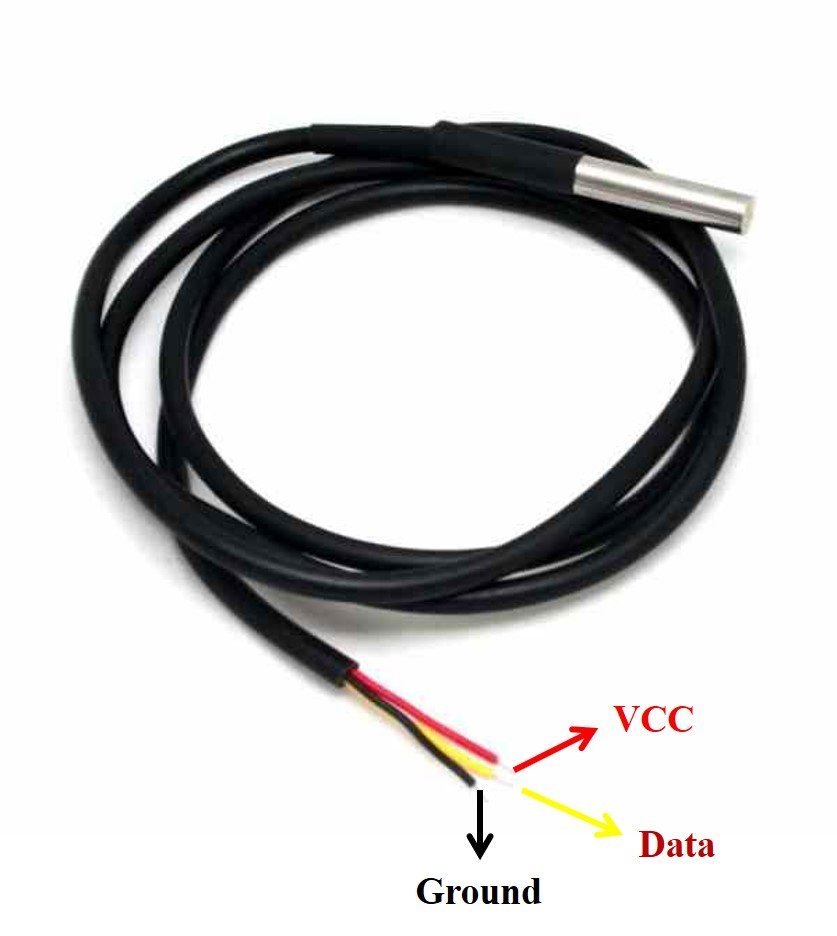
A waterproof version of this sensor is also available in the market. The following figures show the pinout of the DS18B20 sensors.
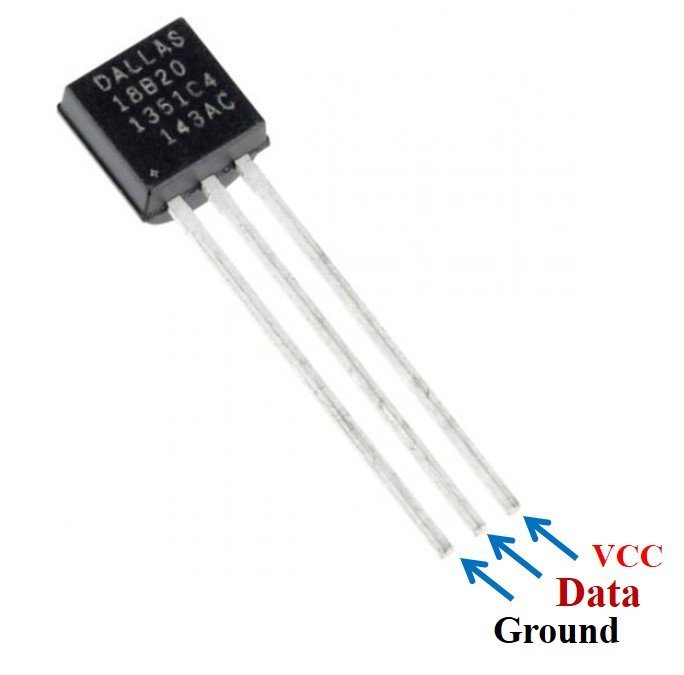
The following diagrams shows the pinout of normal DS18B20 temperature sensor.
The table below lists the pin configurations:
| Pin | Description |
|---|---|
| VCC | This is the pin that powers up the sensor. 3.3V for ESP boards |
| Data | This pin gives the temperature value |
| Ground | This pin is connected with the ground |
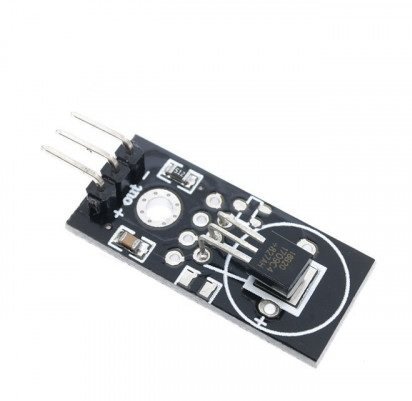
This temperature sensor also comes in a single package module which contains a sensor and a pull-up resistor. If you are using a module, you do not need to connect an external 4.7K ohm resistor. Because the module already has an onboard pull-up resistor.
DS18B20 Parasite vs Normal Mode
The DS18B20 sensor can be powered in two different modes.
Normal Mode: The sensor is powered through an external source through the VDD pin and 4.7K ohm pull-up resistor.
Parasite Mode: The sensor obtains the power from its own data line. Hence, no external power supply is required.
Required Hardware
We will now learn how to connect the temperature sensor with ESP32 /ESP8266 board. We will need the following components.
Required Components:
- ESP32 /ESP8266
- DS18B20 sensor
- 4.7k ohm resistor
- Breadboard
- Connecting Wires
ESP32 Schematic Diagram
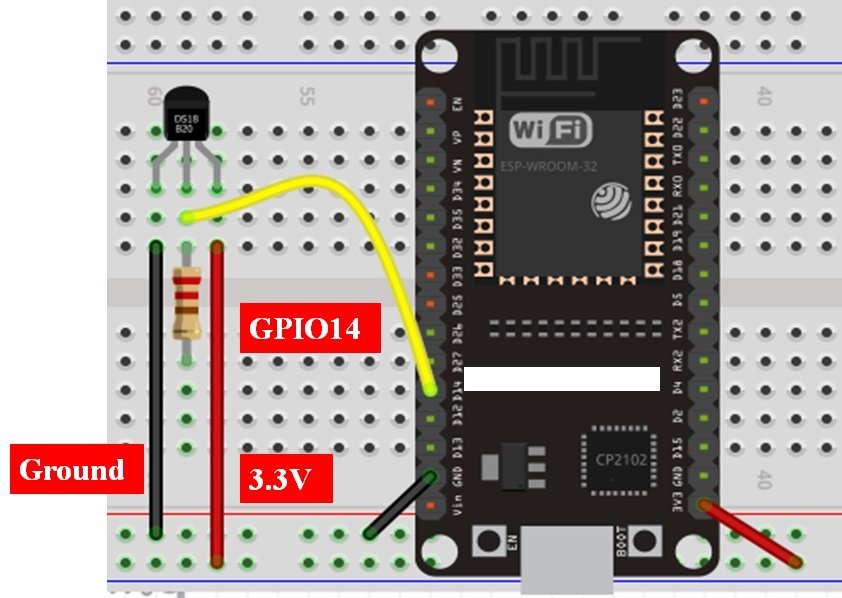
As you can see in the schematic diagram below, we have used DS10B20 in normal mode and powered the sensor with its Vcc pin from 3.3V pin of ESP32 board. Connect ESP32 device with DS18B20 as shown in the schematic diagram below:
ESP8266 Schematic Diagram
If you are using ESP8266 NodeMCU for this project, connect ESP8266 device with DS18B20 as shown in the schematic diagram below:
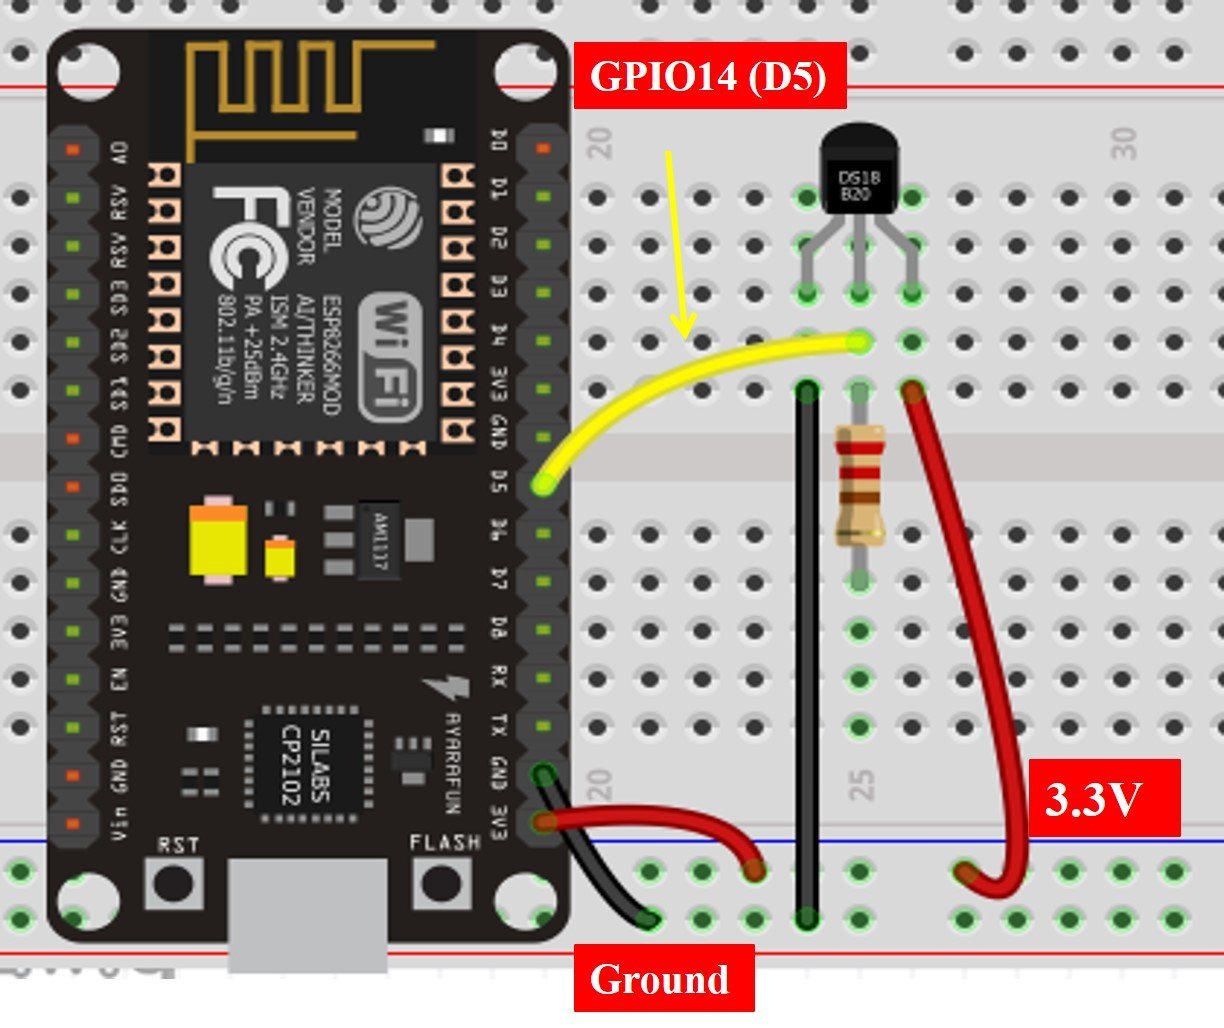
As you can see above, we have powered the sensor using the normal mode. The DS18B20 sensor has three terminals which we saw above in the pinout. The first terminal is grounded with the ESP32 /ESP8266 board. The data line of the sensor, which is the middle terminal, is connected through GPIO14 through a pull-up resistor of 4.7k-ohm. We can choose any other GPIO pin as well. The third terminal is powered by 3.3V from the ESP board.
You can use any other GPIO pin of ESP32 or ESP8266 module. You can refer to these posts to know more about ESP boards GPIO pins:
Introducing MicroPython DS18B20 Web Server
We will build the web server using the socket API of MicroPython. ESP32 or ESP8266 will act ad a socket server, and it contains HTML and CSS document to be served to a socket client such as a web browser. In other words, ESP32/ESP8266 acts as a server and a web browser a client. Any web client can access the web server through an IP address of ESP32/ESP8266. This IP address will be assigned to ESP32/ESP8266 when it will connect to a Wi-Fi network in station mode. The following figure depicts the working of a DS18B20 web server to display temperature values:

Code DS18B20 Web Server MicroPython Files
To create a DHT11/DHT22 web server with ESP32/ESP8266 using MicroPython, we need to create two MicroPython files such as boot.py and main.py. The boot.py file is a microPython script which runs once ESP32/ESP8266 boots. The main.py file contains an HTML document, socket server to listen to socket client requests, script to send and receive data through MicroPython socket API.
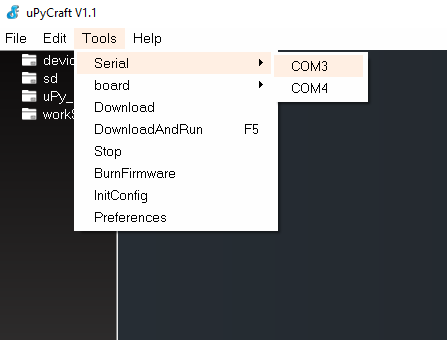
First connect ESP32 or ESP8266 boards with your computer. Select the serial port in uPyCraft IDE and go to Tools>Serial and select the COM port to which ESP32/ESP8266 board is connected.
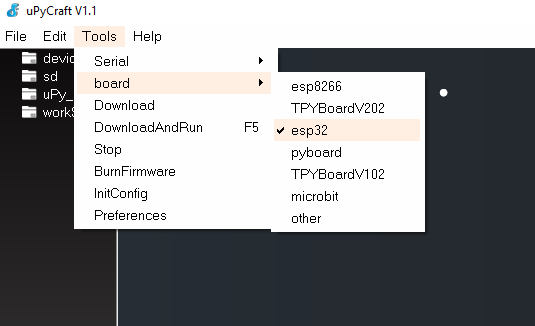
Besides serial port, you should also select the module, go to Tools>Board and select ESP32/ESP8266. Here you can see that two serial ports are showing in my case. Because we have connected both ESP32 and ESP8266 boards with my computer.
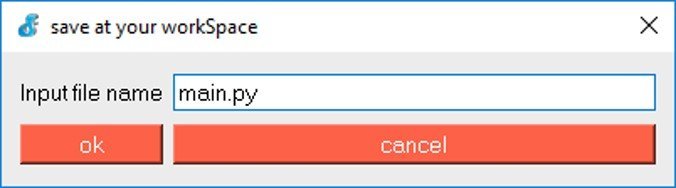
Create a new file MicroPython file and click on the “Save file” button to save the file on your computer. When you click on the “Save file” button, A new window as shown below will open. Save this file with the name of boot.py.
Similarly, Create one more file and give it the name of main.py. Copy the content of main.py to this file given in the next section.
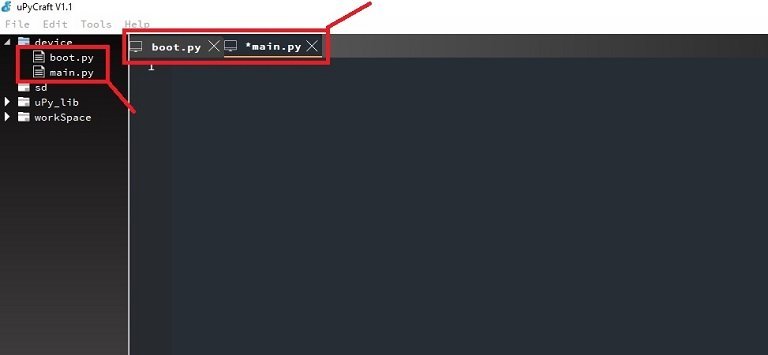
Now upload both these files to ESP boards. After downloading, you will see two files under the device option in UpyCraft IDE as shown below:
Now, let us look at a step by step procedure to display temperature readings from our sensor to a Web Server. We will start off by creating a boot.py file.
boot.py file MicroPython Script
Copy the following code to “boot.py” file.
try:
  import usocket as socket
except:
  import socket

from time import sleep
from machine import Pin
import onewire, ds18x20

import network

import esp
esp.osdebug(None)

import gc
gc.collect()

ds_pin = Pin(4)
ds_sensor = ds18x20.DS18X20(onewire.OneWire(ds_pin))

ssid = 'Enter your SSID name'
password = 'Enter your SSID password here'

station = network.WLAN(network.STA_IF)

station.active(True)
station.connect(ssid, password)

while station.isconnected() == False:
  pass

print('Connection successful')
print(station.ifconfig())
We have already explained network connection and socket API details in the previous web server tutorial with MicroPython and ESP32/ESP8266. We will only explain the relevant part of a DS18B20 web server. You can find details of other code parts here:
- ESP32/ESP8266 MicroPython Web Server – Control Outputs
- MicroPython: DHT11/DHT22 Web Server with ESP32/ESP8266
In order to connect our ESP to the Wi-Fi network, import network AP. As discussed earlier, we will use MicroPython socket programming to create a DS18B20 web server. Hence, we will also import the relevant modules.
Import the pin class from the machine module as we have to configure the GPIO pin to read data from the data line of the DS18B20 temperature sensor.
from machine import Pin
Besides this, we should also import the required library to read data from the sensor which is a one-wire, and ds18x20. Therefore, import one wire and a DS18B20 module so that we can take a temperature reading from a sensor. The time module is used to induce delays.
import onewire, ds18x20
from time import sleep
Next, we created an instance of Pin class with an object name of ds_pin and set GPIO14 as the DS18B20 data line pin. The DS18X20() method
ds_pin = Pin(14)

ds_sensor = ds18x20.DS18X20(onewire.OneWire(ds_pin)) #create one-wire object "ds_sensor"
Make sure you enter your Wi-Fi name in SSID and your wi-fi password as well so that your esp board connects with your local network.
ssid = 'Enter your SSID name'
password = 'Enter your SSID password here'
DS18B20 Web Server main.py File
Write down the following code in a new file and save it as main.py.
def read_ds_sensor():
try:
roms = ds_sensor.scan()
print('Found DS devices: ', roms)
print('Temperatures: ')
ds_sensor.convert_temp()
for rom in roms:
temp = ds_sensor.read_temp(rom)
if isinstance(temp, float):
msg = round(temp, 2)
print(temp, end=' ')
print('Valid temperature')
return msg
return b'0.0'
except OSError as e:
return('Failed to read sensor.')
def web_page():
temp = read_ds_sensor()
html = """<html>
<head>
<meta http-equiv="refresh" content="10">
<title>MicroPython DS18B20 ESP Web Server</title>
<meta name="viewport" content="width=device-width, initial-scale=1">
<link rel="stylesheet" href="https://use.fontawesome.com/releases/v5.7.2/css/all.css" integrity="sha384-fnmOCqbTlWIlj8LyTjo7mOUStjsKC4pOpQbqyi7RrhN7udi9RwhKkMHpvLbHG9Sr" crossorigin="anonymous">
<link rel="icon" href="data:,">
<style>
html {font-family: Arial; display: inline-block; text-align: center;}
p { font-size: 1.2rem;}
body { margin: 0;}
.top_nav { overflow: hidden; background-color: #da0a0a; color: white; font-size: 1rem; }
.content { padding: 30px; }
.card { background-color: white; box-shadow: 2px 2px 12px 1px rgba(140,140,140,.5); }
.cards { max-width: 800px; margin: 0 auto; display: grid; grid-gap: 2rem; grid-template-columns: repeat(auto-fit, minmax(200px, 1fr)); }
.value { font-size: 3rem; }
.symbol { font-size: 2rem; }
</style>
</head>
<body>
<div class="top_nav">
<h1>DS18B20 Web Server</h1>
</div>
<div class="content">
<div class="cards">
<div class="card">
<p><i class="fas fa-thermometer-half fa-3x" style="color:#da0a0a;"></i><span class="symbol">Temperature</span></p><p><span class="value"><span id="temp">""" + str(temp) + """</span> °C</span></p>
</div>
<div class="card">
<p><i class="fas fa-thermometer-half fa-3x" style="color:#da0a0a;"></i> <span class="symbol">Temperature</span></p><p><span class="value"><span id="hum">""" + str(round(temp * (9/5) + 32.0, 2)) + """</span> °F</span></p>
</div>
</div>
</div>
</body>
</html>"""
return html
s = socket.socket(socket.AF_INET, socket.SOCK_STREAM)
s.bind(('', 80))
s.listen(5)
while True:
try:
if gc.mem_free() < 102000:
gc.collect()
conn, addr = s.accept()
conn.settimeout(3.0)
print('Got a connection from %s' % str(addr))
request = conn.recv(1024)
conn.settimeout(None)
request = str(request)
print('Content = %s' % request)
response = web_page()
conn.send('HTTP/1.1 200 OK\n')
conn.send('Content-Type: text/html\n')
conn.send('Connection: close\n\n')
conn.sendall(response)
conn.close()
except OSError as e:
conn.close()
print('Connection closed')
DS18B20 Sensor Read Function
In the main.py script, we define a read_ds_sensor() function which scans and reads 2 bytes of temperature value from the number of DS18B20 sensors connected to the GPIO pin. We have created an object ds_sensor object on the GPIO14 pin in the boot.py file. Additionally, we can use the same GPIO pin to read temperature values from multiple temperature sensors.
def read_ds_sensor():
  roms = ds_sensor.scan()
  print('Found DS devices: ', roms)
  print('Temperatures: ')
  ds_sensor.convert_temp()
  for rom in roms:
    temp = ds_sensor.read_temp(rom)
    if isinstance(temp, float):
      msg = round(temp, 2)
      print(temp, end=' ')
      print('Valid temperature')
      return msg
  return b'0.0'
DS18B20 temperature sensors provide data over a 1-wire serial interface and each sensor has a uniquely identifiable 64-bit number which can be used to read temperature values from multiple DS18B20 sensors using a single GPIO pin. That means we can connect multiple sensors to the same pin.
The scan() method scans all DS18B20 sensors connected to a ds_sensor pin and saves the 64-bit address of each sensor in a list variable that is “roms”. Later, we will use these addresses to read temperature from each sensor one by one.
roms = ds_sensor.scan()
The print() function prints the unique addresses of each temperature sensor on MicroPython shell console:
print('Found DS devices: ', roms)This line prints “Temperatures” string on shell console.
print('Temperatures: ')After that call an object on covert_temp() method before reading a temperature from a sensor using its unique address.
ds_sensor.convert_temp()To read a temperature, use read_temp() procedure on ds_sensor object and pass an address which is stored in roms list.
temp = ds_sensor.read_temp(rom)
The DS18B20 temperature sensor provides data output in float data type. We should validate the readings by checking sensor output using isinstance() method. The isinstance() routine takes a variable and its type as an argument. If both arguments have the same data type, it will return True. Otherwise, it returns False.
if isinstance(temp, float):
If the output of the sensor is validated, the round() method will round off the humidity reading up to 2 decimal points and returns the message.
msg = round(temp, 2)
print(temp, end=' ')
print('Valid temperature')
In this case, there will be an address of only one sensor in the roms list. Because we are using only one DS18B20 sensor. Therefore, we print the temperature on the shell console and return to the execution where this function was called.
return msg
return b'0.0'
DS18B20 Web Page
In this HTML document, we use cards, paragraphs, links, icons, headings and title tags to create a web page. This web page displays temperature readings of DS18B20 in Celcius and Farenheit units.
The web_page() procedure serves a web page to a web client whenever a client make http request. This web page display latest temperature readings.
def web_page():
temp = read_ds_sensor()
html = """<html>
<head>
<meta http-equiv="refresh" content="10">
<title>MicroPython DS18B20 ESP Web Server</title>
<meta name="viewport" content="width=device-width, initial-scale=1">
<link rel="stylesheet" href="https://use.fontawesome.com/releases/v5.7.2/css/all.css" integrity="sha384-fnmOCqbTlWIlj8LyTjo7mOUStjsKC4pOpQbqyi7RrhN7udi9RwhKkMHpvLbHG9Sr" crossorigin="anonymous">
<link rel="icon" href="data:,">
<style>
html {font-family: Arial; display: inline-block; text-align: center;}
p { font-size: 1.2rem;}
body { margin: 0;}
.top_nav { overflow: hidden; background-color: #da0a0a; color: white; font-size: 1rem; }
.content { padding: 30px; }
.card { background-color: white; box-shadow: 2px 2px 12px 1px rgba(140,140,140,.5); }
.cards { max-width: 800px; margin: 0 auto; display: grid; grid-gap: 2rem; grid-template-columns: repeat(auto-fit, minmax(200px, 1fr)); }
.value { font-size: 3rem; }
.symbol { font-size: 2rem; }
</style>
</head>
<body>
<div class="top_nav">
<h1>DS18B20 Web Server</h1>
</div>
<div class="content">
<div class="cards">
<div class="card">
<p><i class="fas fa-thermometer-half fa-3x" style="color:#da0a0a;"></i><span class="symbol">Temperature</span></p><p><span class="value"><span id="temp">""" + str(temp) + """</span> °C</span></p>
</div>
<div class="card">
<p><i class="fas fa-thermometer-half fa-3x" style="color:#da0a0a;"></i> <span class="symbol">Temperature</span></p><p><span class="value"><span id="hum">""" + str(round(temp * (9/5) + 32.0, 2)) + """</span> °F</span></p>
</div>
</div>
</div>
</body>
</html>"""
return htmlWe have created the same web page in the previous project. For details of web page components you can read check this tutorial:
This meta-tag http-equiv provides attributes to HTTP header. The http-equiv attribute takes many values or information to simulate header response. In this example, we use the http-equiv attribute to refresh the content of the web page after every specified time interval. Users aren’t required to refresh the web page to get updated sensor values. This line forces the HTML page to refresh itself after every 10 seconds.
<meta http-equiv="refresh" content="10">
Inside head tags, create a <meta> tag to make the web page responsive in any web
As mentioned earlier, we use cards to display Temperature value readings from DS18B20 in centigrade and Fahrenheit units. In HTML, a card is a bordered box that has features such as padding. Content. Header, footers, and colors, etc.
Create Socket Web Server ESP32/ESP8266
At the end, we create a web server on ESP32/ESP8266 using MicroPython socket API.
For in-depth details on how to create a socket server, you can check this link.
s = socket.socket(socket.AF_INET, socket.SOCK_STREAM)
s.bind(('', 80))
s.listen(5)

while True:
  try:
    if gc.mem_free() < 102000:
      gc.collect()
    conn, addr = s.accept()
    conn.settimeout(3.0)
    print('Got a connection from %s' % str(addr))
    request = conn.recv(1024)
    conn.settimeout(None)
    request = str(request)
    print('Content = %s' % request)
    response = web_page()
After that, the following code sends the current temperature readings on the web page whenever the ESP receives a http request through a web client.
conn.send('HTTP/1.1 200 OK\n')
conn.send('Content-Type: text/html\n')
conn.send('Connection: close\n\n')
conn.sendall(response)
conn.close()
  except OSError as e:
   conn.close()
   print('Connection closed')
ESP32/ESP8266 DS18B20 MicroPython Web Server Demo
To test the MicroPython DS18B20 web server with ESP32 and ESP8266, upload both boot.py and main.py files to ESP boards one by one. First, upload boot.py file and after that upload the main.py file. After uploading MicroPython scripts, click on Enable/Reset button of ESP32:

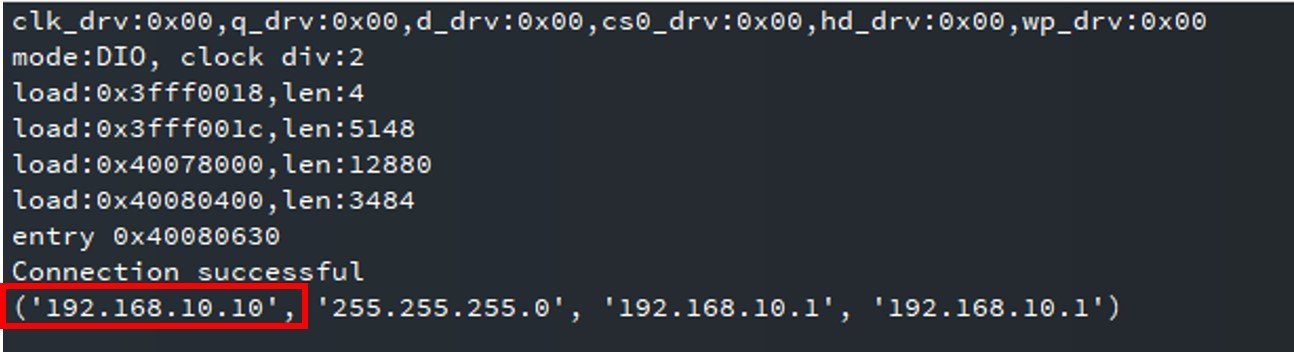
Sometimes later, your ESP board will make a connection with your WiFi router and shows a “successful connection” message and also prints the IP address on the MicroPython shell as follows:
Now, open your web browser either on your laptop or mobile and type the IP address which we have found in the last step. As soon as you type the IP address on your web browser and hit enter. The ESP32/ESP8266 web server will receive an HTTP request. The web page function will be called. In response, the web page function calls read_ds_sensor() function and it checks if the device is connected to a GPIO pin.
If any temperrature sensor is found, you will see the message “Device found” on shell console:
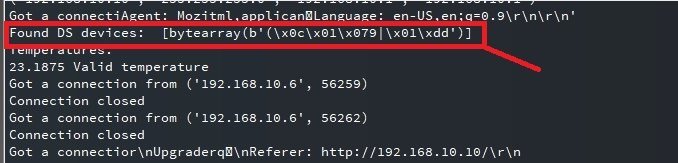
After that, web server send response to a web client and it also prints temperature on shell console:

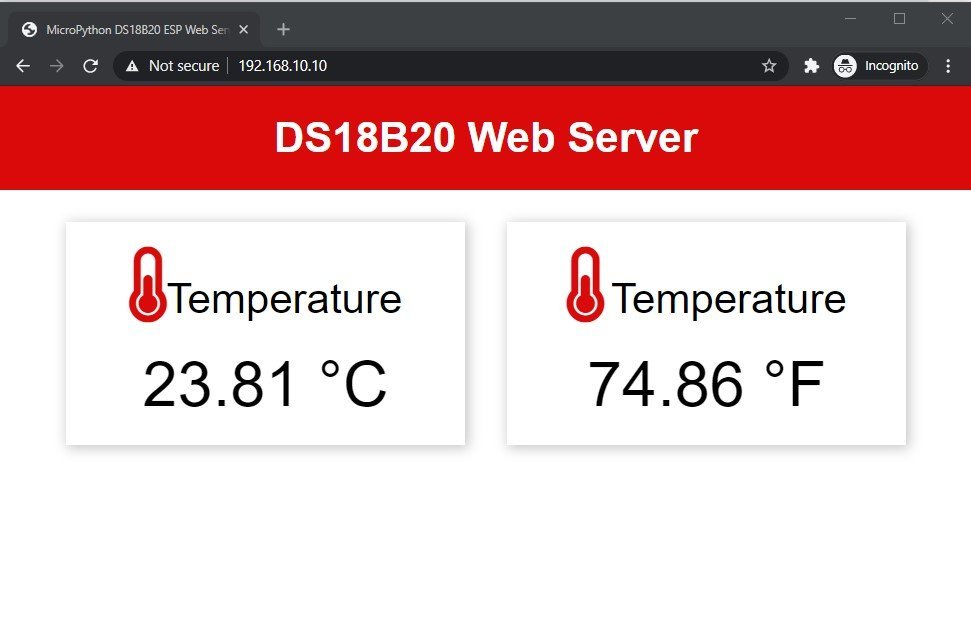
You will see the web page with the latest temperature values in your web browser:
On Mobile, you will see web page like this:

Demo Video:
More MicroPython tutorials:
- ESP32/ESP8266 MicroPython Web Server – Control Outputs
- MicroPython: DHT11/DHT22 Web Server with ESP32/ESP8266
- MicroPython: Timers with ESP32 and ESP8266
- ESP32/ESP8266 ADC with MicroPython
- MicroPython: Interrupts with ESP32 and ESP8266
- Push Button with ESP32 and ESP8266 using MicroPython
- MicroPython: PWM with ESP32 and ESP8266