In this tutorial, we will learn how to install Node-RED on a Raspberry Pi. This installation process works on both 32-bit and 64-bit versions of the Raspberry Pi OS (formerly known as Raspbian). We will cover everything from prerequisites and SSH access to the full installation, configuration, accessing the Node-RED editor, and setting it up to start automatically on boot.
Node-RED is a powerful, open-source, flow-based development tool for visual programming. Originally developed by IBM, it is now part of the OpenJS Foundation and is widely used in IoT, home automation, industrial monitoring, and data processing applications. It allows users to wire together hardware devices, APIs, and online services using a drag-and-drop browser-based editor. Each function or service is represented as a “node,” and you connect these nodes together to create “flows” that define the logic of your application.
Running Node-RED on a Raspberry Pi is one of the most popular setups because the Pi provides an affordable, low-power, always-on platform that is perfect for running background automation tasks. Whether you want to read sensor data from GPIO pins, control relays, send alerts via email or WhatsApp, or build a full home automation dashboard, Node-RED on a Raspberry Pi makes it all possible with minimal coding.
Prerequisites
Before you begin, make sure you have the following:
- A Raspberry Pi (any model: Pi 3, Pi 4, Pi 5, Pi Zero 2 W, etc.)
- Raspberry Pi OS installed on a microSD card (32-bit or 64-bit)
- A stable internet connection (Wi-Fi or Ethernet)
- SSH access enabled on the Raspberry Pi, or a monitor and keyboard connected
- Basic familiarity with the Linux terminal
If you have not yet set up your Raspberry Pi, you can follow this guide to get started:
Buy Raspberry Pi here: Buy here
Steps to Install Node-RED on Raspberry Pi
Before starting the installation process, you need to access your Raspberry Pi either through an SSH connection or through a VNC viewer. In this tutorial, we will use SSH to connect to the Raspberry Pi remotely.
Step 1: SSH into Raspberry Pi
To establish an SSH connection with the Raspberry Pi, we need an SSH client application. On Windows, one of the most popular and free options is PuTTY. On Linux and macOS, you can use the built-in terminal directly.
For Windows users: Download PuTTY from the official website and install it on your system.
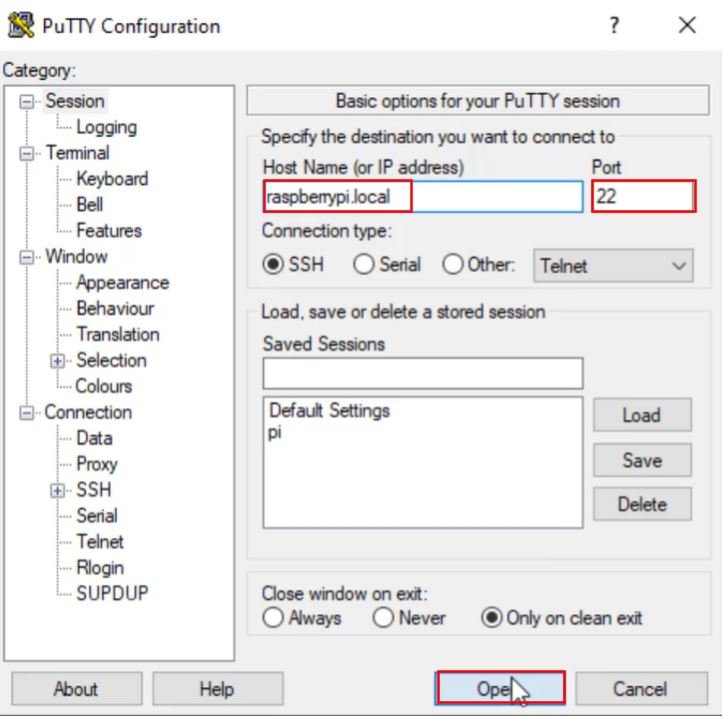
After installing PuTTY, open it by typing “PuTTY” in the Windows search bar. Enter raspberrypi.local as the hostname and leave the port set to 22 (the default SSH port). Then click Open to initiate the connection.
For Linux and macOS users: Open the terminal and run the following command to SSH into your Raspberry Pi:
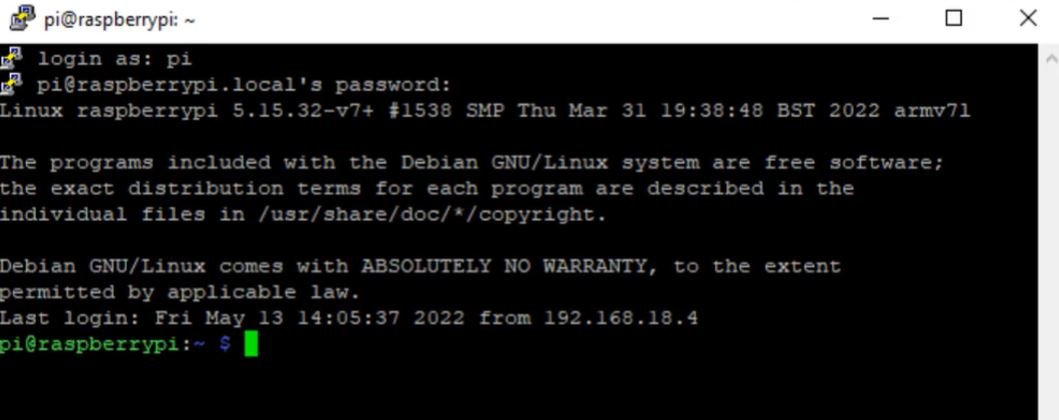
ssh pi@raspberrypi.localWhen prompted, enter the username and password for your Raspberry Pi. The default username is “pi” and the default password is “raspberry.” However, if you changed the password during the initial setup using the Raspberry Pi Imager, use the password you configured at that time.
Step 2: Update the System Packages
Before installing Node-RED, it is a good practice to update the system packages to ensure you have the latest security patches and software versions. Run the following commands on the Raspberry Pi terminal:
sudo apt update && sudo apt upgrade -yThis process may take a few minutes depending on how many packages need to be updated. Once the update is complete, you can proceed with the Node-RED installation.
Step 3: Run the Node-RED Installation Script
After establishing an SSH connection and updating your system, run the following command on the Raspberry Pi terminal to install Node-RED:
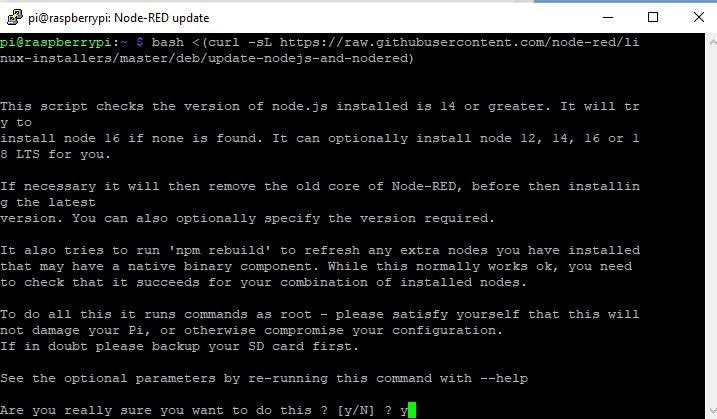
bash <(curl -sL https://raw.githubusercontent.com/node-red/linux-installers/master/deb/update-nodejs-and-nodered)
This is the official Node-RED installation script maintained by the Node-RED project. It performs several tasks automatically: it installs or updates Node.js to a compatible version, installs the latest version of Node-RED, installs npm (Node Package Manager), and sets up the necessary systemd service files for managing Node-RED as a background service.
On 32-bit Raspberry Pi OS, Node-RED often comes pre-installed, so this script will update it to the latest version. On 64-bit Raspberry Pi OS, Node-RED is typically not pre-installed, so the script will perform a fresh installation along with all the required dependencies.
When you run this command, the script will ask for your consent before proceeding. Type Y and press Enter to confirm the installation.
Next, you may be asked: “Would you like to install Pi-specific nodes?” These are special nodes that allow Node-RED to interact with the Raspberry Pi’s GPIO pins, which is useful for hardware projects. Type Y and press Enter to install them.
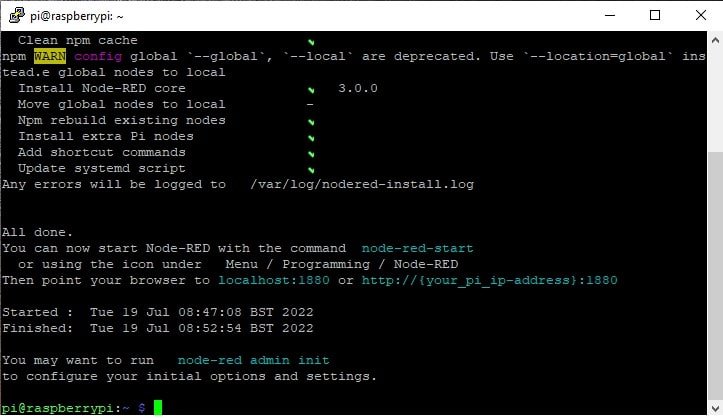
The installation process will now begin. It may take several minutes depending on your internet connection speed and the model of your Raspberry Pi. You will see progress messages on the terminal as the script downloads and installs the packages.

Once the installation is complete, you will see a confirmation message on the terminal indicating that Node-RED has been installed successfully.
Configure Node-RED Settings on Raspberry Pi
After the installation is complete, it is important to configure Node-RED before using it. The configuration wizard allows you to set up user authentication, choose a theme, define a flows file name, and more. Run the following command on the Raspberry Pi terminal:
node-red admin init
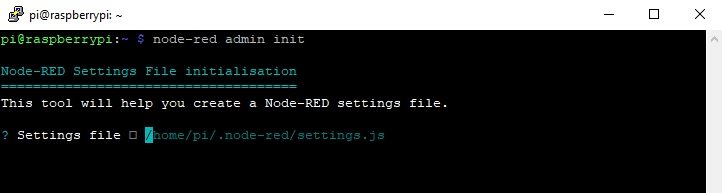
The wizard will guide you through several configuration options. Follow the steps below:
- Press Enter to create the Node-RED settings file at the default location: /home/pi/.node-red/settings.js
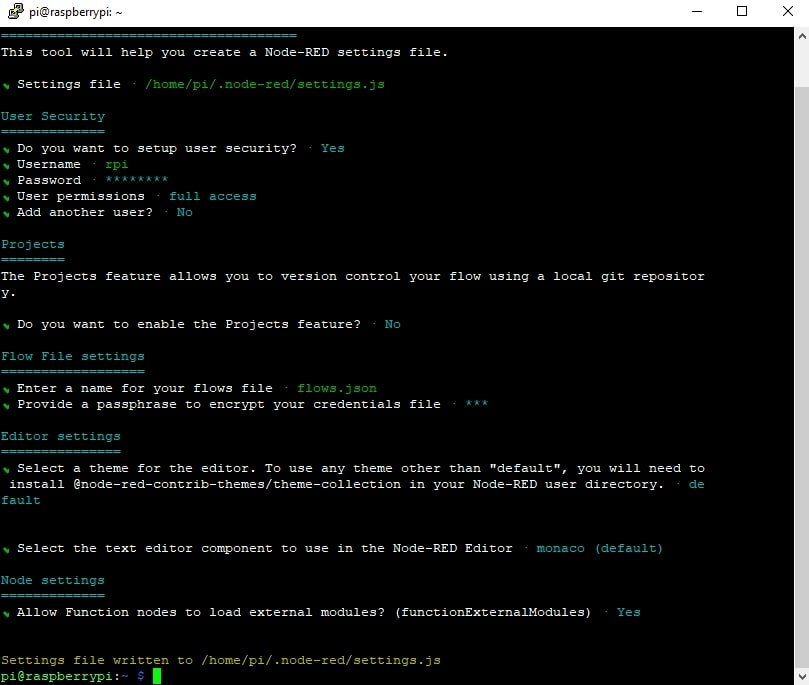
- Do you want to set up user security? Type Yes. This is highly recommended, especially if your Raspberry Pi is accessible over a network, as it prevents unauthorized users from accessing your Node-RED editor.
- Enter a username and press Enter. Make sure to remember this username as you will need it to log in later.
- Enter a password and press Enter. Choose a strong password and remember it for future logins.
- Define user permissions: Press Enter to grant full access (read and write) to the user. This allows the user to create, edit, and deploy flows.
- Add another user? For now, select No. You can always add more users with different permission levels later by editing the settings.js file.
- Do you want to enable the Projects feature? Select No. The Projects feature integrates Node-RED with Git for version control, but it is not necessary for most beginners.
- Enter a name for your flows file. Press Enter to use the default name: flows.json.
- Provide a passphrase to encrypt your credentials file. This passphrase is used to encrypt sensitive data such as API keys and passwords stored within your flows. Learn more about what a passphrase is.
- Select a theme for the editor. Press Enter to use the default theme. You can change this later.
- Press Enter again to select the default text editor component.
- Allow Function nodes to load external modules? Select Yes. This allows you to use npm packages inside Function nodes, which is useful for advanced flows.
Once you complete all the steps, the configuration will be saved to /home/pi/.node-red/settings.js. You can edit this file manually at any time to change settings such as the port number, authentication credentials, or enabled features.
Start Node-RED on Raspberry Pi
Now that Node-RED is installed and configured, you can start it by running the following command on the Raspberry Pi terminal:
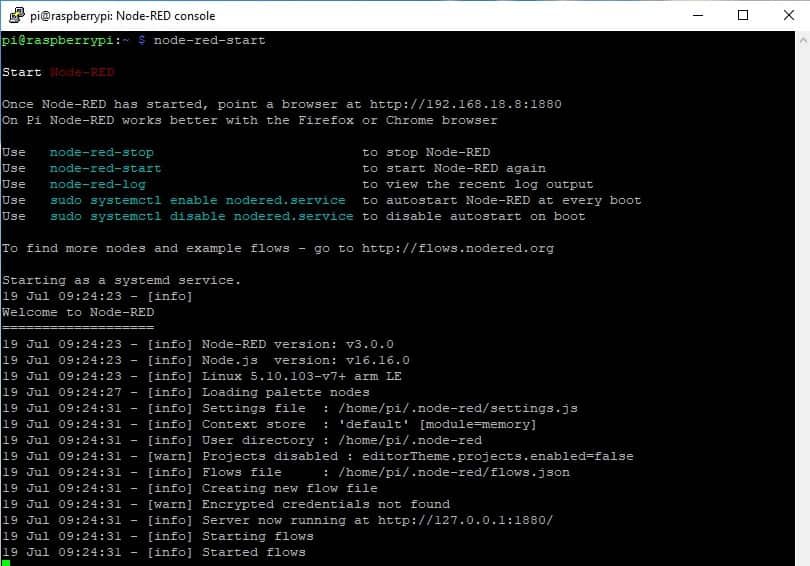
node-red-start
If Node-RED starts successfully, you will see log messages on the terminal showing the Node-RED version, the Node.js version, the IP address, and the port number (default: 1880) on which the editor is running.
To stop Node-RED, you can press Ctrl + C in the terminal, or run the following command from another terminal session:
node-red-stopAccess the Node-RED Editor
To access the Node-RED editor, you need the IP address of your Raspberry Pi and the port number on which Node-RED is running. By default, Node-RED starts on port 1880.
You can find your Raspberry Pi’s IP address by running the following command in the terminal:
hostname -IOnce you have the IP address, open any web browser on a computer connected to the same network and enter the following URL (replace the IP with your Raspberry Pi’s actual IP address):
http://192.168.18.8:1880Alternatively, if you are accessing Node-RED from the Raspberry Pi itself, you can use:
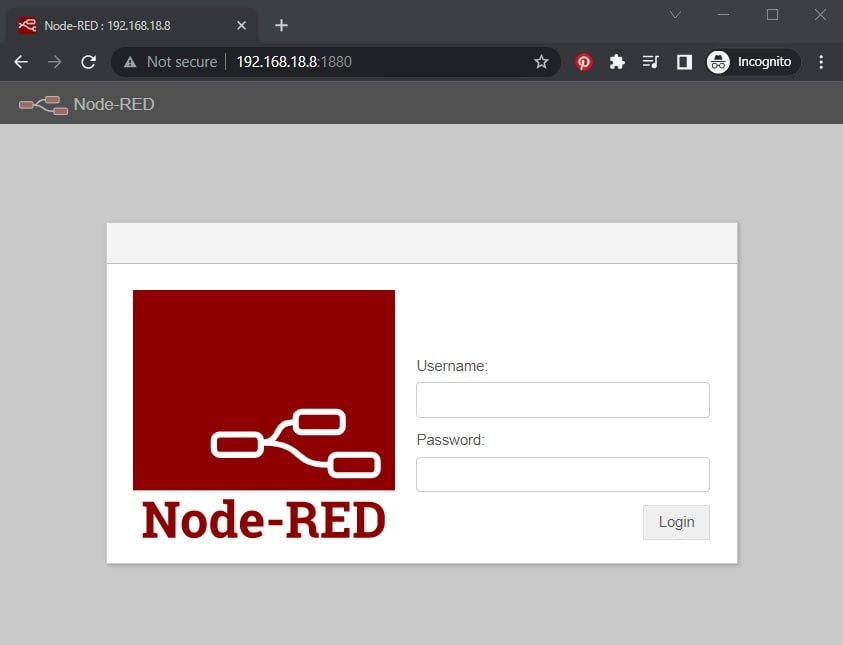
http://localhost:1880You will see the Node-RED login page. Enter the username and password that you created during the configuration step to log in.
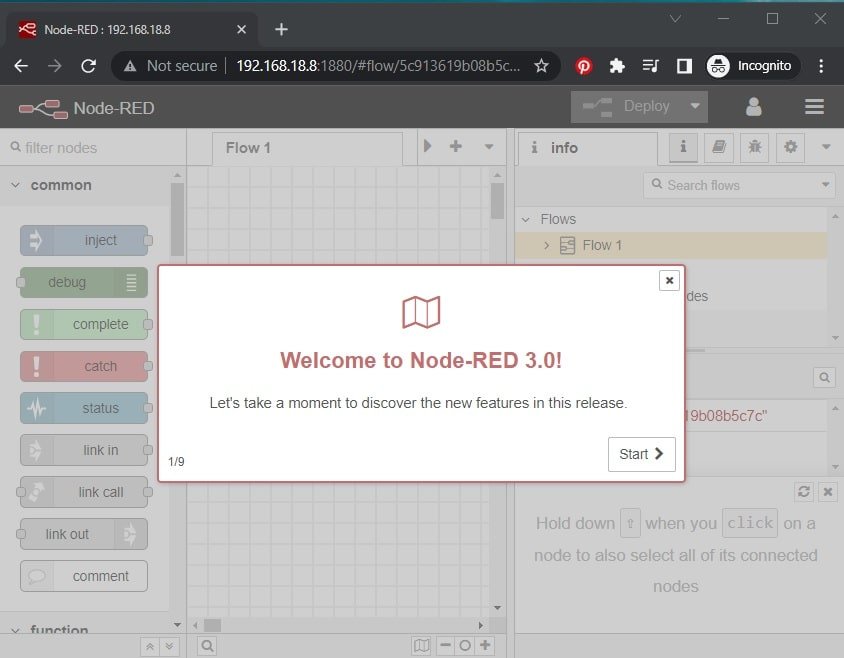
After signing in, you will see the Node-RED flow editor. The left sidebar contains all the available nodes organized by category. The center area is the flow workspace where you drag and drop nodes and connect them with wires. The right sidebar shows node information, debug messages, and configuration panels.
Autostart Node-RED on Raspberry Pi Boot
By default, Node-RED does not start automatically when the Raspberry Pi boots up. You need to manually start it every time you restart your Pi. However, you can enable it to start automatically using the systemd service that was set up during installation.
To enable Node-RED to start automatically on boot, run the following command:
sudo systemctl enable nodered.service
With this command enabled, Node-RED will automatically start in the background every time your Raspberry Pi powers on. This is especially useful for headless setups where the Raspberry Pi runs without a monitor or keyboard.
To verify that the autostart is working, restart your Raspberry Pi:
sudo rebootAfter the Pi restarts, open your browser and navigate to the Node-RED URL. If the login page appears, the autostart service is working correctly.
You can also check the status of the Node-RED service at any time using:
sudo systemctl status nodered.serviceIf you want to disable the autostart feature for any reason, run the following command:
sudo systemctl disable nodered.serviceUseful Node-RED Commands for Raspberry Pi
Here is a quick reference of the most commonly used Node-RED commands on Raspberry Pi:
- node-red-start – Start Node-RED manually
- node-red-stop – Stop Node-RED
- node-red-restart – Restart Node-RED
- node-red-log – View Node-RED log output
- sudo systemctl enable nodered.service – Enable autostart on boot
- sudo systemctl disable nodered.service – Disable autostart on boot
- sudo systemctl status nodered.service – Check if Node-RED is running
- node-red admin init – Re-run the configuration wizard
Troubleshooting Common Issues
If you encounter any issues during or after the installation, here are some common problems and their solutions:
- Cannot access Node-RED in the browser: Make sure your computer and Raspberry Pi are on the same network. Verify the IP address using
hostname -Iand ensure you are using port 1880. - Installation script fails: Ensure your Raspberry Pi has a working internet connection. Try running
sudo apt updatefirst. If the issue persists, check that curl is installed by runningsudo apt install curl. - Node-RED does not start: Check the logs using
node-red-logto identify the error. Common causes include corrupted settings.js files or port conflicts. - Forgot your Node-RED password: You can reset the password by editing the /home/pi/.node-red/settings.js file. Delete the existing user credentials section and run
node-red admin initagain to set up a new password. - Slow performance: If Node-RED runs slowly, especially on older Raspberry Pi models (Pi 2 or Pi Zero), try reducing the number of active flows or increasing the GPU memory split in raspi-config.
Summary
In this tutorial, we covered the complete process of installing Node-RED on a Raspberry Pi running either 32-bit or 64-bit Raspberry Pi OS. We started by setting up SSH access using PuTTY on Windows or the terminal on Linux/macOS. We then updated the system packages, ran the official Node-RED installation script, configured user authentication and other settings, started Node-RED, accessed the web-based editor, and enabled it to start automatically on boot. We also provided a quick reference of useful commands and solutions to common troubleshooting issues. Node-RED on a Raspberry Pi is an excellent platform for building IoT applications, home automation systems, and data processing workflows.
You may also like to read:
- Install Node-RED on Windows and Getting Started with Dashboard
- Node-RED Send Email Alerts and Notifications
- Node-RED Send Messages to WhatsApp Number
- Install Mosquitto MQTT Broker on Raspberry Pi
| Raspberry Pi Components | Amazon Links |
|---|---|
| Raspberry Pi 5 Starter Kit PRO - Turbine Black (128GB Edition) (8GB RAM) | Buy Now |
| Raspberry Pi 5 Starter Kit MAX - Turbine White (256 GB Edition) (16GB RAM) | Buy Now |
| Raspberry Pi 5 8GB | Buy Now |
| Raspberry Pi 5 4GB | Buy Now |
| Raspberry Pi 5 (16GB) | Buy Now |
| CM5 Pi Compute Module 5 Kit | Buy Now |