In this user guide, we will show you how to send email alerts with Node-RED. It is very handy and practical to include email notifications in IoT projects where sensor reading monitoring, motion detection, message notifications and alarm alerts. After following this tutorial, you will be able to easily send emails to a recipient account using Node-RED in a fairly easy manner.
In many IoT and automation projects, sending email alerts and notifications is essential for keeping users informed about important events, system statuses, or potential issues. Node-RED simplifies this process by providing built-in nodes for sending emails with minimal configuration. Whether you want to receive alerts for sensor readings, security notifications, or system failures, Node-RED allows you to automate email notifications efficiently. In this guide, we’ll walk you through the step-by-step process of setting up email alerts in Node-RED, configuring an email service, and ensuring reliable message delivery for your applications.

Before starting this tutorial, you should have Node-RED installed. You can install Node-RED on your computer or on a Raspberry Pi. Check the following tutorials:
- Install Node-RED on Raspberry Pi (32-bit and 64-bit RPI OS)
- Install Node-RED on Windows and Getting Started with Dashboard
Buy raspberry pi here: Buy here
SMTP Server
Simple Mail Transfer Protocol server or SMTP server for short is responsible for sending and receiving emails between the senders and the receivers. Each email provider e.g., Gmail, Yahoo, Hotmail, Outlook, etc. has a unique SMTP address and settings. These can usually be accessed through your account settings. Whenever a user sends an email, the SMTP server processes it and sends it to the particular server accordingly. The recipient’s email service provider obtains the message which then turns up in the recipient’s inbox.
Setting up Sender Gmail Account
To send emails we would require two email accounts. One for the sender and one for the recipient. You can use your own email account as the sender account but it is recommended to create a new one just in case something goes wrong. For this article, we will use Gmail as the primary email provider. You can use any other provider as your preference.
Creating a new account in Gmail (Sender side)
Firstly, type https://www.google.com/gmail/about/ in your browser search tab and press enter. This will open the main page. Click ‘Create an Account as highlighted in the red rectangular box.

Now type all the relevant information and click ‘Next’. You can give in details according to your preference.
Proceed with all the steps accordingly to create your account successfully.
Generate App Password
After your account is created, we have to generate the App password in order for Node-RED to send emails from this account. This password will allow the device to access the sender Gmail account.
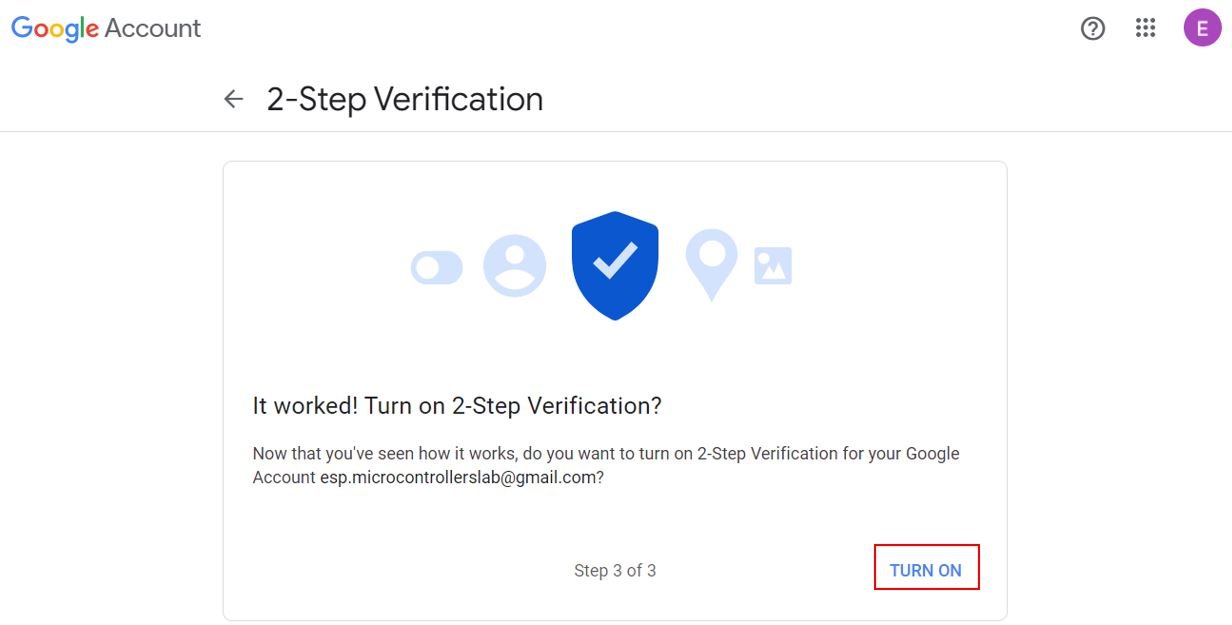
The first step is to turn the 2 step verification on. Head over to the following link which opens your Google Account. Head over to Security and go to ‘Signing in to Google.’ Then click 2-Step Verification and Get Started.
After following a number of steps, you will reach the final step where you will be asked to turn on the 2-Step verification. Click ‘TURN ON’ to proceed.
Note that 2-Step Verification is now On.
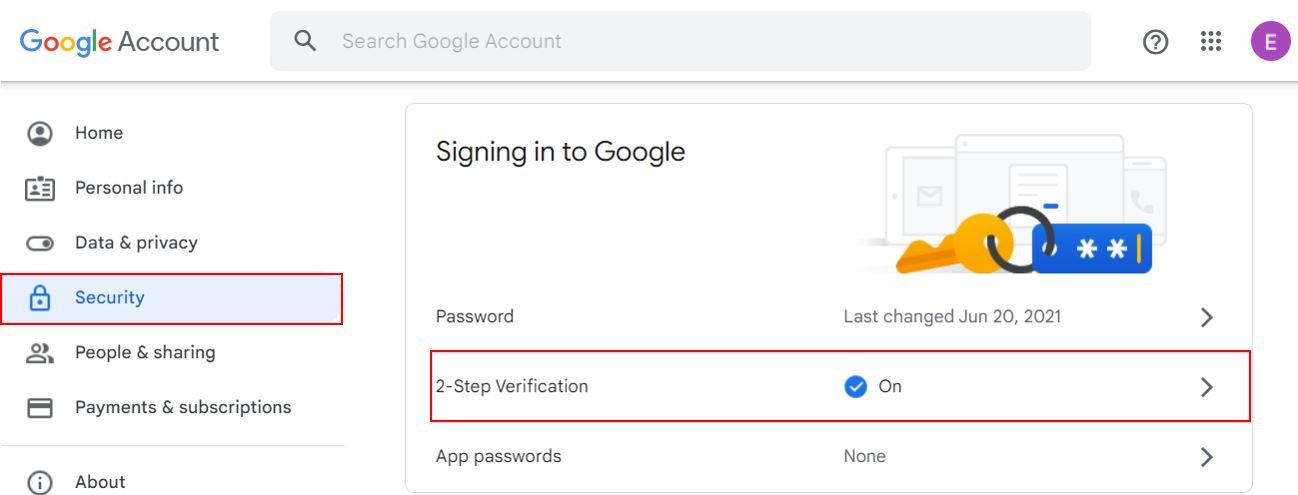
Now we will move ahead and generate the app password. Head over to Security > Signing in to Google > App Passwords.
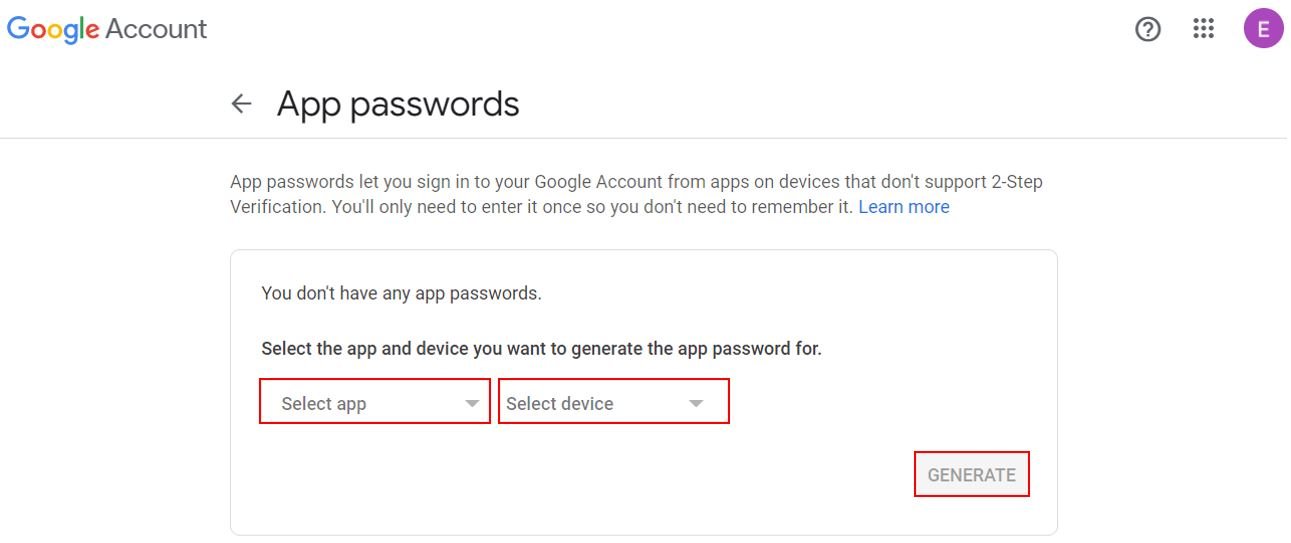
Select app as ‘Mail’ and device as ‘Other.’ Give a name to your device according to your preference. We have set it as ‘Node-RED.’ Finally, click the GENERATE button to obtain the App password.
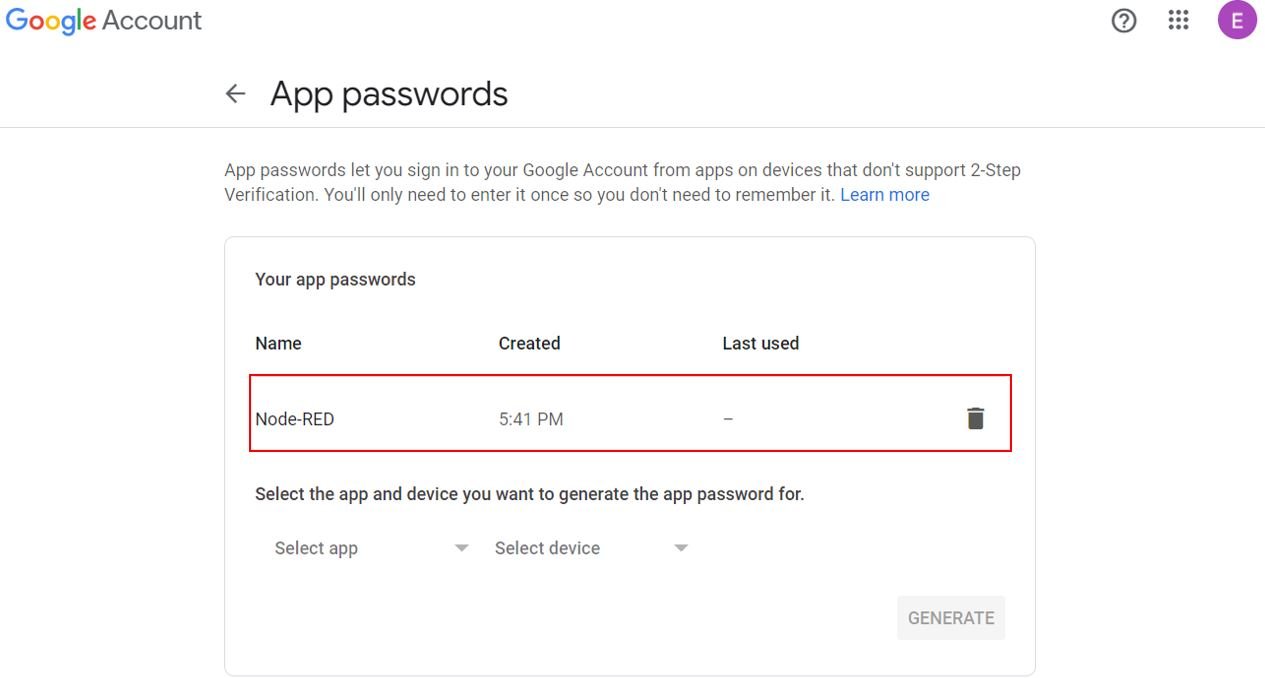
You will obtain the app password for your device. Save it and then click ‘DONE.’

Here you can view that the device Node-RED password has been successfully created.
SMTP Server Settings for Gmail Server
You can view the Gmail server settings as shown below. Knowing this is important because we have to include them in our program code to configure our account properly.
- Server: smtp.gmail.com
- Sender username: the complete email address of the sender account.
- Sender password: the password of the sender account
- Server port (TLS): 587
- Server port (SSL): 465
- SMTP TLS/SSL required: yes
If you are using a different email provider e.g., outlook or yahoo you can access its SMTP server settings online.
Setting up Node-Red for Email Alerts
We will use Node-Red to send emails. In order to get started with Node-Red on Raspberry Pi, refer to the guide:
To access Node-RED, we need the IP address of our Raspberry Pi and the port number on which Node-RED is accessible. By default, it starts on port 1880. Open any web browser and enter the RPI IP address followed by the port number.
192.168.18.8:1880Creating Flow to Send Email
This will open the Node-RED interface. You can start creating the flow.
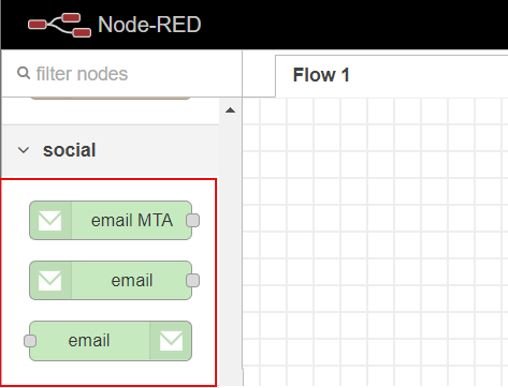
Head over to Menu > Manage Palette > Install. Type node-red-node-email in the search bar and press enter. Install the Node-RED nodes to send and receive simple emails.

After the installation completes, the email nodes will be present in the palette as shown below:
Now drag an inject node and email node to the flow as shown below:

Now double click the inject node to edit its properties as shown below.
msg.payload holds the body of the email in the form of a string. Specify the contents that you want to send. ‘This is a test email sent from Node-RED’ is the email body that we want to send. Similarly, msg.topic is the email subject which we have set as ‘Node-Red Email Alert.’ Click the Done button when you have made the changes.

Now double click the email node and edit its properties as well.
Specify the recipient and sender email addresses. Moreover, enter the app password that we obtained previously for Node-RED to send emails. Click the Done button after making all the changes.

Demonstration
Wire the nodes as shown below:
Now deploy the changes by clicking the Deploy button found at the top.

Now click the left square on the inject node to send the email. You will receive a notification on the top showing that it was successfully injected.

Open the recipient’s email account. You will already have received the email from the sender account using Node-RED.

Troubleshooting Common Issues
If you encounter problems while sending emails from Node-RED, here are some common issues and their solutions. The most frequent issue is an authentication error, which typically means the app password is incorrect or has been revoked. Double-check that you are using the 16-character app password generated from your Google Account and not your regular Gmail password. If the app password was recently generated, wait a few minutes for it to propagate before trying again.
If you receive a “Connection refused” or “Connection timed out” error, verify that your Raspberry Pi has an active internet connection. You can test this by running ping smtp.gmail.com from the terminal. The SMTP connection requires outgoing access on port 587 (TLS) or port 465 (SSL). If you are behind a corporate firewall or network that blocks these ports, the email will fail to send. Contact your network administrator to whitelist these ports if necessary.
Another common problem is Gmail blocking the sign-in attempt. Google may flag the connection from Node-RED as suspicious, especially if it originates from a different geographic location than your usual sign-in. In this case, check your Gmail inbox for a security alert from Google and confirm that the sign-in attempt was legitimate. Using the App Password method as described in this tutorial should prevent most of these issues since it bypasses the normal security checks.
If emails are being sent but not appearing in the recipient inbox, check the spam or junk folder. Automated emails from new sender accounts are sometimes flagged as spam by the recipient email provider. You can improve deliverability by adding a meaningful subject line and avoiding spam trigger words in the email body.
Using Alternative Email Providers
While this tutorial uses Gmail as the email provider, you can configure Node-RED to work with other SMTP servers as well. For Outlook or Hotmail, use the server address smtp-mail.outlook.com with port 587 and TLS enabled. For Yahoo Mail, use smtp.mail.yahoo.com with port 465 or 587. Each provider may require you to enable access for less secure apps or generate an app-specific password similar to the Gmail process described above.
When using the email node in Node-RED, you can manually configure the SMTP server address and port by expanding the Server settings in the email node properties. Simply enter the appropriate SMTP server address, port number, and your login credentials for the email provider you want to use. Make sure to enable TLS or SSL as required by your provider.
Practical Use Cases for Email Alerts
Email alerts from Node-RED can be integrated into a wide range of IoT and automation projects. One common use case is environmental monitoring, where sensors like the DHT22 or BME280 measure temperature and humidity, and Node-RED sends an email alert whenever readings exceed a safe threshold. This is particularly useful for monitoring server rooms, warehouses, or greenhouse environments where conditions must remain within specific ranges.
Another practical application is a home security notification system. You can connect PIR motion sensors, door or window reed switches, or camera modules to the Raspberry Pi and configure Node-RED to send an email with details about the detected event. For more advanced setups, you can combine email alerts with other notification channels such as WhatsApp messages or MQTT topics to create a multi-channel alert system that ensures you never miss an important notification.
Email alerts are also valuable for system health monitoring. You can set up Node-RED flows that periodically check the CPU temperature, disk usage, or memory consumption of your Raspberry Pi and send an email if any of these metrics exceed a warning threshold. This proactive monitoring approach helps you address potential issues before they cause system failures or downtime.
Summary
In this tutorial, we learned how to send email alerts and notifications using Node-RED with Gmail SMTP. We covered the complete setup process including creating a Gmail account, enabling 2-Step Verification, generating an App Password, configuring the SMTP server settings, and building the Node-RED flow with inject and email nodes. We also explored troubleshooting tips for common connection and authentication issues, how to configure alternative email providers, and practical use cases for integrating email alerts into your IoT projects. With this setup, you can automate email notifications for any event or condition monitored by your Raspberry Pi.
You may also like to read:
- ESP32 Send Emails (Plain text, HTML, and Attachments) through SMTP Server
- Arduino Send Email through IFTTT using Ethernet Shield
- ESP32-CAM Take and Send Photos via Email using an SMTP Server
- IoT Based Fire Detection using ESP32 and Flame Sensor with Email Alert
- ESP32 Fall Detection using MPU6050 with Email Alerts
- ESP8266 Send Emails (Plain text, HTML, and Attachments) through SMTP Server
- ESP32 IoT Motion Detection Web Server with Email Alert
- Send Email Alert Based on Temperature Threshold and Update Threshold value with ESP32 Web Server
| Raspberry Pi Components | Amazon Links |
|---|---|
| Raspberry Pi 5 Starter Kit PRO - Turbine Black (128GB Edition) (8GB RAM) | Buy Now |
| Raspberry Pi 5 Starter Kit MAX - Turbine White (256 GB Edition) (16GB RAM) | Buy Now |
| Raspberry Pi 5 8GB | Buy Now |
| Raspberry Pi 5 4GB | Buy Now |
| Raspberry Pi 5 (16GB) | Buy Now |
| CM5 Pi Compute Module 5 Kit | Buy Now |