In this tutorial, we will see how to erase the flash memory of an ESP32 using the esptool.py command-line utility in Windows, Linux, and MacOS, and discuss why and when you might want to do this. As with any electronic device, there may be times when you need to reset the ESP32 to its factory settings in order to start fresh or troubleshoot issues. One way to do this is by erasing the flash memory of the ESP32, which effectively wipes all data and settings from the device.

We have a similar guide for ESP8266:
Recommended Components
The following components are used in this project or are helpful for building it with the ESP32.
| Component | How it’s used in this project | Buy on Amazon |
|---|---|---|
| ESP32 Development Board | The main microcontroller board that runs the code for this project. | Check Price |
| Micro USB Cable | Connects the ESP32 to your computer for programming and power. | Check Price |
| Breadboard | Lets you build the circuit without soldering. | Check Price |
| Jumper Wires | Connect the ESP32 to the other components on the breadboard. | Check Price |
As an Amazon Associate we earn from qualifying purchases. Prices and availability are accurate as of the date/time indicated and are subject to change.
Installing esptool.py
As mentioned earlier, we use esptool.py utility to perform an ESP32 factory reset.
Before we start the installation of esptool.py, make sure you have the latest version of Python 3.7 or the latest installed on your windows-based. If you don’t have the python 3 packages installed on your Windows, Linux, and MacOS, follow these steps to install one:
Install Python on Windows
- First of all, go to this link here and download the latest version of Python3.
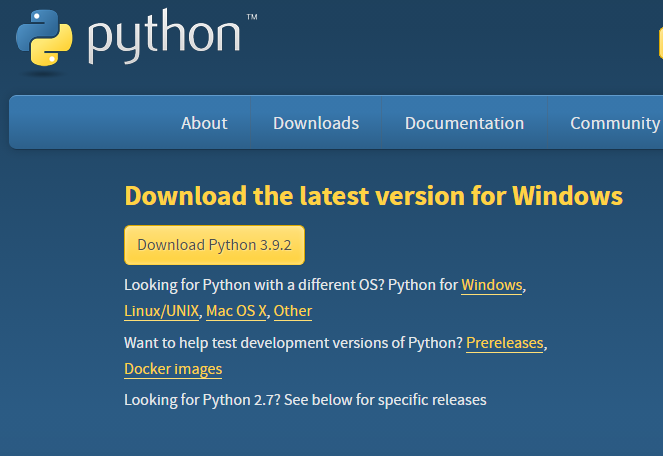
- After you click the Download Python 3.9.2 button .exe file will start downloading. After the download is completed click on it and the following appears.
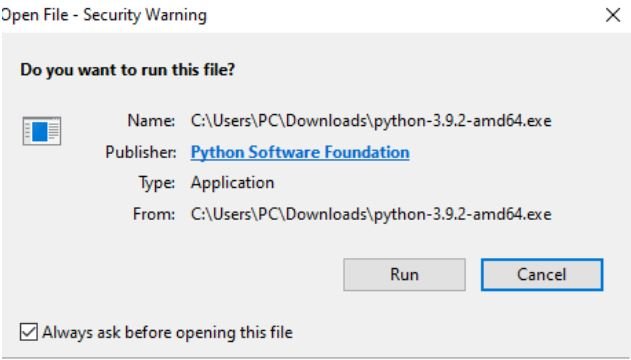
- Press the run button. The following screen appears. Make sure to tick Add Python 3.9 to a path and then click Install Now.

After the installation is complete a screen appears showing that the download was successful.
Install Python on Linux
Most Linux distributions come with Python preinstalled. However, you may need to install a specific version or a package that is not included in the default installation. Here’s how to install Python on popular Linux distributions:
To install Python on Ubuntu or Debian, open a terminal and run the following command:
sudo apt-get install python3
To install Python on CentOS or Fedora, open a terminal and run the following command:
sudo dnf install python3
Installing esptool.py in Python3
Now after you have successfully installed the latest version of Python3, we will install the esptool.py in it. First, open the command prompt by typing cmd.exe in the search box of the taskbar.
Type the following command in the terminal and the installation will start.
pip install esptoolIf for some reason the installation does not start, try typing the commands given below:
- pip3 install esptool
- python -m pip install esptool
- pip2 install esptool
Now, the esptool.py will get installed in the Python directory.
To check whether everything is working fine, type esptool.py in the command terminal.
You will be able to view the following messages.

We have successfully installed esptool.py on our machine. Now, let’s learn how to perform a factory reset on the ESP32 using this tool.
Erase ESP32 Flash using esptool.py
To erase the flash memory of an ESP32 and perform a factory reset, connect the ESP32 to your computer using a USB cable and to which port it is connected.
First, we need to find a port number to which ESP32 is connected. Here’s how to find the connected port number in Windows, Linux, and macOS:
Windows
- Open the Device Manager by pressing the Windows key + X and selecting “Device Manager” from the menu.
- Look for the device you want to find the port number for. It should be listed under “Ports (COM & LPT)”.
- Right-click on the device and select “Properties”.
- Click on the “Port Settings” tab.
- The port number will be listed under “Port”.
Linux
- Open a terminal and type the following command:
dmesg | grep ttyUSB*
or
ls /dev/ttyUSB*
This command will display a list of all serial devices that have been detected by the system. Look for the device you want to find the port number for. The device name will typically start with “tty”. The port number will be listed at the end of the device name. For example, if the device name is “/dev/ttyUSB0”, the port number is “0”.
MacOS
Open the Terminal app. Type the following command:
ls /dev/tty.*
- This command will display a list of all serial devices that have been detected by the system
- The port number will be listed at the end of the device name. For example, if the device name is “/dev/tty.usbserial-ABC123”, the port number is “ABC123”.
Open a terminal on your machine and type the following command while holding the ESP32 boot button:
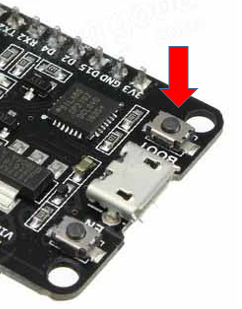
esptool.py --chip esp32 -p <USB-to-Serial Port> erase_flash
Make sure to replace with the name of your specific port, for instance, COM7 for Windows, /dev/tty.usbserial- for macOS, or /dev/ttyUSB0 for Linux.
As erase process begins, you can release the boot button of ESP32:

Note that if you continue to see new dots appear after the “Connecting…” message, it indicates that your ESP32 is not in flashing mode. You will need to repeat all the previously described steps and press the “BOOT/FLASH” button again to ensure that your ESP32 enters flashing mode and completes the erasing process successfully.
Why do we need to perform ESP32 Factory Reset?
There are several reasons why you might want to erase the flash memory of an ESP32:
Factory reset: Erasing the flash memory is a way to reset the ESP32 to its factory settings. This is useful when you want to start with a clean state and remove any existing code or data that may be stored on the device.
Code debugging: When developing software for the ESP32, it can be useful to erase the flash memory to ensure that there is no residual code or data from previous iterations of the program. This can help to isolate and debug issues that may be caused by conflicting or outdated code.
Memory management: The flash memory of the ESP32 is limited, so erasing it can free up space for new code or data. This can be useful when working with applications that have a large code base or require a lot of data storage.
Security: In some cases, it may be necessary to erase the flash memory of an ESP32 for security reasons. For example, if the device contains sensitive data that should not be accessible to others, erasing the flash memory can help to prevent unauthorized access to this information.
Summary
In summary, we have learned how to erase the flash memory of an ESP32 and perform a factory reset using the esptool.py utility. We started by installing Python on our computer, followed by installing esptool.py using pip. After that, we connected the ESP32 to our computer via a USB-to-serial adapter and put it into flashing mode by holding down the “BOOT/FLASH” button. Finally, we used the esptool.py utility to erase the flash memory of the ESP32 and return it to its factory state. It’s essential to ensure that the ESP32 is in flashing mode before proceeding with the erasing process. Otherwise, it will not work correctly, and you will need to repeat the previous steps.
You may also like to read:
Good article.
But isn’t there a way to restore to factory state using the BOOT and or the other button om the board?
Best wishes, Ronny