In this tutorial, we will learn to program ESP32 and ESP8266 boards with VS code by using the Pymakr extension available in visual studio code. As we have seen in previous tutorials, we have learned to program ESP32 and ESP8266 boards using various IDEs.

Recommended Components
The following components are used in this project or are helpful for getting started with MicroPython on ESP32 and ESP8266.
| Component | How it’s used in this project | Buy on Amazon |
|---|---|---|
| ESP32 Development Board (DevKit V1) | The ESP32 board flashed with MicroPython firmware. | Check Price |
| ESP8266 NodeMCU (ESP-12E) | The ESP8266 NodeMCU running the same MicroPython code. | Check Price |
| Micro USB Cable | Programs and powers the board from your PC. | Check Price |
As an Amazon Associate we earn from qualifying purchases. Prices and availability are accurate as of the date/time indicated and are subject to change.
Previously we looked upon Thonny IDE and uPyCraft IDE when programming our ESP boards using MicroPython. You can refer to them here:
- Getting Started with Thonny MicroPython IDE for ESP32 and ESP8266
- Getting Started with UpyCraft IDE MicroPython on ESP32 and ESP8266
But through this user guide, we will look upon how to use Visual Studio Code (VS Code) to program our ESP32/ESP8266 development boards using MicroPython and PymaKr plugin. VS Code is a source code editor designed for Windows, macOS, and Linux which is used in building and debugging applications.
We will also use the Pymakr extension in VS code to be able to use MicroPython. This extension causes the VS code editor to communicate with the ESP board if it is running in MicroPython by using the REPL command line.
To successfully implement the above-mentioned points, the following steps will be performed in this guide:
- Flashing MicroPython firmware to ESP32/ESP8266.
- Installing the VS Code Editor.
- Installing the Pymakr plugin in VS code to enable us to use MicroPython in our development boards.
- Connecting our ESP32 and ESP8266 boards with the Pymakr plugin.
- Creating a simple LED blinking project in our ESP boards with VS code and pymakr.
Windows: Installing VS Code
To download and install the visual code editor IDE, click here. This will open the window as shown below.

Click on the ‘Download for Windows’ button which is shown in the red rectangular box. You can choose your system bit type by clicking on the drop-down arrow. If you are using another operating system example Linux or macOS then click the ‘Download’ button in the top right corner.
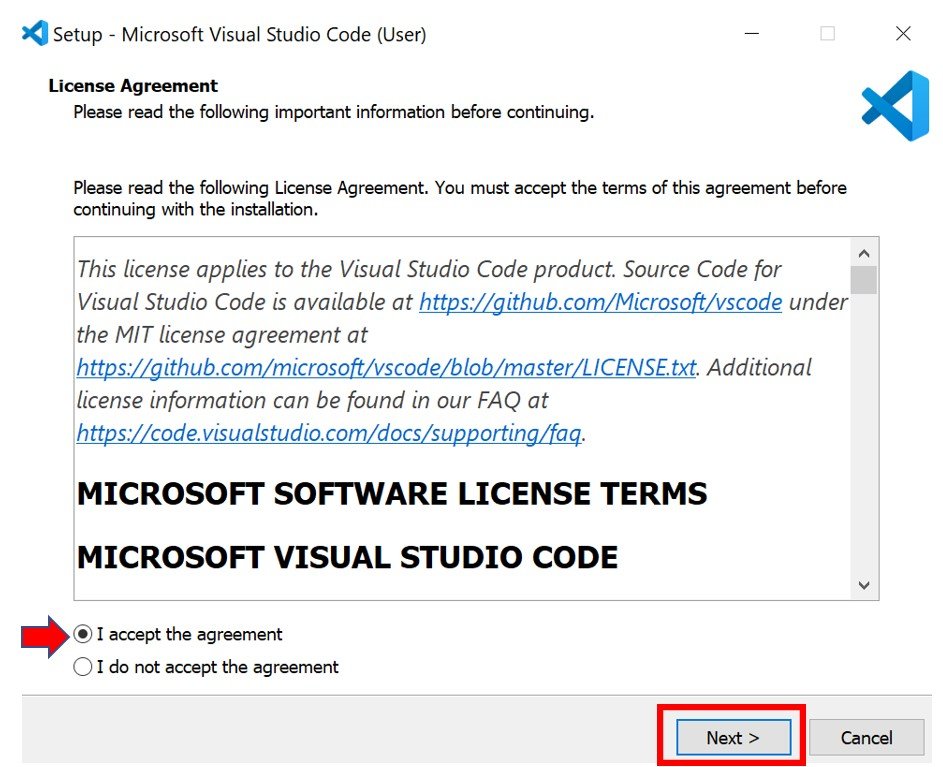
A few moments later, after specifying the directory your download will start. After opening the setup .exe file you will see the window asking for your agreement. Click ‘I accept the agreement’ and then go to the ‘Next’ button.
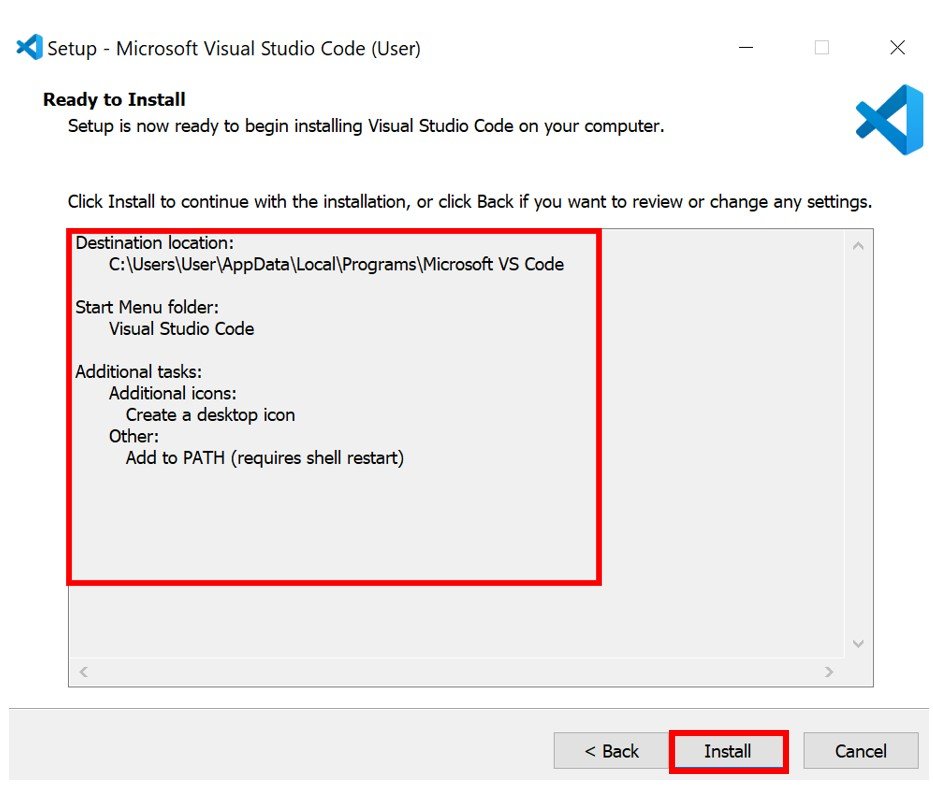
Then, choose your desired location to install the editor by specifying it as shown below.

After clicking ‘Next,’ choose any additional tasks you want to add.

Then, click on the ‘Install’ button. You can view all the features we ticked along the way in the red rectangular box above.
After the installation is completed, click ‘Finish’ to launch the application.

The following ‘Getting Started-Visual Studio Code’ window will open up indicating a successful installation.

MacOS X: Installing VS Code
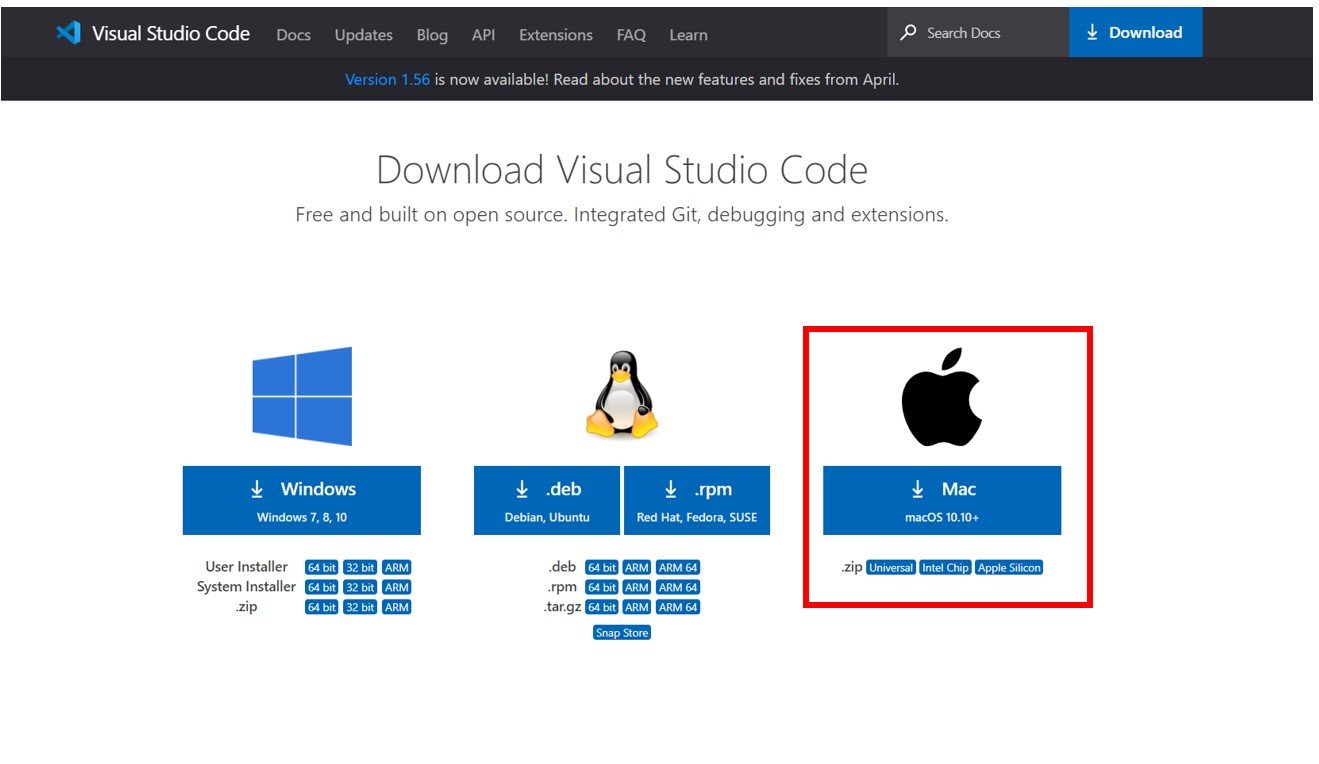
To install VS Code in your macOS X click here. This will open a window containing various download options. Go to the download option for Mac and choose the .zip file according to your machine type.
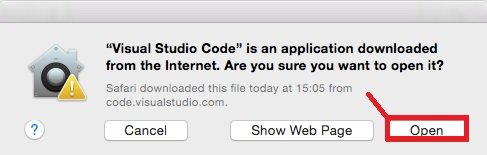
After downloading the setup file, the following pop-up appears. Click on ‘Open’ to launch the editor.
Alternatively, you can also open the editor through the Downloads folder. You will receive the following welcome page in VS Code initiating a successful installation in macOS X.

Linux Ubuntu: Installing VS Code
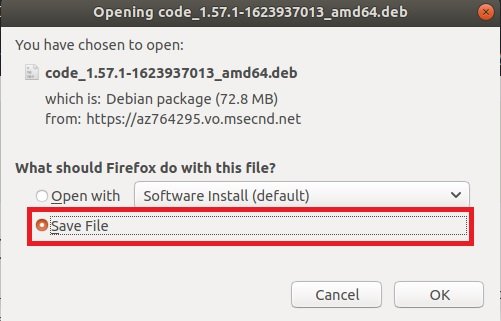
To install VS Code in your Linux Operating system, click here. This will open a window containing various download options. Go to the download option for Linux and choose the one shown in the red rectangular box.

After downloading, save the installation file by clicking ‘Save File’ and then ‘OK.’
To install the file, copy the command and run it on your Linux terminal.
$ cd Downloads
$ sudo apt install ./code_1.49.1-1600299189_amd64.deb
This command will install the VS Code in your system which after the process has completed will be seen in the installed applications. Click the VS Code icon and open it to reveal the following welcome screen on your monitor.
The easiest way to install VS code in Linux is through the software store of Ubuntu. Simply go to the software store and search for VS code.

After that click on install button, it will install visual studio code on Linux Ubuntu:

Installing Pymakr plugin in VS Code (Visual Studio Code)
To program our ESP32/ESP8266 modules in MicroPython we will require a Pymakr plugin installed in our Visual Studio Code. This will help us in the writing, debugging, and executing MicroPython scripts on ESP development boards and our PC by providing a REPL prompt. It makes the programming very easy as it provides an interactive User Interface to type and execute commands.
Before installing the Pymakr extension in visual studio code, you should have the latest version of node.js installed on your system.
Installing Node.js
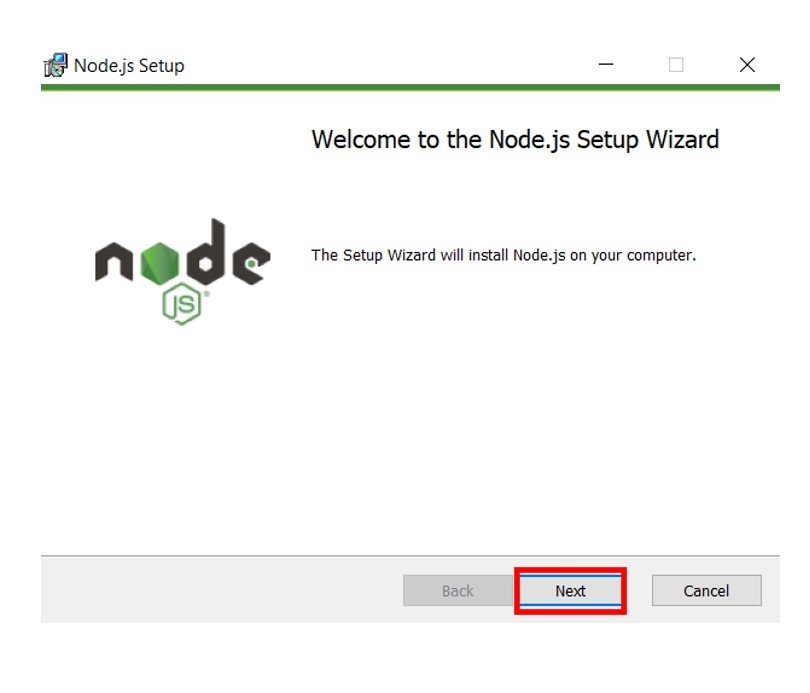
Before installing the Pymakr extension, we will have to install node.js as well. Go to the Node.js webpage by clicking here and download it.

After downloading the Node.js setup, click ‘Next’ to install it on your PC.
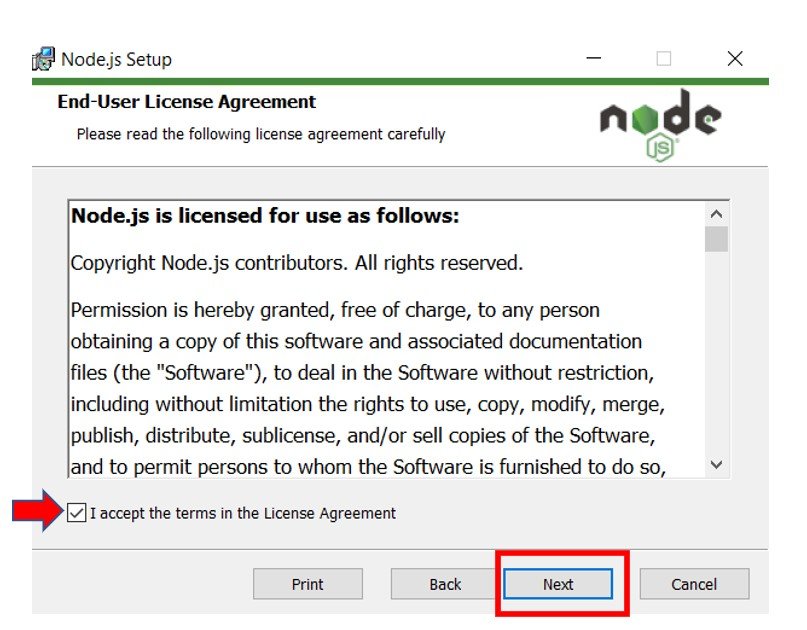
Check the agreement box and click ‘Next’ to proceed further.
After specifying the relevant saving location click on ‘Install’ to finish the installation process.

A few moments later, you will receive the following prompt indicating that the installation was performed successfully.

When you will click the ‘Finish’ button, the nodejs terminal will open up.
Installing Pymakr in VS Code
Now as we have already installed the node.js on our computer let’s proceed further and complete the installation process of Pymakr in VS Code. Follow the steps in the particular order:
Open your Visual Studio Code and go to the Extensions icon and click it or press Ctrl+Shift+X

Type pymakr in the search tab and install it as shown in the yellow box below.

The Pymakr plugin will get installed in a few moments. After the installation is complete, you can view the Pymakr console. As you can see below, more commands are now available in the bottom bar of visual studio code.

In the bottom bar you can view the following five commands:

- Pymakr Console: When you click this command, it will be able to toggle the board connection meaning it will be used to revert the connection or disconnection of the ESP board.
- Run: This will run the currently opened file.
- Upload: This will upload the program code to your board.
- Download: This will download the project from your board.
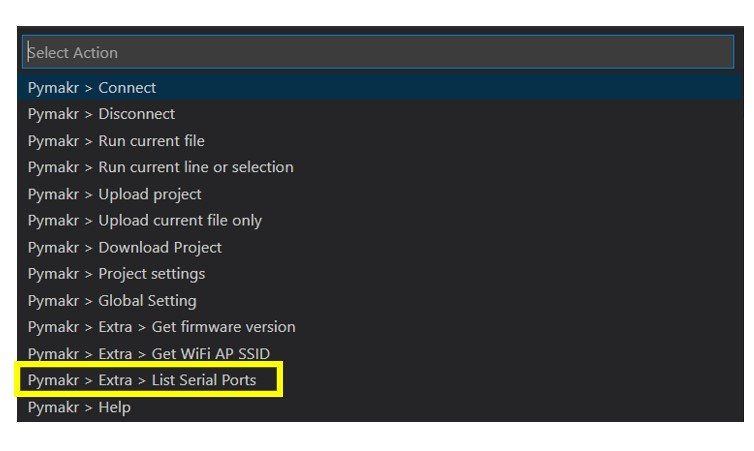
- All Commands: This will give a list of all available paymakr commands. If you click on this you will view the following list:

When you install paymakr, it will also open the pymakr.json file. It is used to setup board. We will discuss it later.
Connecting ESP MicroPython Devices to Pymakr
On the bottom bar, click on the ‘All Commands’

A drop-down list will open. Select Pymakr > Global Setting and a pymakr.json file will open.

We will edit this pymakr.json file to connect our ESP development board.
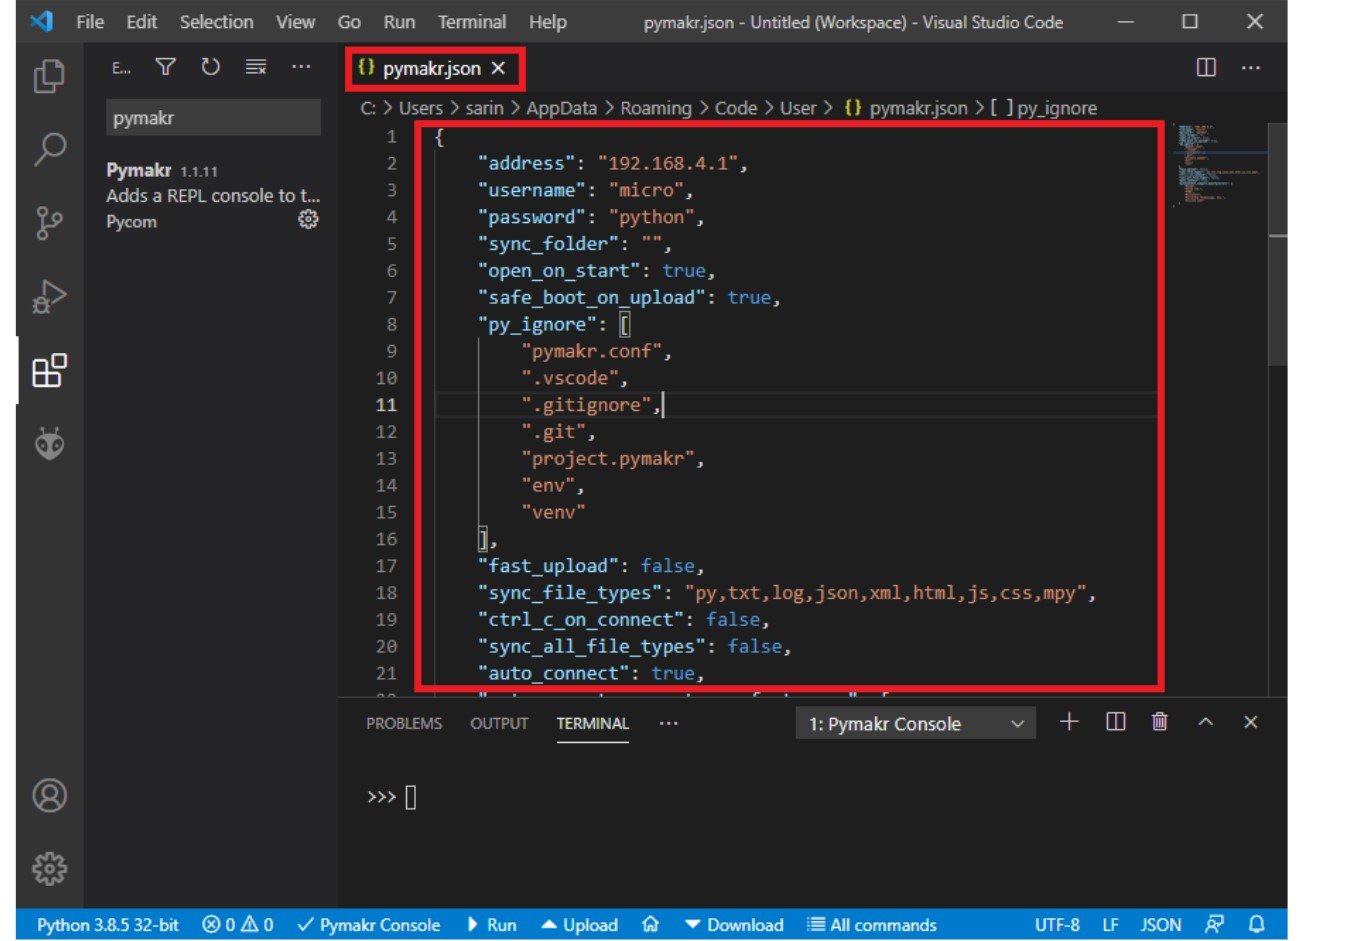
Inside this .json file, we will specify the driver and COM port of our ESP board which will be connected with the computer. To check for the driver of your module, go to the Device Manager and check for USB devices that are connected to your computer. For both ESP32 and ESP8266, the USB manufacturer is Silicon Labs. The COM port is also specified. It is COM3 in our case.

You can also view the COM port inside the pymakr as well. Go to ‘All Commands’ at the bottom and choose Pymakr > Extra > List Serial Ports.
We will implement some changes inside the pymakr.json file which we opened earlier. Inside the file, go to the “autoconnect_comport_manufacturers” section of the program code and add “Silicon Labs” or whatever the manufacturer is in your case, inside this section.

"autoconnect_comport_manufacturers": [
        "Pycom",
        "Pycom Ltd.",
        "FTDI",
        "Microsoft",
        "Microchip Technology, Inc."
        “Silicon Labs”
    ]
Selecting the COM port
Now, you can specify the COM port of your ESP board manually or it can also be automatically detected through the application. To initiate automatic detection, pass an empty string to address and set auto_connect to true. This can be seen below:
"address": "",
"auto_connect": true,
If you want to manually add the COM port then specify it in the address and set the auto_connect to false as follows:
"address": "COM3",
"auto_connect": false,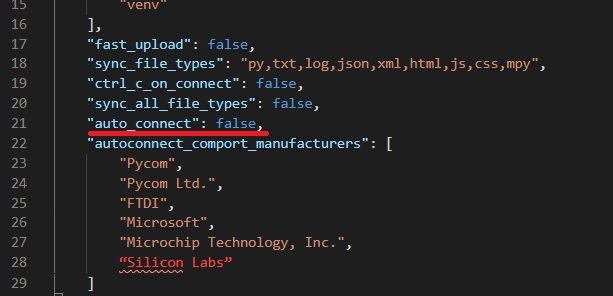
Now save the pymakr.json file (ctrl+S). After, you have made these changes save your .json file. Your ESP board will get detected automatically and it will be shown by a tick near the Pymakr Console command.

If this does not happen click on the Pymakr Console command to establish connection otherwise restart your Visual Studio Code.
To check if your board is connected successfully to visual studio code, in the terminal window, type help() to receive helpful guidelines regarding MicroPython syntax in ESP32/ESP8266.

ESP32/ESP8266 Creating a MicroPython Project on VS Code + Pymakr
As we have seen up till now, the installation of VS Code, pymakr and the connection of our MicroPython device (ESP32/ESP8266) with the IDE let us proceed further and demonstrate a simple project.
- Firstly, we will connect our ESP32/ESP8266 development board and flash it with the MicroPython firmware installed on our PC.
- Next, we will open the Visual studio code and enable the pymakr plugin in it. Make sure you have edited the pymakr.json file correctly and according to your device connected. The ESP module will automatically get connected with the pymakr. If it does not, recheck the .json file.
- Then, we will create a folder on your computer and name it Led_project.
Creating Project VS Code and Pymakr
Inside pymakr, go to File > Open folder and select the Led_project folder which we just created. Inside the folder create two files namely main.py and boot.py which are a characteristic of every MicroPython program. The boot.py file is run first when the connected device is powered on or boots. This contains the support code which runs on boot. The main.py file contains the main script of the program which gets run right after the boot.py file. In our case, we will leave the boot.py file empty as we are programming our ESP board for a simple LED blinking project so we just need the main.py file.
Code and Demonstration
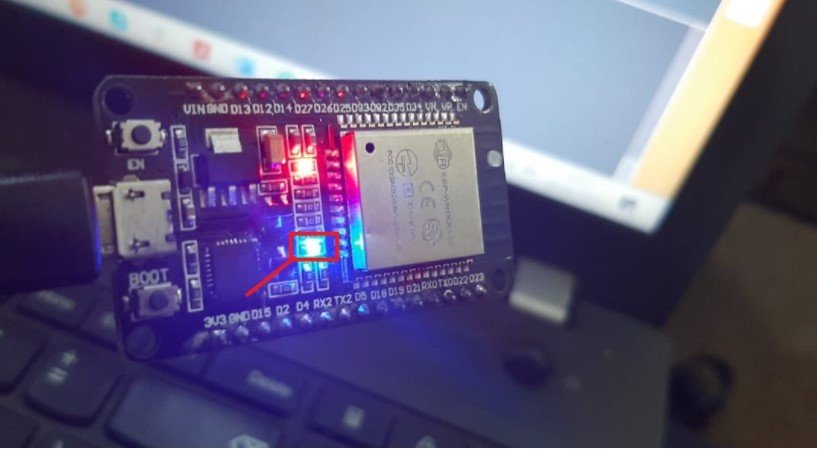
Inside the main.py file copy the code given below which will turn the on-board LED on and off after every 1 second. Notice that we are using GPIO2 to configure the LED as an output pin as the onboard LED is connected through that GPIO. This code will work for both ESP32 and ESP8266.
from machine import Pin
from time import sleep

led = Pin(2, Pin.OUT)

while True:
 led.value(not led.value())
 sleep(1)
Save the main.py file and click the Upload button found in the bottom tab.

After you click the upload button, the onboard LED will start blinking with a delay of 1 second. If you use the Run command instead of the Upload command, the code will only run as long as the ESP board is connected to the computer.
When the code is running, we will not see the >>> prompt in the terminal window. To stop the code, you will have to press Ctrl+ C. The >>> prompt will show up in the terminal indicating that a new command can now be initiated.
Disable Pymakr Plugin
The Pymakr plugin can also be disabled when it is not in use. This is convenient when using another extension with the ESP boards so that it does not cause any issues. Having multiple extensions enabled may cause errors while uploading the program code. To disable the extension, go to Extension and type pymakr. Click the disable button and restart your application.

Conclusion
In conclusion, we learned how to get started with the VS code, pymakr extension and also programmed our ESP32/ESP8266 development board with a simple project using MicroPython.
Thank you for this wonderful, readable and well-described, great Tutorial on VisualStudio Code for MicroPython.