This getting started user guide is an introduction to Raspberry Pi Pico W Wireless Wi-Fi module with MicroPython. We will give you an overview of Pico W including its features, pinout and few examples. Then, we will show you how to install MicroPython on Raspberry Pi Pico W and demonstrate some basic programs such as LED blink, Wi-Fi scan and connecting to Wi-Fi etc. So let us begin!

Recommended Components
The following components are used in this project or are helpful for getting started with Raspberry Pi Pico development.
| Component | How it’s used in this project | Buy on Amazon |
|---|---|---|
| Raspberry Pi Pico W | The Wi-Fi-enabled RP2040 board this guide gets you started with. | Check Price |
| Micro USB Cable | Data cable to connect the Pico W to your computer and upload code. | Check Price |
| Breadboard | Handy for prototyping circuits as you start building projects. | Check Price |
As an Amazon Associate we earn from qualifying purchases. Prices and availability are accurate as of the date/time indicated and are subject to change.
If you are using Raspberry Pi Pico:
Raspberry Pi Pico W Introduction
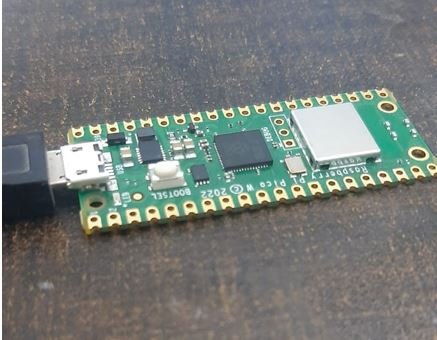
The Raspberry Pi Pico W development board is a newly launched development board from the Raspberry Pi in the microcontroller series. It can be programmed with MicroPython as well as C/C++ SDK. Raspberry Pi Pico W is a high-performance board based on the Raspberry Pi RP2040 microcontroller chip & CYW43439 Wi-Fi + BLE Chip. The RP2040 chip contains a dual-core cortex M0+ microcontroller which can operate up to 133MHz with 256kB RAM. This chip offers 26 multi-function GPIO pins and 2MB of onboard Flash memory.
One of the biggest enhancement in Raspberry Pi Pico W is the inclusion of the Wi-Fi and BLE chip. The development board supports 2.4GHz wireless LAN b/g/n wireless connectivity whose interface is operated by internal Raspberry Pi Pico W pins. With the addition of the CYW43439 Wi-Fi and BLE chip, it adds Wi-Fi connectivity in both station and access point modes, better Bluetooth features, SDIO host interface, WPA3 and DPP. Additionally, the enhanced Wi-Fi features include 20 MHz channels which have data rate of maximum 96 Mbps. Moreover, the Raspberry Pi Pico W also features an onboard antenna and internal PA, LNA and T/R switch which work for both Wi-Fi and Bluetooth functionality.
Raspberry Pi Pico W Pinout
The Raspberry Pi Pico W consists of a total of 40 pins including, 26 GPIO pins, eight GND, 3 debugging, and VCC pins. The color marking at the bottom end of this pinout diagram shows Power, ground, UART, GPIO, PWM, ADC, SPI, I2C, system control, and debugging pins.

Brief Descriptions of Pins
The 40 pins of Raspberry Pi Pico W are identical to the ones on Raspberry Pi Pico. Lets briefly go through each of them.
| GP0-GP28 | The general purpose input output pins. Raspberry Pi Pico W exposes 26 multi-function GPIO pins from a total of 30 GPIO pins available in RP2040 microcontroller. Out of these 26 pins, 23 pins are digital pins, and only 3 pins have analog read capability. These digital pins are marked as GP0, GP1, and up to GP22. GP23, GP24, and GP25 are not exposed on the pinout. Therefore cannot be used. GP26, GP27, and GP28 are the next digital pins available. These 26 GPIO pins can be used both in digital input and digital output mode. |
| VSYS | It has a voltage range of 1.8-5.5V which is the main input voltage. This pin is connected to the Raspberry Pi Pico W’s internal power supply and used by the on-board SMPS to produces the 3.3V for the chip. |
| VBUS | It is the 5V power pin connected with the micro-USB port. |
| 3V3(OUT) | It is the 3.3V power pin which is produced from the VSYS input. It is the main power supply to the RP2040 chip and GPIOs. |
| 3V3_EN | It is used to enable/disable the power to the board. To depower RP2040, set this pin to a LOW state. |
| RUN | It is used to enable the RP2040 chip. If you want to reset the microcontroller, set this pin to a LOW state. |
| ADC_VREF | It is the analog-to digital converter voltage reference. It is used to set the reference voltage for the analog inputs. It is produced by filtering the 3.3V supply of Raspberry Pi Pico W. |
| AGND | It is the analog-to-digital converter ground. It is used with the ADC_VREF pin to set the reference voltage for the analog inputs. |
Raspberry Pi Pico W Features and Specifications
- Raspberry Pi Pico W features RP2040 with 2MB of flash memory.
- Single band 2.4GHz wireless interface (802.11n)
- Micro USB B Port
- Three pin Arm serial wire debug port (SWD)
- Dual-core cortex M0+ at up to 133MHz
- 264kB multi-bank high performance SRAM
- Multiple digital peripherals including UART(2), I2C(2), SPI(2) ,PWM Channels(16), RTC(1), Timer (1)
- 30 general purpose input/output pins which have an input/output voltage range of 1.8-3.3V. Out of 30, four pins are for ADC.
Setting up Raspberry Pi Pico W for MicroPython
It is very easy to get started with Raspberry Pi Pico W using MicroPython. Follow the steps carefully to successfully set up Raspberry Pi Pico W to be used in Thonny IDE to program in MicroPython.
- Plug the Raspberry Pi Pico W in your computer while holding down the BOOTSEL button.

- Release the BOOTSEL button and the RPI-RP2 drive appears in ‘This PC’. Open the RPI-RP2 drive.
- Now open up the official Raspberry Pi Pico documentation guide.
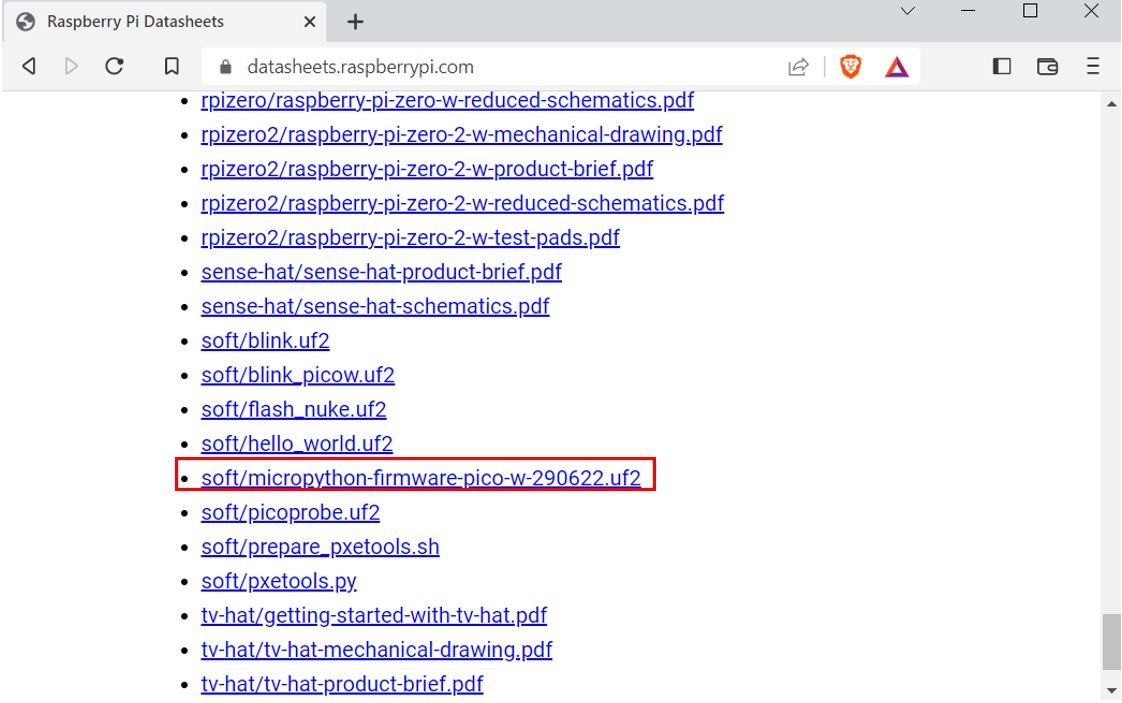
- Now under the Computers tab, scroll down and click ‘Datasheets.’ Head over to soft/micropython-firmware-pico-w-290622.uf2 and download it. This is the MicroPython UF2 file.
- After the download is completed, drag this file and drop it in your Raspberry Pi Pico W RPI-RP2 drive folder that opened up when we plugged it in our system. The Raspberry Pi Pico W detects it and reboots.
Now we are ready to program Raspberry Pi Pico in MicroPython using Thonny IDE.
Thonny IDE Installation Steps
In this section, we will list step by step instructions to download and install Thonny IDE on Windows, Linux and Mac OS based computers.
Installing Thonny IDE in Windows Operating System
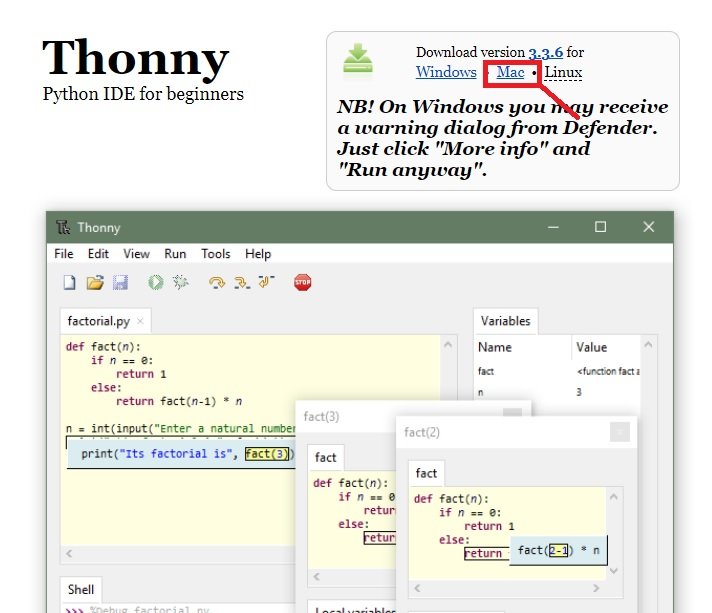
We will show you how to download and install Thonny in Windows operating system. By Clicking here, you will be redirected to the official page of Thonny IDE. You can download the latest version of the IDE. The window shown below will be displayed. Click on download version 3.3.6 for Windows.

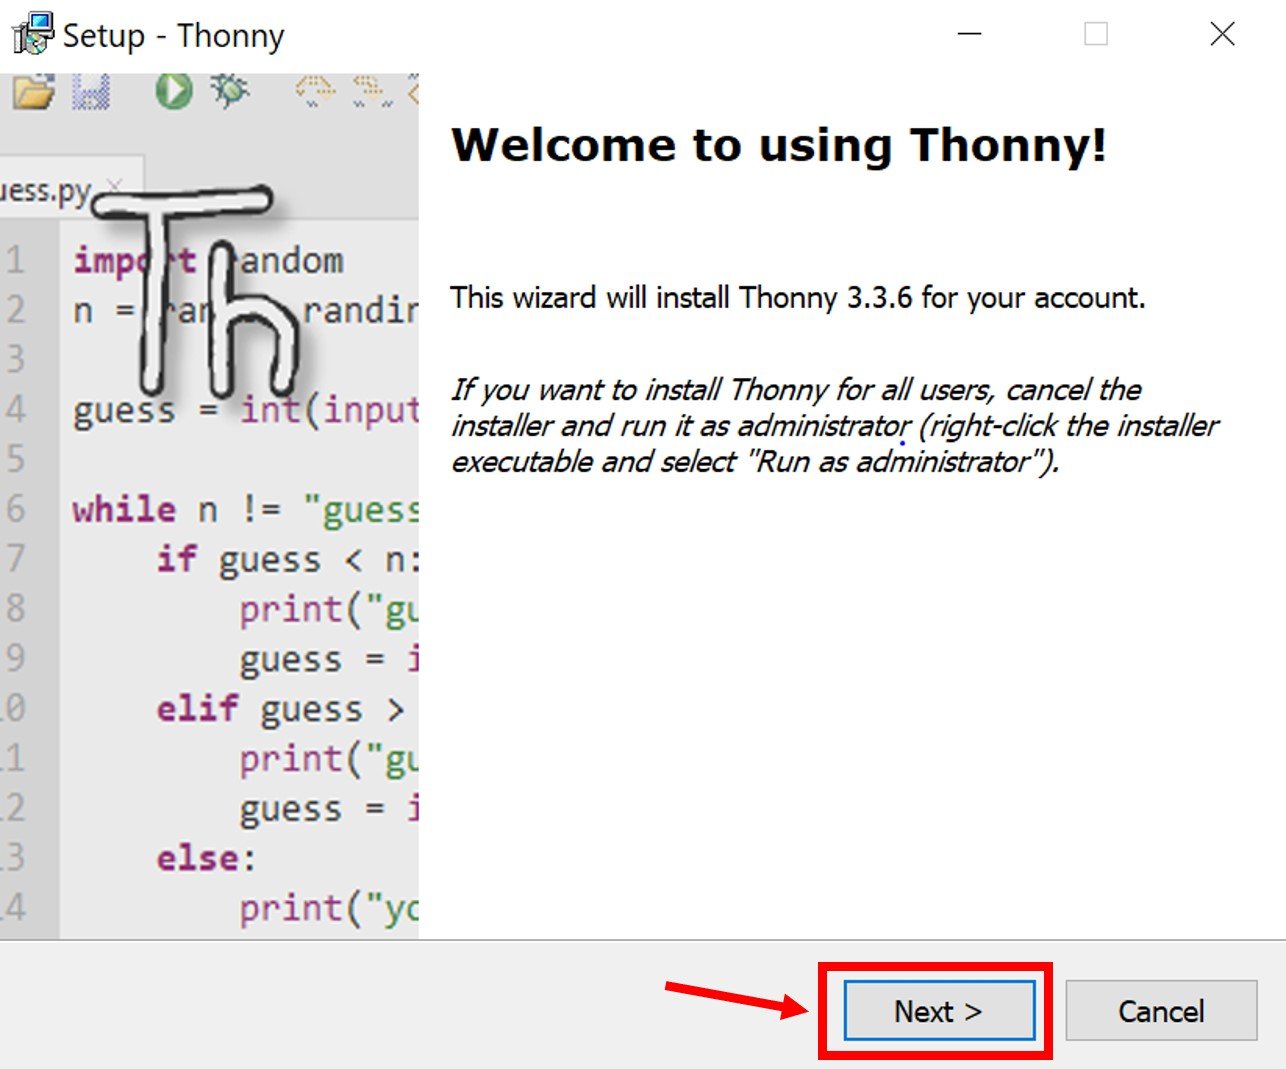
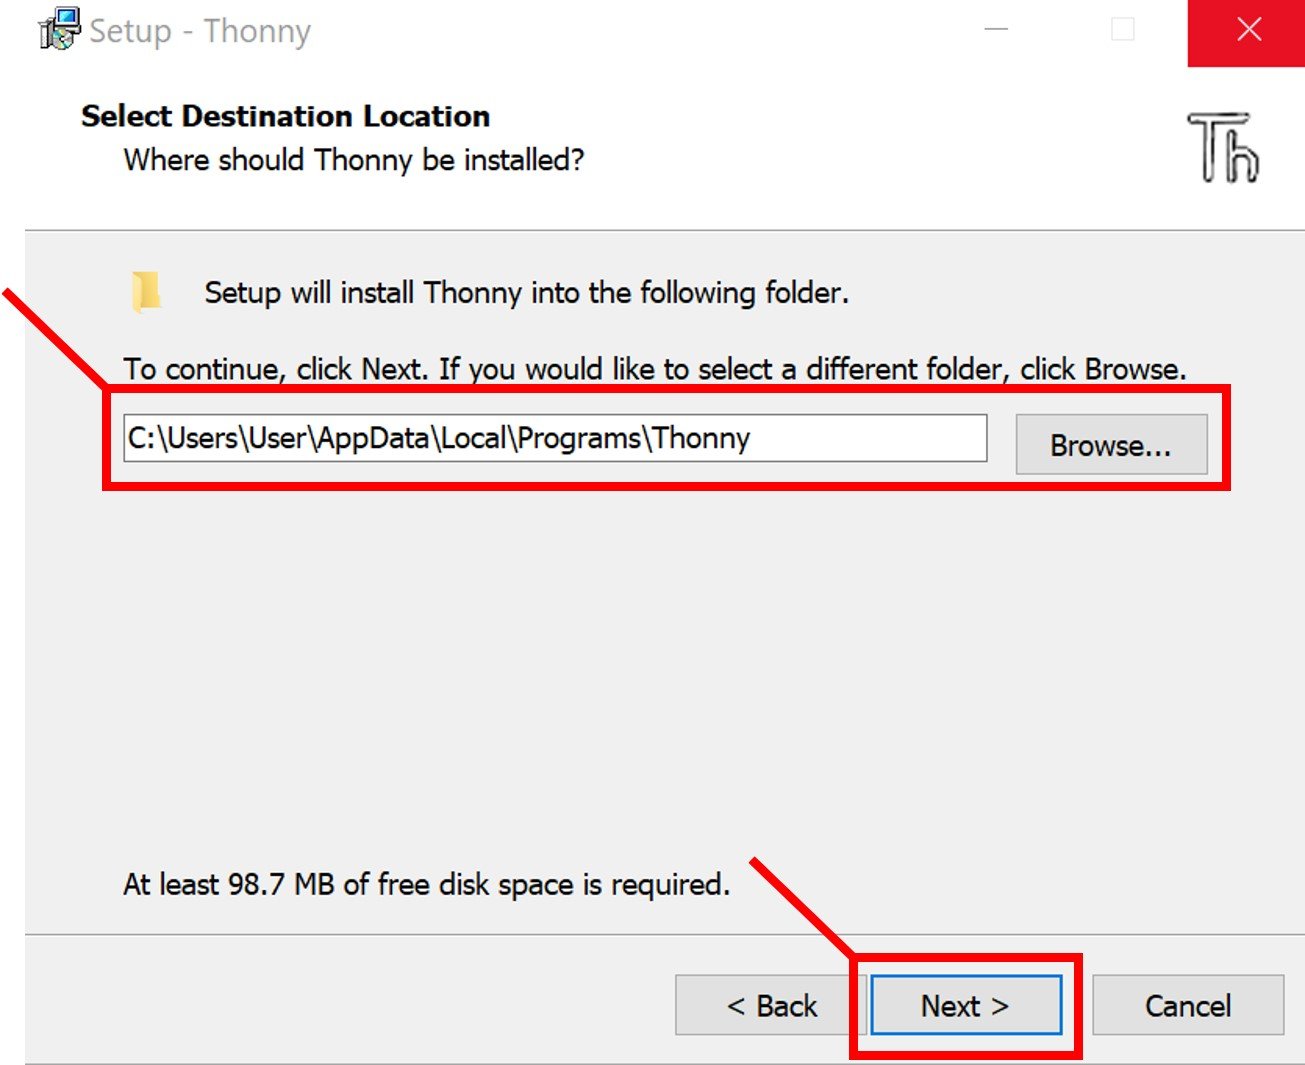
To start the installation process, run the .exe file and the Thonny Setup window opens. Click Next to proceed.
You can set the directory where the installation file should save by clicking on browse button. After specifying the location, click Next.
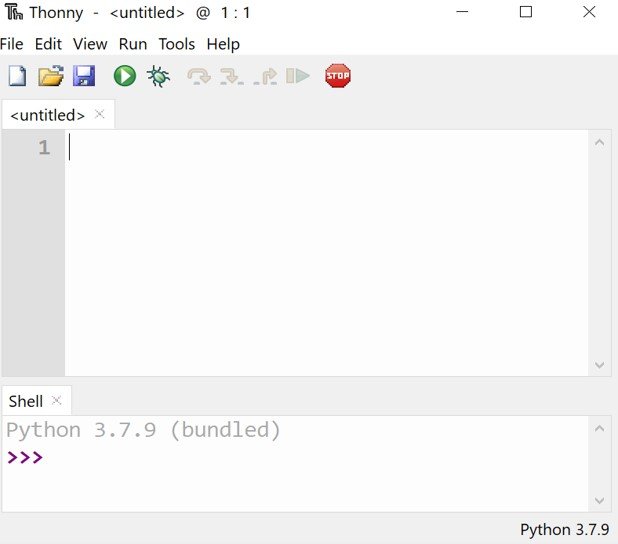
After that follow the instruction and as soon as the installation process finishes, the following window will open up. We have successfully installed Thonny IDE in Windows.
Installing Thonny IDE in Mac OS X
Thonny IDE is not available as a verified application on App Store. that is why Mac OS X blocks its installation. In order to work in this IDE in our Mac, we will need to unblock it and perform some additional security steps.
- In the menu, click System Preferences
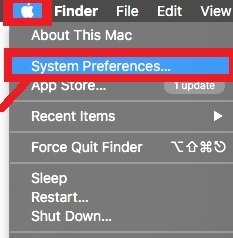
- Inside it, Click on Security & Privacy

- The following dialog box appears. Click on the lock to make changes to your Security settings.
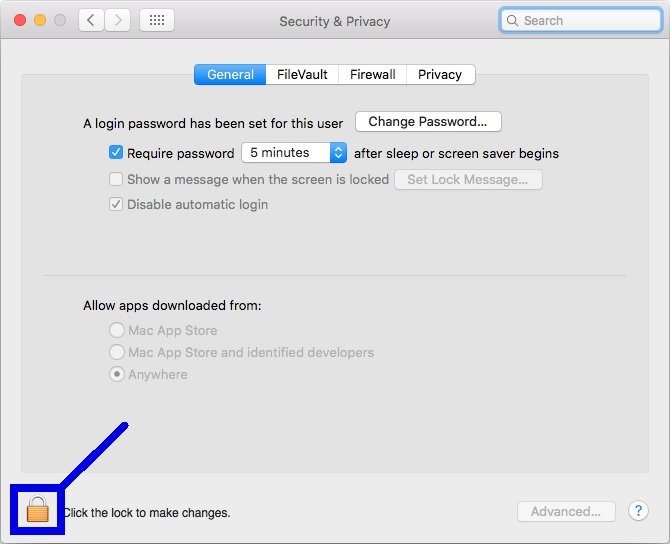
- You will have to enter your username and password and then click the Unlock button

Click ‘Anywhere’ in allow apps to download from, after you have successfully entered your credentials and unlocked.

Now, we will be able to download Thonny just like we did for Windows OS. Now follow these steps to install Thonny IDE in Mac OS X.
- Go to the following website (https://thonny.org/) to download and install the IDE. The following page will open. Click Download version 3.3.6 Mac.
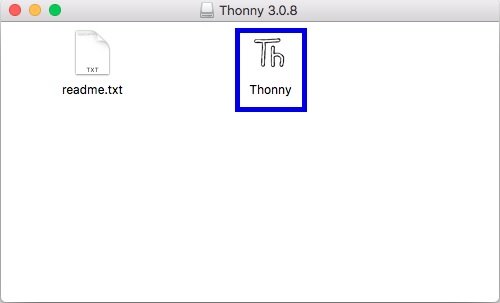
It will start downloading. After the process is completed, go to Downloads and click the .dmg file.

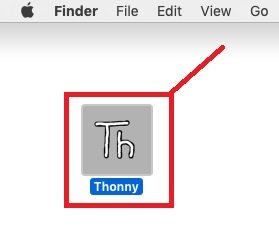
We can bring the shortcut to the desktop by dragging it.
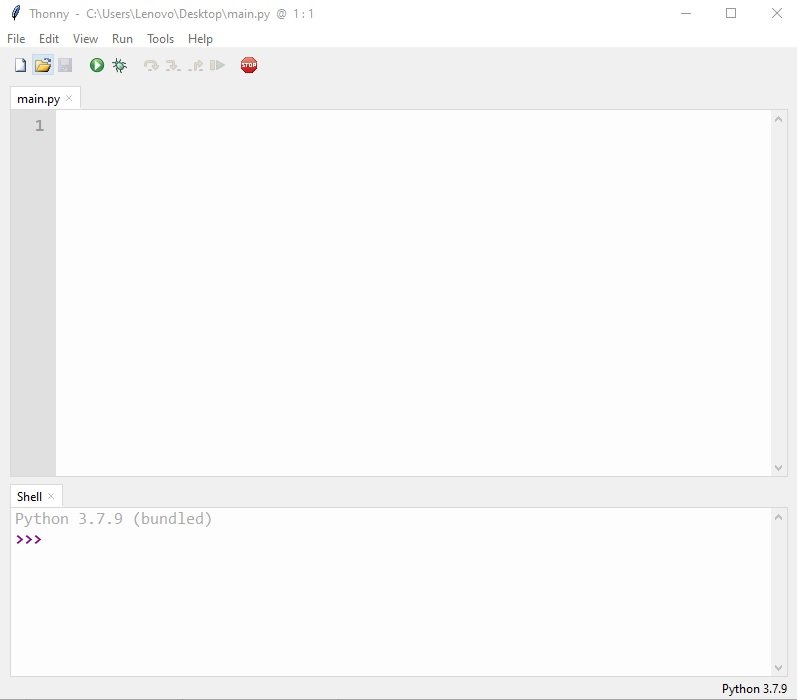
After opening the IDE, the following window will be displayed.
After that follow the instruction and as soon as the installation process finishes, the following window will open up. We have successfully installed Thonny IDE in Mac OS X.
Installing Thonny IDE in Linux
In order to install Thonny IDE on Linux OS, you should first check the Linux distribution you are using and install Python dependencies accordingly.
For Linux OS, you should first install these Python dependencies to proceed to the next step:
- python3
- python3-pip
- python3-tk
This can be achieved in Ubuntu by typing in the following command in the terminal:
sudo apt install python3 python3-pip python3-tkPress Enter and type the following command to install the Thonny IDE
bash <(wget -O - https://thonny.org/installer-for-linux)We can also perform the installation via pip3 by giving the command:
sudo pip3 install thonnyIn Fedora distribution, use this command to install Thonny IDE:
sudo dnf install thonnyAfter the installation has completed, type Thonny in the terminal, and the following window will appear. (This is for the case if you used pip3 for installation)
thonnyWe have successfully installed the IDE in Linux.
LED Blinking Example with Raspberry Pi Pico W
Now, as we have installed our Thonny IDE for Windows, Linux, and Mac Operating Systems. But the procedure to use this IDE remains the same in all operating systems. Without any further details, let’s get started with Thonny IDE to write our first MicroPython Program.
Running a Simple on-board LED
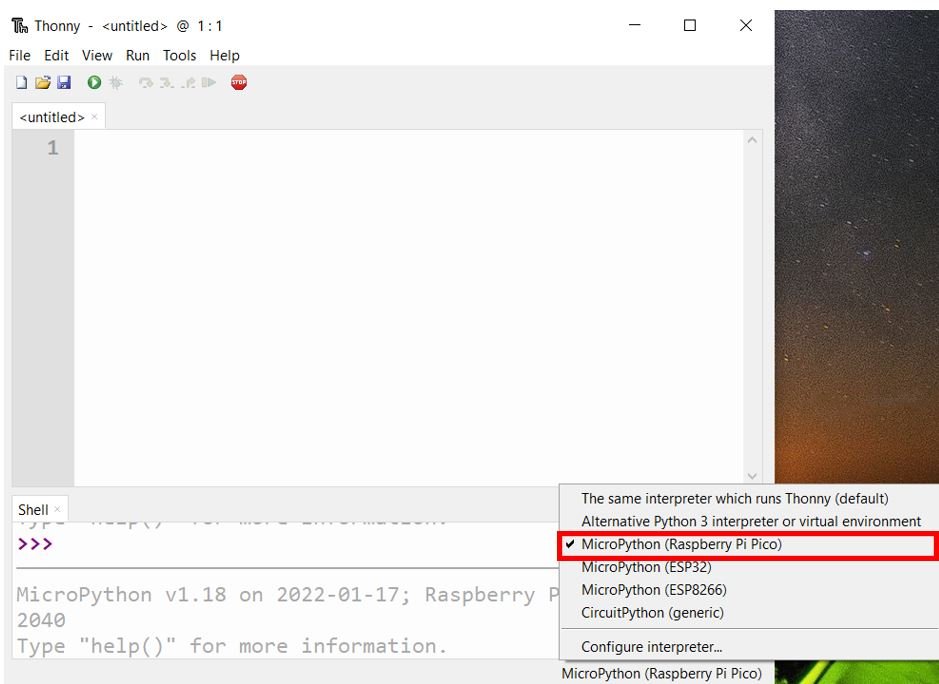
Open Thonny IDE and at the bottom right hand select the device as Raspberry Pi Pico.
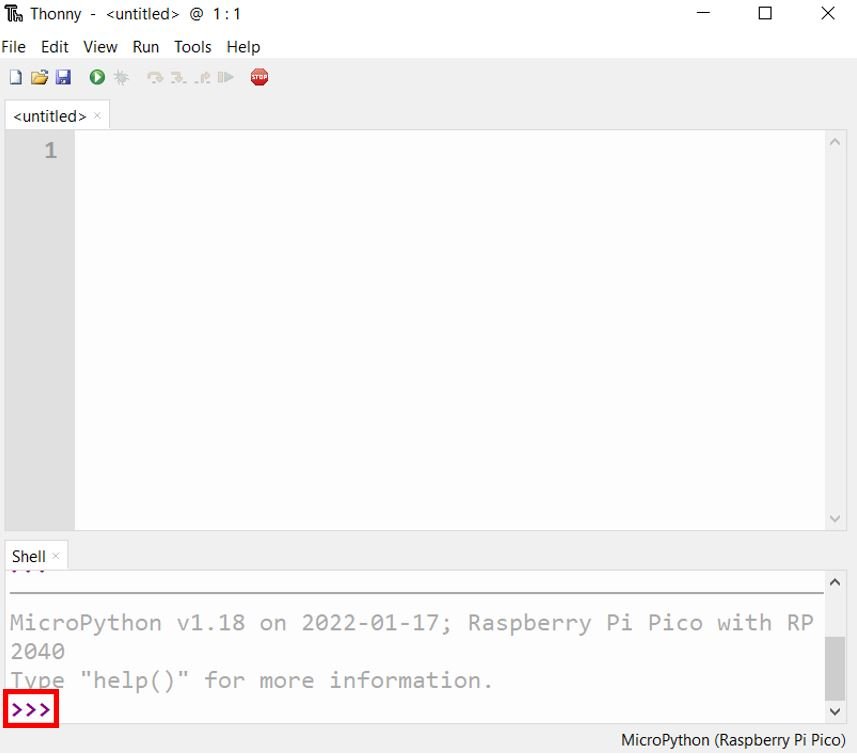
Now, your Raspberry Pi Pico W board and the Thonny IDE are connected. This can be seen below in the window. This can be seen by the prompt in the Shell window below.
Now lets write a program to toggle the onboard LED of Raspberry Pi Pico W. Note that the onboard LED of Raspberry Pi Pico W is connected to a GPIO pin on the CYW43439 wireless chip instead of being directly attached to RP2040. Therefore MicroPython already comes with this modification.
Copy the following code to a new file. It toggles the onboard LED after every second.
import machine
import time

led= machine.Pin('LED', machine.Pin.OUT)

while (True):
    led.on()
    time.sleep(1)
    led.off()
    time.sleep(1)
Save it to Raspberry Pi Pico as main.py
Click on the save icon, a pop-up window will appear. This gives two options to save this file either to your computer or directly to your devices such as Raspberry Pi Pico W. That means we can also directly upload files to a device.

Type the file name as ‘main.py’ and press “OK”. It will upload file to your device.
This would upload the code onto our Raspberry Pi Pico W board. The onboard LED will start blinking after a delay of 1 second.


Scan Wi-Fi Access Points with Raspberry Pi Pico W
As mentioned previously, the Raspberry Pi Pico W includes Wi-Fi connectivity in both station and soft access point modes. Lets show you a MicroPython script which scans all the nearly Wi-Fi access points.
Copy the following code to a new file and save it to your computer as scan.py
import network
wlan=network.WLAN(network.STA_IF)
wlan.active(True)
access_points = wlan.scan()
for AP in access_points:
        print(AP)
In this MicroPython script, the Raspberry Pi Pico W acts in station mode and scans all the nearby access points. These are then printed in the Thonny Shell Terminal when you press the run button.
Below you can view that four different access points have been scanned.

Connect Raspberry Pi Pico W to Wi-Fi
After scanning all the nearby access points, lets show you a MicroPython program to connect our Raspberry Pi Pico W to Wi-Fi.
Copy the following program to a new file inside Thonny IDE. Remember to replace the SSID and password with your own Wi-Fi credentials so that the microcontroller is successfully able to connect to it.
import network
wlan = network.WLAN(network.STA_IF)
wlan.active(True)
wlan.connect("YOUR_SSID","YOUR_PASSWORD")
print(wlan.isconnected())
After saving the file to your computer, press the run button to run the MicroPython script. If the board successfully connects to the internet, ‘True’ gets printed in the Thonny Shell terminal, otherwise ‘False’ gets printed.

Raspberry Pi Pico W IP Address
The following MicroPython script waits for the Raspberry Pi Pico W to connect to the Wi-Fi, if the microcontroller is unable to connect within the number of tries then a failure message is printed on the shell terminal. Otherwise, the IP address of the connected network is printed, incase of a successful connection.
Copy the following program to a new file inside Thonny IDE. Remember to replace the SSID and password with your own Wi-Fi credentials so that the microcontroller is successfully able to connect to it.
import network
import time

wlan = network.WLAN(network.STA_IF)
wlan.active(True)
wlan.connect("SSID","PASSWORD")

# Wait for connect or fail
wait = 10
while wait > 0:
    if wlan.status() < 0 or wlan.status() >= 3:
        break
    wait -= 1
    print('waiting for connection...')
    time.sleep(1)

# Handle connection error
if wlan.status() != 3:
    raise RuntimeError('wifi connection failed')
else:
    print('connected')
    print('IP: ', wlan.ifconfig()[0])
To obtain the IP address, we use wlan.ifconfig()[0]. This function acquires the IP address, along with the subnet masks, gateways, and DNS servers.
After saving the file to your computer, press the run button to run the MicroPython script. When the Raspberry Pi Pico W successfully connects with the network, the IP address gets printed on the terminal.

Store Wi-Fi Credentials Separately
In this section, we will show you a MicroPython program that accesses Wi-Fi credentials saved on another file for security purposes.
Copy the program given below in a new file called credentials.py and save it. Remember to replace the SSID and PASSWORD with your own Wi-Fi network credentials. In our case, the SSID is HUAWEI-u67E and password is 4uF77R2n.
credentials = {
'ssid': 'HUAWEI-u67E',
'password': '4uF77R2n',
}
Now create another new file and copy the MicroPython script given below. Save it as wifi_connect.py
This program waits for the Raspberry Pi Pico W to connect to the Wi-Fi, if the microcontroller is unable to connect within the number of tries then a failure message is printed on the shell terminal. Otherwise, the IP address of the connected network is printed, incase of a successful connection. Note that we have not specified our network credentials in this program and our importing it from credentials.py.
import network
import time
from credentials import *

def wifi_connect(ssid=credentials['ssid'],psk=credentials['password']):
    wlan = network.WLAN(network.STA_IF)
    wlan.active(True)
    wlan.connect(ssid, psk)

    # Wait for connect or fail
    wait = 10
    while wait > 0:
        if wlan.status() < 0 or wlan.status() >= 3:
            break
        wait -= 1
        print('waiting for connection...')
        time.sleep(1)

    # Handle connection error
    if wlan.status() != 3:
        raise RuntimeError('wifi connection failed')
    else:
        print('connected')
        ip=wlan.ifconfig()[0]
        print('network config: ', ip)
        return ip
Finally, copy the following program in another file called main.py and save it.
from wifi_connect import *
wifi_connect()
Now run all the three scripts one by one. The Thonny Shell terminal prints the following:

You may also like to read these web server projects with Pico wireless: