Recommended Components
The following components are used in this project or are helpful for building it with the Arduino.
| Component | How it’s used in this project | Buy on Amazon |
|---|---|---|
| Arduino Uno R3 | The main controller board that runs the sketch and drives every component in this project. | Check Price |
| HC-05 Bluetooth module | Receives commands wirelessly from the Android app and passes them to the Arduino over serial. | Check Price |
| DC motor | The motors whose speed and direction are controlled by the Arduino in this project. | Check Price |
| L298N motor driver | Drives the DC motors and lets the Arduino control their speed and direction. | Check Price |
| Breadboard | Lets you build and prototype the circuit without soldering. | Check Price |
| Jumper Wires | Used to make all the connections between the Arduino, breadboard, and modules. | Check Price |
As an Amazon Associate we earn from qualifying purchases. Prices and availability are accurate as of the date/time indicated and are subject to change.
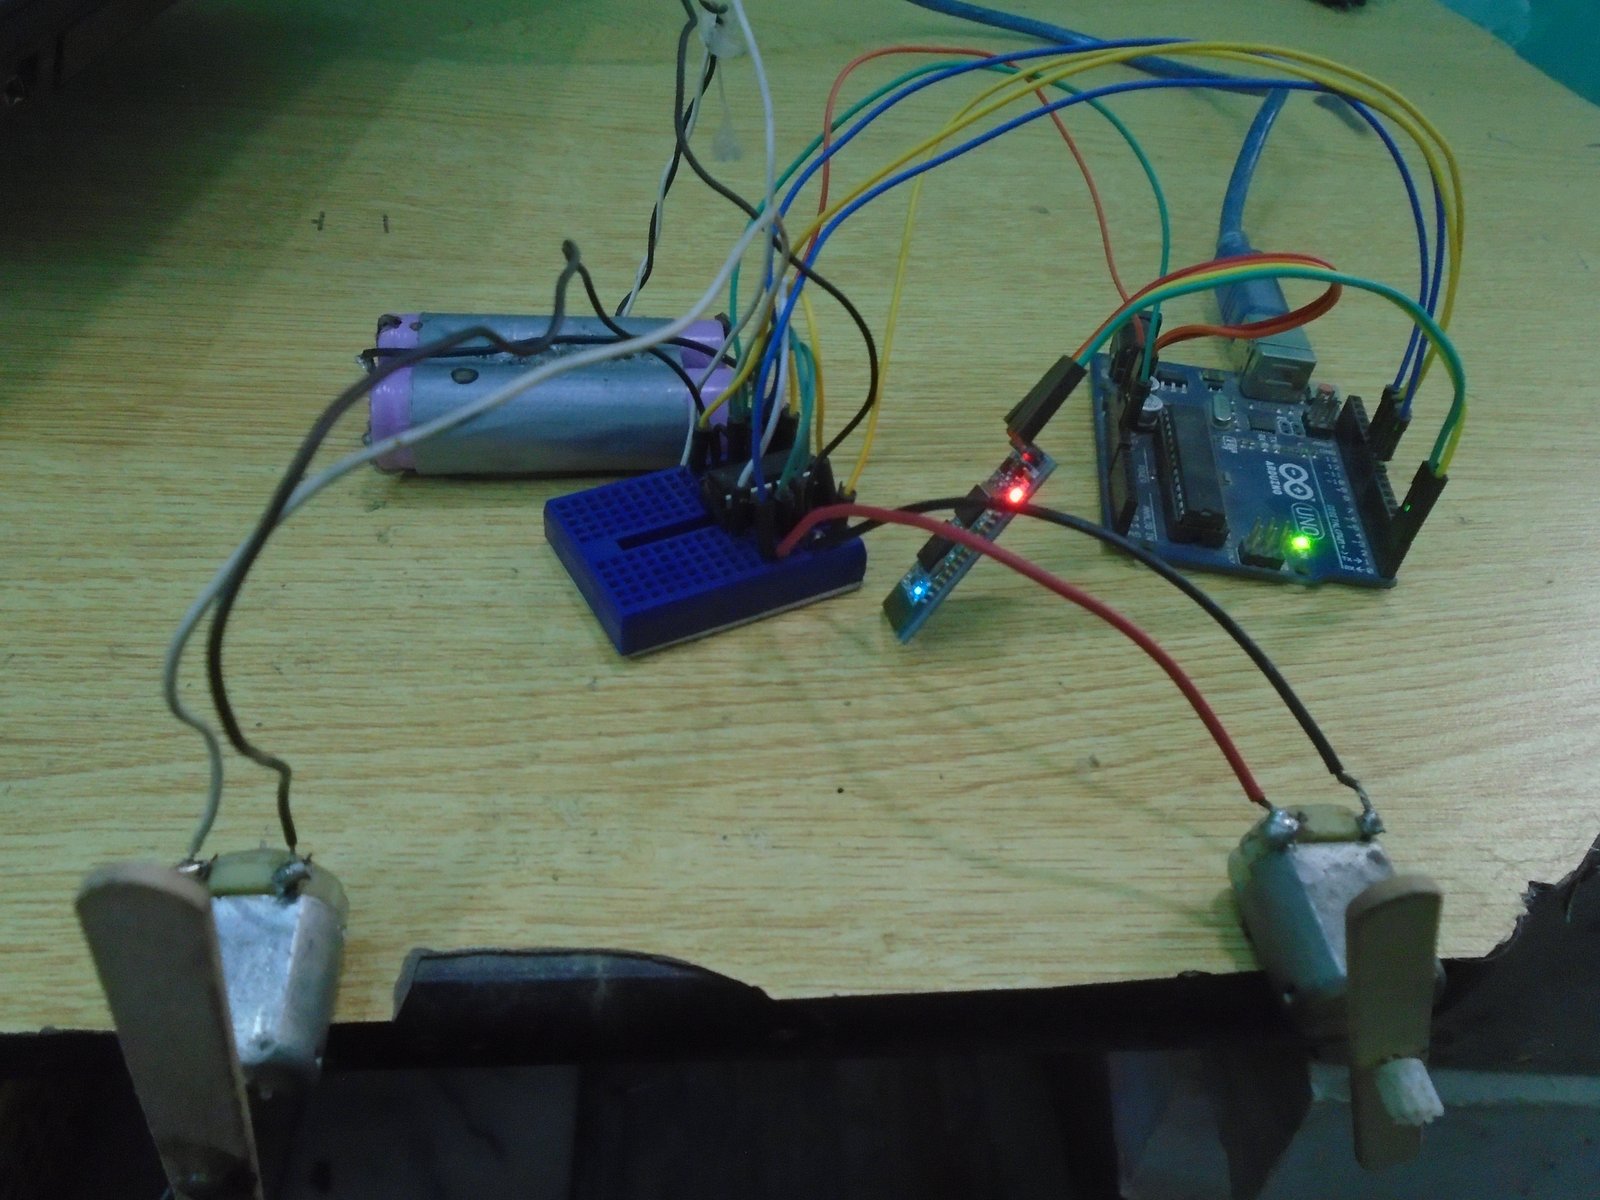 Required Components for Bluetooth based dc motor speed and direction controlThe components required for this project are as follows
- Arduino Uno
- HC-06 Bluetooth device
- L293D Motor Controller IC
- DC Motors
- 9V battery
- Connecting wires
- Breadboard
 First of all, we will connect the L293D IC with the Arduino. The connections of the L293D motor controller IC with the Arduino are as follows
- Pins 1, 9, 16 of L293D IC with the 5V pin of Arduino.
- Pin 2 of L293D IC is the Input pin; connect it with the pin 6 of Arduino.
- Pin 3 of L293D IC to one end of the motor and connect the other end of the motor to the pin 6 of L293D.
- Pins 4, 5, 12 and 13 are GND pins of L293D IC; connect these to the GND of Arduino.
- Pin 7 of L293D IC is the Input pin; connect it with the pin 5 of Arduino.
- Pin 8 is the VCC pin of L293D IC, connect it to positive end of battery and connect the negative end of battery to the Ground.
- Pin 10 of L293D IC is the Input pin for second motor; connect it with pin 9 of Arduino.
- Pin 11 of L293D to one end of motor and connect the second end of motor to the pin 14 of L293D.
- Pin 15 of L293D is the second Input pin for second motor; connect it with the pin 10 of Arduino.
- VCC of HC-06 to the 5V of Arduino
- GND of HC-06 to the GND of Arduino
- TX of HC-06 to the RX pin of Arduino
- RX pin of HC-06 to the TX pin of Arduino
int first_motor_pin1 = 11;

int first_motor_pin2 = 10;

int second_motor_pin1 = 9;

int second_motor_pin2 = 8;

int state;

int flag = 0;

void setup ( ) {

  Serial.begin (9600);

  pinMode (first_motor_pin1, OUTPUT);

  pinMode (first_motor_pin2, OUTPUT);

  pinMode (second_motor_pin1, OUTPUT);

  pinMode (second_motor_pin2, OUTPUT);

}

void loop ( ) {

if(Serial.available( ) > 0){

      state = Serial.read( );

      flag = 0;

    }

    if (state == '1') {

       digitalWrite (first_motor_pin1, LOW);

      digitalWrite (first_motor_pin2, HIGH);

      digitalWrite (second_motor_pin1, HIGH);

      digitalWrite (second_motor_pin2, HIGH);

          if(flag == 0){

          Serial.println("Left Motor ON");

          flag = 1;

        }

    }

    else if (state == '2') {

        digitalWrite (first_motor_pin1, HIGH);

      digitalWrite (first_motor_pin2, HIGH);

      digitalWrite (second_motor_pin1, HIGH);

      digitalWrite (second_motor_pin2, LOW);

        if(flag == 0){

          Serial.println("Right Motor ON");

          flag = 1;

    }

    }

    else if (state == '3') {

        digitalWrite (first_motor_pin1, LOW);

      digitalWrite (first_motor_pin2, HIGH);

      digitalWrite (second_motor_pin1, HIGH);

      digitalWrite (second_motor_pin2, LOW);

          if(flag == 0){

          Serial.println("Both Motors Clockwise");

          flag = 1;

        }

    }

     else if (state == '4') {

         digitalWrite (first_motor_pin1, HIGH);

      digitalWrite (first_motor_pin2, LOW);

      digitalWrite (second_motor_pin1, LOW);

      digitalWrite (second_motor_pin2, HIGH);

        if(flag == 0){

          Serial.println("Both Motors Anti-clockwise");

          flag = 1;

        }

    }

    else if (state == '0') {

         digitalWrite (first_motor_pin1, LOW);

      digitalWrite (first_motor_pin2, LOW);

      digitalWrite (second_motor_pin1, LOW);

      digitalWrite (second_motor_pin2, LOW);

        if(flag == 0){

          Serial.println("Both Motors OFF");

          flag = 1;

        }

    }

}
Code ExplanationFirst of all, we initialized the pins in the code which are for controlling the motors. We initialized four pins, two are for controlling the first motor and the other two are for controlling the second motor. The state variable we initialized is for storing the output that will come from the Bluetooth device. The flag variable initialized will make sure that the serial prints only once the state.int first_motor_pin1 = 11; int first_motor_pin2 = 10; int second_motor_pin1 = 9; int second_motor_pin2 = 8; int state; int flag = 0;Then in the setup function, we declared all the pins as the output pins because we will give the output to the L293D motor controller from these pins. This output from the Arduino will be the input for the L293D motor controller IC.
 pinMode (first_motor_pin1, OUTPUT);

  pinMode (first_motor_pin2, OUTPUT);

  pinMode (second_motor_pin1, OUTPUT);

  pinMode (second_motor_pin2, OUTPUT);
Then in the loop function, we checked that if the data is available or not or if the button on the android app is pressed or not. If the data will be available, then it will get stored in the state variable. Then we will compare this data with the already saved data in our code. If the data will match, then the code written in that will get execute and the motor will run according to that.
if(Serial.available( ) > 0){

      state = Serial.read( );

      flag = 0;

    }

    if (state == '1') {

       digitalWrite (first_motor_pin1, LOW);

      digitalWrite (first_motor_pin2, HIGH);

      digitalWrite (second_motor_pin1, HIGH);

      digitalWrite (second_motor_pin2, HIGH);

          if(flag == 0){

          Serial.println("Left Motor ON");

          flag = 1;

        }

    }
Where is speed control.