In this tutorial, we will see how to send text messages with ESP32/ESP8266 and Twilio using MicroPython. Twilio is a communications web service that allows users to make and receive phone calls and SMS along with other communication functions. Although Twilio is not free to use but you can get started with a free trial account as well to test the service. With Twilio, there is no need to use a GSM module or have a SIM card, as you get access to a Twilio phone number to send messages.
Twilio provides an HTTP POST API to send SMS to a recipient. We will use that API to make an HTTP POST request from MicroPython script for ESP32 and ESP8266 using urequests http library.
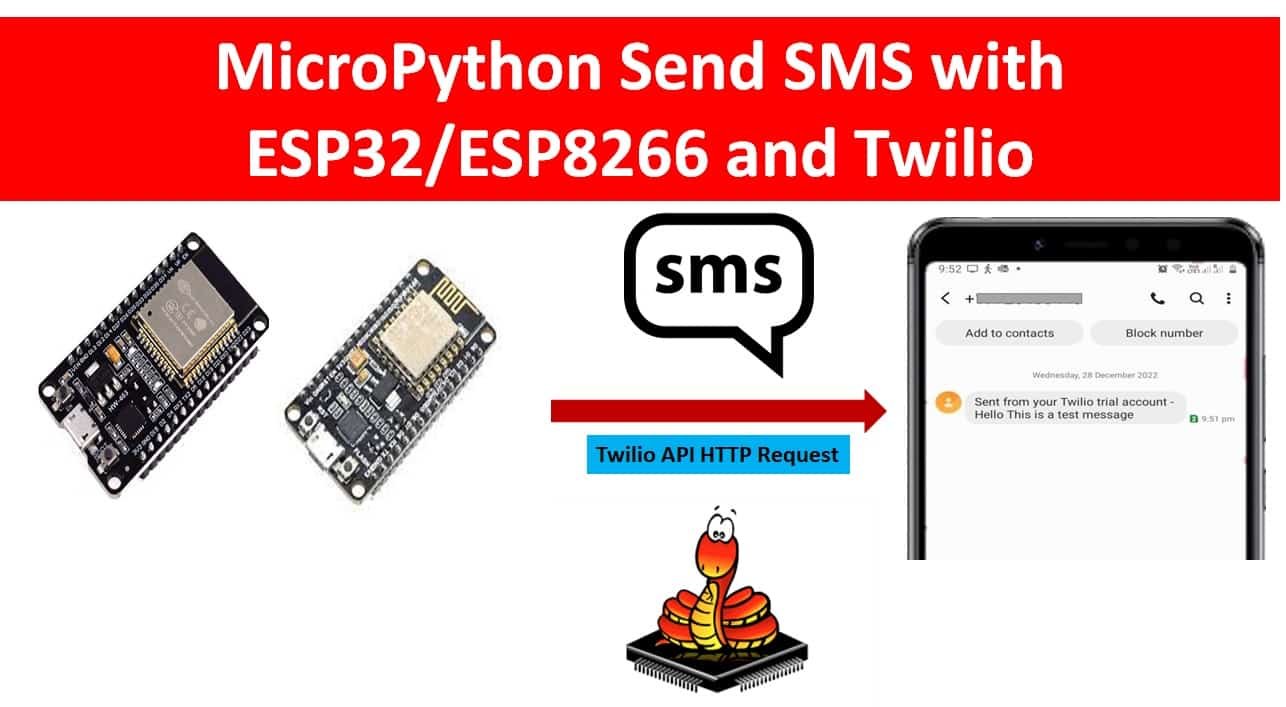
We have a similar guide with ESP32 using Arduino IDE and with Raspberry Pi Pico using MicroPython:
Twilio Web Service
“Twilio powers personalized interactions and trusted global communications to connect you with customers.”
Twilio is a cloud communication platform that enables developers to build, scale, and operate communications within software applications. Twilio provides a suite of APIs, or application programming interfaces, that allow developers to integrate voice, video, messaging, and other communication capabilities into their applications.
Some examples of how Twilio can be used include:
- Enabling users to make phone calls or send text messages directly from a website or mobile app
- Building chatbots that can communicate with users over messaging platforms such as SMS or WhatsApp
- Adding voice and video capabilities to online meeting and collaboration tools
- Integrating SMS or voice notifications into business processes and workflows
Twilio is designed to be easily integrated into a wide range of programming languages and development environments, and it provides extensive documentation and support resources to help developers get started.
As mentioned before, Twilio is a communication web service for making and receiving calls/messages and other communication features. Our focus will be to show you how to use Twilio Twilio with ESP32 and ESP8266 to send SMS to a phone number. The sender’s phone number will be one that we will buy from Twilio itself. We will be using the trial version to demonstrate, however, if you like the services you can upgrade your account as well.
Create Twilio Trial Account
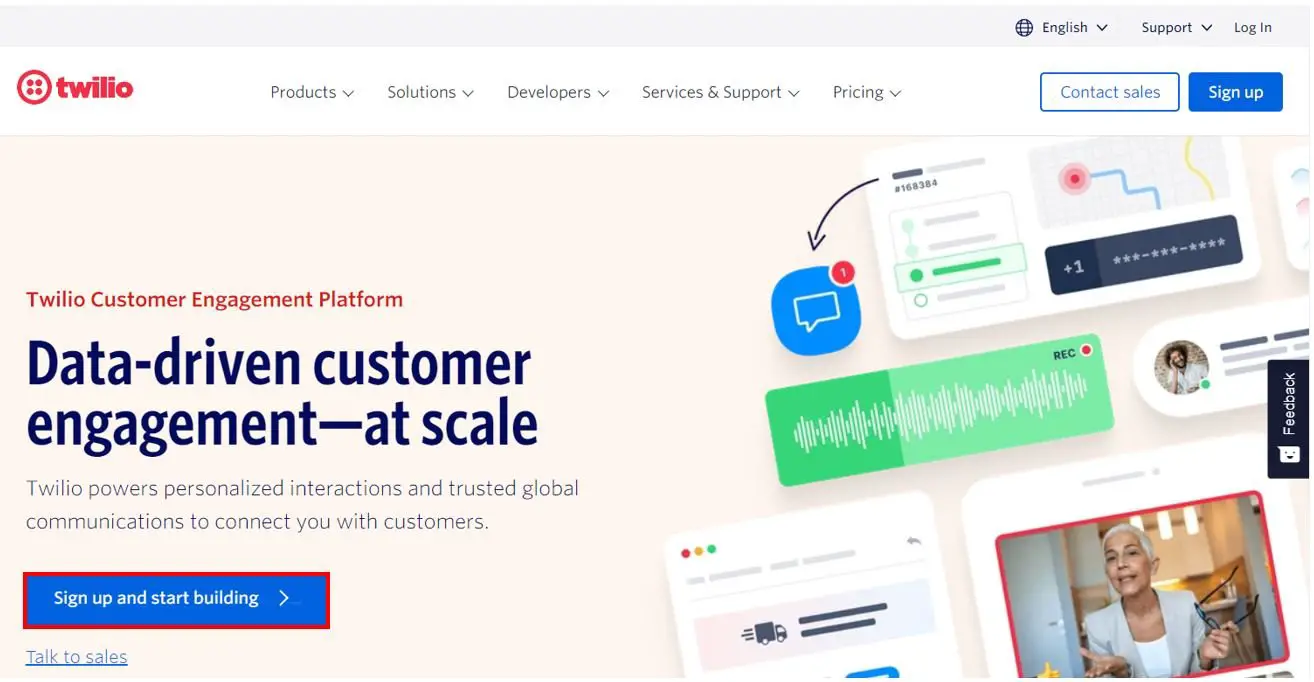
Let’s start by creating a free trial account on Twilio. Open the following link and head over to ‘Sign up and start building.’
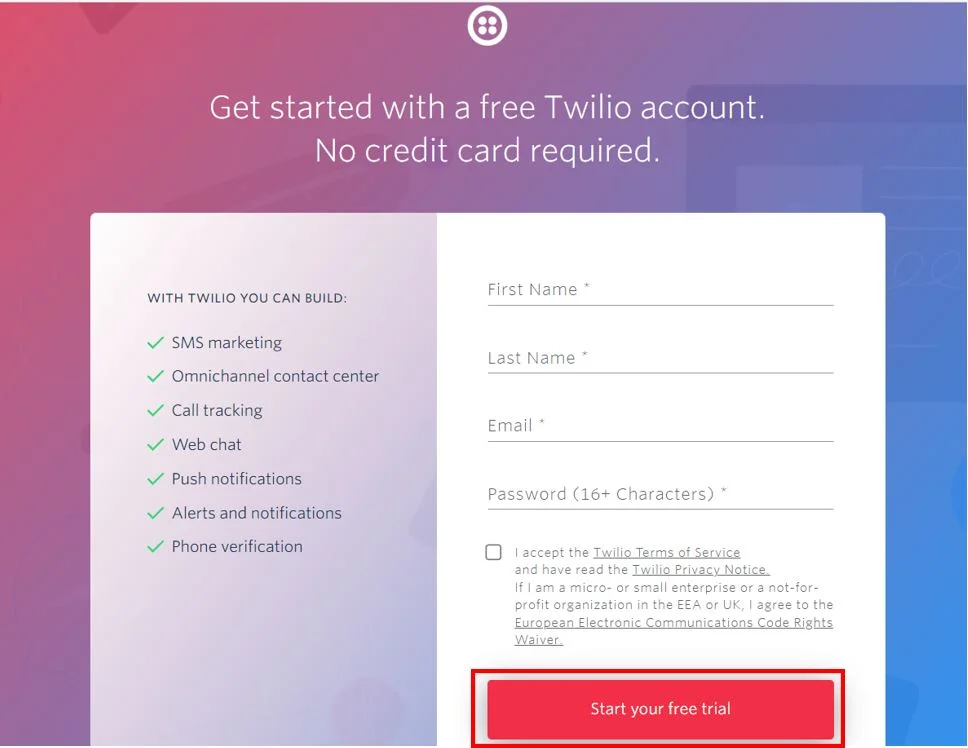
Now you will be asked to fill in your details to create the free Twilio account. Enter your first name, last name, email and password. Then accept the Twilio terms of service. Now click the ‘Start your free trial’ button.
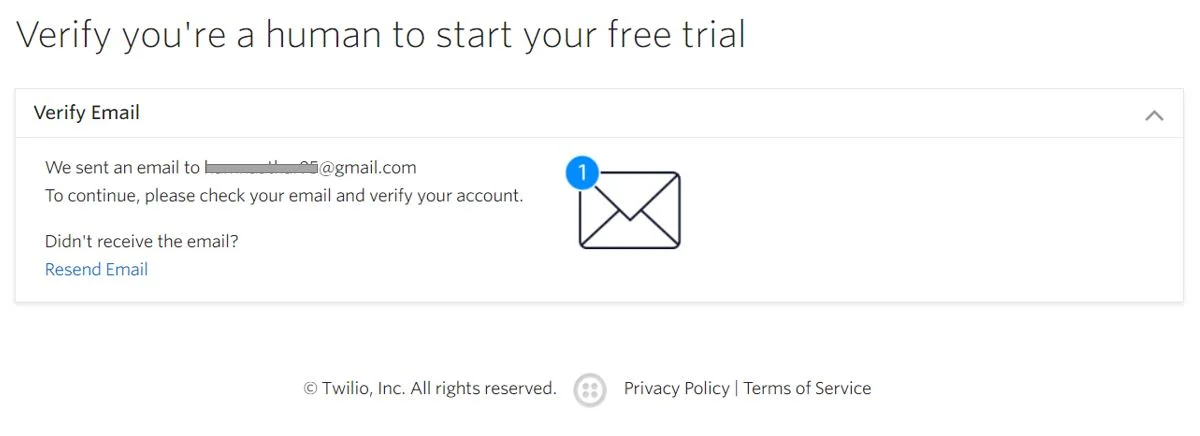
You will be asked to verify your email. Open your email to verify your account.
After verifying the email, you will be asked to enter your phone number for verification.

After the verifications are complete, your Twilio console will open up.

Set up Twilio Free Account
Now to set up our Twilio free account, head over to Phone Numbers > Manage > Verified Caller IDs.
You will be able to see the phone number you entered while verifying your Twilio account.

Next click ‘Add a new Caller ID‘ to add a caller ID. Once you enter the number, you will receive the verification code through an SMS on that number. Enter the verification code to successfully add the caller ID.
Any number that we will use to send any SMS will have to be verified first as we are using a free trial account. Therefore, we will have to add the caller ID.

Get a Phone Number from Twilio
In order to use Twilio, we would have to buy a phone number from Twilio itself. Although we are using a free trial account but we get $15.50 credit from Twilio. This can be used to buy the number that we will use to send the SMS.
Go to Phone Numbers > Manage > Buy a number. Select the capabilities you want for the number. Remember to tick SMS. Moreover, you have the option to choose the country as well as other advanced search options as well which will offer you a number that you want from the available numbers.
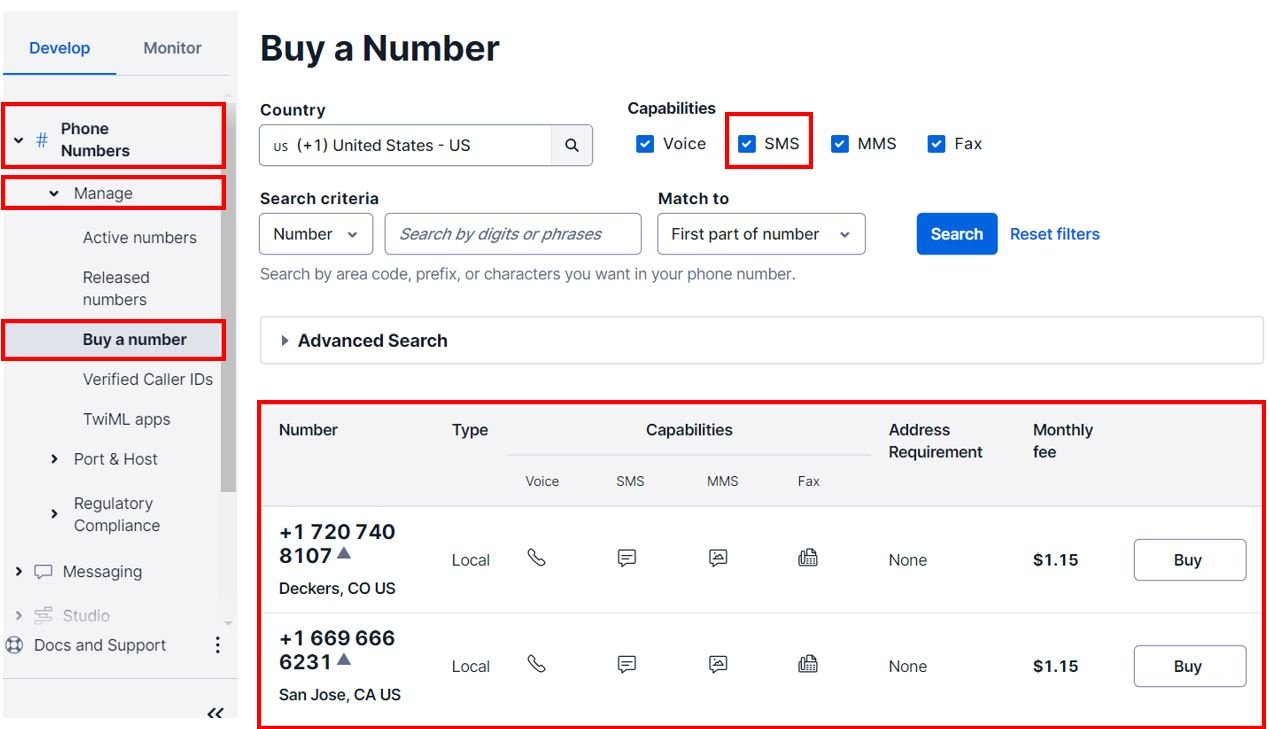
You will be asked to agree to the terms and conditions. Finally click the Buy button.

Moreover, you may be asked to configure the number as well.

Head over to Phone Numbers > Manage > Active Numbers and you will be able to see the number that you just bought in the Active Numbers.
Setting Up a Programmable Messaging Service
Now that we have set up our free Twilio account, added verified caller ID, and bought a Twilio number to send SMS with, let us set up the programmable messaging service.
Head over to Messaging > Try it out > Get Set Up. This opens the programmable messaging service welcome page. Click the ‘Start setup‘ button.

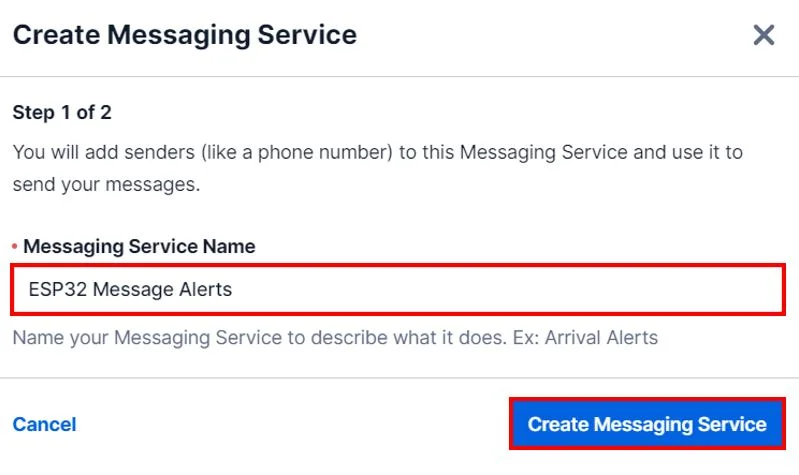
Give a name to your messaging service and then click ‘Create Messaging Service‘.
Enter the Twilio Phone number that you just bought. Then click ‘Add this number.’

Now we have successfully set up our programmable messaging service. You will get access to your Message Service SID, Account SID, and Auth Token. These will be required while programming the ESP32 and ESP8266 board to send SMS.
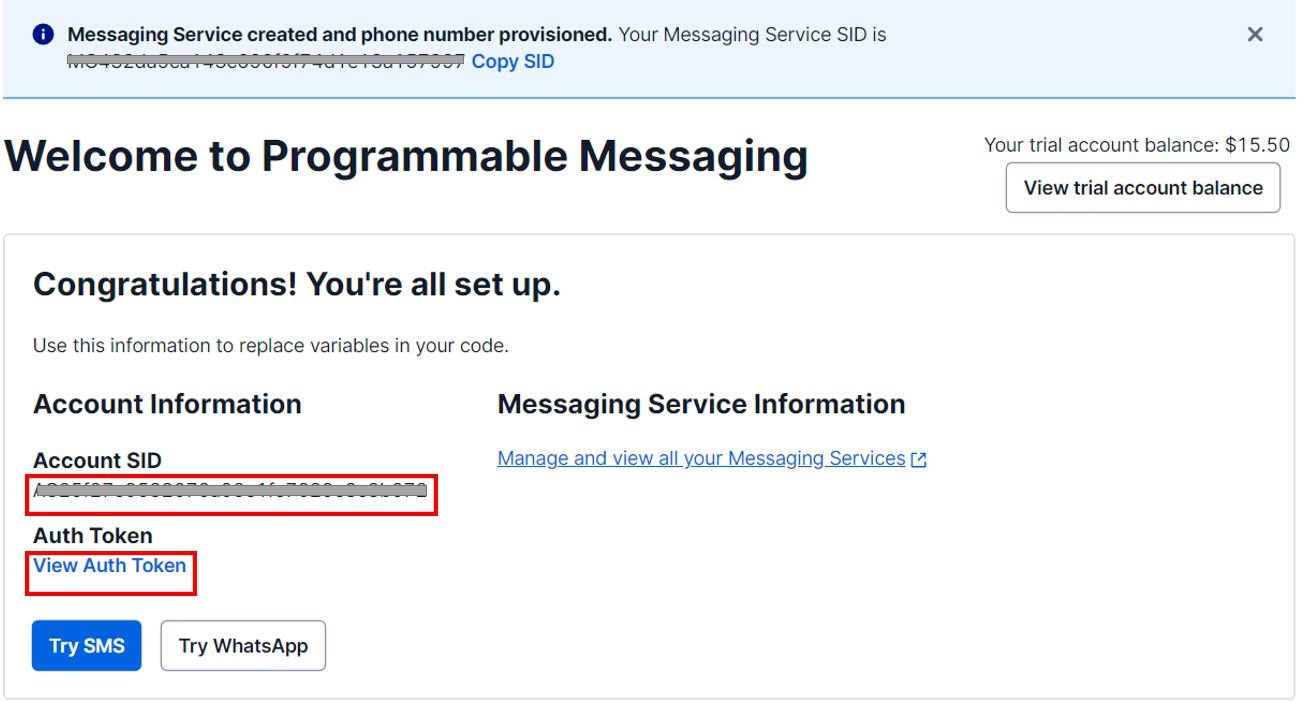
Testing the Service
Before writing a MicroPython script for ESP32 and ESP8266 to send SMS, let’s first test the programmable messaging service that we created using curl.
Go to Messaging > Try it out > Send an SMS. Enter the recipient’s phone number. Remember it should be a verified caller ID, messaging service SID and the message body. Then click the ‘Send test SMS‘ button.

MicroPython Script to Send SMS
This MicroPython script for ESP32 and ESP8266 sends SMS to a mobile number. It makes an HTTP POST request to the Twilio REST API along with a message that you want to send. You need to replace Twilio information with your in the following script.
try:
  import urequests as requests
except:
  import requests

import network

import esp
esp.osdebug(None)

import gc
gc.collect()

ssid = 'Enter_Your_WiFi_SSID'
password = 'Enter_Your_WiFi_PASSWORD'

# Your Account SID and Auth Token from twilio.com/console
account_sid = 'Enter_Your_Twilio_ACCOUNT_SID'
auth_token = 'Enter_Your_Twilio_ACCOUNT_AUTH_TOKEN'
recipient_num = 'Enter_Recipient_number'
sender_num = 'Enter_Sender_number'

def send_sms(recipient, sender,
             message, auth_token, account_sid):

    headers = {'Content-Type': 'application/x-www-form-urlencoded'}
    data = "To={}&From={}&Body={}".format(recipient,sender,message)
    url = "https://api.twilio.com/2010-04-01/Accounts/{}/Messages.json".format(account_sid)

    print("Trying to send SMS with Twilio")

    response = requests.post(url,
                             data=data,
                             auth=(account_sid,auth_token),
                             headers=headers)

    if response.status_code == 201:
        print("SMS sent!")
    else:
        print("Error sending SMS: {}".format(response.text))

    response.close()

def connect_wifi(ssid, password):
  station = network.WLAN(network.STA_IF)
  station.active(True)
  station.connect(ssid, password)
  while station.isconnected() == False:
    pass
  print('Connection successful')
  print(station.ifconfig())

connect_wifi(ssid, password)
message = "Hello This is a test message"
send_sms(recipient_num, sender_num, message, auth_token, account_sid)
How MicroPython Script Works?
Now let’s see how above MicroPython script works?
First start by importing require MicroPython modules such as import requests – this module imports the ‘requests’ library, which is used to make HTTP requests. Secondly, this import network module imports the ‘network’ library, which is used to interact with the device’s network interfaces.
try:
  import urequests as requests
except:
  import requests

import network
import gc
These two line assigns variable ‘ssid’, which is used to store the name of the wifi network and variable ‘password’ is used to store the wifi network’s password to which ESP32 or ESP8266 will connect.
ssid = 'Enter_Your_WiFi_SSID'
password = 'Enter_Your_WiFi_PASSWORD'
In the following lines, you need to replace account_sid, auth_token , recipient_num and sender_num details with information from your Twilio account. The procedure to get these details from Twilio is mentioned in the last section. Remember, phone numbers should include country codes.
# Your Account SID and Auth Token from twilio.com/console
account_sid = 'Enter_Your_Twilio_ACCOUNT_SID'
auth_token = 'Enter_Your_Twilio_ACCOUNT_AUTH_TOKEN'
recipient_num = 'Enter_Recipient_number'
sender_num = 'Enter_Sender_number'
MicroPython: Connecting to a Wi-Fi Network
Next, we will connect the ESP32 or ESP8266 board to the Wi-Fi network. The network.WLAN() is used to create a WLAN network interface object.
Supported interfaces are:
- network.STA_IF (station mode)
- network.AP_IF (Soft access point mode)
After that, activate the station by passing the “True” argument to the sta_if.active() method. The connect() method is used to connect to the specified wireless network using the specified Wi-Fi name (SSID) and password.
In station mode, isconnected() method returns “True” if ESP32 or ESP8266 successfully connects to a Wi-Fi network and a device also assigned a valid IP address. Otherwise, it returns “False”. This statement checks if the Raspberry Pi Pico W device connects to the Wi-Fi or not. The code does not move to the next step till the board is not connected to the Wi-Fi network.
After a Wi-Fi connection is established on the ESP32 or ESP8266 board, an IP address gets assigned. The ifconfig() method provides an IP address assigned to the ESP32 or ESP8266. In this statement, we print the IP address using the ifconfig() method on the station object which we created previously.
def connect_wifi(ssid, password):
  station = network.WLAN(network.STA_IF)
  station.active(True)
  station.connect(ssid, password)
  while station.isconnected() == False:
    pass
  print('Connection successful')
  print(station.ifconfig())
ESP32 or ESP8266 HTTP GET Request to Callmebot API
The function send_sms(recipient, sender, message, auth_token, account_sid) make an HTTP POST request to Twilio REST API. This function takes in 5 parameters: “recipient, sender, message, auth_token, account_sid”.
- account_sid and auth_token: These are your Twilio account SID and authentication code for the message service which you created earlier in previous section.
- recipient_num and sender_num: These are sender and receive phone numbers.
- message: This is the message that you want to send through SMS.
Now, construct two strings one is header for HTTP request and second one is data string which receiver and sender mobile number and message which we want to send.
headers = {'Content-Type': 'application/x-www-form-urlencoded'}
  data = "To={}&From={}&Body={}".format(recipient,sender,message)
Next, construct a Twilio REST API URL string by adding your Twilio account SID:
url = "https://api.twilio.com/2010-04-01/Accounts/{}/Messages.json".format(account_sid)
Finally, requests.post() makes a POST request to the ‘url’ using the ‘requests.post’ function and stores the response in the ‘response’ variable.
response = requests.post(url,
                             data=data,
                             auth=(account_sid,auth_token),
                             headers=headers)
After that we check if the status code of the ‘response’ is 201. if yes, print the message ‘Success!’, indicating that the SMS message was sent successfully. If status code is not 201, print the message ‘Error’ indicating that an error has occurred while sending the message.
if response.status_code == 201:
        print("SMS sent!")
    else:
        print("Error sending SMS: {}".format(response.text))

    response.close()
Call the ‘connect_wifi’ function defined earlier to connect ESP32 or ESP8266 to Wi-Fi network.
connect_wifi(ssid, password)Define a SMS message “Hello This is a test message” which will be the message sent in the SMS message.
message = "Hello This is a test message"Finally call send_sms() function by passing recipient, sender, message, auth_token, account_sid as function arguments.
send_sms(recipient_num, sender_num, message, auth_token, account_sid)
In summary, this code will sends SMS to a recipient number through Twilio and ESP32 or ESP8266.
Send SMS with Twilio and ESP32 or ESP8266 Demo
n the above MicroPython code, add the Wi-Fi credentials of your router into the above code and replace the API key.
Now let’s see the demo of the above MicroPython script which will send a SMS message to your number. Open Thonny IDE and create a new file with the name of main.py. After that save that file to ESP32 or ESP8266. Lastly, click on the run button on Thonny IDE.
As soon as you click on the run button and if everything goes well, you will see a success message on the Thonny ID console as shown below:

If there is any issue with the http request, you will get an error response on the Thonny IDE terminal.
Now open SMS app on your mobile and within second the recipient’s phone number will receive the test message as shown below:

Summary:
In this tutorial, we have learned how to send SMS with ESP32 or ESP8266 using Twilio API. By using this free cloud service, we can send SMS to any device without requiring a physical GMS module and a physical SIM card.
Twilio offers a free trial that allows you to try out its SMS, voice, and other communication services. During the free trial, you can send and receive SMS and voice calls, and use other Twilio features at no cost. However, after the free trial period ends, you will need to purchase a Twilio plan in order to continue using the services.
Twilio offers a variety of pricing plans, including pay-as-you-go and monthly subscription plans. The cost of using Twilio depends on the specific services you use and the volume of usage. You can view Twilio’s current pricing for SMS, voice, and other services on its website.
It’s worth noting that while Twilio provides a powerful set of tools for building communication applications, it is not the only option available. There are other providers that offer similar services, and you may want to compare pricing and features to find the best fit for your needs.
Twilio Limitations
Twilio has a number of limitations that you should be aware of when using its services.
- SMS message length: SMS messages are limited to 160 characters in most countries. If you want to send a message that is longer than 160 characters, Twilio will automatically send it as multiple messages, which will be charged as separate SMS messages.
- Number of messages per second: Twilio limits the number of messages you can send per second. If you exceed this limit, your messages may be rejected or delayed.
- Phone number availability: Twilio may not have phone numbers available for all countries or regions.
- Content restrictions: Twilio has certain content restrictions for SMS and voice messages. You are not allowed to send spam or illegal content, or content that is deemed to be inappropriate or offensive.
- Geographical limitations: Twilio’s services may not be available in all countries or regions.
It’s important to carefully review Twilio’s terms of service and pricing plans before using its services, to ensure that you understand the limitations and costs associated with using Twilio.
You may also like to read: