This tutorial shows how to interface DHT11/DHT22 temperature and humidity sensors with Raspberry Pi Pico using MicroPython. These popular sensors allow you to measure ambient temperature and relative humidity with a single data wire, making them ideal for weather stations, environmental monitoring, and home automation projects. First, we will learn to interface DHT22 with Raspberry Pi Pico. After that, we will see the MicroPython example code to measure current temperature and humidity and display it on the MicroPython terminal. Secondly, we will see a MicroPython example to display these sensor readings on an SSD1306 OLED display.

Prerequisites
Before we start this lesson, make sure you are familiar with Python 3 and have the latest version installed on your system. You should also have MicroPython set up on your Raspberry Pi Pico and a running Integrated Development Environment (IDE). We will be using Thonny IDE, which we have used previously when learning how to blink and chase LEDs in MicroPython. If you have not followed our previous tutorials, check here:
If you are using uPyCraft IDE, you can check this getting started guide:
DHT11/DHT22 Introduction
The DHT11 and DHT22 are digital temperature and humidity sensors that communicate using a single-wire protocol. They provide calibrated digital output, meaning all the signal processing is handled internally, so you do not need any external components other than a pull-up resistor on the data line. Both sensors are affordable and widely used in hobbyist and educational projects.
The DHT22 (also known as AM2302) is an upgraded version of the DHT11. It offers higher measurement accuracy and a wider temperature and humidity range. However, it costs slightly more and has a slower sampling rate. Regardless of these differences, both sensors share the same pinout and can be used with the same MicroPython library on Raspberry Pi Pico.
Internally, DHT sensors consist of a capacitive humidity sensing element and a thermistor for temperature measurement. A small internal microcontroller processes the readings and outputs them serially on the data pin. Since the sensors are factory-calibrated, no additional calibration is needed on your end.
DHT11 vs DHT22
The following table compares the key specifications of both DHT sensors so you can choose the right one for your project.
| DHT22 | DHT11 | |
| Temperature Range | -40 to 80 ºC ± 0.5ºC | 0 to 50 ºC ±2 ºC |
| Humidity Range | 0 to 100% ±2% | 20 to 90% ±5% |
| Resolution | Humidity: 0.1%, Temperature: 0.1ºC | Humidity: 1%, Temperature: 1ºC |
| Operating Voltage | 3–6 V DC (directly powerable from Raspberry Pi Pico) | 3–5.5 V DC (directly powerable from Raspberry Pi Pico) |
| Sampling Rate | Once every 2 seconds | Once every 1 second |
| Output Data Type | Float | Integer |
| Pinout | 4-pin (same as DHT11) | 4-pin (same as DHT22) |
| Approximate Price | $4–$10 | $1–$5 |
As the table shows, the DHT22 provides finer resolution and a wider measurement range, making it more suitable for precision applications. The DHT11 is a better choice when cost is a priority and measurements do not need to be as accurate. Both sensors operate at voltages compatible with Raspberry Pi Pico’s 3.3V GPIO pins, so no voltage translation is required for the data line.
DHT11/DHT22 Pinout
The DHT sensor has four pins. On the bare sensor, all four pins are present, but on DHT modules (the blue or white breakout board versions), only three pins are exposed since the pull-up resistor is built in. The pin numbering goes from left to right when you face the sensor from the front (the side with the sensing mesh).

Pin Description
| DHT11/DHT22 Pin | Connection with Raspberry Pi Pico |
| 1 (VCC) | 3.3V |
| 2 (Data Out) | Any GPIO pin of Raspberry Pi Pico, with a 10kΩ pull-up resistor |
| 3 (NC) | Not used |
| 4 (GND) | Ground |
- VCC: Power supply pin. Connect to the 3.3V pin of Raspberry Pi Pico.
- Data Out: Digital output pin that transmits temperature and humidity readings as serial data using a proprietary 1-wire protocol.
- NC: Not connected. Leave this pin unconnected.
- GND: Ground pin. Connect to any GND pin of Raspberry Pi Pico.
Parts Required
You will need the following components:
- Raspberry Pi Pico
- DHT11 or DHT22 sensor
- Breadboard
- 10K ohm resistor (not required if using the module version of the sensor with built-in pull-up resistor)
- Jumper wires
DHT22 Interfacing with Raspberry Pi Pico
Connect the DHT22 to Raspberry Pi Pico along with a 10K ohm pull-up resistor. The connection diagram is shown in the picture below.

- The first pin (VCC) of the DHT sensor is the power supply pin. Connect it to the 3.3V pin of Raspberry Pi Pico.
- The data pin (Pin 2) is used to receive temperature and humidity readings from the sensor. Connect this pin to GPIO2 of Raspberry Pi Pico and also connect a 10K pull-up resistor between this pin and 3.3V. You can use any other digital GPIO pin as well.
The pull-up resistor keeps the data line high during idle state, which is required for the single-wire protocol to work correctly. Without it, you may get checksum errors or no readings. If you are using a DHT module with a built-in resistor, you can skip adding an external one. The DHT22 is also known by the name AM2302.
- Pin 3 is not used. Leave it unconnected.
- Connect Pin 4 (GND) to any ground pin of Raspberry Pi Pico.

MicroPython DHT11/DHT22 Raspberry Pi Pico Code
MicroPython has a built-in dht module that supports both DHT11 and DHT22 sensors. You do not need to install any external library. Simply import the module and create a sensor object with the GPIO pin connected to the data line.
Copy the following code to the main.py file and upload it to Raspberry Pi Pico. This script reads temperature and humidity from the DHT22 sensor and prints the values on the MicroPython shell console every 2 seconds.
from machine import Pin
from time import sleep
import dht

sensor = dht.DHT22(Pin(2))  # Use dht.DHT11(Pin(2)) for DHT11

while True:
    try:
        sensor.measure()
        temp = sensor.temperature()
        hum = sensor.humidity()
        print("Temperature: {}\u00b0C   Humidity: {:.0f}%".format(temp, hum))
    except OSError as e:
        print("Failed to read sensor:", e)
    sleep(2)
How the Code Works?
First, we import the required modules: Pin from the machine module for GPIO control, sleep from time for adding delays, and the built-in dht module for sensor communication.
from machine import Pin
from time import sleep
import dht
Next, we create a dht object named sensor and specify the GPIO pin connected to the data line. Here we use GPIO2 and DHT22. To use a DHT11 instead, simply replace dht.DHT22 with dht.DHT11 and adjust the pin if needed.
sensor = dht.DHT22(Pin(2))Inside the infinite loop, we call sensor.measure() to trigger a new reading. This is wrapped in a try/except block to catch any OSError exceptions that may occur if the sensor is not connected or if there is a checksum error. After measuring, we retrieve the temperature in degrees Celsius and humidity as a percentage, then print them to the shell console.
while True:
    try:
        sensor.measure()
        temp = sensor.temperature()
        hum = sensor.humidity()
        print("Temperature: {}\u00b0C   Humidity: {:.0f}%".format(temp, hum))
    except OSError as e:
        print("Failed to read sensor:", e)
    sleep(2)
Demo
Upload the main.py file to your Raspberry Pi Pico board. Open the Thonny IDE shell and you will see the sensor readings printed every two seconds, similar to the output below.

Troubleshooting Common Issues
If your DHT sensor is not producing reliable readings, here are the most common problems and how to fix them.
OSError or Checksum Error on Every Reading
This usually means the sensor is not receiving data at all, or the data is getting corrupted. Check that the data pin has a 10K pull-up resistor connected between it and 3.3V. If you are using the bare sensor (not a breakout module), the pull-up resistor is essential. Also verify that the wires are firmly connected and that the sensor is powered from 3.3V, not 5V (which could damage the Pico’s GPIO).
Readings Are Stuck at the Same Value
This can happen if you call sensor.measure() faster than the sensor’s minimum sampling interval. The DHT22 requires at least 2 seconds between measurements, and the DHT11 requires at least 1 second. Make sure your sleep() delay is set appropriately. Calling the sensor too frequently causes it to return stale or invalid data.
Erratic or Fluctuating Readings
Electrical noise on the power supply lines can cause random fluctuations in sensor readings. Adding a 100nF decoupling capacitor between the VCC and GND pins of the sensor, placed as close to the sensor as possible, can help filter out noise. Also make sure the sensor is not placed near heat sources, motors, or strong electromagnetic fields that could affect its readings.
Temperature Reading Seems Elevated
If your sensor reports temperatures higher than expected, self-heating from nearby components or the Pico board itself may be responsible. DHT sensors should ideally be positioned away from heat-generating parts. Enclosures that trap heat can also raise ambient temperature readings significantly. In outdoor applications, shade the sensor from direct sunlight to get accurate readings.
MicroPython Displaying DHT11/DHT22 Sensor values on OLED Display with Raspberry Pi Pico
In this section, we will see how to display DHT sensor readings on a 0.96-inch SSD1306 OLED display using MicroPython and Raspberry Pi Pico.
SSD1306 OLED Display MicroPython Library
To use the SSD1306 OLED display, you need to install the micropython-ssd1306 library. Open Thonny IDE with your Raspberry Pi Pico connected, then go to Tools > Manage Packages.
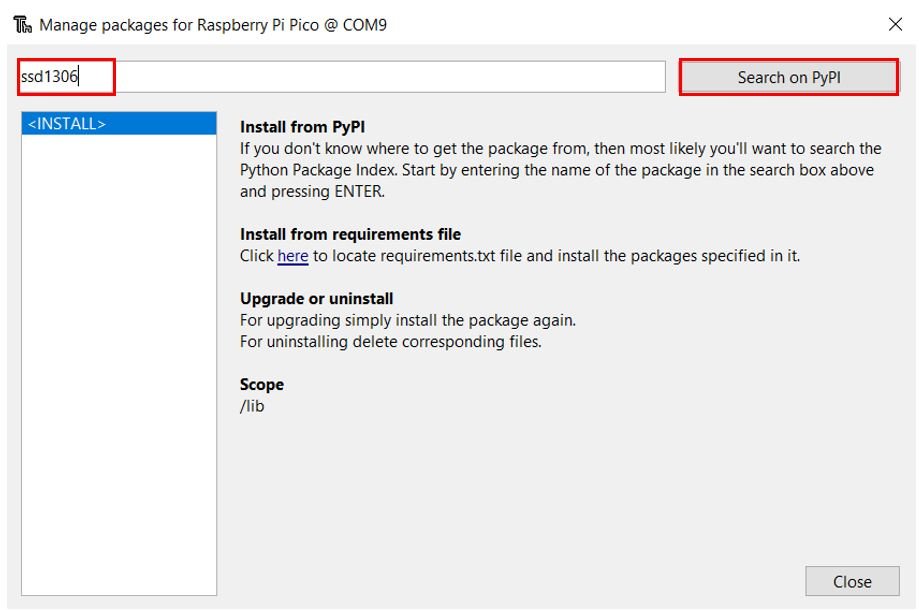
Search for ssd1306 and click Search on PyPI.
From the search results, click on micropython-ssd1306.
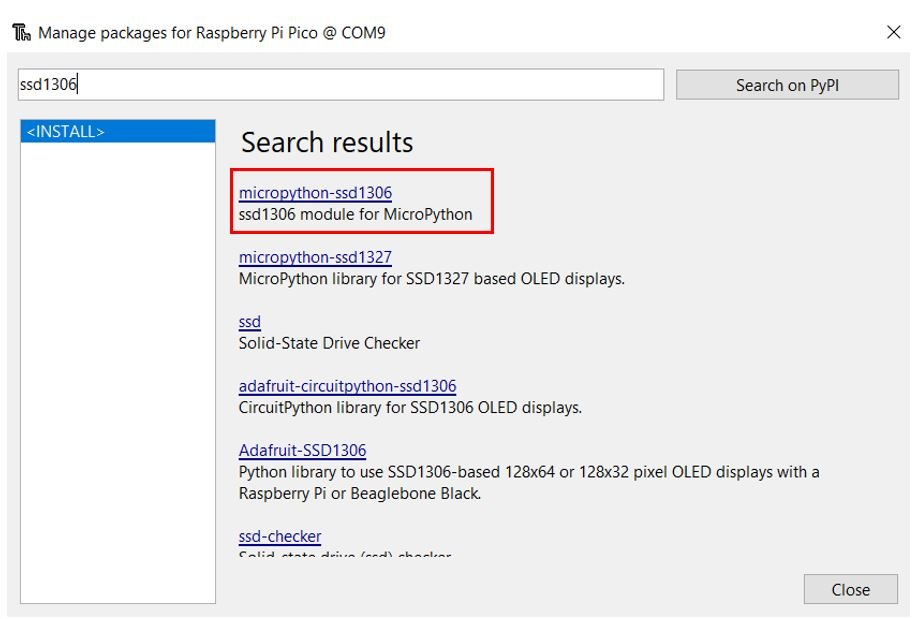
Click Install and wait for the library to be installed on Raspberry Pi Pico.

After a few moments, the library will be successfully installed. Now we are ready to program the Raspberry Pi Pico to display DHT readings on the OLED.
Connecting SSD1306 OLED Display with Raspberry Pi Pico and DHT11/DHT22
You will need the following components:
- Raspberry Pi Pico
- DHT11 or DHT22
- SSD1306 OLED Display (128×64, I2C version)
- 10K ohm resistor (for bare DHT sensor)
- Connecting wires and breadboard
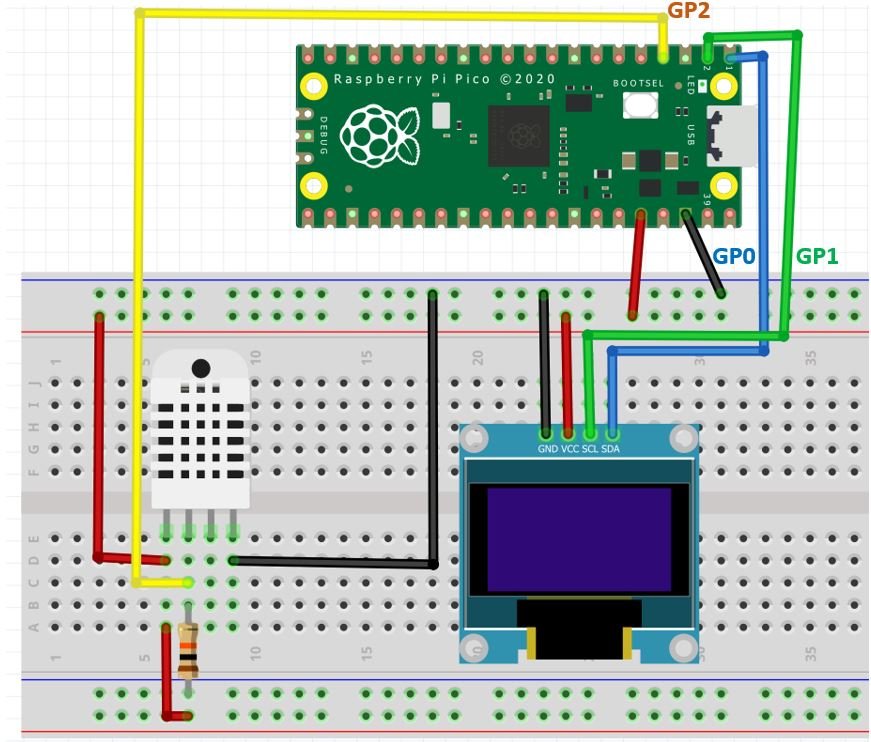
The OLED display connects over I2C, which requires only two wires (SDA and SCL) in addition to power and ground. The connections are shown in the tables below.
| SSD1306 OLED Display | Raspberry Pi Pico |
| VCC | 3.3V |
| SDA | GP0 (I2C0 SDA) |
| SCL | GP1 (I2C0 SCL) |
| GND | GND |
| DHT11/DHT22 | Raspberry Pi Pico |
| Pin 1 (VCC) | 3.3V |
| Pin 2 (Data Out) | GP2 |
| Pin 3 (NC) | Not used |
| Pin 4 (GND) | GND |
Schematic: Raspberry Pi Pico with OLED and DHT22
Follow the schematic diagram below to connect the components on your breadboard.

MicroPython Code: Displaying DHT22 Readings on OLED Display
from machine import Pin, I2C
from time import sleep
import dht
from ssd1306 import SSD1306_I2C

sensor = dht.DHT22(Pin(2))  # Use dht.DHT11(Pin(2)) for DHT11
i2c = I2C(0, sda=Pin(0), scl=Pin(1), freq=400000)
oled = SSD1306_I2C(128, 64, i2c)

while True:
    oled.fill(0)
    try:
        sensor.measure()
        temp = str(round(sensor.temperature(), 1))
        hum = str(round(sensor.humidity(), 1))
        oled.text("Temperature:", 0, 0)
        oled.text(temp + " C", 0, 10)
        oled.text("Humidity:", 0, 35)
        oled.text(hum + " %", 0, 45)
    except OSError:
        oled.text("Sensor Error", 0, 20)
    oled.show()
    sleep(2)
How Does the Code Work?
In this section, we explain the parts of the code that are specific to the OLED display. The DHT sensor reading portion works the same way as in the previous example.
We import the I2C class from machine and the SSD1306_I2C class from the ssd1306 library. These are needed to initialize and communicate with the OLED display over I2C.
from machine import Pin, I2C
from ssd1306 import SSD1306_I2C
Next, we initialize the I2C bus on channel 0, with SDA on GP0 and SCL on GP1, running at 400 kHz (Fast mode).
i2c = I2C(0, sda=Pin(0), scl=Pin(1), freq=400000)We then create an SSD1306_I2C display object with a resolution of 128×64 pixels and the i2c bus object.
oled = SSD1306_I2C(128, 64, i2c)In the main loop, we clear the display buffer with oled.fill(0) before drawing new content. We then read sensor data inside a try/except block and display temperature and humidity values at specific pixel coordinates. The round() function ensures the values are formatted to one decimal place. Finally, oled.show() pushes the buffer to the physical display.
Demonstration
Upload the code as main.py to Raspberry Pi Pico. The OLED display will start showing live temperature and humidity readings from the DHT22 sensor, refreshing every 2 seconds.

Practical Applications
Once you are comfortable reading temperature and humidity from a DHT sensor, you can apply this knowledge in many real-world projects.
Indoor Weather Station
Combine the DHT sensor with an OLED or LCD display to build a compact indoor weather monitor. You can extend it to log readings to a microSD card over time, allowing you to track temperature and humidity trends throughout the day or over several weeks.
Greenhouse and Plant Monitoring
Plants thrive within specific temperature and humidity ranges. You can set threshold values in your MicroPython code and trigger a fan, heater, or humidifier when conditions fall outside the ideal range. This forms the foundation of a simple automated climate control system for a grow tent or greenhouse.
Server Room or Cabinet Monitoring
Electronic equipment is sensitive to heat and moisture. A DHT sensor connected to a Raspberry Pi Pico can continuously monitor conditions inside equipment enclosures and trigger an alert or activate a cooling fan when temperature exceeds a safe threshold.
IoT Weather Node
Pair the Raspberry Pi Pico W with a DHT sensor to publish readings to an MQTT broker or a cloud service like ThingSpeak or Adafruit IO. This creates a standalone Wi-Fi-enabled sensor node that can upload environmental data for remote monitoring and visualization.
We have other guides with popular sensors:
- HC-SR04 Ultrasonic Sensor with Raspberry Pi Pico using MicroPython
- DS18B20 Temperature Sensor with Raspberry Pi Pico using MicroPython
- MPU6050 with Raspberry Pi Pico (Accelerometer, Gyroscope, and Temperature)
- BME280 with Raspberry Pi Pico using MicroPython
You may also like to read other DHT11 and DHT22 tutorials:
- DHT11/DHT22 Web Server ESP8266 NodeMCU using Arduino IDE
- ESP32 DHT11 and DHT22 Web Server using Arduino IDE
- DHT11 DHT22 with Arduino – Display Readings on OLED
- DHT11 DHT22 with ESP8266 NodeMCU – Display Readings on OLED
- DHT22 Data Logger with Arduino and Micro SD Card
- DHT11 DHT22 with ESP32 – Display Readings on OLED
- MicroPython: DHT11/DHT22 Web Server with ESP32/ESP8266 (Weather Station)
I’m trying to run this with a dht11. The dht22, from your chart, outputs float, the 11, int. When I run the code, changing the sensor line to:
sensor = dht.DHT11(Pin(15))
The error I get, referring to line
temp = sensor.temperature()
is:
TypeError: ‘float’ object isn’t callable
I notice in dht.py, there is this:
class DHT11:
_temperature: float
_humidity: float
Just out of curiosity, I changed them to int, nothing different happened.
Am I missing something?
i like this idea i have made several but i have space on screen i would like to add Max and Min temp and Humidity but struggling getting it to work do you have any ideas ?
Could you provide me with the dht library that is used?
If there’s a separate file for the DHT22.py, I’d like to find it since I had to use the dht.py that supports the DHT11, and some heavy coding to make this all work!
I also changed it to Fahrenheit…
Is there any way to make temp display in F? Been trying to edit code with conversion formula and cant seem to make it work properly