In this getting started guide on MicroPython with Raspberry Pi Pico, we will learn how to use the program Raspberry Pico using uPyCraft IDE and MicroPython. We will see how to download and install uPyCraft IDE and finally see how to use it to program our Pi Pico board.
Recommended Components
The following components are used in this project or are helpful for getting started with Raspberry Pi Pico development.
| Component | How it’s used in this project | Buy on Amazon |
|---|---|---|
| Raspberry Pi Pico | The RP2040 board you flash and program with uPyCraft IDE. | Check Price |
| Micro USB Cable | Data cable to connect the Pico to your computer and upload code. | Check Price |
| Breadboard | Handy for prototyping circuits as you start building projects. | Check Price |
As an Amazon Associate we earn from qualifying purchases. Prices and availability are accurate as of the date/time indicated and are subject to change.
We have a similar guide with Thonny IDE:
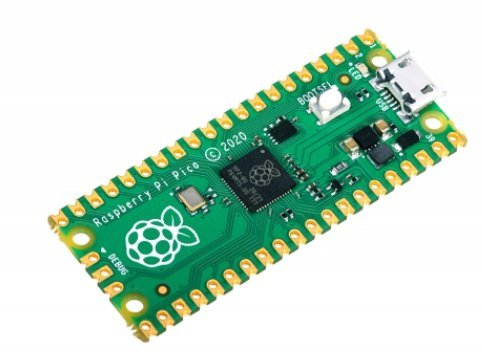
Raspberry Pi Pico
Raspberry Pi Pico development board which is the first development board from the Raspberry Pi in the microcontroller series. It can be programmed with MicroPython as well as C/C++ SDK. Raspberry Pi Pico is a low-cost, high-performance board based on the Raspberry Pi RP2040 microcontroller chip. RP2040 chip contains a dual-core cortex M0+ microcontroller which can operate up to 133MHz This chip offers 26 multi-function GPIO pins and 2MB of onboard Flash memory.
For more information refer to the following guide:
Raspberry Pi Pico – Getting Started Guide
Setting up Raspberry Pi Pico for MicroPython
It is very easy to get started with Raspberry Pi Pico using MicroPython. Follow the steps carefully to successfully set up Raspberry Pi Pico to be used in Thonny IDE to program in MicroPython.
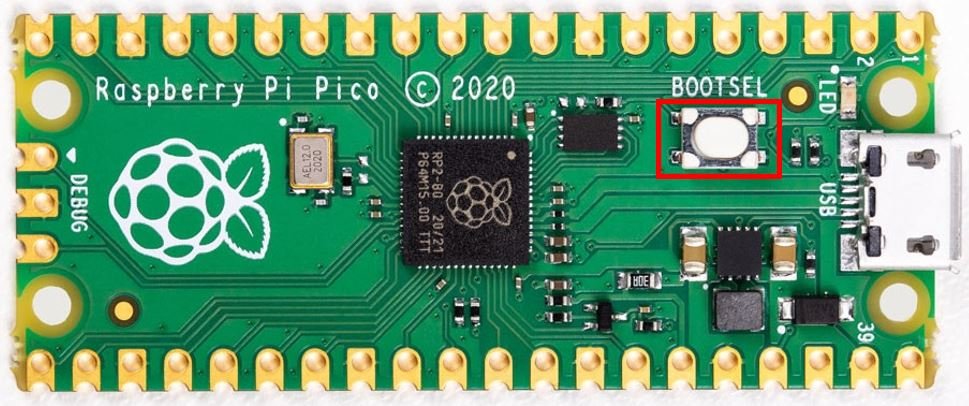
- Plug the Raspberry Pi Pico in your computer while holding down the BOOTSEL button.
Release the BOOTSEL button and the following two files will show up. Our computer recognizes it as a storage device. Click INDEX.HTM file.
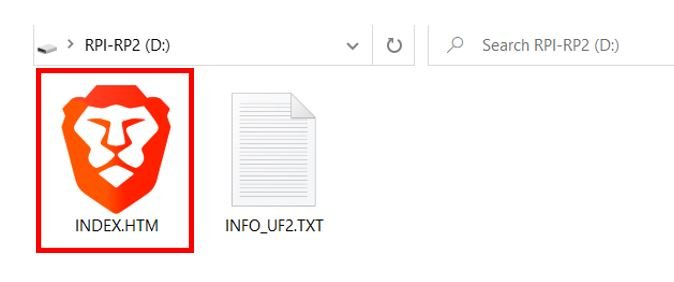
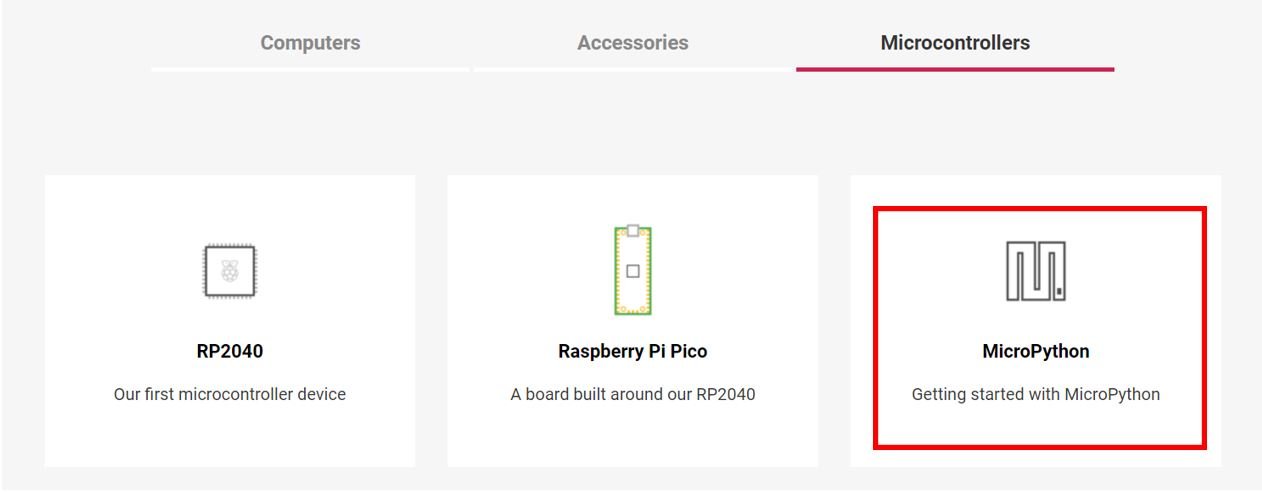
This will open up the official Raspberry Pi Pico documentation guide.
Now under the Microcontrollers tab, scroll down and click ‘MicroPython.’
A getting started guide with MicroPython for Raspberry Pi Pico will open up. We will have to download the MicroPython bootloader. It is a UFC file. Scroll down and find the link to download.
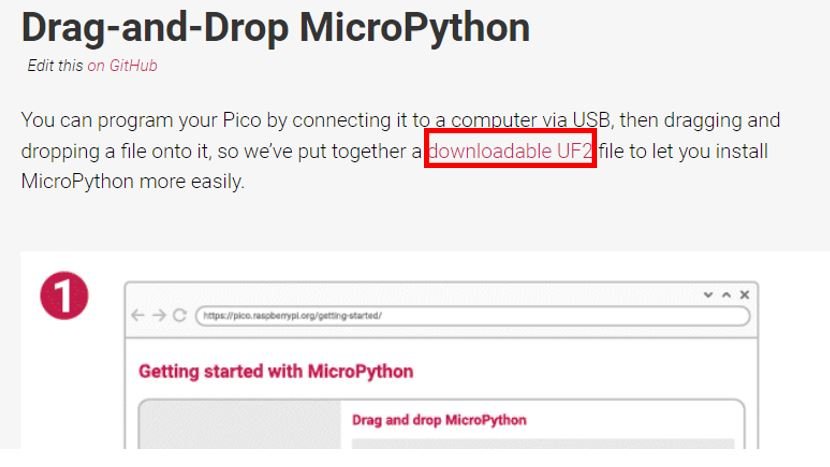
After the download is completed, drag this file and drop it in your Raspberry Pi Pico folder that opened up when we plugged it in our system. Now it will consist of three files. The Raspberry Pi Pico detects it and reboots.
Now we are ready to program Raspberry Pi Pico in MicroPython.
MicroPython Introduction
MicroPython is the reimplementation of the software Python3 which is specially designed for microcontrollers and embedded systems. It is very similar in use to that of Python. For example, if someone knows how to write simple programs in Python then it is very easy to work in MicroPython as the programming language is the same. The only major difference is that it does not come with a full standard library, but it can be easily used to access lower-level hardware because it has those modules present in it.
Why do We use MicroPython ?
The reason for Micro-python being used so readily in the embedded fields is because it is a simple and easy to learn software development language even for beginners than C and C++. Another important is that the Python programming language is easier to learn and all beginners find it very easy when comes to the learning curve for Python as compared to C and C++. Because MicroPython is similar to python. On top of that, we can use it to program embedded boards. Therefore, the main objective of MicroPython developers is to make embedded programming as simple as possible so that hobbyists, researchers, teachers, educators, and beginners can easily learn and dive into the embedded field.
Last but not the least important reason to use MicroPython is that it contains REPL (Read-Evaluate-Print Loop) which let us run the code on boards without going through program compilation process.
As compared to C and other embedded programming languages, the LED blinking code for Raspberry Pi Pico can be written in few lines as shown:
import time
from machine import Pin
led=Pin(25,Pin.OUT)       #create LED object from pin25, Set Pin25 to output

while True:

led.value(1)            #Set led turn on

time.sleep(0.5)

led.value(0)            #Set led turn off

time.sleep(0.5)
There are several devices which can be run through this software but for now, we will focus on Pi Pico.
MicroPython Supported Board
There are many MicroPython supported boards available in the market. We have mentioned some of them below:
- ESP32
- Raspberry Pi Pico
- ESP8266
- Adafruit Circuit Playground Express
- PyBoard
- Micro: Bit
- Teensy 3 Serial Boards
- WiPy – Pycom
- All types ESP32/ESP8266
You can look in these guides to find more information on supported boards for MicroPython
Installing uPyCraft IDE
Now we will learn how to use Raspberry Pi Pico in Micro-python firmware. In order to do that we need to first install an IDE. There are many integrated development environments available that can be used to write programs for Raspberry Pi Pico.
We will be using uPyCraft IDE as it can be run in any major operating system and is always extremely interactive and easy. We will be installing uPyCraft IDE in Windows.
Installing Python3
Before we start the installation of the uPyCraft IDE IDE, make sure you have the latest version of Python 3.7 or the latest installed on your windows-based. If you don’t have the python 3 package installed on your Windows, follow these steps to install one:
- First of all go this link here and download latest version of Python3.
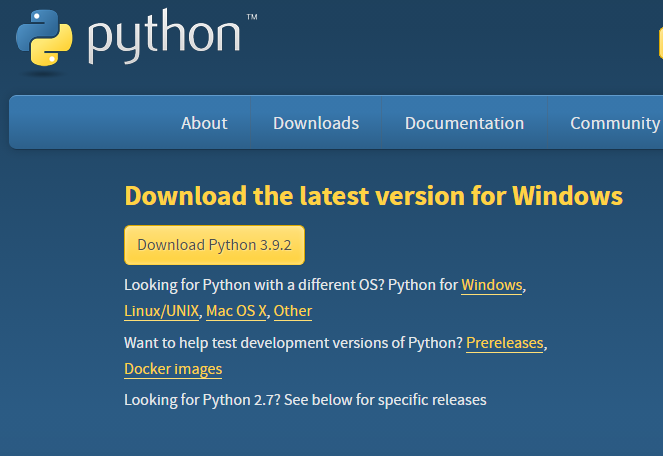
After you click the Download Python 3.9.2 button an .exe file will start downloading. After the download is completed click on it and the following appears.
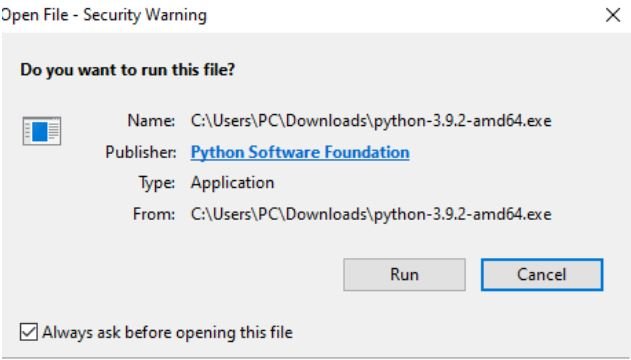
Press the run button. The following screen appears. Make sure to tick Add Python 3.9 to a path and then click Install Now.

After the installation is complete you will receive a successful setup message.
Download and Install uPyCraft IDE
As we mentioned earlier, we will use uPyCraft IDE to program our Raspberry Pi Pico board. The reason we are using uPyCraft IDE is that it is simple and easy to use IDE among other MicroPython based IDEs available in the market.
Now follow these steps to download and install uPyCraft IDE:
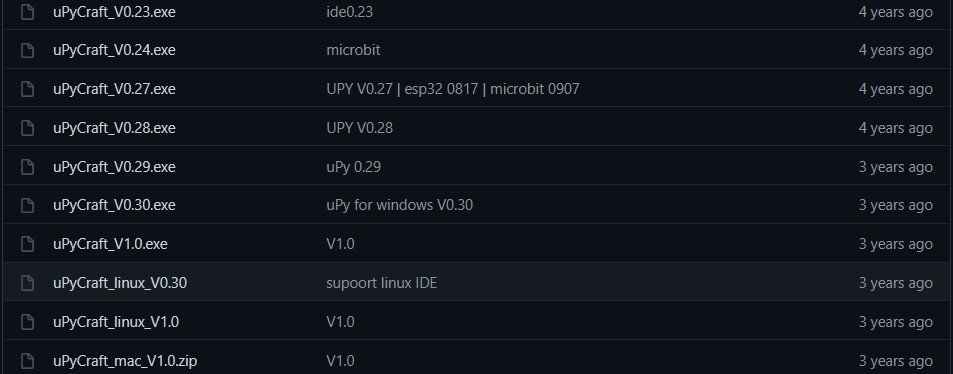
- In order to download the uPyCraft IDE, go to this link here and download the .exe file for windows as shown below. You can also download for Linux and Mac if you are using Linux or Mac operating system.
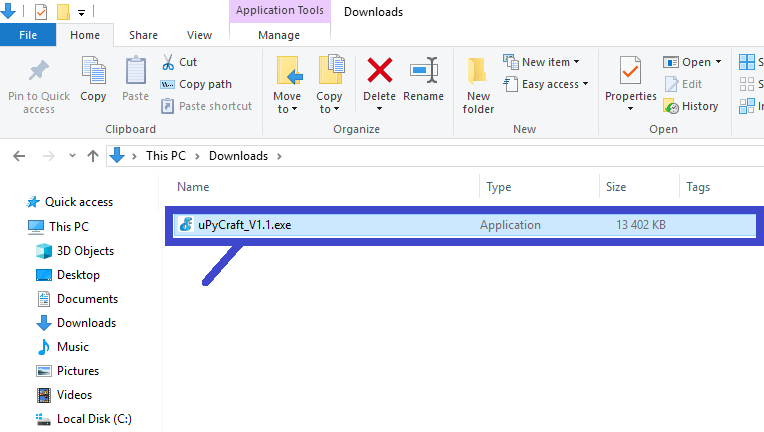
2. After that click on the uPyCraft_VX.exe which you download in the previous step:
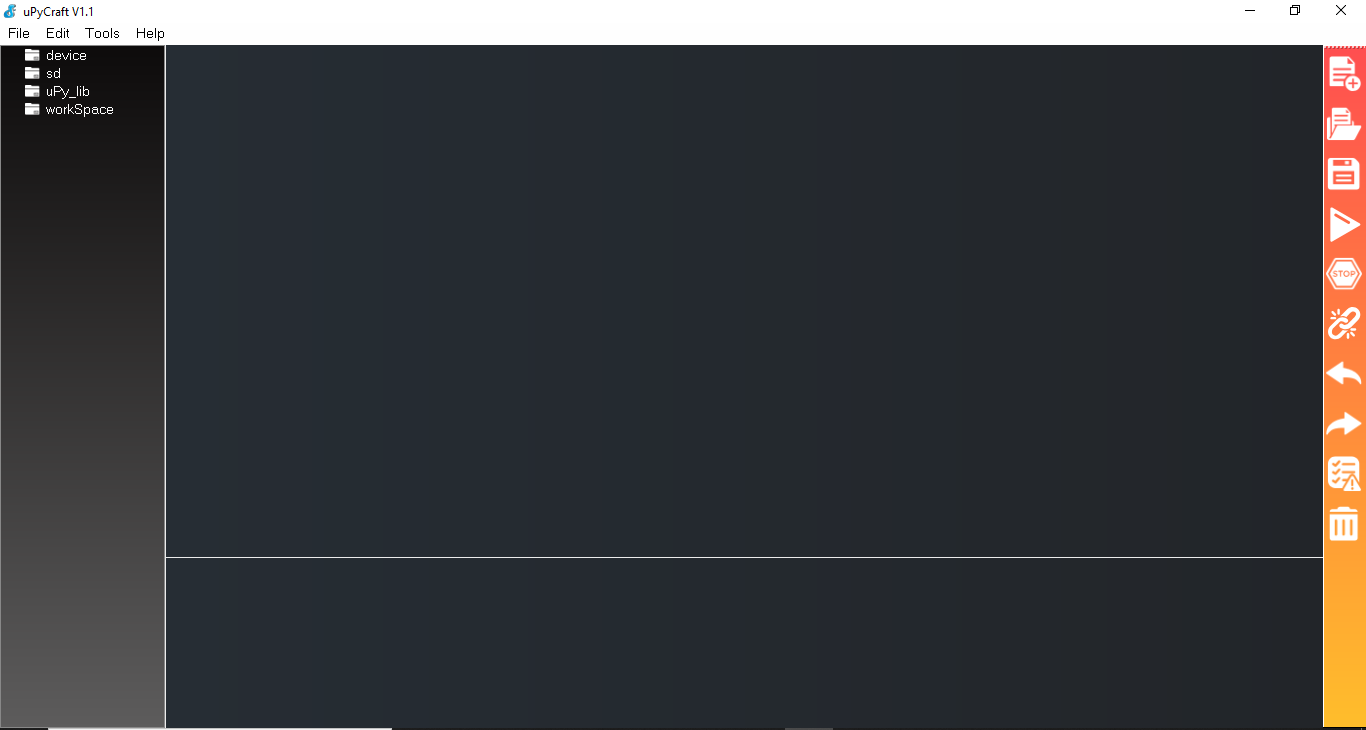
3. After installing the IDE, click on its icon and the following screen will appear.
Till now we have downloaded and installed uPyCraft IDE. We will use this IDE to write firmware and upload to Raspberry Pi Pico.
uPyCraft IDE Introduction
Now lets explore different windows and components of uPyCraft IDE. First open uPyCraft IDE, you will see a window like this:
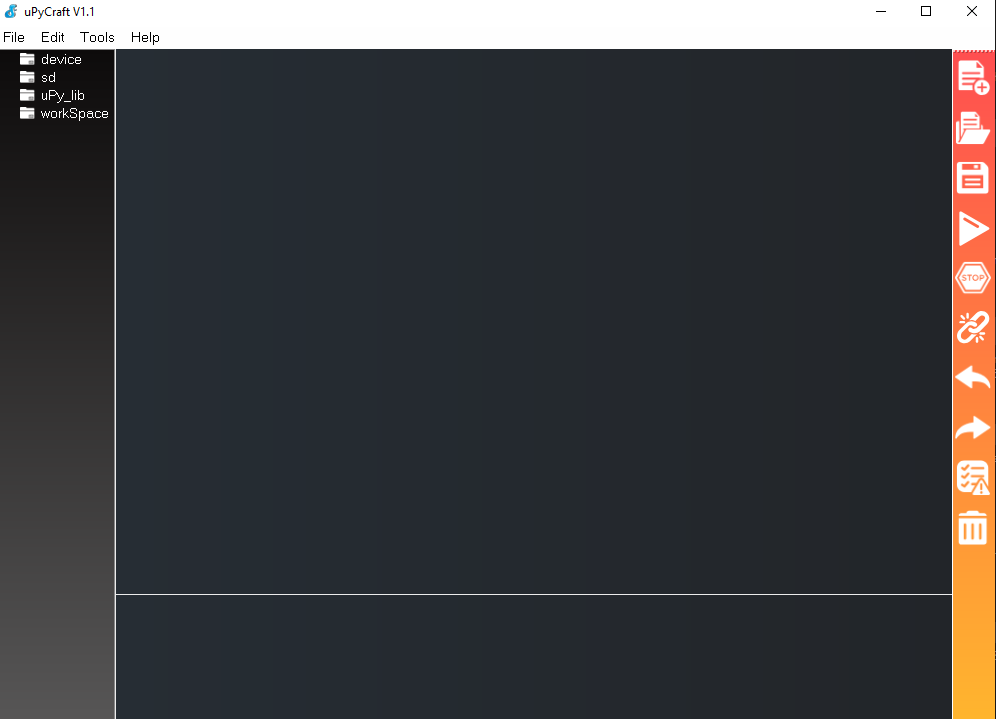
uPyCraft IDE is a integrated development environment which is used to program development boards in MicroPython language. It makes the steps for firmware development, code debugging and uploading code to the Pi Pico board very easier under a single package.
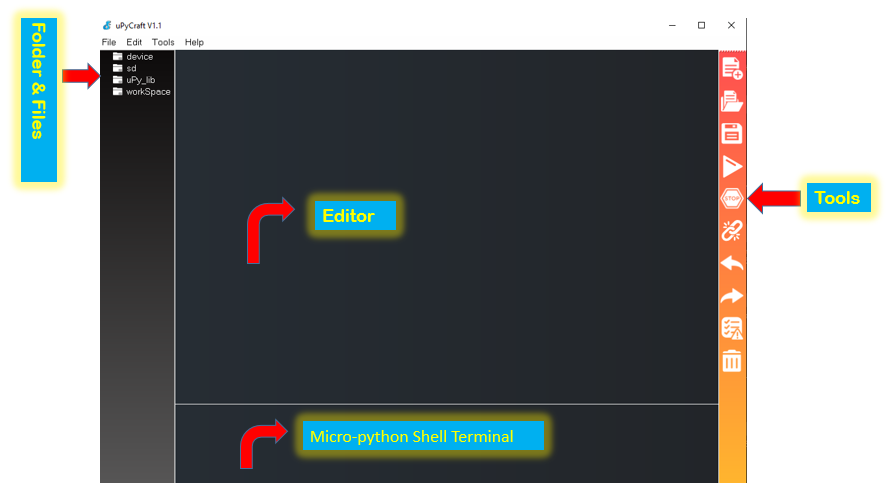
Now we will learn about the different sections which are found on the IDE. The picture below shows the four main sections found in the IDE.
- Tools
- Editor
- Folder and files
- Micro-python shell terminal.
1. Tools
On the furthest right side, you can see the different icons which can perform multiple tasks. It is very convenient to use and each function can be achieved with ease. The picture below shows each icon labelled.

- New file: By clicking on this icon a new file will be created in the editor.
- Open file: This icon opens up previously saved files.
- Save file: By clicking on this icon the file will be saved automatically.
- Download and run: This button uploads the program code written in the editor onto your module and runs it.
- Stop: By clicking on this icon the execution of the program code stops.
- Connect/Disconnect: Tools>Serial is used to connect your module through the serial.
- Undo: By clicking on this icon the last change done to the program code is erased and it goes back to its previous state.
- Redo: This icon restores the program code which was erased by the undo button.
- Syntax Check: This is a very helpful feature that helps us check any syntax mistakes in the program code in the editor.
- Delete: Clears the messages in the Shell Micro-python terminal.
2. Editor
In the editor section, we write our program code which is then executed and run onto the Raspberry Pi Pico module serially. The extension of files is .py. We can open and create multiple files for a single project here in the editor window.
3. Folder & Files
This section is found at the extreme left hand side of the screen. Four different folders can be seen namely:
Device: In this folder, you can view all the files which are saved on your module. When you click the device folder all the files already stored would be visible. boot.py file is the default file that runs when the program is started and the main.py file contains your main program code
sd: In this folder you can view files which are already stored in your sd card. This option is available for those modules which support it.
uPy_lib: This is the in-built uPyCraft library. You can view the individual files by clicking on this.
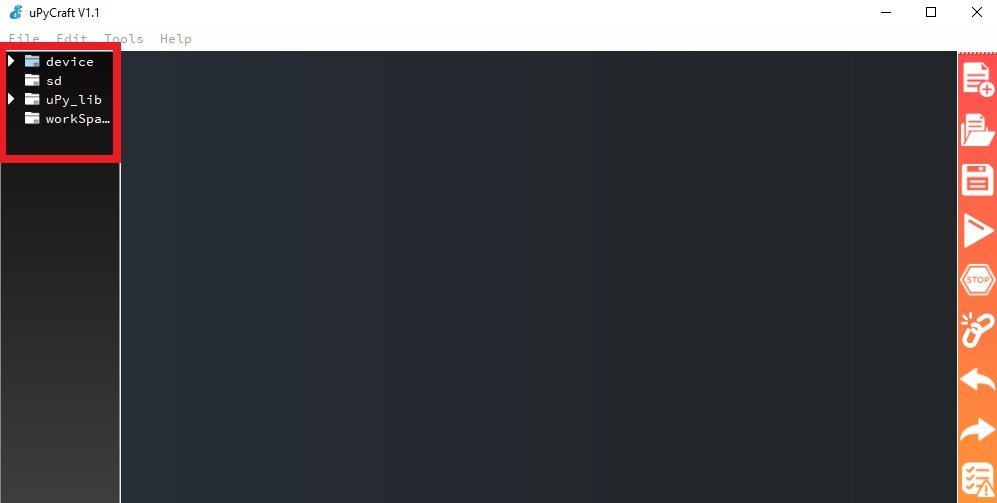
Workspace: This is a very handy folder which helps you organize your files and save them in the particular directory you choose. In order to set your path double click on the workspace folder and choose your path where you want to save all the program code. In order to update your current directory go to File>Reflush Directory as shown in the picture below.
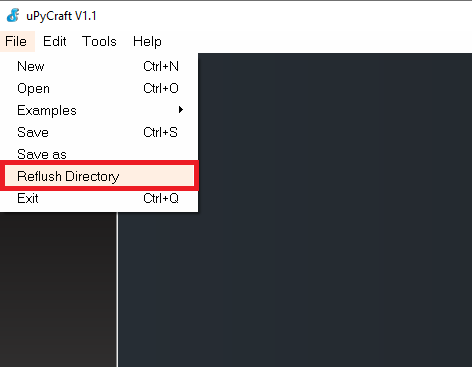
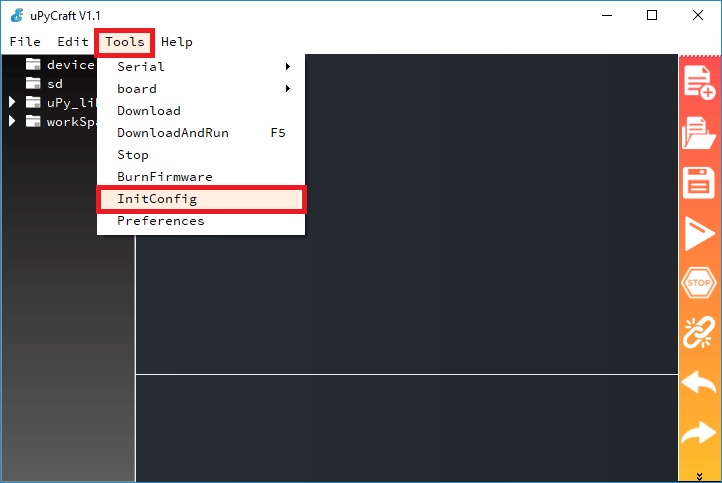
After that go Tools >InitConfig and select the workspace directory where you want to store project files.
4. Micro-Python Shell Terminal
All messages are displayed in this section including errors that are found at the bottom of the screen. If you don’t want to upload new files you can directly write the command in the terminal so that it can be performed quickly.
Writing Your First MicroPython Script
So far in this getting started tutorial on MicroPython for Raspberry Pi Pico, we learned to install software that is required to process and execute code on Pi Pico. Now let’s write a simple script in uPyCraft IDE and execute it on our board. We will write a simple LED blinking script for Raspberry Pi Pico in Python programming language and will upload it to the board and see how it works.
Serial Connection with Raspberry Pi Pico in uPyCraft IDE
Now let’s see how to establish a communication between uPyCraft IDE and Raspberry Pi Pico.
- Connect your board to your computer using a USB cable.
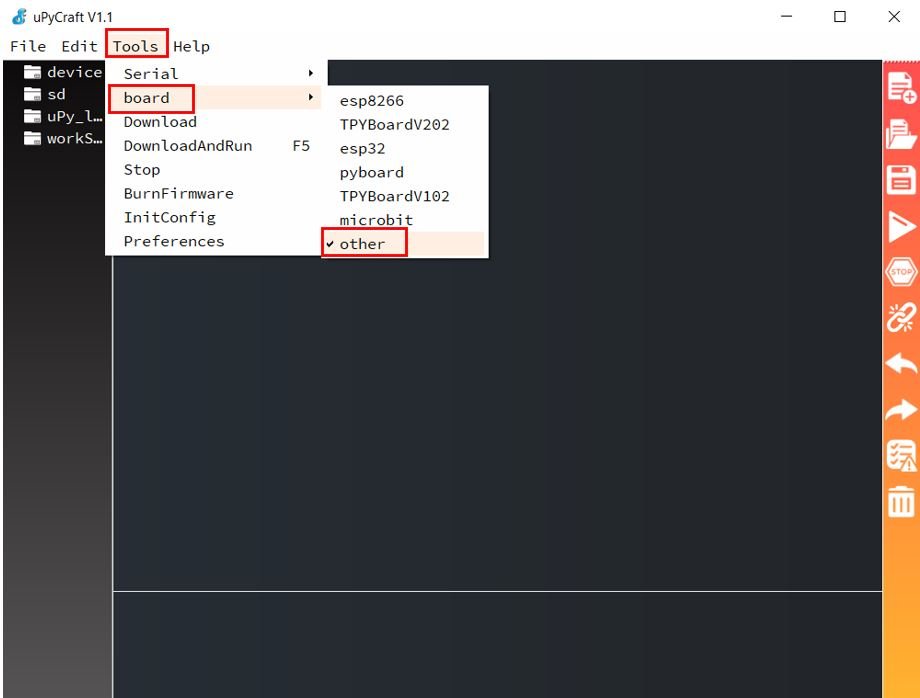
- After that go to tools > boards and select ‘other.’
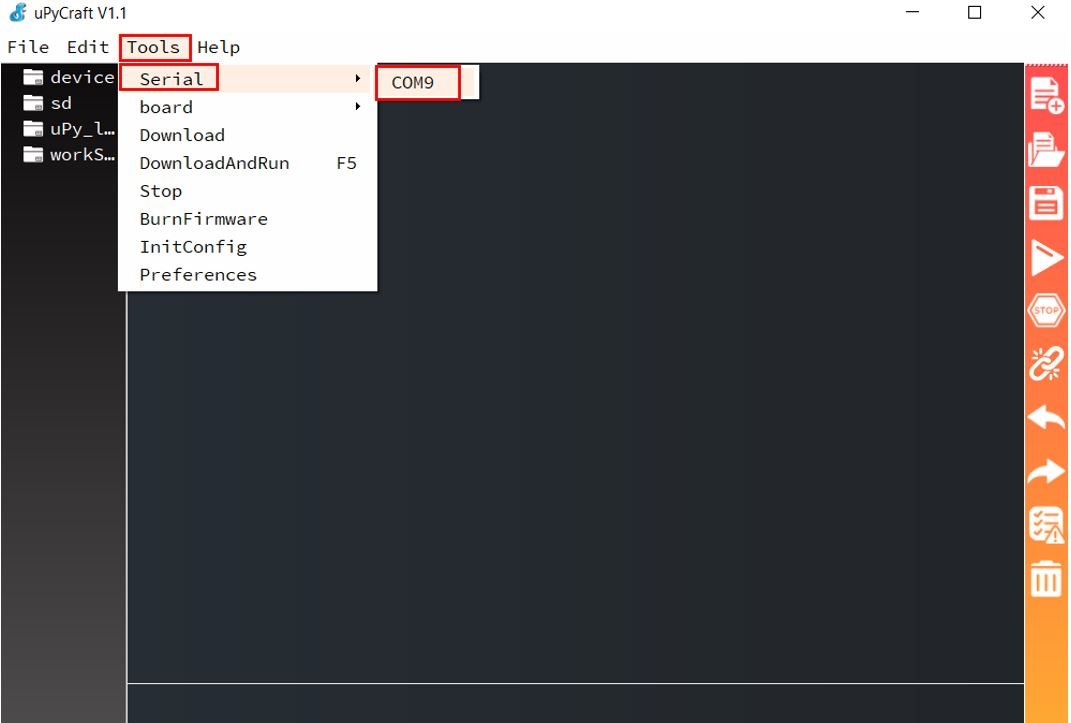
- Next, go to tools > Serial and select the serial port through which your board is connected.
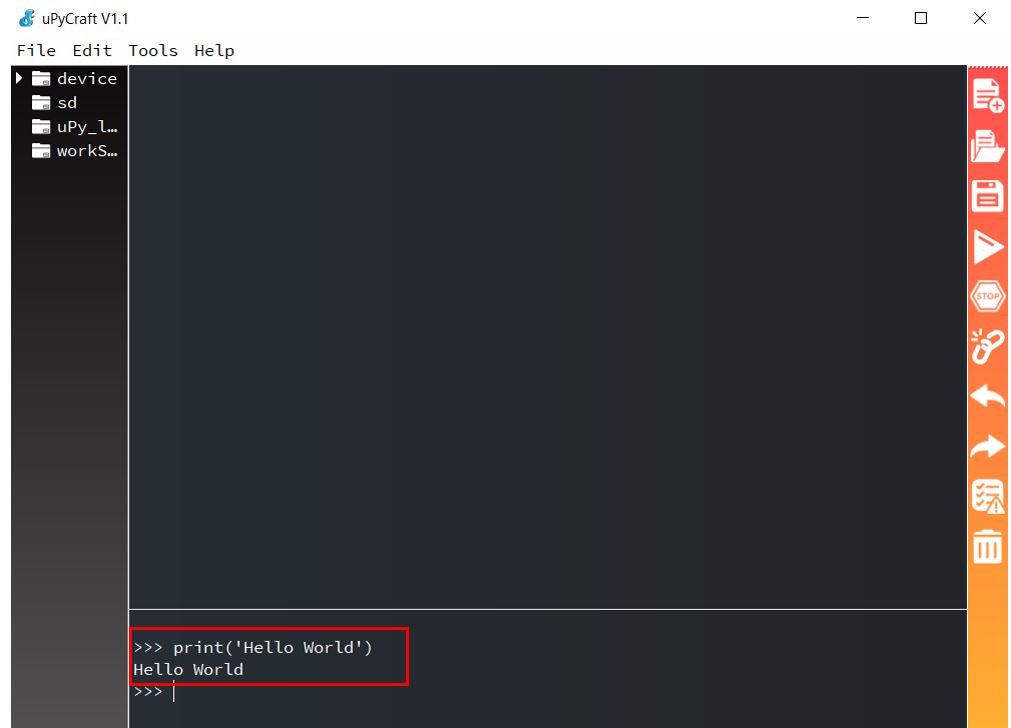
The >>> will show up in the Shell window of uPyCratf IDE and it shows that a successful connection has been developed with your board. Now to see its working, you can type this command on the shell window and it will print “Hello World” on console in response.
>>> print('Hello World')
Hello World
>>>
Note: If you don’t see the output of print() command on the shell console of uPyCraft IDE that means your board has not made a serial connection with your computer. You should check the connection and try again.
Creating the main.py file on your board
In this section, we will see how to create new MicroPython file and download and run on Raspberry Pico Pi. Follow these steps:
1. From the left sidebar, click the “New file” button and it will create a new file and it will up in editor window as a untitled.

Now copy this MicroPython code into your editor window.
from machine import Pin
from time import sleep
led = Pin(25, Pin.OUT)
while True:
   led.value(1)
   sleep(1)
   led.value(0)
   sleep(1)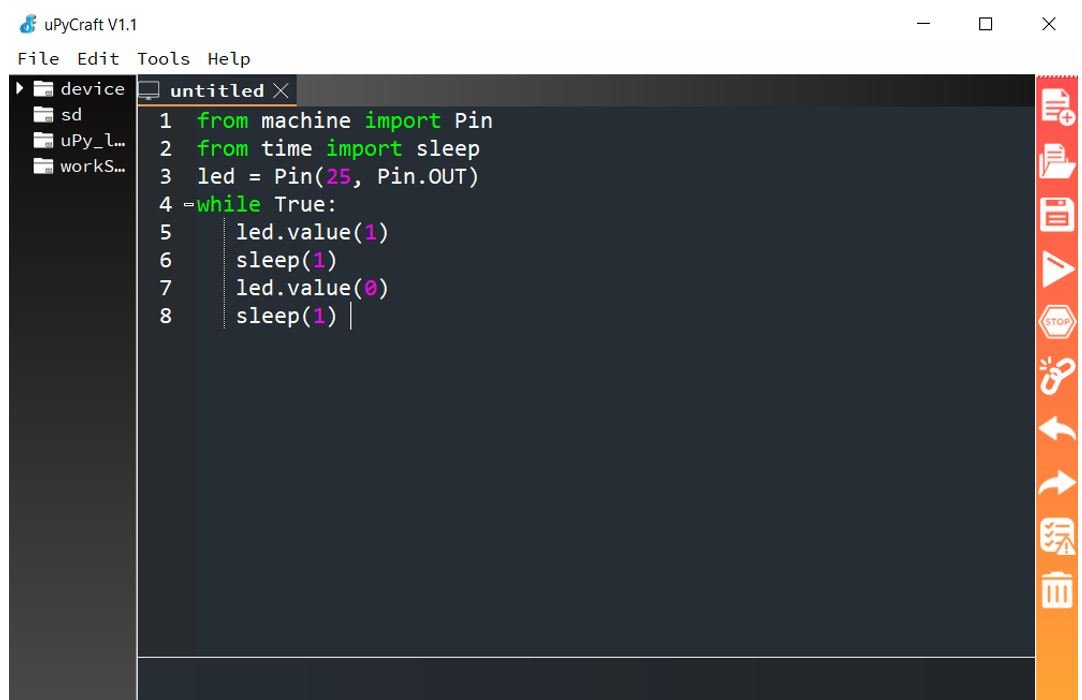
3. After that click on the “Save file” button to save the file on your computer. You can select any location in your computer where you want to save this file.

4. When you click on the “Save file” button, A new window as shown below, will open. Given your file a name such as main.py and save it in your computer.
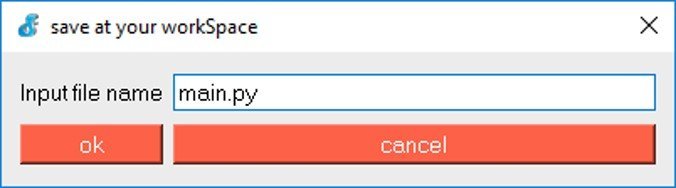
Note: You can give any name to this file. But the extension of file should always be .py.
Now let’s download the script to our board. To download script, click on the “Download and Run button” as shown below:

Once you click the “Download and Run button” and code downloaded successfully to your board, you will see a message saying “download ok” in the Shell window.
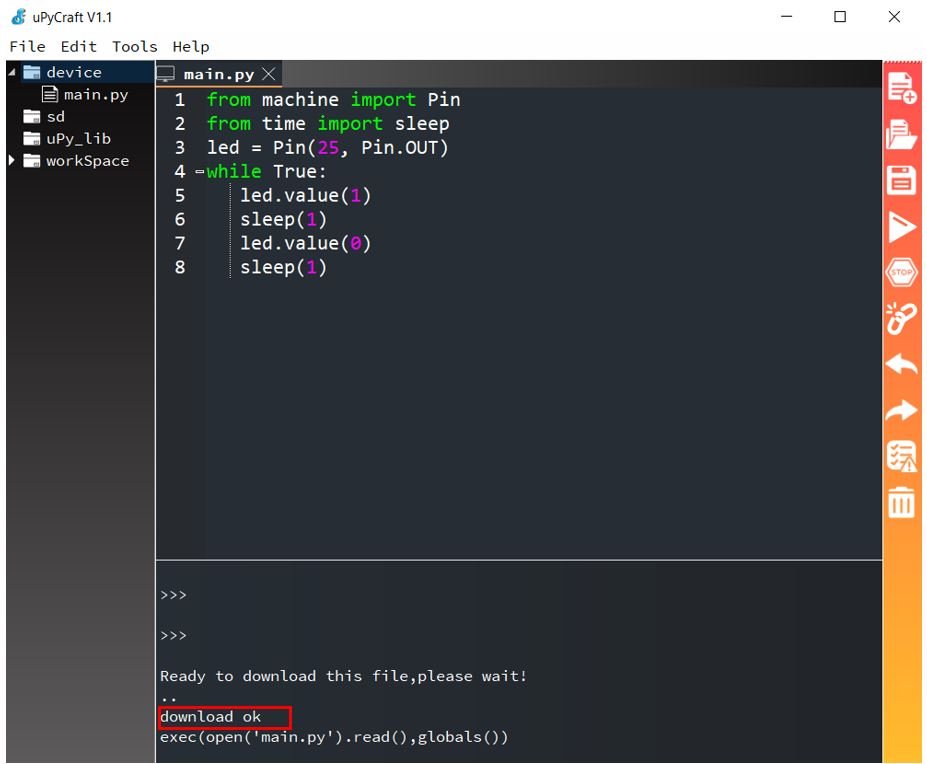
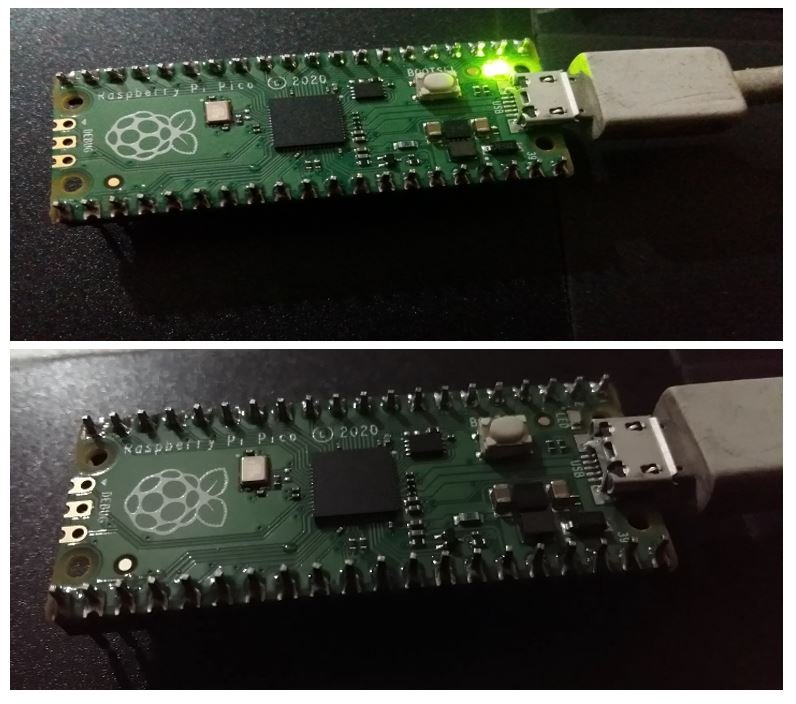
The onboard LED of Raspberry Pi Pico will start blinking at a delay of 1 second.
This is all about getting started with Micropython for Raspberry Pi Pico using uPyCraft IDE. In the coming tutorial, we will further explore Pi Pico peripherals using MicroPython.