In the last tutorial, we have seen how to use Binary Semaphore with FreeRTOS and Arduino. We have learned to synchronize software tasks and tasks with interrupt service routines using binary semaphore. In this tutorial, we will learn to use the counting semaphore of FreeRTOS and examples with Arduino. Firstly, we will provide an introduction to counting semaphores and their types. After that, we will discuss the FreeRTOS API used to give and take counting semaphores. Finally, examples will be discussed by using the FreeRTOS API with Arduino.
Counting Semaphores Introduction
We can define counting semaphores just like a binary semaphore. For instance, consider counting semaphores as a queue of length more than one. Tasks that want to use counting semaphores will track the number of items available in the queue. Whenever a task takes a counting semaphore, the number of items available in the queue reduces. In other words, the number of items available in the queue defines the count of semaphore.
Note: In order to use FreeRTOS counting semaphore, you must first enable configUSE_COUNTING_SEMAPHORES by setting it to one. This configuration setting option is available in FreeRTOSConfig.h file of FreeRTOS.
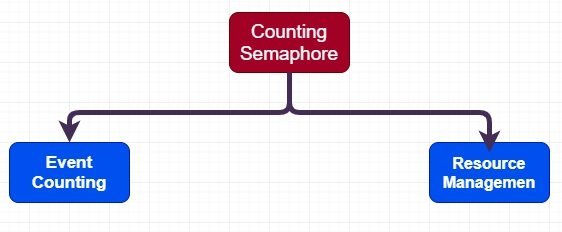
Types
It has two types. It is typically used for two things such as counting events and for resource Management.
Counting Events
In case of events counting, we can consider it as a counter which defines the maximum value and also keeps track of the number of times the event has occurred. Usually an event handler is used to give semaphore access and keep track of count value. Whenever a task takes a semaphore value, the count value is decremented by one.
For example, we created a counting semaphore of maximum value of 4 and initial value set to zero. In this case, an event handler will ‘give’ a semaphore each time an event occurs but the maximum events it can handle are upto four.
Resource Management
In case of resource management, counting semaphore defines the count of the number of shared resources available and that can be used by tasks at the same time.
For example, there are two FreeRTOS tasks that want to write data to a serial monitor of Arduino through the UART communication module of Arduino. But as you know that Arduino IDE has only one serial monitor. Also, Arduino uno has only one on-board UART module. Therefore, we must manage UART and Arduino IDE serial monitor resources between two tasks by using counting semaphore for resource management. We must first initialize the counting semaphore equal to the number of resources. After that, a task which wants to use a resource must take a semaphore by decrementing the semaphore’s count value.
Counting Semaphore Resoruce Management Example
For example, if two resources are available that can be shared among tasks. Hence, we must first set the counting semaphore value to 2. Therefore, only two tasks can acquire semaphore value at the same time. Also, whenever a task takes a semaphore, count value will be decremented by one. When a count value reaches zero that means no other resource is available. When count value reaches zero, any other task tries to access semaphore, it will enter the blocking state until currently executing tasks release the semaphore ( or release the resource).
FreeRTOS API for Counting Semaphores
Before using a counting semaphore, we must first create it using FreeRTOS API. Like xSemaphoreCreateBinary(), xSemaphoreCreateCounting() API function is used to create counting semaphores. Also, the same function is used for event counting and resource management. Only the way we use input arguments with xSemaphoreCreateCounting() initialize it for event counting or resource management.
This is a function prototype:
SemaphoreHandle_t xSemaphoreCreateCounting( UBaseType_t uxMaxCount, UBaseType_t uxInitialCount );This function takes two input arguments. The first argument is known as the uxMaxCount and the second argument is known as the uxInitialCount. The uxMaxCount is the maximum value to which the semaphore will count.
when the counting semaphore is to be used to count events, the uxMaxCount is the maximum number of events that can be counted. On the other hand, when the semaphore is used to manage access to a collection of resources the uxMaxCount should be set to the total number of resources that are available.
The next argument the uxInitialCount is the initial count value of the semaphore after it has been created. When the semaphore is to be used for counting events the uxInitialCount should be set to zero this means when we create the semaphore, no event has occurred yet. Therefore set it to zero. When the counting semaphore is used to manage access to a collection of resources the uxInitialCount should be set equal to uxMaxCount. This means when the semaphore is created, all resources are available. Therefore, we set the uxInitialCount equal to the uxMaxCount.
FreeRTOS Counting Semaphores Example with Arduino
For demo, we will create an example using counting semaphore and Arduino. We will create two tasks such as Task1 and Task2. Both these tasks use serial communication of Arduino to send string to Arduino serial monitor. This picture depicts the functionality of this example.

Both tasks will use the same UART module of Arduino to write data on the serial monitor. If we consider the Arduino serial monitor and Uart communication module as a resource that will be utilized by both tasks. Then, we can use counting semaphore for this resource management for Task1 and Task2. Because only one task can hold these Arduino resources at a time.
If you don’t know how to create task wtih FreeRTOS and Arduino, check these tutorials:
Arduino Code
#include <Arduino_FreeRTOS.h>
#include <semphr.h>
SemaphoreHandle_t xCountingSemaphore;

void setup()
{
  Serial.begin(9600); // Enable serial communication library.
  pinMode(LED_BUILTIN, OUTPUT);

 // Create task for Arduino led
  xTaskCreate(Task1, // Task function
              "Ledon", // Task name
              128, // Stack size
              NULL,
              0 ,// Priority
              NULL );
   xTaskCreate(Task2, // Task function
              "Ledoff", // Task name
              128, // Stack size
              NULL,
              0, // Priority
              NULL );
   xCountingSemaphore = xSemaphoreCreateCounting(1,1);
   xSemaphoreGive(xCountingSemaphore);

}

void loop() {}


void Task1(void *pvParameters)
{
  (void) pvParameters;

  for (;;)
    {
      xSemaphoreTake(xCountingSemaphore, portMAX_DELAY);
      Serial.println("Inside Task1 and Serial monitor Resource Taken");
      digitalWrite(LED_BUILTIN, HIGH);
      xSemaphoreGive(xCountingSemaphore);
      vTaskDelay(1);
    }
  }

void Task2(void *pvParameters)
{
  (void) pvParameters;
  for (;;)
    {
      xSemaphoreTake(xCountingSemaphore, portMAX_DELAY);
      Serial.println("Inside Task2 and Serial monitor Resource Taken");
      digitalWrite(LED_BUILTIN, LOW);
      xSemaphoreGive(xCountingSemaphore);
      vTaskDelay(1);

  }
}
How Code works
Now let’s write a code to create the above-mentioned example of counting semaphore. Firstly, adds libraries of FreeRTOS and semaphore using #include preprocessor directives.
#include <Arduino_FreeRTOS.h>
#include <semphr.h>
You will need a reference handler to handle counting semaphore. Therefore, you must create a SemaphoreHandle_t type handle with any name. For convenience, we will give it the name “xCountingSemaphore”.
SemaphoreHandle_t xCountingSemaphore;Inside the Setup Function
Task1 and Task2 use serial communication to print data on a serial monitor. Therefore, you must enable the serial port of Arduino with any possible baud rate. Hence, we enable it with a baud rate of 9600. Both tasks also control a Built-in LED of Arduino development board. Task1 turn on and Task2 turns off LED.
 Serial.begin(9600); // Enable serial communication library.
 pinMode(LED_BUILTIN, OUTPUT);
The next step is to create two tasks such as Task1 and Task2. Both tasks are created with an equal priority level. Hence, the FreeRTOS scheduler will schedule them according to the time-slicing algorithm. At the start, both tasks will be ready in a state. But only one task will be able to execute after taking counting semaphore. Another task will enter the blocking state due to the non-availability of resources such as a serial communication port and Arduino serial monitor.
// Create task for Arduino led
  xTaskCreate(Task1, // Task function
              "Ledon", // Task name
              128, // Stack size
              NULL,
              0 ,// Priority
              NULL );
   xTaskCreate(Task2, // Task function
              "Ledoff", // Task name
              128, // Stack size
              NULL,
              0, // Priority
              NULL );
This line creates a counting semaphore by passing one to both input arguments. Because, we are using counting semaphores for resource management. Also, in this example, the maximum available resource is one that is a serial port or Arduino serial monitor. Hence, only one task can access this resource at a time. As we mentioned earlier, When the counting semaphore is used to manage access to a collection of resources the uxInitialCount should be set equal to uxMaxCount.
xCountingSemaphore = xSemaphoreCreateCounting(1,1);The line makes the resource available inside the setup function.
xSemaphoreGive(xCountingSemaphore);This function provides a definition of Task1. Firstly, it takes the counting semaphore by using semaphoreTake() function. If the semaphore is available, it will execute other instructions such as printing the “Inside Task1 and Serial monitor Resource Taken” string on the Arduino serial monitor and turning on the built-in LED of the Arduino board. Otherwise, it will enter the blocking state for an indefinite timer and wait for the resource to become available. It will enter the blocking state for an indefinite timer. Because we set the second argument of xSemaphoreTake() to portMAX_DELAY. After completing execution, it will give back the counting semaphore using xSemaphoreGive().
void Task1(void *pvParameters)
{
  (void) pvParameters;

  for (;;)
    {
      xSemaphoreTake(xCountingSemaphore, portMAX_DELAY);
      Serial.println("Inside Task1 and Serial monitor Resource Taken");
      digitalWrite(LED_BUILTIN, HIGH);
      xSemaphoreGive(xCountingSemaphore);
      vTaskDelay(1);
    }
  }
Similarly, this routine defines the functionality of Task2. It works similar to Task1 except it turns off LED.
void Task2(void *pvParameters)
{
  (void) pvParameters;
  for (;;)
    {
      xSemaphoreTake(xCountingSemaphore, portMAX_DELAY);
      Serial.println("Inside Task2 and Serial monitor Resource Taken");
      digitalWrite(LED_BUILTIN, LOW);
      xSemaphoreGive(xCountingSemaphore);
      vTaskDelay(1);

  }
}
Arduino Sketch Output
This picture shows the output of serial monitor. At the start, Task1 takes counting semaphores and locks resource such as UART port and Arduino serial monitor. After that, it displays “Inside Task1 and Serial monitor Resource Taken” on the Arduino serial monitor. It also executes their other instructions and after that release semaphore. As soon as Task1 releases counting semaphore, Task2 which is in blocking state takes the semaphore and enters the running state. After completing execution, it also releases the semaphore. Task1 again takes it and similarly the program keeps executing with these pattern.

Video Demo