⚠️ Affiliate Disclosure: This post contains Amazon affiliate links. If you purchase through our links, we may earn a small commission at no extra cost to you. We only recommend products we have thoroughly researched and verified. Prices change frequently, so we don’t list them here — always tap through and confirm the live price on Amazon before buying.
Ultimate Buying Guide 2026
☀️ Best Solar Charging Modules for IoT
10 solar charging modules ranked for makers and IoT builders — from tiny CN3791 MPPT boards and nano-power harvesters to full 6–24V power managers that run a Raspberry Pi off-grid — with real specs, honest verdicts, and direct Amazon links.
✅ 10 Modules Reviewed
✅ Verified Amazon Links
✅ Updated July 2026
✅ Honest Pros & Cons
A solar charging module is what turns a bare solar panel and a lithium battery into a reliable, self-recharging power supply for a remote IoT node. Instead of babysitting a USB cable, your ESP32 weather station, LoRa sensor or ESP8266 camera can sit on a rooftop or in a field for months, topping up its battery every sunny day and running through the night. Getting this power stage right is the difference between a project that lasts a season and one that dies the first cloudy week.
The tricky part is choosing the right board. Solar charging modules vary enormously in solar input range (a single 5–6V cell vs. a 6–24V panel), whether they include real MPPT (Maximum Power Point Tracking) to squeeze the most out of weak light, the output rails they provide (raw battery, 3.3V, 5V, or dual USB), the charge current they push into the cell, and the protection they build in. This guide ranks 10 solar charging modules across every budget and use-case — from ultra-cheap single-cell chargers to plug-and-play power managers and nano-power harvesters — on the specs that actually matter for solar-powered embedded and IoT work.
💡 Reality check before you buy: A solar module’s headline numbers are best-case figures in full sun. “MPPT” on a $7 board is usually a simple fixed-voltage tracker, not the sophisticated sweep you get on industrial controllers — it still helps, but don’t expect lab efficiency. Match the module’s solar input voltage to your panel: a 6V-optimized board will barely charge from a 5V panel and can be damaged by an 18V one. Size the panel for your worst week, not your best day — a good rule is a panel that can replace a full day’s battery draw in 3–4 hours of usable sun. And remember cheap TP4056-class boards are linear chargers with no MPPT: fine for a small 5V panel, wasteful with a bigger one.
☀️ Quick Comparison — All 10 Solar Charging Modules
| Module | Solar Input | Output | MPPT | Best For | Buy |
|---|
| 🥇 Waveshare Power Manager (D) | 6–24V + Type-C | 5V / 3A | Yes | Best Overall | Buy Here → |
| 🏅 DFRobot Power Manager 5V | 5V panel | 5V / 1A | Yes | Best for Compact Nodes | Buy Here → |
| ⚡ Solar Energy Manager A | 5–24V | Dual USB 5V/3.1A | Yes | Best Dual-Output | Buy Here → |
| 🔋 Waveshare Power Module | 6–24V | 5V / 1A | Yes | Best Wide-Input Value | Buy Here → |
| 🛠️ HiLetgo CN3791 MPPT | 12V panel | 1S LiPo (~2A) | Yes | Best Bare MPPT Charger | Buy Here → |
| 🧠 Waveshare Recharged | 6–24V | 5V or 3.3V / 1A | Yes | Best for 3.3V Sensors | Buy Here → |
| 🔆 Taidacent CN3791 (6V) | 6V panel | 1S LiPo (~2A) | Yes | Best for 6V Micro Panels | Buy Here → |
| 💵 HiLetgo TP4056 (3-pack) | 5V panel | 1S / 18650 | No (linear) | Best Ultra-Budget | Buy Here → |
| 🔋 LiFePO4 MPPT Charger | 4.5–28V | 1S LiFePO4 (~1A) | Yes | Best for LiFePO4 | Buy Here → |
| 🌙 BQ25570 Harvester | 0.1–5V | Adj. boost | Yes* | Best Indoor / Low-Light | Buy Here → |
Specs are approximate and depend on your panel, battery and light conditions. “MPPT” on low-cost boards is a simplified fixed-voltage tracker (the BQ25570 uses adaptive sampled MPPT). Always confirm details and the live price on the Amazon listing before buying.
🔍 What to Look for in a Solar Charging Module
🔆
Solar Input Range
The single most important match. A board built for a 6V cell will choke on an 18V panel — and vice versa. Wide-input managers (6–24V) are flexible; bare CN3791 boards come tuned per panel voltage. Buy the version that fits your panel.
📈
MPPT vs Linear
MPPT charging keeps the panel at its most productive voltage, harvesting far more energy in weak light than a linear (TP4056-style) charger that just clamps to the battery voltage. For anything beyond a small 5V cell, MPPT is worth it.
🔌
Output Rails
Do you want raw battery voltage to a regulator you already have, a clean 3.3V for a bare ESP, a 5V/USB rail, or both? Power managers with a built-in DC-DC save you a board; bare chargers hand you raw cell voltage to regulate yourself.
🛡️
Battery Protection
Over-charge, over-discharge, over-current and reverse-polarity protection keep an unattended outdoor node safe for years. Managers usually bundle it in; some bare charger boards leave over-discharge to a separate BMS — check before you deploy.
🔋
Charge Current & Cells
Most of these charge a single 3.7V Li-ion/LiPo (1S) cell at 0.9–2A; a couple target LiFePO4 or tiny harvested loads. Bigger current fills a bigger battery faster, but only if your panel can supply it. Confirm the cell chemistry and count before wiring.
🏆 Detailed Reviews — All 10 Solar Charging Modules
🥇 BEST OVERALL
Waveshare Solar Power Manager (D)
⭐ 4.7/5 · Off-Grid Powerhouse
Buy on Amazon →

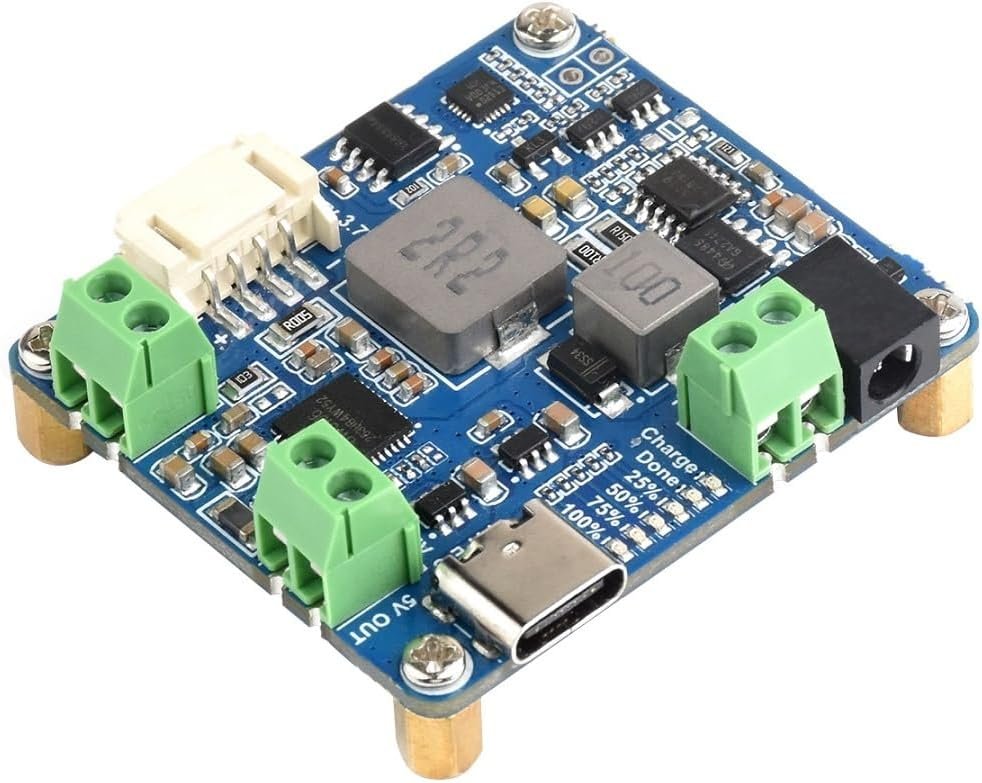
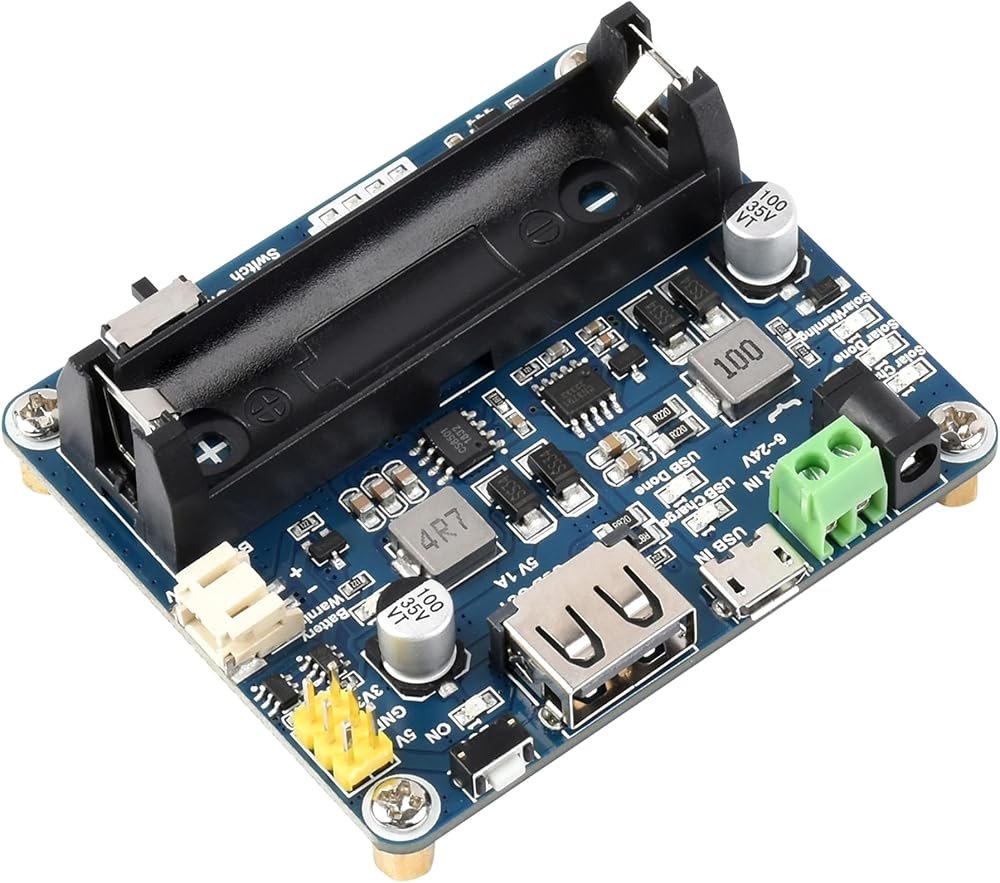
The Waveshare Solar Power Manager (D) is the board we hand to anyone who wants a solar node to just work. It accepts a wide 6–24V solar panel (or a Type-C adapter as backup), runs MPPT charging into a 3.7V Li battery, and delivers a stiff 5V/3A regulated output with PD/QC-style fast charging — enough to actually run a Raspberry Pi, Jetson Nano or a hungry ESP32-CAM, not just trickle a sensor. Over-charge, over-discharge, reverse and over-current protection are all built in, so it’s genuinely deploy-and-forget. For most solar IoT builds it’s the sweet spot of capability, safety and price.
✅ Pros- Wide 6–24V panel input + Type-C
- Strong 5V/3A output runs a Pi
- MPPT + full protection suite
- Excellent Waveshare wiki/docs
❌ Cons- Overkill for a tiny sensor
- Battery not included
- Bigger footprint than bare boards
🎯 Verdict: The best all-round solar charging module for IoT. Wide input, real output current and safety, without industrial pricing.
👉 Check Price on Amazon →
🏅 BEST FOR COMPACT NODES
DFRobot Solar Power Manager 5V
⭐ 4.6/5 · The Maker’s Favourite
Buy on Amazon →

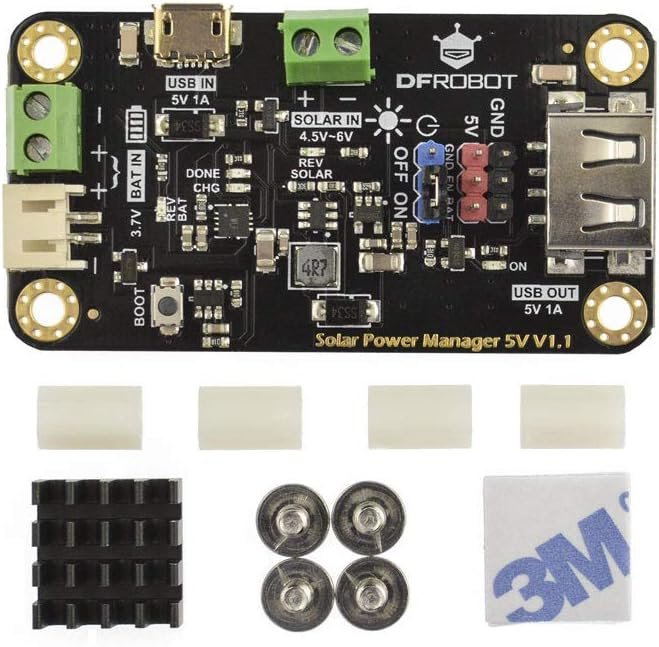
The DFRobot Solar Power Manager 5V (DFR0559) is the tidy, well-documented choice for a compact ESP32, ESP8266 or Arduino node running off a small 5V/6V panel. It pushes up to 900mA of MPPT charge into a single 3.7V Li cell from either the solar input or USB, and its switchable 5V/1A DC-DC output cleanly powers your board. Battery over-current and over-discharge protection are built in, and DFRobot’s excellent wiki makes wiring it up painless. It won’t run a Pi, but for the battery-powered sensor nodes most people actually build, it’s spot on.
✅ Pros- MPPT tuned for small 5V panels
- Clean 5V/1A switchable output
- Battery protection built in
- First-class DFRobot documentation
❌ Cons- Only 1A out — not for a Pi
- 5V-panel input only
- Costs more than a bare CN3791
🎯 Verdict: The best solar module for compact IoT nodes. Tidy, protected and superbly documented for ESP32/Arduino sensors.
👉 Check Price on Amazon →
⚡ BEST DUAL-OUTPUT · ⭐ 4.4/53. Solar Energy Manager A
5–24V solar · dual USB 5V/3.1A · Type-C fast charge · 18650 mgmt · MPPT
Buy →

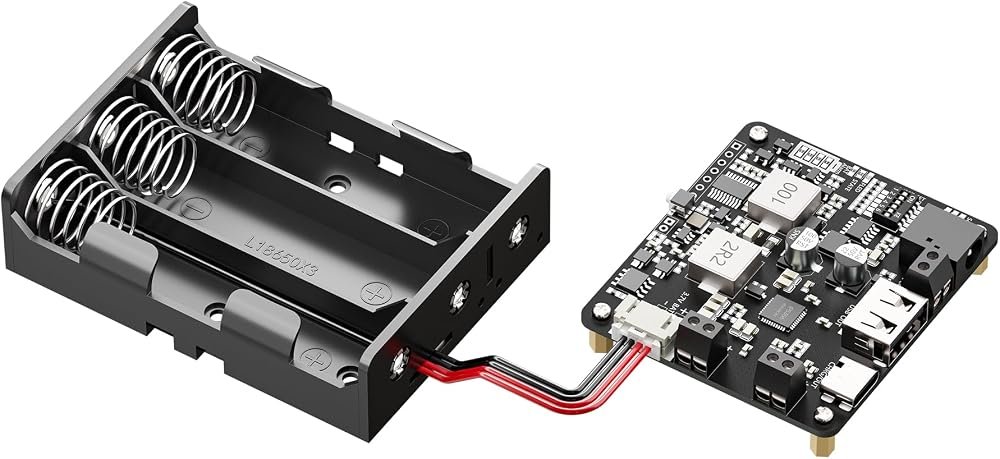
The Solar Energy Manager A is essentially a solar-fed power bank for your projects: a wide 5–24V solar input, MPPT charging into 18650 cells, and dual USB outputs at 5V/3.1A plus a Type-C fast-charge port. That makes it great when you want to power more than one thing — say an ESP32 gateway and a USB camera — or want a friendly USB rail instead of solder pads. It’s a consumer-flavoured board rather than a maker breakout, so documentation is thinner, but the raw capability per dollar is excellent.
✅ Pros: Dual USB + Type-C outputs; wide 5–24V input; 18650 management built in.
❌ Cons: Sparse docs; USB-only rails; quality varies by batch.
🎯 Verdict: The best dual-output pick. Reach for it when your node needs USB power for more than one device.
🔋 BEST WIDE-INPUT VALUE · ⭐ 4.5/54. Waveshare Solar Power Module
6–24V solar · onboard MPPT · 5V/1A output · USB or solar · multi-protection
Buy →

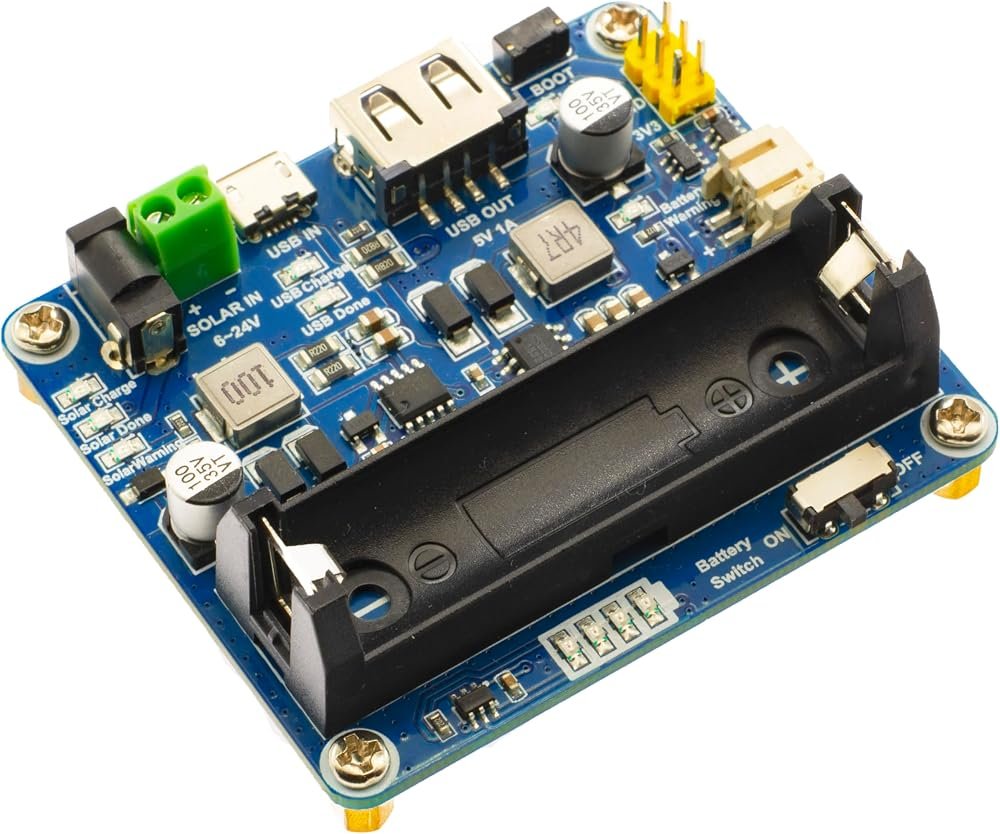
The original Waveshare Solar Power Management Module is the value pick in the range: the same friendly 6–24V panel input and onboard MPPT as its bigger sibling, but with a 5V/1A output sized for typical microcontroller nodes rather than a Pi. It charges a 3.7V Li battery from solar or USB, wraps in over-charge, over-discharge, reverse and over-current protection, and is a proven choice for mini weather stations, solar monitors and low-power IoT. If your load is an ESP32 or ESP8266 and you want wide panel flexibility on a budget, this is the one.
✅ Pros: Wide 6–24V input; onboard MPPT; full protection; great value.
❌ Cons: 1A output only; single 5V rail; battery not included.
🎯 Verdict: The best wide-input value manager. Panel flexibility and MPPT for an ESP-class node at a friendly price.
🛠️ BEST BARE MPPT CHARGER · ⭐ 4.4/55. HiLetgo CN3791 MPPT
12V panel · single-cell LiPo · ~2A · JST PH2.0 · auto recharge
Buy →

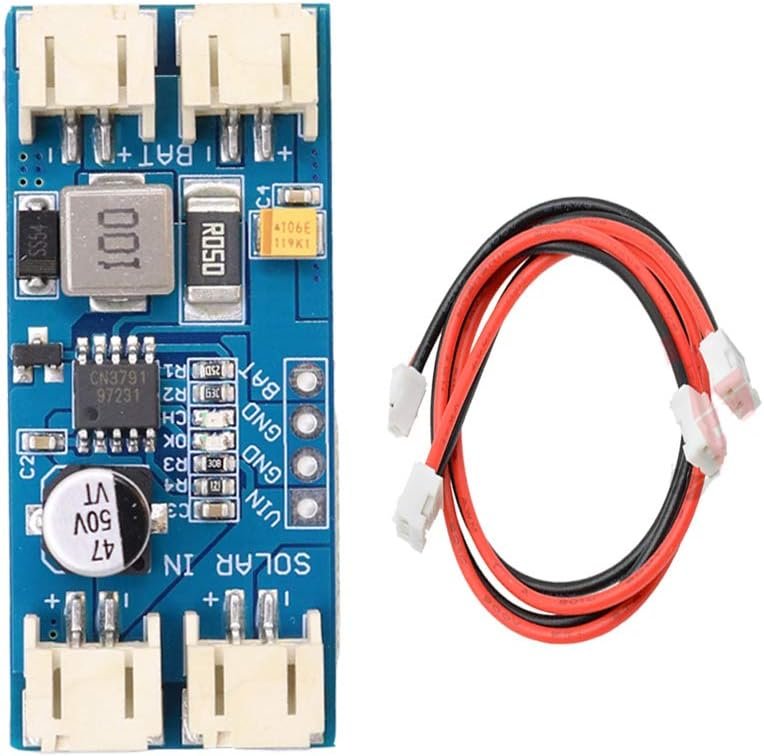
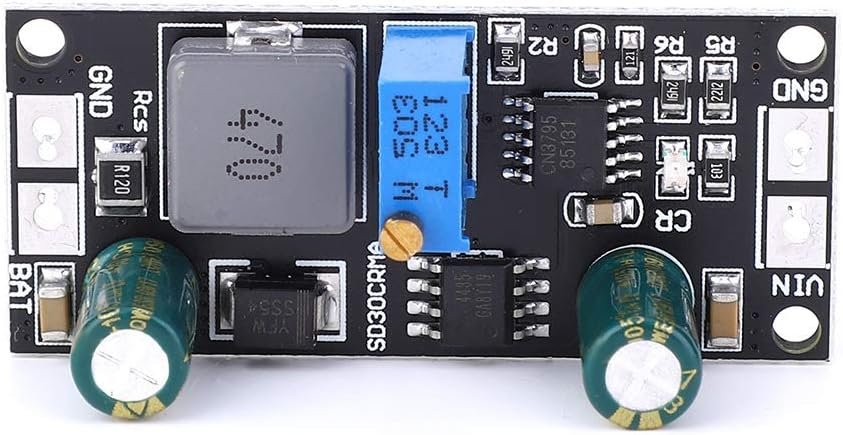
The HiLetgo CN3791 is the classic bare-bones MPPT charger for a single 3.7V LiPo cell. There’s no 5V rail or fuss — you feed it a 12V-class solar panel on the JST connector, wire a cell to the other, and the CN3791 tracks the panel’s maximum power point while charging at up to ~2A. It’s the enthusiast’s building block: cheap, effective, and perfect when you already have your own 3.3V/5V regulator and just need efficient solar charging into the battery. Just remember it’s a charger, not a full manager — pair it with a battery that has its own protection.
✅ Pros: Real MPPT; up to ~2A; cheap; JST connectors and cables included.
❌ Cons: Charger only (no output rail); needs a 12V-class panel; add your own BMS.
🎯 Verdict: The best bare MPPT charger. The efficient, low-cost heart of a DIY solar power stage.
🧠 BEST FOR 3.3V SENSORS · ⭐ 4.4/56. Waveshare Recharged Module
6–24V solar · 5V/1A or 3.3V/1A output · USB or solar · MPPT
Buy →

The Waveshare “Recharged” module covers a gap the others don’t: it offers a jumper-selectable 3.3V/1A output as well as 5V/1A, so you can feed a bare ESP32, nRF52 or STM32 sensor at its native voltage without a second regulator wasting energy. Same wide 6–24V solar input and MPPT as the family, with USB backup charging. For ultra-low-power 3.3V sensor nodes where every milliamp of overhead matters, that dual rail is a genuinely useful trick.
✅ Pros: Selectable 3.3V or 5V rail; wide input; MPPT; USB backup.
❌ Cons: 1A max; one rail at a time; less common, thinner listings.
🎯 Verdict: The best pick for 3.3V sensor nodes. Native-voltage output means less wasted energy on a low-power build.
🔆 BEST FOR 6V MICRO PANELS · ⭐ 4.3/57. Taidacent CN3791 (6V)
6V panel · single-cell LiPo · 3.7/4.2V ~2A · MPPT
Buy →

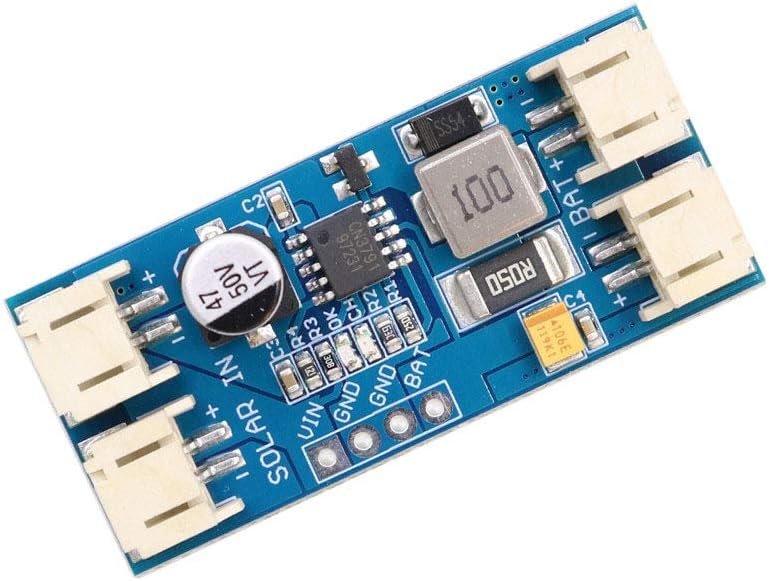
The Taidacent CN3791 is the same proven MPPT charger tuned for the small 6V panels most hobby solar nodes actually use. If your build has a 5–6V garden-light-style panel rather than a chunky 12V one, this is the correct variant — the fixed MPPT voltage is matched to that panel so you get efficient single-cell LiPo charging at up to ~2A. It’s a bare charger like the HiLetgo, so plan for your own regulation and battery protection, but for compact 6V setups it’s the natural fit.
✅ Pros: MPPT matched to 6V panels; ~2A charge; compact and cheap.
❌ Cons: 6V-only tuning; charger only; add regulation + BMS.
🎯 Verdict: The best charger for 6V micro panels. Get the panel-voltage variant right and it just works.
💵 BEST ULTRA-BUDGET · ⭐ 4.2/58. HiLetgo TP4056 (3-pack)
5V panel · 1S / 18650 · 1A linear CC/CV · dual protection · Type-C
Buy →

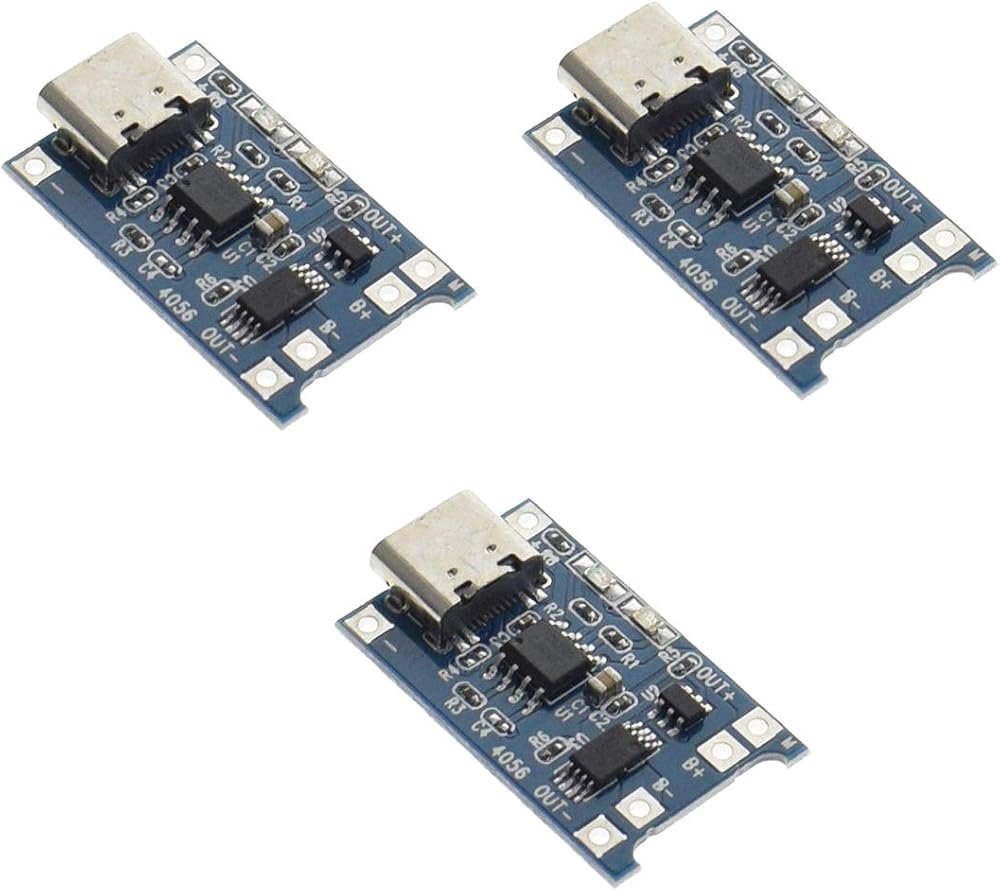
The TP4056 is the cheapest way to charge a single Li cell, and a 3-pack costs less than a coffee. With a small 5V/6V panel on the input it will happily top up an 18650 for a light-duty sensor, and the protected version adds over-charge, over-discharge and over-current safety via its DW01 chip. Be honest about what it is, though: it’s a linear charger with no MPPT, so it wastes energy from anything bigger than a small 5V panel and won’t harvest well in weak light. For a bright-location, low-power node on a shoestring, it’s unbeatable value; for serious harvesting, step up to an MPPT board above.
✅ Pros: Dirt cheap 3-pack; protection built in; tiny; Type-C input.
❌ Cons: No MPPT (linear); 5V panel only; poor in weak light.
🎯 Verdict: The best ultra-budget option. Perfect for a sunny-spot, low-power node — just don’t expect MPPT efficiency.
🔋 BEST FOR LiFePO4 · ⭐ 4.4/59. LiFePO4 MPPT Solar Charger
4.5–28V solar · 1S LiFePO4 (3.2V) · MPPT · ~1A (resistor-set)
Buy →

Most boards here charge Li-ion/LiPo, but if you want the long cycle life and rugged temperature tolerance of LiFePO4 for a deploy-once outdoor node, you need a charger tuned to its ~3.6V charge voltage. This CN3801-class MPPT module takes a wide 4.5–28V panel and charges a single 3.2V LiFePO4 cell with maximum power point tracking, at a current you set with a resistor. LiFePO4 shrugs off heat and thousands of charge cycles far better than LiPo — exactly what you want on a rooftop for years — just make sure your regulator is happy with the ~3.2–3.6V cell voltage.
✅ Pros: MPPT tuned for LiFePO4; wide 4.5–28V input; rugged, long-life chemistry.
❌ Cons: LiFePO4 only (not LiPo); ~1A stock; charger only, add regulation.
🎯 Verdict: The best pick for LiFePO4 builds. Long cycle life and heat tolerance for years-long outdoor deployments.
🌙 BEST INDOOR / LOW-LIGHT · ⭐ 4.2/510. BQ25570 Energy Harvester
0.1–5V in · nano-power boost · adaptive MPPT · µW–mW harvesting
Buy →

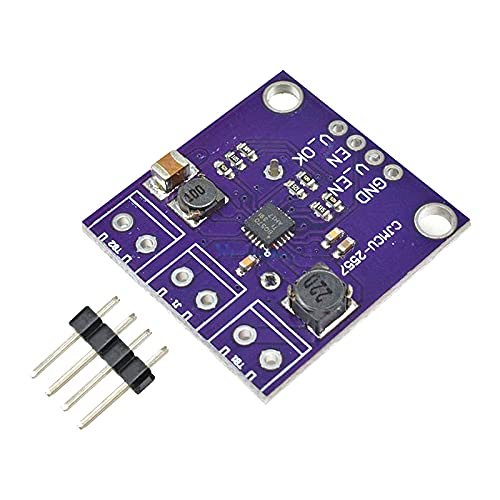
When there isn’t much light at all — an indoor sensor, a shaded corner, a tiny cell — a normal charger won’t even start. The TI BQ25570 is a nano-power energy harvester built for exactly this: it cold-starts from as little as ~330mV and keeps harvesting down to ~100mV, with adaptive MPPT sipping microwatts to milliwatts from a small PV cell into a battery or supercap. It’s the specialist choice for battery-light or battery-free IoT — door/window sensors, beacons and ultra-low-power nodes running on indoor light. It won’t fast-charge anything and expects a genuinely low-power design, but nothing else here harvests in such dim conditions.
✅ Pros: Cold-starts at ~330mV; harvests in dim/indoor light; adaptive MPPT; ultra-low quiescent.
❌ Cons: µW–mW only (not for hungry nodes); needs careful low-power design; pricier per watt.
🎯 Verdict: The best harvester for indoor/low-light IoT. The way to run a sensor where a normal solar charger simply won’t start.
🛒 How to Choose the Right Solar Module
🌐
Running a Raspberry Pi off-grid?
Get the Waveshare Power Manager (D) — 6–24V input and a stiff 5V/3A output that a Pi or Jetson can actually live on.
📡
Building an ESP32 sensor node?
The DFRobot Power Manager 5V gives you MPPT, a clean 5V/1A rail and great docs in a compact board.
🔬
Powering a bare 3.3V MCU?
The Waveshare Recharged module’s selectable 3.3V rail skips a regulator and saves precious energy.
🧰
Rolling your own power stage?
A bare CN3791 (12V) or Taidacent CN3791 (6V) gives efficient MPPT charging you pair with your own regulator.
🔌
Need to power two devices?
The Solar Energy Manager A offers dual USB 5V/3.1A plus Type-C — a solar power bank for your build.
💡
On a tight budget in bright sun?
A protected TP4056 3-pack with a small 5V panel is the cheapest way to keep a low-power node topped up.
🌡️
Deploying outdoors for years?
A LiFePO4 MPPT charger handles heat and thousands of cycles far better than LiPo for set-and-forget nodes.
🌙
Only have indoor or dim light?
The BQ25570 harvester cold-starts at millivolts and sips power a normal solar charger can’t touch.
⚙️ Key Specs Compared — Side by Side
| Spec | Waveshare (D) | DFRobot 5V | CN3791 (HiLetgo) | LiFePO4 MPPT | BQ25570 |
|---|
| Solar Input | 6–24V | 5V | 12V | 4.5–28V ⭐ | 0.1–5V ⭐ |
| Output Rail | 5V / 3A ⭐ | 5V / 1A | None (charger) | None (charger) | Adj. boost |
| MPPT | Yes | Yes | Yes | Yes | Adaptive ⭐ |
| Battery | 1S Li | 1S Li | 1S LiPo | 1S LiFePO4 ⭐ | Li / supercap |
| Power Level | High ⭐ | Medium | Medium-High | Low-Medium | µW–mW |
| Protection | Full suite ⭐ | OC + OD | Charger only | Charger only | UVLO |
| Best Role | Pi / heavy node | ESP32 node | DIY power stage | Years outdoors | Indoor/low-light |
Specs are approximate and vary with panel, battery and seller. Always confirm details on the live Amazon listing before buying.
❓ Frequently Asked Questions
Do I really need MPPT, or is a plain TP4056 enough?
It depends on your panel and location. A TP4056 is a linear charger: it drags the panel down to roughly battery voltage, so any extra voltage the panel could deliver is lost as heat. With a small 5V panel in bright sun that’s fine. But with a 6V, 12V or larger panel — or in cloudy, low-angle light — an MPPT board keeps the panel at its most productive point and can harvest substantially more energy per day. For a node that must survive marginal weeks, MPPT is worth the few extra dollars.
How big a solar panel do I need for an ESP32 node?
Work from daily energy, not peak watts. Estimate your node’s average draw (a deep-sleeping ESP32 waking to send data might average a few mA; an always-on ESP32-CAM far more), multiply by 24 hours for daily mAh, then size a panel that can replace that in about 3–4 hours of usable sun with margin for cloudy days. As a rough starting point, a 5–6V/1–2W panel and a 2000–3500mAh 18650 keep a well-behaved sleeping sensor running indefinitely; camera or always-on nodes want a bigger panel and battery.
Can these modules power my board and charge the battery at the same time?
The power managers (Waveshare, DFRobot, Solar Energy Manager) are designed for exactly that — they charge the cell and run their regulated output simultaneously, drawing from solar first and the battery when the sun dips. Bare chargers like the CN3791, LiFePO4 board and TP4056 only handle the charging side; you tap the battery through your own regulator for the load. If you want true seamless “run while charging” behaviour without designing it yourself, choose a manager, not a bare charger.
Should I use LiPo or LiFePO4 for a solar IoT node?
LiPo/Li-ion packs more energy in a smaller, lighter cell and is fine for most builds, but it ages faster and dislikes heat — a real issue in a sun-baked enclosure. LiFePO4 stores a bit less energy per gram and sits at a lower ~3.2V, but it tolerates high temperatures, survives thousands of cycles, and is far safer against thermal runaway. For a node you want to install once and forget for years outdoors, LiFePO4 with a matched charger (like pick #9) is often the smarter long-term choice; just confirm your regulator accepts the lower cell voltage.
Why does the solar input voltage of the module matter so much?
Because a fixed-MPPT board is tuned to hold the panel at one voltage. Feed a 6V-tuned CN3791 from a 5V panel and it can barely start; feed it an 18V panel and you risk exceeding the input rating and damaging the board. This is why CN3791 boards are sold in 6V/9V/12V variants — buy the one that matches your panel’s rated voltage. Wide-input managers (6–24V) and the LiFePO4 board (4.5–28V) sidestep this by accepting a range, which is part of why they’re more beginner-friendly.
Do these boards include battery protection, or do I need a separate BMS?
The full power managers bundle over-charge, over-discharge, reverse and over-current protection, so a bare cell is safe. The protected TP4056 version adds a DW01 protection stage too. Bare CN3791 and LiFePO4 charger boards, however, generally handle only the charging side — for an unattended outdoor deployment you should use a protected battery or add a small BMS so a deep discharge can’t kill the cell. Always confirm what a specific listing includes before trusting it outdoors.
🏁 Final Verdict — Best Solar Module for Every Build
The right solar charging module for every project and budget:
🥇 Best Overall — Waveshare Power Manager (D): 6–24V input, 5V/3A, MPPT, full protection
Buy →🏅 Best for Compact Nodes — DFRobot Power Manager 5V: MPPT, clean 5V/1A, great docs
Buy →🛠️ Best Bare MPPT Charger — HiLetgo CN3791: efficient single-cell charging for DIY power stages
Buy →🧠 Best for 3.3V Sensors — Waveshare Recharged: selectable 3.3V rail, wide input, MPPT
Buy →🔋 Best for LiFePO4 — LiFePO4 MPPT Charger: rugged long-life chemistry for years outdoors
Buy →🌙 Best Indoor / Low-Light — BQ25570 Harvester: cold-starts at millivolts to run sensors in dim light
Buy →💵 Best Ultra-Budget — HiLetgo TP4056 3-pack: cheapest way to charge a cell in bright sun
Buy →No single module is right for every solar IoT build, but every pick here earns its place. For most projects the Waveshare Solar Power Manager (D) is the one to buy — wide panel input, a real 5V/3A output and full protection you won’t outgrow. Compact ESP32 and Arduino nodes are perfectly served by the DFRobot Power Manager 5V; makers rolling their own power stage should grab a CN3791 in the right panel voltage; bare 3.3V sensors love the Waveshare Recharged module’s native rail; multi-device builds want the dual-USB Solar Energy Manager A; long-life outdoor nodes should run LiFePO4 with a matched charger; indoor and dim-light sensors need the nano-power BQ25570 harvester; and a sunny-spot, penny-pinching node runs fine on a protected TP4056. Pair your solar power stage with our Arduino, ESP32, ESP8266 and Raspberry Pi Pico tutorials and build something that runs on sunshine.
💬 Not sure which module fits your project? Tell us what you’re powering — a weather station, a LoRa sensor, a trail camera or a Pi gateway — and roughly how much sun you get, in the comments below, and we’ll point you to the right pick.
All Amazon links above use our affiliate tag (microlab05-20). Purchasing through them supports microcontrollerslab.com at no extra cost to you. Prices and availability change frequently — always confirm the current price on Amazon before buying.