⚠️ Affiliate Disclosure: This post contains Amazon affiliate links. If you purchase through our links, we may earn a small commission at no extra cost to you. We only recommend products we have thoroughly researched and verified. Prices change frequently — always confirm the live price on Amazon before buying.
🔥 2026 BUYING GUIDE
🌡️ Best Thermal Camera Modules for Embedded Devices
10 thermal imaging sensors and IR camera modules for Raspberry Pi, ESP32, Arduino & STM32 — tested specs, honest pros & cons, and a clear pick for every budget.
✅ ASINs verified July 2026
✅ Real specs, no fluff
✅ From $16 to $110
✅ MCU compatibility checked
Thermal cameras used to be lab equipment with four-digit price tags. Today, a $27 sensor the size of a fingernail can stream a live heat map into an ESP32 over plain I2C. That opens the door to embedded projects that were unthinkable a few years ago: presence detection that works in total darkness, overheating alarms for motor drivers and battery packs, HVAC energy audits, PCB hot-spot inspection, and non-contact temperature monitoring for machines and people.
The catch is that “thermal camera module” covers everything from a 64-pixel presence sensor to an 80×62 microbolometer HAT — and picking the wrong one wastes money in both directions. In this guide we compare 10 modules we verified live on Amazon, spanning the Melexis MLX9064x family, Panasonic’s AMG8833 Grid-EYE, the classic MLX90614 single-point sensor, and two high-resolution Raspberry Pi thermal HATs.
🧯 Reality check before you buy
None of these modules will give you FLIR-handheld image quality. At 8×8 you get heat blobs, not pictures; at 32×24 you can recognize a hand or a hot IC; only the 80×62 HATs approach a usable “image.” Accuracy is typically ±1.5 to ±2.5 °C — fine for trends and alarms, not for medical diagnostics. Thermal IR also does not pass through glass or acrylic, and 768-pixel sensors need a microcontroller with real RAM (ESP32, Pi, STM32 — not an Arduino Uno). Budget accordingly and match the sensor to the job, not the spec sheet.
📊 Quick Comparison — All 10 Thermal Modules
| Module | Sensor | Resolution | FOV | Interface | Best For | Link |
|---|
| 🏆 Waveshare MLX90640-D110 | MLX90640 | 32×24 (768 px) | 110°×75° | I2C | Best overall | Buy → |
| Waveshare Thermal HAT (B) | Microbolometer hybrid | 80×62 (4,960 px) | 45° | 40-pin GPIO (Pi/Pico) | Best resolution | Buy → |
| XYGStudy MLX90640-D55 | MLX90640 | 32×24 (768 px) | 55°×35° | I2C | Long-range detail | Buy → |
| UeeKKoo MLX90641 | MLX90641 | 16×12 (192 px) | 55° | I2C | Fast refresh, mid budget | Buy → |
| WatangTech MLX90642-D45 | MLX90642 | 32×24 (768 px) | 45°×35° | I2C | Newest sensor | Buy → |
| TUOPUONE Thermal-90 HAT (B) | Microbolometer hybrid | 80×62 (4,960 px) | 90° wide | 40-pin GPIO (Pi) | Wide-area high-res | Buy → |
| Teyleten Robot AMG8833 | AMG8833 Grid-EYE | 8×8 (64 px) | ~60° | I2C | Budget heat mapping | Buy → |
| DORHEA AMG8833 | AMG8833 Grid-EYE | 8×8 (64 px) | ~60° | I2C | Arduino beginners | Buy → |
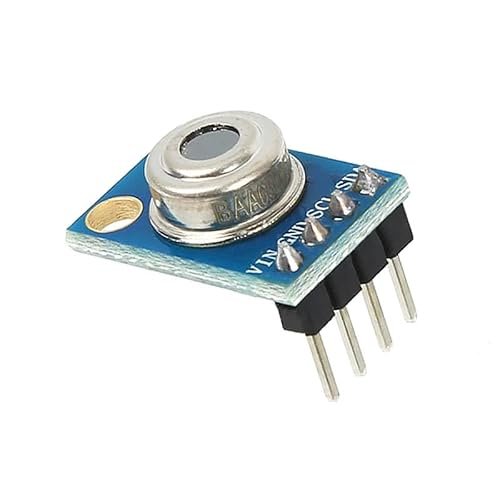
| SHILLEHTEK GY-906 MLX90614 | MLX90614 (single-point) | 1 px | 90° cone | I2C/SMBus | Plug-and-play temp probe | Buy → |
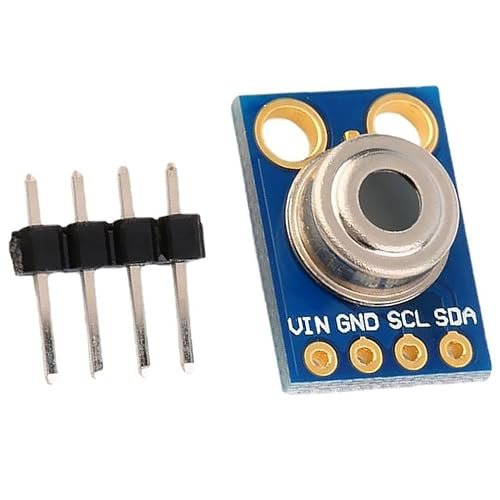
| HiLetgo GY-906 MLX90614 | MLX90614 (single-point) | 1 px | 90° cone | I2C/SMBus | Ultra budget | Buy → |
🔍 What to Look For in a Thermal Camera Module
🔲
Resolution
8×8 detects presence and hot zones. 32×24 shows recognizable heat shapes — the sweet spot for most projects. 80×62 delivers actual thermal images for inspection work.
🔭
Field of View
Wide FOV (90–110°) covers a room but spreads pixels thin. Narrow FOV (45–55°) concentrates pixels for more detail at distance. Match FOV to target distance.
🔌
Interface & MCU Load
All array sensors here use I2C, but a 768-pixel frame plus calibration math needs ~20 KB+ of RAM. ESP32, Raspberry Pi and STM32 are safe; an Uno only handles 8×8 or single-point.
🌡️
Temp Range & Accuracy
AMG8833 tops out at 80 °C; MLX9064x reads to 260–300 °C; MLX90614 spans −70 to +380 °C. Expect ±1.5–2.5 °C — plan alarms around trends, not absolute precision.
💻
Library & Code Support
Adafruit and Melexis maintain solid Arduino/Python drivers for MLX9064x, AMG88xx and MLX90614. Waveshare ships wiki examples for its HATs. Avoid sensors with no public driver.
🏆 Detailed Reviews — Our Top 10 Picks
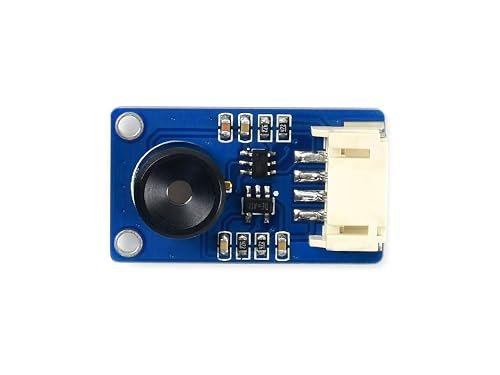
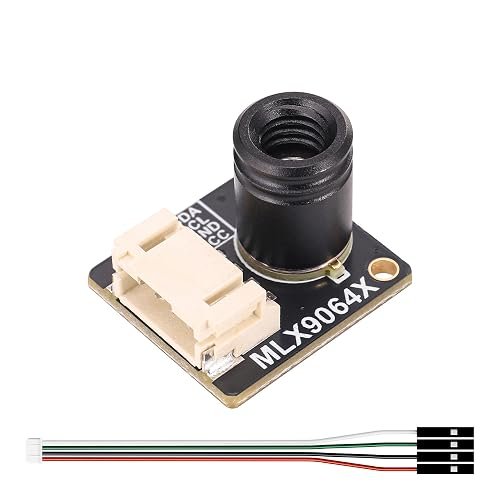
The Waveshare MLX90640-D110 is the module we would put in most embedded projects without hesitation. Its 768-pixel array streams heat maps over plain I2C to a Raspberry Pi, ESP32, STM32 or any 3.3 V/5 V MCU, and the 110° lens covers an entire room from a corner mount — ideal for presence detection, HVAC monitoring and multi-target heat tracking. Waveshare’s wiki includes wiring diagrams and working Python/C demos, so first frames take minutes, not evenings.
✅ Pros
- Room-scale 110° coverage
- Works with Pi, ESP32, STM32, Arduino boards with enough RAM
- Refresh selectable up to 32 Hz
- Strong documentation and demo code
❌ Cons
- Wide lens trades away per-pixel detail at distance
- Too heavy for 8-bit MCUs (needs ~20 KB RAM)
- ±1.5–2 °C accuracy — not lab grade
Verdict: The best balance of resolution, coverage, ecosystem and price in the roundup. If you buy one thermal module for general embedded work, buy this one.
→ Check current price on Amazon
🥈 #2 — BEST RESOLUTION
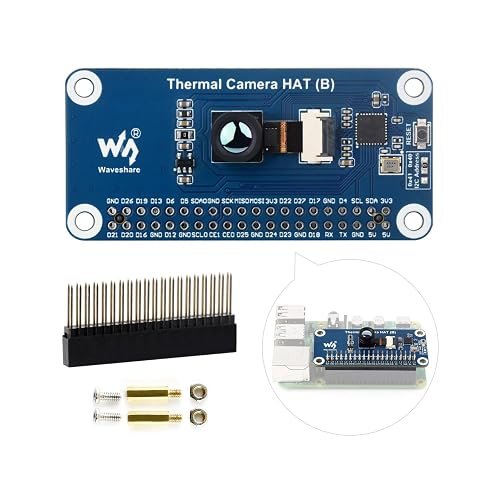
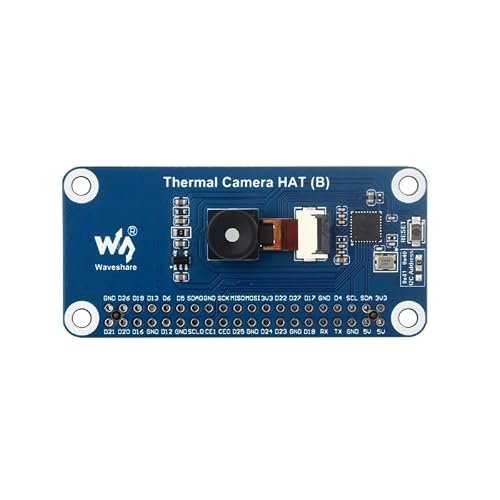
Waveshare Thermal Camera HAT (B)
⭐ 4.6/5 — 80×62 long-wave IR array for Raspberry Pi & Pico
RESOLUTION
80×62 (4,960 px)
PLATFORM
Pi 5/4/3/Zero, Pico
This HAT is in a different league from the I2C breakouts: a hybrid microbolometer/thermopile array with 4,960 calibrated pixels, shutterless continuous video, 150 mK NETD sensitivity and up to 25 FPS. Drop it on a Raspberry Pi’s 40-pin header (Pico is supported too) and you get genuinely usable thermal video for PCB inspection, machine monitoring and fever-screening prototypes. For serious thermal imaging on a maker budget, nothing else here comes close.
✅ Pros
- 6× the pixels of an MLX90640
- Smooth 25 FPS shutterless video
- Per-pixel factory calibration
- Works with Pi and Pico via 40-pin header
❌ Cons
- Priciest pick in this guide
- HAT form factor — not for ESP32/Arduino builds
- 45° FOV needs aiming for room coverage
Verdict: The pick when image quality actually matters — inspection stations, thermal vision robots, and any project where 32×24 blobs aren’t enough.
→ Check current price on Amazon
#3 XYGStudy MLX90640-D55 — ⭐ 4.5/5 · Best for Long-Range Detail · 32×24 · 55°×35° · I2C
Buy on Amazon →

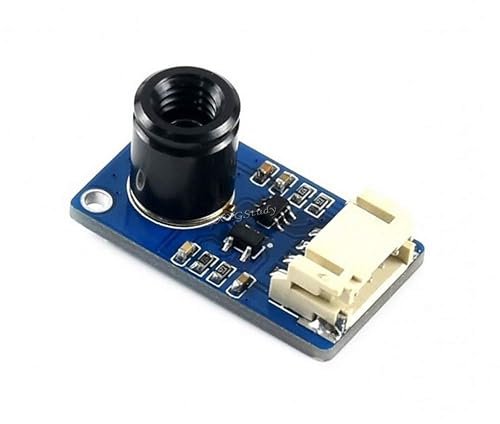
Same proven MLX90640 core as our top pick (≈ $66), but with a 55°×35° narrow-angle lens that packs all 768 pixels into a tighter cone. That means noticeably more detail on distant or small targets — a breaker panel across the room, a motor housing, a specific zone on a conveyor. Choose the D55 over the D110 whenever your subject is more than ~2 m away or you want to isolate one object rather than survey a whole room.
✅ Pros: Better pixel density on target · same wide MCU support · −40 to +300 °C range
❌ Cons: Narrow view misses off-axis heat sources · same RAM demands as D110
Verdict: The long-range twin of our winner — pick by FOV, not by brand.
#4 UeeKKoo MLX90641 — ⭐ 4.4/5 · Best Fast-Refresh Mid-Ranger · 16×12 · 55° · I2C
Buy on Amazon →

The MLX90641 (≈ $54) is the smart middle ground: 192 pixels is plenty for zone monitoring and hot-spot alarms, while the smaller frame slashes RAM use and lets the sensor refresh up to 64 Hz — the fastest in the Melexis family. Its per-pixel data is also less noise-prone than the 90640’s, making it a favorite for industrial condition monitoring on modest MCUs. Note: stock was low (8 units) when we checked.
✅ Pros: Up to 64 Hz refresh · light on RAM — ESP32-friendly · −40 to +300 °C · cheaper than 32×24 modules
❌ Cons: 16×12 can’t resolve fine detail · limited stock at review time
Verdict: Best pick when you need fast thermal response on a mid-range budget.
#5 WatangTech MLX90642-D45 — ⭐ 4.3/5 · Newest Sensor Tech · 32×24 · 45°×35° · I2C
Buy on Amazon →

Built on Melexis’s newest MLX90642 (≈ $68), this module adds a global shutter for distortion-free capture of fast temperature changes and excellent 65 mK thermal sensitivity. The vendor ships complete C++ and Python demo code for Raspberry Pi, so you can display thermal frames almost immediately. Its −40 to +260 °C range and focused 45° optics suit circuit-board inspection and targeted machine monitoring. Stock warning: only 1 unit was left when we verified the listing.
✅ Pros: Global shutter · 65 mK NETD sensitivity · ready-made Pi demos · newest silicon
❌ Cons: Very limited stock · smaller community than MLX90640 · 260 °C ceiling (vs 300 °C)
Verdict: The forward-looking choice — grab it if it’s in stock, or the D55 covers similar ground.
#6 TUOPUONE Thermal-90 Camera HAT (B) — ⭐ 4.4/5 · Best Wide-Angle High-Res · 80×62 · 90° · Pi HAT
Buy on Amazon →
Same 80×62 sensor class as the Waveshare HAT, but with a 90° wide-angle lens (≈ $106) — so you keep the high pixel count and get room-scale coverage. That combination is ideal for smart-building occupancy analytics, server-rack monitoring and wide-area intrusion detection where a 45° lens would need panning. It mounts on the standard 40-pin Raspberry Pi header.
✅ Pros: High resolution + wide 90° FOV · standard 40-pin HAT fit · slightly cheaper than the Waveshare (B)
❌ Cons: Smaller brand with thinner documentation · Pi-only workflow · wide lens reduces long-range detail
Verdict: The wide-angle counterpart to pick #2 — choose it when one camera must watch a whole space.
#7 Teyleten Robot AMG8833 — ⭐ 4.3/5 · Best Budget Thermal Array · 8×8 · I2C
Buy on Amazon →
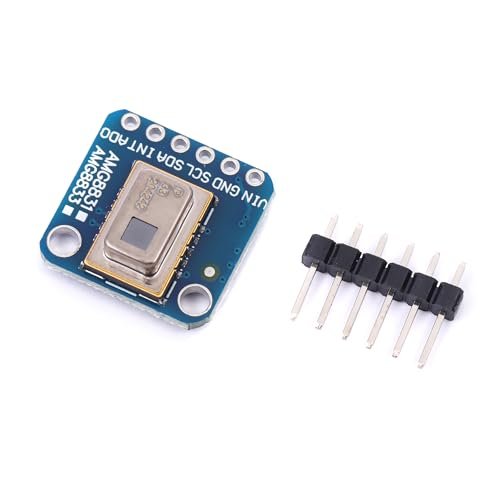
Panasonic’s Grid-EYE AMG8833 (≈ $27) outputs an 8×8 grid of temperatures at 10 FPS over I2C — enough to detect people, track movement direction, and flag hot equipment. It runs happily on 3.3–5 V, works with Adafruit’s excellent AMG88xx libraries, and is light enough for almost any microcontroller, including an Arduino Uno. Interpolate the 64 pixels in software and you get surprisingly watchable mini heat maps.
✅ Pros: Great price · Uno-compatible · mature Adafruit library · 10 FPS is fine for presence detection
❌ Cons: 0–80 °C range only · ±2.5 °C accuracy · 64 pixels is blobs, not images
Verdict: The cheapest way to add real thermal sensing to any MCU project.
#8 DORHEA AMG8833 Grid-EYE Breakout — ⭐ 4.2/5 · Best for Arduino Beginners · 8×8 · I2C
Buy on Amazon →
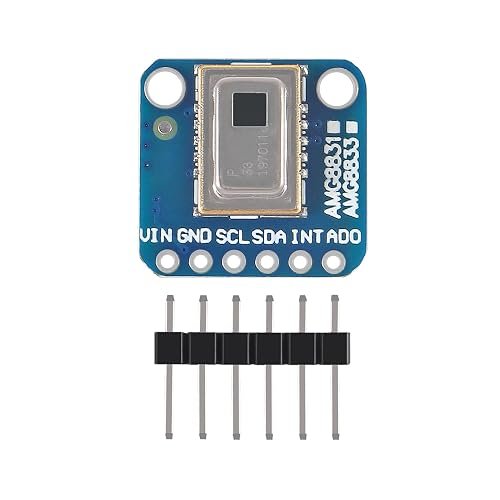
Functionally the same Grid-EYE sensor as pick #7 (≈ $33) on a beginner-friendly breakout with onboard regulation for clean 3.3 V/5 V hookup. It drops straight into Adafruit AMG88xx tutorials and example sketches, which makes it a popular classroom and first-thermal-project board for Arduino and Raspberry Pi. Pay the few extra dollars if you value the breakout layout; otherwise #7 is the better deal.
✅ Pros: Beginner-friendly wiring · library-compatible with Adafruit examples · solid seller track record
❌ Cons: Costs more than identical-spec rivals · same 8×8 / 80 °C limits
Verdict: A friendly first thermal sensor — ideal for learning, workshops and classrooms.
#9 SHILLEHTEK GY-906 MLX90614 (Pre-Soldered) — ⭐ 4.4/5 · Best Plug-and-Play Temp Probe · 1-point · I2C
Buy on Amazon →
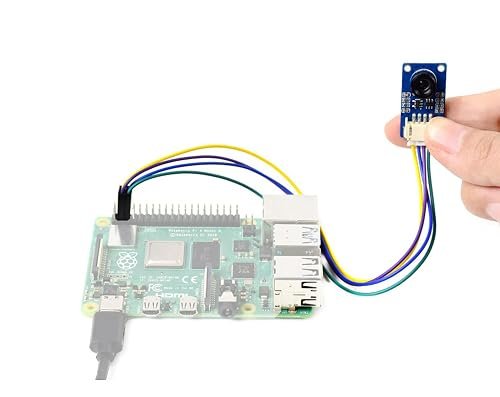
Not every project needs an image — many just need one accurate non-contact temperature. The MLX90614 (≈ $17) reads object temperatures from −70 to +380 °C over I2C/SMBus, and this SHILLEHTEK board arrives with headers pre-soldered plus vendor tutorials for Arduino, Raspberry Pi and ESP32. Perfect for nozzle monitoring on 3D printers, motor and heatsink alarms, and contactless thermometer builds.
✅ Pros: No soldering needed · huge −70 to +380 °C object range · good beginner tutorials
❌ Cons: Single point — no imaging · wide 90° sensing cone averages nearby objects
Verdict: The fastest path from parts drawer to working non-contact thermometer.
#10 HiLetgo GY-906 MLX90614ESF — ⭐ 4.3/5 · Best Ultra-Budget Pick · 1-point · I2C
Buy on Amazon →
The classic GY-906 (≈ $16) that has appeared in thousands of Arduino tutorials, from a long-established seller. Same MLX90614ESF sensor and −70 to +380 °C object range as pick #9 — you just solder the headers yourself. If you’re comfortable with a soldering iron and want the lowest cost of entry into IR temperature sensing, this is it.
✅ Pros: Cheapest verified pick in the guide · proven HiLetgo quality · works with every MCU platform
❌ Cons: Headers unsoldered · no imaging capability
Verdict: Sixteen dollars for reliable non-contact temperature — hard to argue with.
🧭 How to Choose — Match the Module to Your Project
🏠 Room presence & occupancy
People show up clearly even at low resolution. Teyleten AMG8833 on a budget, or Waveshare MLX90640-D110 for zone-level tracking.
🔬 PCB & equipment inspection
You need pixels. Waveshare Thermal HAT (B) at 80×62 is the clear winner; MLX90642-D45 is the compact I2C alternative.
🎯 Distant or small targets
Narrow optics win. XYGStudy MLX90640-D55 concentrates 768 pixels on the target instead of the wall behind it.
⚡ Fast-changing temperatures
Motors, heaters, power stages: the 64 Hz MLX90641 catches spikes that 8–16 Hz sensors smear.
🌡️ One-point temperature alarms
3D-printer nozzles, heatsinks, bearings: a GY-906 MLX90614 does the job for under $17 — pre-soldered (#9) or classic (#10).
🏢 Wide-area monitoring on a Pi
Server rooms, workshops, entrances: TUOPUONE Thermal-90 HAT pairs high resolution with a 90° lens so one camera covers the space.
⚖️ Key Specs Side by Side
| Module | Resolution | FOV | Temp Range | Max Refresh | Platforms | Rating |
|---|
| Waveshare MLX90640-D110 | 32×24 | 110°×75° 🏆 | −40…+300 °C | 32 Hz | Pi, ESP32, STM32, Arduino | ⭐ 4.7 |
| Waveshare Thermal HAT (B) | 80×62 🏆 | 45° | Human/industrial ranges | 25 FPS | Pi, Pico | ⭐ 4.6 |
| XYGStudy MLX90640-D55 | 32×24 | 55°×35° | −40…+300 °C | 32 Hz | Pi, ESP32, STM32, Arduino | ⭐ 4.5 |
| UeeKKoo MLX90641 | 16×12 | 55° | −40…+300 °C | 64 Hz 🏆 | Pi, ESP32, STM32, Arduino | ⭐ 4.4 |
| WatangTech MLX90642-D45 | 32×24 | 45°×35° | −40…+260 °C | Global shutter | Pi, Arduino, STM32 | ⭐ 4.3 |
| TUOPUONE Thermal-90 HAT (B) | 80×62 🏆 | 90° | Human/industrial ranges | 25 FPS class | Pi | ⭐ 4.4 |
| Teyleten AMG8833 | 8×8 | ~60° | 0…+80 °C | 10 FPS | All incl. Arduino Uno | ⭐ 4.3 |
| DORHEA AMG8833 | 8×8 | ~60° | 0…+80 °C | 10 FPS | All incl. Arduino Uno | ⭐ 4.2 |
| SHILLEHTEK MLX90614 | 1 point | 90° cone | −70…+380 °C 🏆 | On demand | All platforms | ⭐ 4.4 |
| HiLetgo MLX90614 | 1 point | 90° cone | −70…+380 °C 🏆 | On demand | All platforms | ⭐ 4.3 |
❓ Frequently Asked Questions
Can an Arduino Uno run an MLX90640?
Not practically. Processing a 768-pixel frame with the Melexis calibration library needs roughly 20 KB of RAM, and the Uno has 2 KB. Use an ESP32, Raspberry Pi, STM32 or another 32-bit MCU for MLX9064x sensors. On an Uno, stick to the AMG8833 (8×8) or the single-point MLX90614.
What resolution do I actually need?
For presence/motion detection, 8×8 is enough. For recognizing heat shapes — a person vs. a pet, one hot IC on a board — you want 32×24. For anything you’d call an inspection image, go 80×62. More pixels always cost more money and more processing.
Thermal array vs. single-point IR sensor — which one?
If you always measure the same known spot (a nozzle, a bearing, a heatsink), a $16 MLX90614 is simpler, cheaper and has a wider temperature range. Arrays earn their price when you need to know where heat is, not just how much.
Can these sensors see through glass or plastic windows?
No. Long-wave infrared (8–14 µm) is blocked by ordinary glass and acrylic, so a thermal sensor behind a window sees the window, not the scene. If you must enclose the sensor, use an IR-transparent window material such as germanium, zinc selenide or a proper LWIR polymer film.
Are these accurate enough for fever screening?
They can flag elevated skin temperature as a screening aid, but at ±1.5–2.5 °C none of these modules meets medical-device accuracy. Treat readings as relative indicators, calibrate against a reference, and never use hobby modules for clinical decisions.
🏁 Final Verdict — Best Pick for Every Budget
Prices checked July 2026 — always confirm the live price on Amazon.
UNDER $20HiLetgo GY-906 MLX90614 — reliable single-point IR sensing for pocket change
Buy →
UNDER $30Teyleten Robot AMG8833 — the cheapest true thermal array, Uno-friendly
Buy →
MID BUDGETUeeKKoo MLX90641 — 64 Hz refresh and industrial temp range around $54
Buy →
🏆 TOP PICKWaveshare MLX90640-D110 — the best all-round thermal module for embedded work (~$69)
Buy →
PREMIUMWaveshare Thermal Camera HAT (B) — 80×62 real thermal imaging on a Raspberry Pi (~$110)
Buy → Once your thermal module arrives, put it to work with our step-by-step guides on microcontrollerslab.com — we cover I2C interfacing, ESP32, Raspberry Pi, STM32 and Arduino tutorials that pair perfectly with every sensor in this list. Got a favorite thermal sensor, or a project where one of these saved the day (or caught a fire before it started)? Tell us in the comments below — we read every one.
As an Amazon Associate, microcontrollerslab.com earns from qualifying purchases made through the links in this article (tag: microlab05-20). This comes at no extra cost to you and helps us keep publishing free embedded-systems tutorials. Product availability and prices verified on Amazon in July 2026 and may have changed.