What is Atmospheric Pressure and BMP 180 Atmospheric Pressure Sensor? BMP 180 atmospheric pressure sensor is a such type of sensor which is mainly used for measuring atmospheric pressure or biometric pressure. If we talk about pressure, then pressure is a force that effect on per unit area .The unit, which is commonly used for pressure is pound per square inch means when one pound force presses one square inch area then this pressure is called one psi. The SI unit of pressure is newton per square meter which is called one pascal (Pa). There are so many situations when we measure the pressure but here we are only interested in atmospheric pressure. Atmospheric pressure is basically the force, whose effect is existed on all the surrounding things. Means, the weight of gases in atmosphere creates the atmospheric pressure.
For measuring the pressure of these gases atmospheric pressure sensor is used. It is a high precision low cost sensing solution and especially designed for consumer applications such as weather forecast, sports devices ,GPS, computer peripherals, indoor navigation, hobby projects and vertical velocity indication etc. It can also be used as an altimeter because pressure is changed with altitude. It is easy to use and easy to solder on printed circuit board(PCB) as well as it has small size and consume less power. If it used as a temperature sensor then it is prefect sensor. It is easily available on market or online shop. A simple BMP 180 atmospheric pressure sensor is shown in figure 1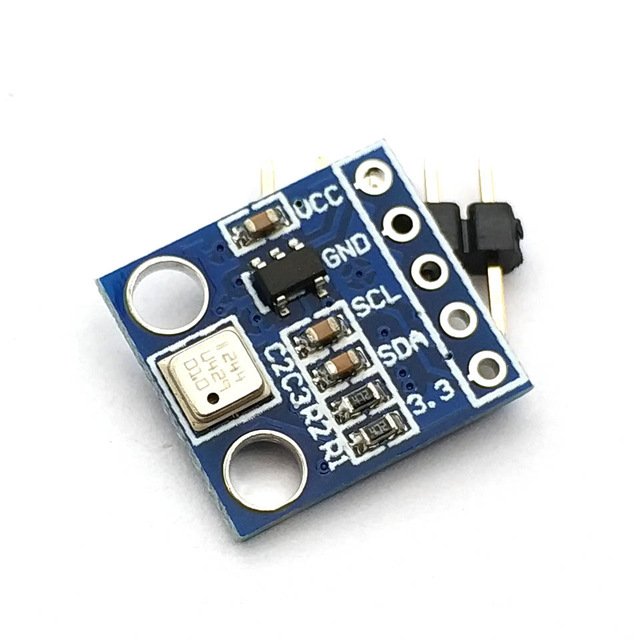
Figure 1 BMP 180 Atmospheric Pressure Sensor
Pin Configuration of BMP 180 Atmospheric Pressure Sensor
Currently BMP 180 atmospheric pressure sensor is available in two modules. First one consists of four pins and second one consists of five pins means with 3.3V additional pin which is not available in four pins module. But the functions of both are almost same. The pin configuration of this BMP 180 atmospheric pressure sensor is shown in figure 2
Figure 2 Pin Configuration of BMP 180 Atmospheric Pressure Sensor
Its pin configuration is shown in table,
| No. of Pins | Configuration |
| VCC | This is power pin and is connected to 3.3V to 5V dc source. |
| SDA | This is serial data pin and is used for serial communication. |
| SCL | This is serial clock pin and is used for clock pulse. |
| 3.3V | This is also power pin and is used when 5V dc is not available. |
| GND | This ground pin and connected to source ground. |
Working Principle of BMP 180 Atmospheric Pressure Sensor
The working principle of this atmospheric pressure sensor is very simple it works on the base of air weight. Because our surrounding air has a certain weight and this weight has specific pressure.SO, this pressure is sensed by BMP 180 atmospheric pressure sensor. Which is actually consists of four basic components, fist one is piezo resistive sensor, second one is analogue to digital converter, third one is control unit with E2PROM and fourth one is 12C serial interface. When the air weight or pressure is changed then the resistance of piezo resistive sensor is changed. Because this change value is an analogue value therefore this value is converted to digital value through analogue to digital converter. Then this value is control through control unit and eventually it is sent towards any type of controller with the help of 12C serial interface.
How to Interface BMP 180 Atmospheric Pressure Sensor with Arduino Board
For measuring atmospheric pressure with the help of this BMP 180 atmospheric pressure sensor a controller is must is required for interfacing purpose. Here we shell tell the user how interface this sensor with Arduino board. For interfacing with Arduino board connections are made according to figure 3
Figure 3 Interfacing Connection of BMP 180 Atmospheric Pressure sensor with Arduino Board
According to figure 3, BMP 180 atmospheric pressure sensor is powered up with Arduino board and for this purpose GND and VCC pins are used. Similarly, for data collection A4 and A5 pins of Arduino board are used. After making connection , a logic program is made up by using Arduino library and it is up load in Arduino board with the help of Arduino IDE software.