In this tutorial, you will learn how interrupt management works with FreeRTOS. In other words, you will learn to manage interrupts with the FreeRTOS kernel. Real-time operating systems, each application consists of several tasks. These tasks can be periodic, aperiodic, and sporadic in nature. But along these some tasks execute only whenever an interrupt occurs. For example, we have an aperiodic task which executes only whenever a user presses a push-button connected with a digital I/O pin of an Arduino. On top of that, we have attached an interrupt to this digital I/O pin. That means whenever a user presses a push-button, Arduino starts to execute an interrupt service routine.
In this tutorial, we will see an example to read and write value to queues using interrupt service routine.
Recommended Components
The following are recommended for following along with these FreeRTOS Arduino tutorials.
| Component | How it’s used in this project | Buy on Amazon |
|---|---|---|
| Arduino Starter Kit (Uno R3) | An Arduino board and parts to build and run the FreeRTOS example tasks. | Check Price |
| 37-in-1 Sensor Modules Kit | Assorted sensor modules handy for the FreeRTOS tasks, queues and semaphore demos. | Check Price |
| Hands-On RTOS with Microcontrollers (Book) | Recommended reference for learning FreeRTOS concepts in depth. | Check Price |
| Hands-On RTOS with Microcontrollers (2nd Edition) | Updated second edition of the FreeRTOS reference book. | Check Price |
As an Amazon Associate we earn from qualifying purchases. Prices and availability are accurate as of the date/time indicated and are subject to change.
Interrupt Management Introduction
While using RTOS, it is very critical to handle interrupt service routines. Because the misuse of interrupts can lead to time constraint issues such as other periodic tasks failing to meet their deadlines.
Note: Interrupts have higher priorities than other Tasks. Therefore, it Interrupts should not wait for a mutex, semaphore, and other resources and should be executed as soon as it occurs. Otherwise, it may cause issues. Defer processing of interrupts through other tasks is a possible countermeasure to minimize the processing time of ISR as soon as possible. In short, the code and execution time of interrupt service routine should be as small as possible.
Prerequisites
If you don’t know how to use queues with FreeRTOS queue management API, you can read these tutorials:
- Create Queue using FreeRTOS API and Arduino
- Passing structures as items to the Queue with Arduino
- FreeRTOS create and use Queue sets using Arduino
Using Interrupt to Read and Write to Queues
FreeRTOS interrupt provides an interrupt safe version of queue API to read and write data from queues using ISR. These are the two API functions:
- xQueueSendToBackFromISR() : It is used to write data to the queue from an interrupt service routine. It works similar to xQueueSendToBack() API with the same function of input argument and a return value. For information about this API, check this link.
- xQueueReceiveFromISR(): It is used to read data from the queue from an interrupt service routine. It works similar to xQueueReceive() API with the same function of input argument and a return value. For information about this API, check this link.
FreeRTOS Interrupt Management Example with Arduino
In this example, we will create a task to print a string on an Arduino Serial monitor. First, it will read a string from a string type queue. An interrupt service routine writes the string to the queue and the print function reads value from that queue and prints it on the serial monitor of Arduino. To generate interrupt, we will use a timer1 of Arduino. Timer1 of Arduino will generate an interrupt on every overflow. That means, the interrupt service routine will execute on overflow of timer1.

If you don’t know about Arduino Interrupts, you can read this tutorial:
Inside the ISR, we define 5 strings and depending on the string number passed to the xQueueSendToBackFromISR() function , this API writes corresponding string to the queue string and string print task display message on Arduino serial monitor accordingly.
Arduino Code
Copy this example code and upload it your Arduino board. First lets check the output of this code and after that we will explain the working of code.
#include <Arduino_FreeRTOS.h>
#include "queue.h"

QueueHandle_t xStringQueue;
int timer1_counter ;

void setup(){

  Serial.begin(9600);
  xTaskCreate(vStringPrinter," String Printer", 100, NULL, 1,NULL);
  xStringQueue  = xQueueCreate(5,sizeof(char *));
  InterruptInit();
}

void vStringPrinter(void *pvParameters)
{
  char *pcString;
  while(1)
  {
    xQueueReceive(xStringQueue,&pcString,portMAX_DELAY);
    Serial.println(pcString);
  }
}

ISR(TIMER1_OVF_vect)
{
  TCNT1 = timer1_counter;
  uint32_t receivedNumber;
  static const char *pcStrings[]=
  {
    "Hello\r\n",
    "Hi\r\n",
    "I\r\n",
    "am\r\n",
    "here\r\n",
  };
  xQueueSendToBackFromISR(xStringQueue,&pcStrings[0],pdFALSE);

}

void loop(){}

void InterruptInit()
{
  noInterrupts();
  TCCR1A =0;
  TCCR1B =0;
  timer1_counter = 34286;
  TCNT1 = timer1_counter;
  TCCR1B |=(1<<CS12);
  TIMSK1 |= (1 << TOIE1);
  interrupts();
}
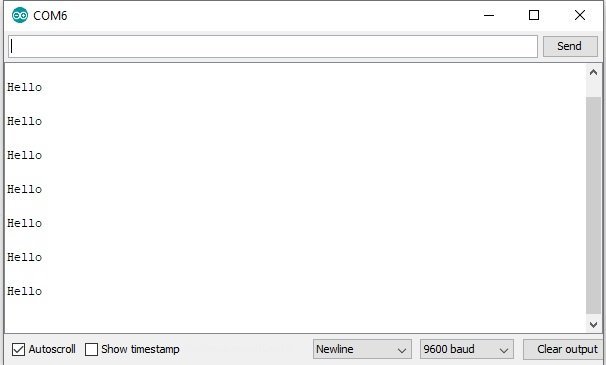
Serial Monitor Output
As you can see from the output of the Arduino serial monitor, it prints “Hello” on every interrupt due to the overflow of timer1. The reason it is displaying “Hello”. Because we wrote string one to the queue.
Great post ,well explained