In this tutorial, you are going to download and install all the core files required to interface ESP8266 with Arduino IDE. If you want to know about ESP8266 modules, development boards, and pinouts, you can find it over here. So you can program ESP modules using Arduino IDE and C++ programming language. You can find many variants of ESP8266 boards in market and you can program all these development board using Arduino IDE. So this ESP8266 installation process in Arduino will help you program any type ESP8266 board like Nodemcu, ESP01 etc.
The Arduino integrated development environment (IDE) itself is a Java program that creates an editor environment for you to write, compile, and upload your Arduino programs. The software is also open source and freely available for download for Windows, Mac OS X, and Linux. The codes written in Arduino IDE are called Sketches. This question must be wondering in your mind why use Arduino IDE to program ESP8266 ? Because there are many open source libraries are available which you can use and develop your IOT project in no time.
Downloading and Installing Java
To install the Arduino IDE, first of all, we have to install Java otherwise it didn’t work perfectly. To download Java visit this website https://www.java.com/en/download/ and download the latest version on your system. The benefit of installing Java is that Arduino IDE works smoothly and sketches compile in second otherwise the software will take the time you start and compile sketches.
When you visit the website click the below mention button to go to the agreement page.
After clicking the Java Download button you will be directed to another page similar to first one Here you have to again click the below mention button through with you agree with the terms and condition of Java and free downloading of software started.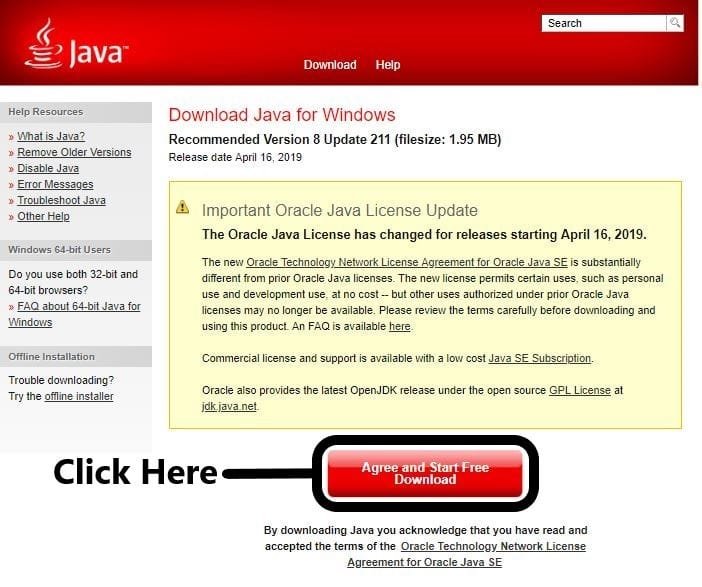
Open the downloaded Java setup and install it on your desired location. If you have done everything right so you will see the following window on your screen. If Java is installed successfully now you are ready to download and install Arduino IDE.
Downloading and Installing Arduino IDE
To download the Arduino IDE visits its official website: https://www.arduino.cc/en/Main/Software
- Always download the latest version of the Arduino IDE. Then select the operating system running on your systems. So you will be directed to another page.


Arduino is an open-source platform so you can download it for free. Click the encircled button to start downloading the zip file.
Open the location where your browser downloaded the zip file. Unzip the folder to your desired location. Then execute the following highlighted application.
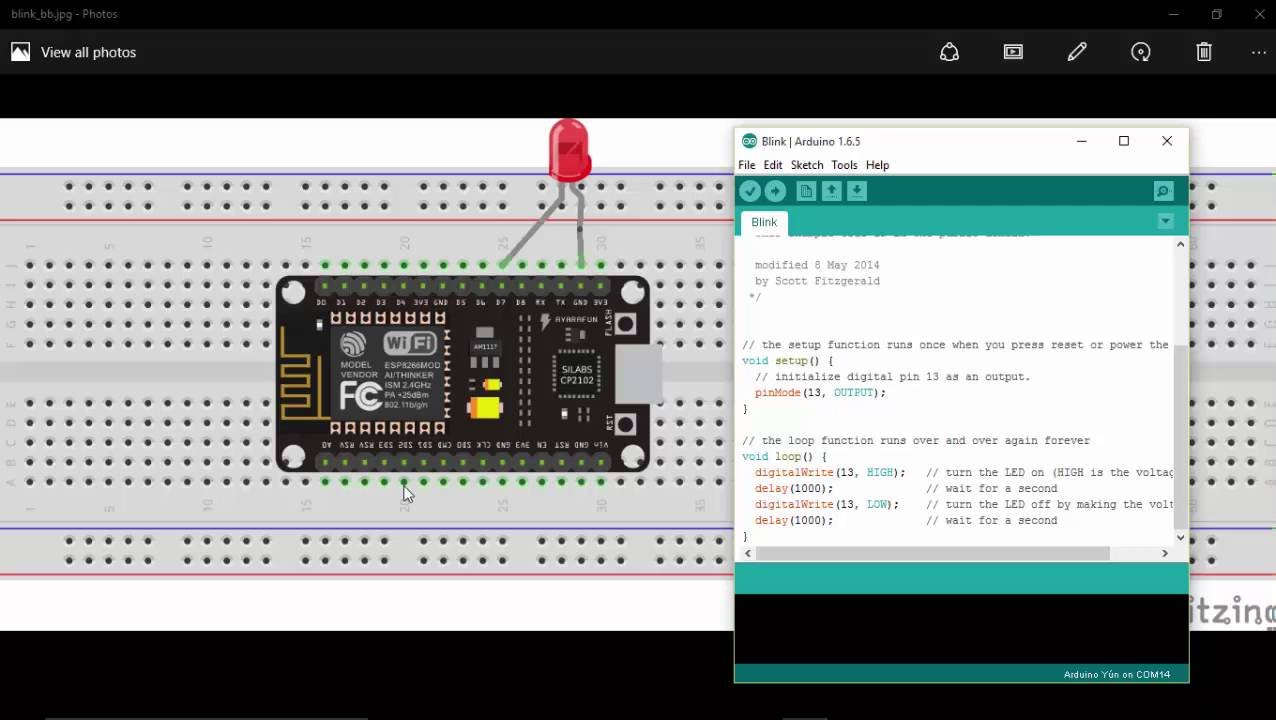
If everything goes with the plan after opening the above application you will see the following window.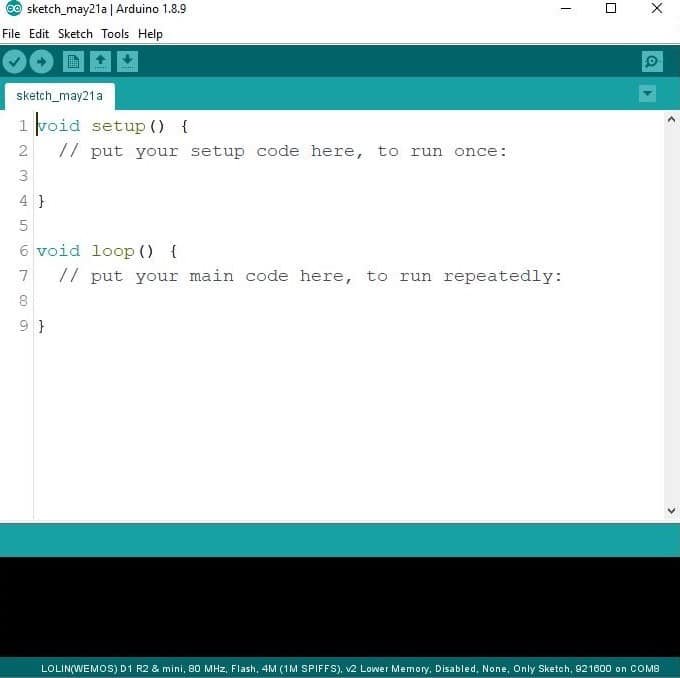
Arduino Web Editor
If you face problem in downloading and installing the Arduino IDE there is an alternative way to interface ESP8266 with Arduino IDE is by using their Arduino Web Editor.
Visit this URL:https://create.arduino.cc to use online Arduino web editor. We can use Arduino web editor from any web browser like Safari, Firefox, Chrome, and Edge. But their officials recommend Google Chrome. The Arduino Web Editor is always up to date will new libraries and facilities and supports new boards because it is hosted online.
Web editor automatically recognized the board connected to the PC. Web editor provide us facility to write and save sketches on the cloud and we can access it from any device. To use the web editor just signing up to Arduino.
Installing the ESP8266 Board
Following the below steps will leads to install ESP8266 development boards in your Arduino IDE.
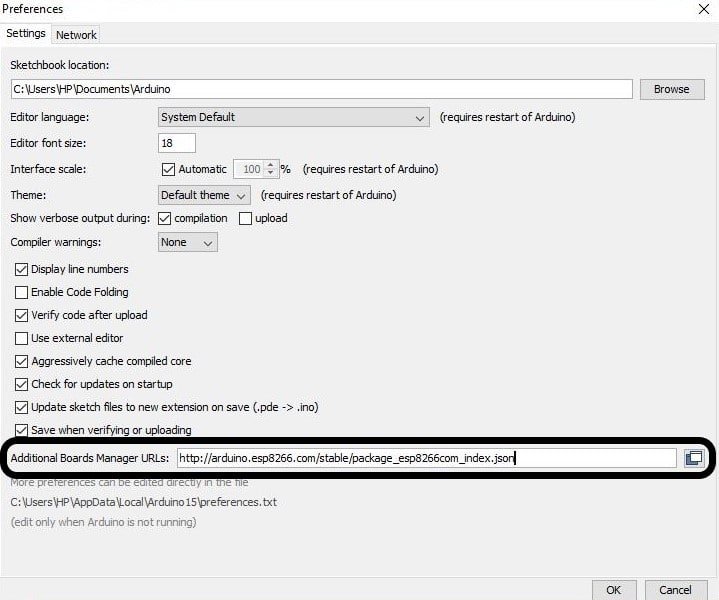
- Go to File a Preferences to open the Preferences window in the Arduino IDE.
- Copy this URL: http://arduino.esp8266.com/stable/package_esp8266com_index.json and paste it into Additional Boards Manager URLs as highlighted below.
- Then go to Tools à Board à Boards Manager.

- Write ESP8266 in the search column and Install the latest version of “esp8266 by ESP8266 Community”

- Now open Arduino Tools Menu
- Select Board à scroll down to ESP8266 Modules

- Close Arduino IDE and reopen Arduino IDE to see that new boards installed successfully.


List of ESP8266 Development Boards available in Arduino IDE
- Generic ESP8266 Module
- Generic ESP8285 Module
- ESPDuino (ESP-13 Module)
- Adafruit Feather HUAZZAH ESP8266
- Invent One
- XinaBox CW01
- ESPresso Lite 1.0
- ESPresso Lite2.0
- Phoenix 1.0
- Phoenix 2.0
- NodeMCU 0.9(ESP-12 Module)
- NodeMCU 1.0(ESP-12E Module)
- Olimex MOD-WIFI-ESP8266(-DEV)
- SparkFun ESP8266 Thing
- SparkFun ESP8266 Thing Dev
- SweetPea ESP-210
- LOLIN(WEMOS) D1 R2 &mini
- LOLIN(WEMOS) D1 mini Pro
- LOLIN(WEMOS) D1 mini Lite
- WeMos D1 R1
- ESPino (ESP-12 Module)
- ThaiEasyElec’s ESPino
- WifInfo
- Arduino
- 4D Systems gen4 loD Range
- Digistump Oak
- Wifiduino
- Amperka Wifi Slot
- Seeed Wio Link
- ESPectro Core
ESP8266 Boards Configuration in Arduino IDE
The following board and programming configuration always worked perfectly.
Select ==> Tools ==> Board: ==> “Generic ESP8266 Module”
Select ==> Tools ==> Upload Speed: ==> “115200”
Select à Tools ==> CPU Frequency: ==> “80 MHz”
Select ==> Tools ==> Flash Size: ==> 4M (no SPIFFS)
Select ==> Tools ==> Debug port: ==> “Disabled”
Select ==> Tools ==> Debug Level: ==> “None”
Select ==> Tools ==> IwIP Variant: ==> “v2 Lower Memory”
Select ==> Tools ==> Tables: ==> “Flash”
Select ==> Tools ==> Exceptions: ==> “Disabled”
Select ==> Tools ==> Erase Flash: ==> “Only Sketch”
Select ==> Tools ==> SSL Support: ==> “All SSL ciphers (most compatible)”
I have tried everything listed here , and everything that I have found on the Internet and I still cannot load the ESP8266 boards to the Arduino v1.8.10 version.
I have been working on this problem for a week, Can you help me. Arduino Forum is not responding to my request.
Which version of Arduino IDE, you are using?
Arduino v1.8.10
Win 10 prof
USB DRIVER IN DEVICE MNGR SHOWS CH340
I have a different issue. the Arduino IDE won’t let me select an port when I mouse to Tools>port. I am thinking I must need some driver installed CH340 usb. In the past when I set up the system Linux had CH340 installed by default. But now I am unsure what to do
CH430 USB has issues with windows. You can unplug or plug it again. Sometimes even you have to restart the computer. we recommend you to replace your USB with good quality CH340 USB.