In this tutorial, we will focus on timers in ESP32 and ESP8266 and learn to configure Timers using MicroPython.
Timers Introduction
Previously we learned how to blink an LED using delays infinitely but this time we will be performing this function using timers instead. Timers are more efficient than using the sleep function because they are not blocking functions as opposed to the latter. A blocking function stops the program from performing any task until the previous one is completed.
For example, the sleep() function, when we call sleep(2), our program stops at this line for 2 seconds, and thus it acts as a blocking function. This is not the case for Timers. To perform multiple tasks at once we prefer to use timers and should avoid using delays because they slow down the process.
Perquisites
Before we start this lesson make sure you are familiar with and have the latest version of Micro-python firmware installed in your ESP boards and have a running Integrated Development Environment (IDE) in which we will be doing the programming. We will be using the same uPyCraft IDE as we have done previously when we learned how to blink and chase LEDs in micro-python.
- Getting Started with MicroPython on ESP32 and ESP8266
- ESP32 and ESP8266 GPIO Programming with MicroPython – LED Blinking Example
If you are using Thonny IDE, you can check this getting started guide:
Timer Interrupt in ESP32/ESP8266
Now first let’s see the number of hardware Timer modules are supported by both ESP32 and ESP8266 boards and their API support in MicroPython.
Timers in ESP8266
ESP8266 has two timers: Timer0 and Timer1. We must use Timer1 as the Timer0 is used by the WiFi. But one important point to note here is that at the time of writing this article, MicroPython Timer class from machine module does not support Timers of ESP8266. But it provides API for virtual timers (RTOS bases). We can use the machine.Timer class with timer ID of -1 to use virtual timers.
from machine import Timer
tim = Timer(-1)
tim.init(period=5000, mode=Timer.ONE_SHOT, callback=lambda t:print(1))
ESP32 Timers
ESP32 had a total of 4 hardware timers(Timer0, Timer1, Timer2, Timer3) which are all 64 bit based on 16-bit pre-scalers. The timing of these timers depends upon the clock and varies from one board to the other. MicroPython Timer API supports allf four hardware timers. We can use the machine. Timer class with timer ID of 0 to 3. On top of that MicroPython machine class also supports virtual timer for ESP32.
Where to use Timers?
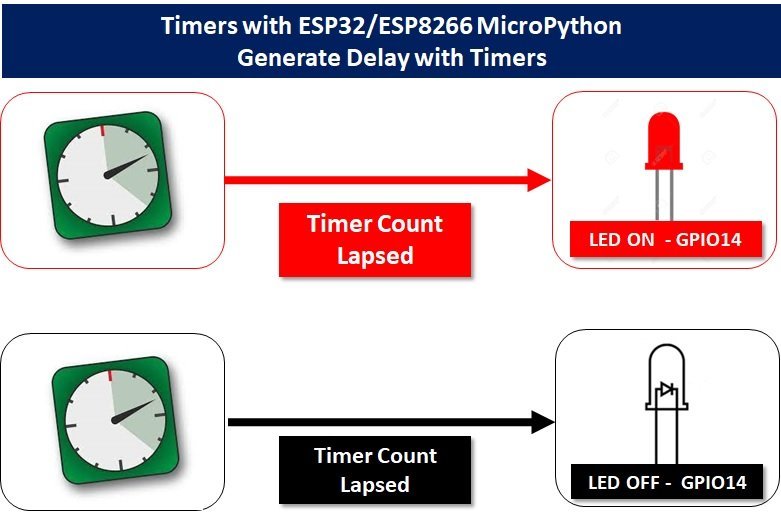
Timers available in ESP boards can also be used to perform a certain task periodically after a certain amount of time. For example, we can use a timer interrupt to toggle the LED after every one second. Like, interrupt handler routines, when a timer interrupts occurs, it stops the sequential execution of the program and performs a task that is attached to a respective time interrupt. After completing the interrupt service routine, the program returns to the next instruction from where it left off.
How to use ESP32 and ESP8266 Timers in MicroPython?
Firstly, we have to import the machine module and from that module, we have to import the Timer class:
from machine import TimerAfter that create an instance of a timer class with an object name. We can give any descriptive name to the timer class object such as “timer”. The input argument to the timer () method is the ID of the timer which we want to use. For example, if we want to use virtual timer, the ID will be -1. Similarly, if you want to use any other timer module of ESP32, you can pass it number as an ID such as 0, 1, 2 and 3. One important point to note here is that the MicroPython current implementation for ESP8266 only supports virtual timer and does not supports its internal hardware timers.
MicroPython Initialize Timers
The timer is then initialized in the following way. The Timer() function has three arguments namely:
- Period: The first argument is that of the period of the interrupt signal in milliseconds. This is the total time until the callback is called.
- Mode: The second argument is the mode of the signal. We can choose between two mode types: ‘Timer.PERIODIC’ or ‘Timer.ONE_SHOT.’ This means whether we want to configure our Timer as periodic or in one shot. In a periodic timer, the callback is called after every period continuously and in a one-shot timer, it is not continuous but only runs once after one period is up. In this lesson, we will be using the timer in periodic mode.
- Callback: The third argument is the callback which is executed whenever a timer is triggered. When we will use the timer in periodic mode, the callback function will be called after every period which we will specify.
Initializing Timer Interrupt in ESP32/ESP8266
We have set the period as 5000ms which means 5 seconds. The mode chosen is periodic and the callback function is the print command so this timer will print ‘Welcome to Microcontrollerslab’ after every 5 seconds.
timer = Timer(period=5000, mode=Timer.PERIODIC, callback=lambda t:print("Welcome to Microcontrollerslab"))ESP32/ESP8266 Create Delay using Timers
Previously we had to use an infinite loop to delay the led or check for a button press. Through a timer, the same result will be achieved while also freeing room for other processes to run. Now we will see a demonstration of how to blink a Led using timer interrupt.
You will need the following components:
- ESP32/ESP8266 board
- One 5 mm LED
- One 220 ohm resistor
- Connecting Wires
- Breadboard
We will connect all the components as we did before in our blinking-led tutorial. Below is a connection diagram for both boards.
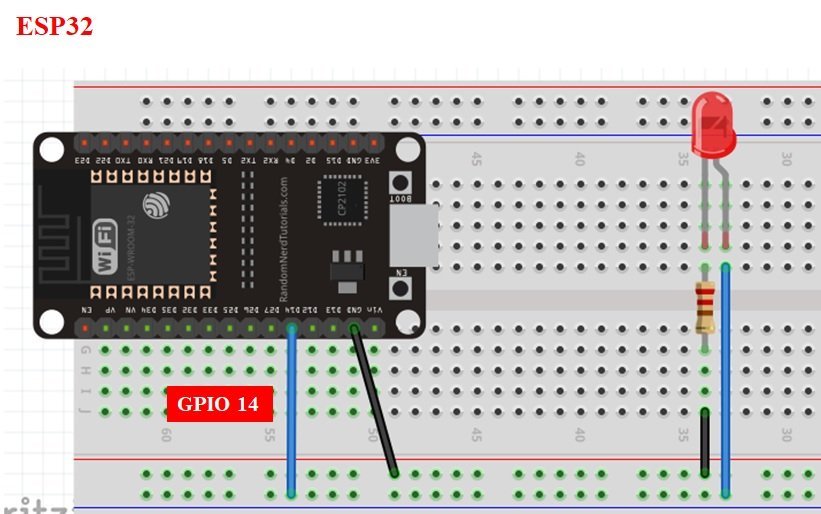

An LED is connected between GPIO14 and ground with a resistor. As seen above we have chosen GPIO14 as output for both the ESP boards although any suitable output GPIO pin can be connected. It is your own choice.
Timers Delay MicroPython Script
from machine import Pin, Timer        #importing pin, and timer class
led= Pin(14, Pin.OUT)              # GPIO14 as led output

led.value(0)              #LED is off
timer=Timer(-1)

timer.init(period=1000, mode=Timer.PERIODIC, callback=lambda t:led.value(not led.value()))   #initializing the timer
Copy and Save the following code in your main.py to your ESP board.

You should observe the LED blinking once per second continuously. Using a timer frees processing time because you do not have to run the endless loop.

Demo Video
How Code Works?
To use the Timer class we will import it from the machine module. As we want to use the pin class to configure our led as an output we will import it as well.
from machine import Pin, Timer #importing pin, and timer classNext, we initialize the ‘led’ as an output on GPIO14 and set its value to zero meaning it is OFF.
led= Pin(14, Pin.OUT)              #GPIO14 as led output
led.value(0)              #LED is off
Then we create a timer object and set its id to -1. This indicates that it is a virtual timer.
timer=Timer(-1) #create an instance of Timer methodThe next line initializes the timer’s 3 parameters:
timer.init(period=1000, mode=Timer.PERIODIC, callback=lambda t:led.value(not led.value()))The first parameter is the period which the time the timer takes in executing the call back function. This is set to 1000ms.
period=1000The second parameter is set to ‘Periodic’ which means the timer will execute the callback continuously once every period.
mode=Timer.PERIODICThe third parameter callback is set to a function that will run after every period. In this case, we set it to a lambda function that toggles the led.
led.value(not led.value()) //function which is toggling the ledIn this tutorial, we saw how timers work in ESP32 and ESP8266 boards using a microPython script by simply blinking an LED light.
You may like to read: