This tutorial explains how to download and install Keil uVision IDE for programming ARM Cortex-M microcontrollers (such as the TM4C123 Tiva LaunchPad) and 8051-family microcontrollers. We will start with a brief introduction to Keil µVision and what makes it the most popular IDE for ARM development. We will then walk through the complete download and installation procedure step by step. This is the second tutorial in our Tiva LaunchPad series — the first one introduced the TM4C123 Tiva C Series LaunchPad hardware.
Recommended Components
The following components are used in this project or are helpful for getting started with TM4C123 Tiva C LaunchPad development.
| Component | How it’s used in this project | Buy on Amazon |
|---|---|---|
| TM4C123G Tiva C LaunchPad | The board you will program with the Keil IDE you install here | Check Price |
| Micro USB Cable | Connects the LaunchPad to your PC for flashing and debugging | Check Price |
As an Amazon Associate we earn from qualifying purchases. Prices and availability are accurate as of the date/time indicated and are subject to change.
What You Will Learn
- What Keil uVision IDE is and why it is the standard tool for ARM Cortex-M development
- The difference between MDK-ARM (for ARM Cortex-M) and C51 (for 8051-family microcontrollers)
- Where to download Keil uVision from the official ARM/Keil website
- How to fill out the MDK-ARM registration form
- How to install Keil uVision step by step on Windows
- What the Pack Installer is and what it does after installation
Introduction to Keil µVision
Keil µVision is a powerful integrated development environment (IDE) that combines a real-time environment, a code build system, source code editor, and code debugger into a single workspace. It is designed to accelerate embedded software development and is widely used in industry, academia, and the hobbyist community for programming ARM Cortex-M and 8051 microcontrollers. The IDE supports flexible window layouts, multiple monitors, and integrates tightly with ARM’s compiler toolchain to produce highly optimized code.
Keil ships in two main editions, and you should pick the one that matches your target microcontroller:
- MDK-ARM (Microcontroller Development Kit for ARM) — for ARM Cortex-M based microcontrollers. This is what you need for the TM4C123 Tiva LaunchPad, STM32, NXP LPC, Nordic nRF, Silicon Labs EFR32, and any other Cortex-M0/M3/M4/M7 part.
- C51 / Keil 8051 Tools — for classic 8051-family microcontrollers (AT89S52, P89V51RD2, etc.).
Since this tutorial series targets the TM4C123 ARM Cortex-M4F microcontroller, we will download MDK-ARM. The download and install steps for C51 are very similar — only the product page and setup file differ.
You can download the latest version of Keil from the official ARM/Keil website. Click the link below in your browser to begin.
How to Download Keil uVision
Keil download source: https://www.keil.com. This will open the official ARM Keil website as shown in the figure below:

From the menu list at the top of this web page, select Download as shown in the figure below:

When you click on this section, a webpage with the available download categories will appear, as shown in the figure below:

The two main categories on this page are Product Downloads and File Downloads. Product Downloads provides the actual Keil IDE setup files; File Downloads provides example projects and code samples that you can run inside Keil after installation.
We need to install the IDE first before we can use any sample code, so the category we select here is Product Downloads, as shown below:

When you click on this category, the following webpage will appear, listing the available development kit setups:
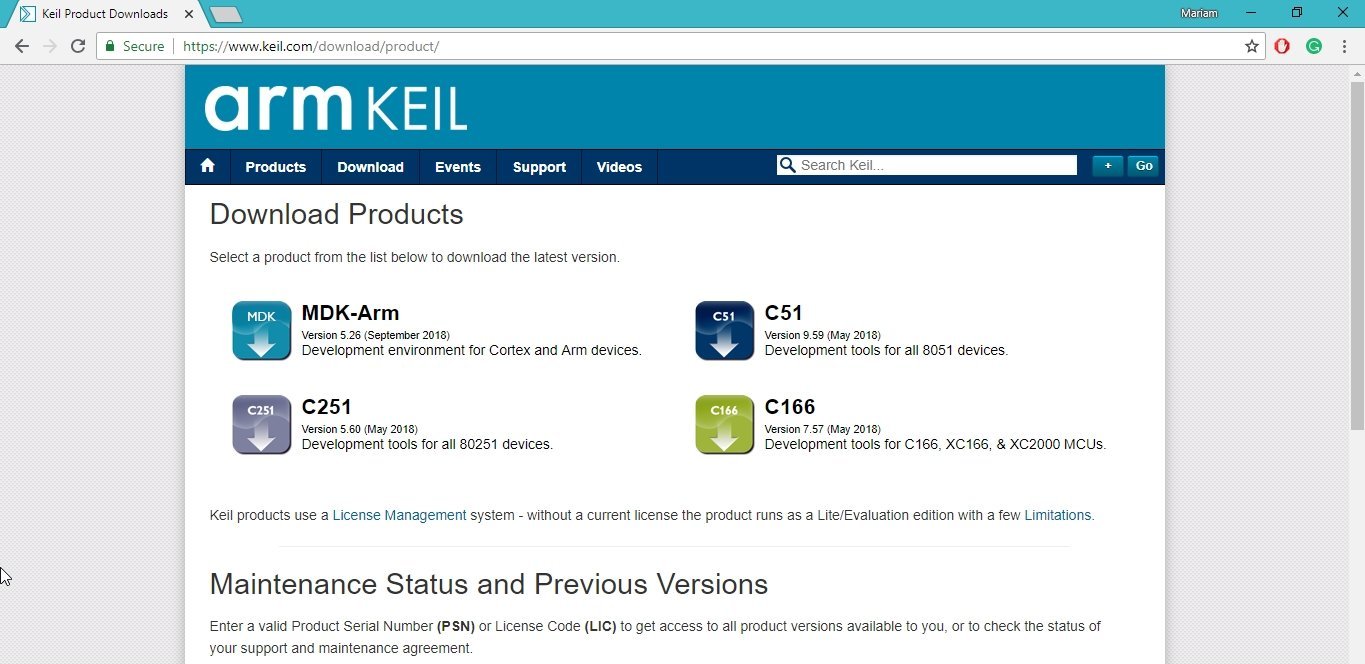
Since we are programming the TM4C123G — a Cortex-M4F ARM device — we need the development environment for ARM Cortex devices, which is MDK-ARM.
This will display a registration form asking for your personal and organization information. ARM uses this only to track who is using the product. The form is shown in the figure below:

Figure 6: MDK-ARM registration form
Fill out the form shown above with your name, organization, and email, then press Submit. This takes you to a download page that lists the MDK-ARM features and provides the setup file link, as shown in the figure below:

- The mdk526.exe file shown in the figure above is the Keil µVision version 5.26 setup file (the latest version at the time this tutorial was originally written).
- Click on the
.EXEfilename at the bottom of the page, as shown in the figure below — this is the Keil setup installer.

- After you click the file, your browser will ask you where to save the setup
.exefile. Choose a folder where you want to save the installer and confirm, as shown in the figure below.

The setup file is around 900 MB in size, so the download will take some time depending on your internet connection. Wait for the download to complete before proceeding to the installation step.
After the download finishes, the file will be in the folder you selected during download, as shown below:

How to Install Keil uVision
The downloaded folder contains all the drivers needed to run Keil along with a PDF datasheet for the TM4C123G microcontroller, as shown in the figure below:

The datasheet contains complete information about the microcontroller — its onboard pins, peripheral libraries, alternate function mappings, and the addresses of every register. It is the definitive technical reference and worth keeping handy as you work through later tutorials.
Now open the inner folder inside the downloaded folder. It contains the actual setup file that needs to be run.
Both folders share the same name because the outer folder only holds the drivers and datasheet, while the main MDK setup is in the second nested folder. Inside the nested folder, you will see the files shown in the figure below:

This folder includes the necessary drivers and libraries needed to run code in the Keil IDE. These supporting folders are required for a successful installation, and the installer will pull from them automatically — just keep them in the same parent folder as the setup file. From the folder, select the setup file as shown below:

Double-click the setup file. The installer will start preparing the necessary files automatically. Windows will first ask for administrator permission to make changes to your system.
Click Yes, and the setup will display the welcome screen shown below:

- This welcome screen lists the features of the Keil version you are about to install and the products that will be installed alongside it.
- Click Next — there is nothing else to configure on this screen. The next screen, the License Agreement, is shown below:
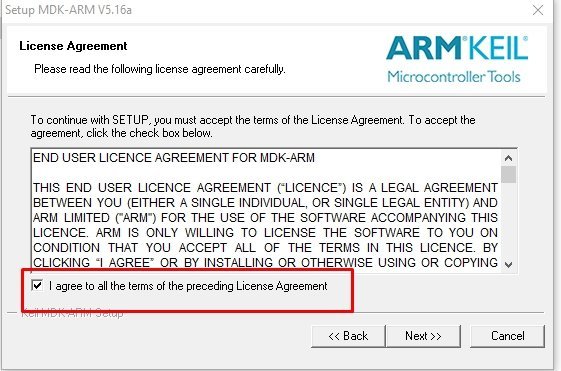
This is the license agreement page. You agree to the terms and conditions required by ARM/Keil to use any version of their tooling.
Tick the highlighted checkbox shown above and click Next to continue. The next window asks you to choose an installation folder, as shown below:

- This window asks you to select the folder where Keil files, drivers, and libraries will be installed. Click Browse to pick a folder if you want to change the default, then click Next. The next window, customer information, is shown below:

In this window, the installer asks for some basic personal information about the user who will be running Keil.
This information has nothing to do with the actual installation — it is only kept by ARM/Keil for product analytics, so they know how many people are using their tools and which companies or institutions they are using them at.
Enter your first and last name (the PC owner’s name is recommended, or whoever will use the IDE), the name of your company or institution, and your email address. Then click Next. The next screen — installation status — is shown below:
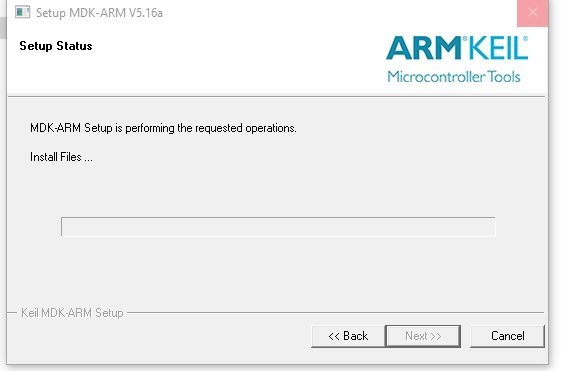
This is where the installation progress is displayed. Setup will take several minutes. You can minimize the window and let the installer copy files in the background.
The installer will automatically extract all required files. Once the file extraction completes, the setup will request permission to install device drivers, as shown below:

- This is where you give consent for the device drivers (USB-to-debug interface, ULINK, J-Link bridge drivers) to be installed. Click Install.
- After the installation finishes, the setup window will display a Finish screen as shown below:

- If you finish the installation with the “Show Release Notes” checkbox ticked, the installer will open your browser and show you the latest release notes for the Microcontroller Development Kit (MDK), as shown below:

Figure 21: Release notes
- If you uncheck the box before finishing the installation, the release notes page will not be shown automatically — but you can always view them later by opening the local file:
file:///C:/Keil_v5/ARM/HLP/Release_Notes.htm - After installation finishes, the Pack Installer opens automatically. The Pack Installer is what manages the device support packs (DFPs) for the various microcontroller families you can target with Keil. It is shown below:

Since we just installed the latest version of Keil, all the bundled device packs will already be up to date. The Pack Installer is where you can later add support for additional microcontroller families (e.g. Texas Instruments TM4C, STM32, NXP LPC) if they are not already installed. For TM4C123 development, make sure the Texas Instruments TM4C_DFP pack is installed and shows a green checkmark.
Once the Pack Installer finishes, your Keil µVision installation is complete and ready to use. Follow the next tutorial in this series to write your first program with Keil uVision for the Tiva LaunchPad:
Frequently Asked Questions
Is Keil uVision free to use?
Keil µVision IDE is free for evaluation, but the ARM Compiler that ships with MDK-ARM has a 32 KB code-size limit in the free version. For most beginner tutorials and small projects (including blinky, GPIO, ADC, and basic UART projects on the TM4C123) the 32 KB limit is plenty. Larger projects require a commercial MDK-Plus or MDK-Professional license.
What is the difference between MDK-ARM and Keil C51?
MDK-ARM is for ARM Cortex-M based microcontrollers (TM4C123, STM32, nRF52, LPC, EFR32, etc.). Keil C51 is for the classic 8051 microcontroller family (AT89S52, P89V51RD2, AT89C51, etc.). They share the same uVision IDE shell but use different compilers and target completely different architectures. You install whichever matches the chip you intend to program.
What are the system requirements for installing Keil uVision?
Keil µVision runs on Windows (Windows 10 and 11 are officially supported, older versions like Windows 7/8 may also work). You need approximately 2–3 GB of free disk space for a typical install with one device pack, more if you plan to install multiple device families. 4 GB of RAM is the practical minimum; 8 GB or more is recommended for larger projects with debugging. Keil does not run natively on macOS or Linux — for those operating systems, use Code Composer Studio instead, or run Keil inside a Windows virtual machine.
Do I need to install separate drivers for the TM4C123 LaunchPad?
Yes. After installing Keil, you also need to install the Stellaris ICDI (In-Circuit Debug Interface) drivers from Texas Instruments so Windows recognizes the LaunchPad’s onboard debugger. These drivers are not bundled with the Keil installer. Download them from the TI website and install before connecting the LaunchPad for the first time.
Why does the Keil installer ask for personal information?
ARM/Keil collects basic name, organization, and email information for product analytics — to track who is using their tools and in what industries. This information is only used internally and is not shared with third parties. It is not validated and does not affect the installation. The free version of MDK-ARM does not require a license key.
What is the Pack Installer in Keil?
The Pack Installer is the tool inside Keil µVision that manages Device Family Packs (DFPs) — the per-vendor packages that contain the headers, startup files, flash algorithms, and example projects for a specific microcontroller family. To program a TM4C123, you need the Texas Instruments TM4C_DFP pack installed. The Pack Installer can also be opened later from inside Keil’s main window via Project → Manage → Pack Installer.
Conclusion
You now have Keil uVision (MDK-ARM) installed and ready to develop firmware for ARM Cortex-M microcontrollers, including the TM4C123 Tiva LaunchPad that this tutorial series is built around. The next step is to launch Keil, create your first project, and write a simple LED blink program — that’s covered in detail in the next tutorial. Once you understand the project setup workflow in Keil, the same steps apply to every TM4C123 tutorial in this series.
best software
So far, so good,
now we see the rest