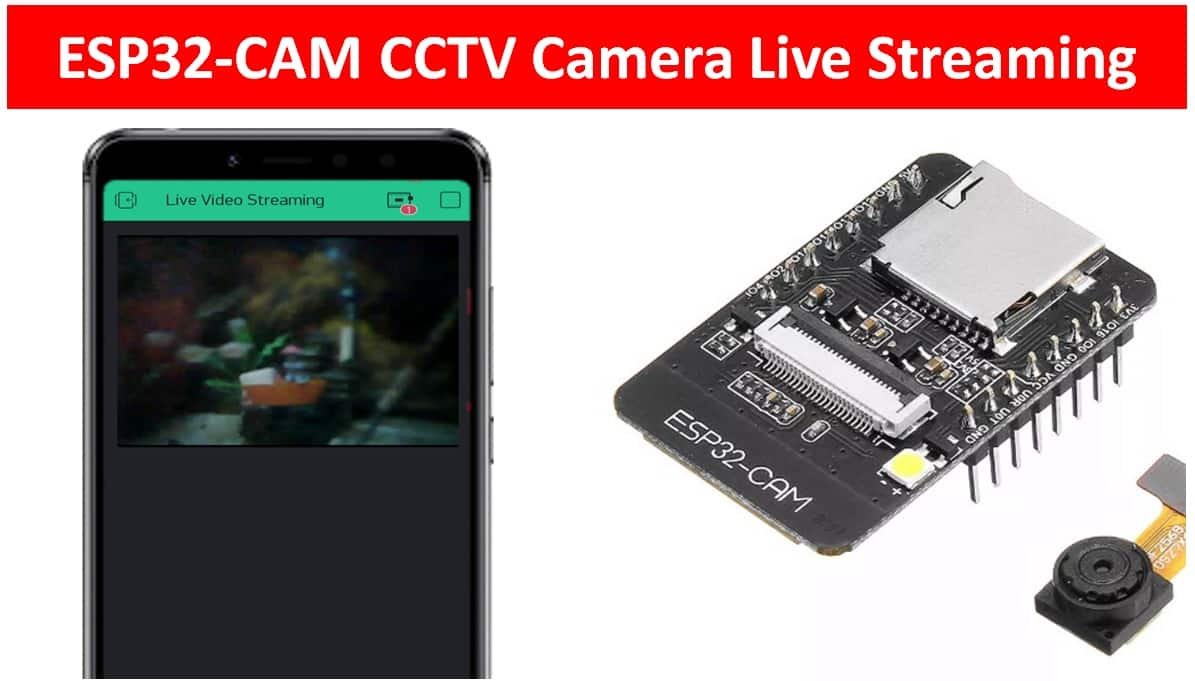
In this ESP32-CAM project, we will create an IoT CCTV live streaming camera using ESP32-CAM and Blynk application. It will enable us you monitor live streaming and surroundings where the ESP32-CAM is fitted using our android phone with the Blynk Application installed from anywhere.
Blynk is a free-to-use app where the user can build software to control microcontrollers such as Raspberry Pi, Arduino, ESP8266 NodeMCU, etc. For the user, it becomes extremely interactive and easy to use this application to build IoT projects from anywhere over the internet. Only the Blynk application and a steady internet connection in your device (smartphone, laptop, tablet, etc.) are a requirement.
You can also read this getting started guide on ESP32 CAM:
- ESP32 CAM Video Streaming and Face Recognition with Arduino IDE
- ESP32-CAM AI-Thinker Board – All about GPIO Pins
Recommended Components
The following components are used in this project or are helpful for building it with the ESP32.
| Component | How it’s used in this project | Buy on Amazon |
|---|---|---|
| ESP32 Development Board | Used to flash and prototype before deploying to the ESP32-CAM module. | Check Price |
| Micro USB Cable | Programs the ESP32 and powers it during testing. | Check Price |
| Breadboard | Holds the wiring between the programmer and the camera board. | Check Price |
| Jumper Wires | Connect the FTDI programmer to the ESP32-CAM for uploading code. | Check Price |
| ESP32-CAM board | Streams the live video to the Blynk app over Wi-Fi. | Check Price |
| FTDI / USB-TTL programmer | USB-to-TTL adapter required to program the ESP32-CAM, which has no USB port. | Check Price |
As an Amazon Associate we earn from qualifying purchases. Prices and availability are accurate as of the date/time indicated and are subject to change.
Connecting ESP32-CAM with FTDI programmer
We will require the following components for this project:
- ESP32-CAM development board
- FTDI Programmer/ USB Serial to TTL Converter
- Connecting Wires
- External 5V power supply (optional)
Unlike the ESP32 development board, the ESP32-CAM does not come with the USB port attached to it. So to upload a program sketch to the ESP32-CAM, we will need to use an FTDI programmer (USB to TTL Serial converter).
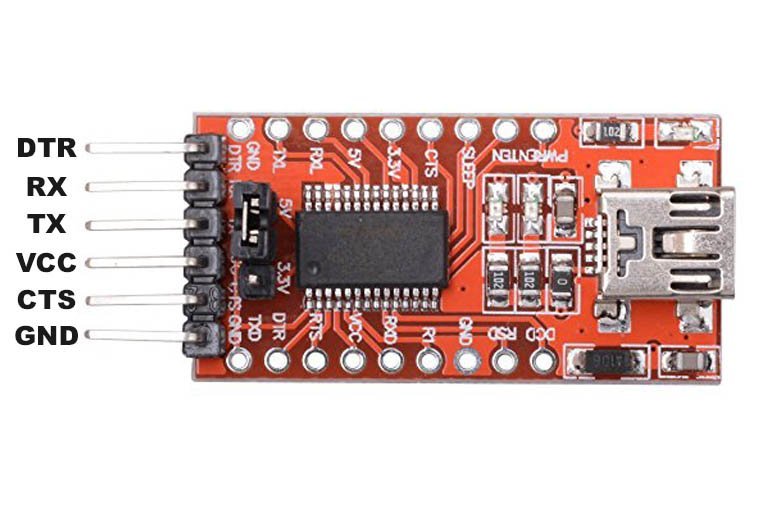
You can learn more about this FTDI cable here:
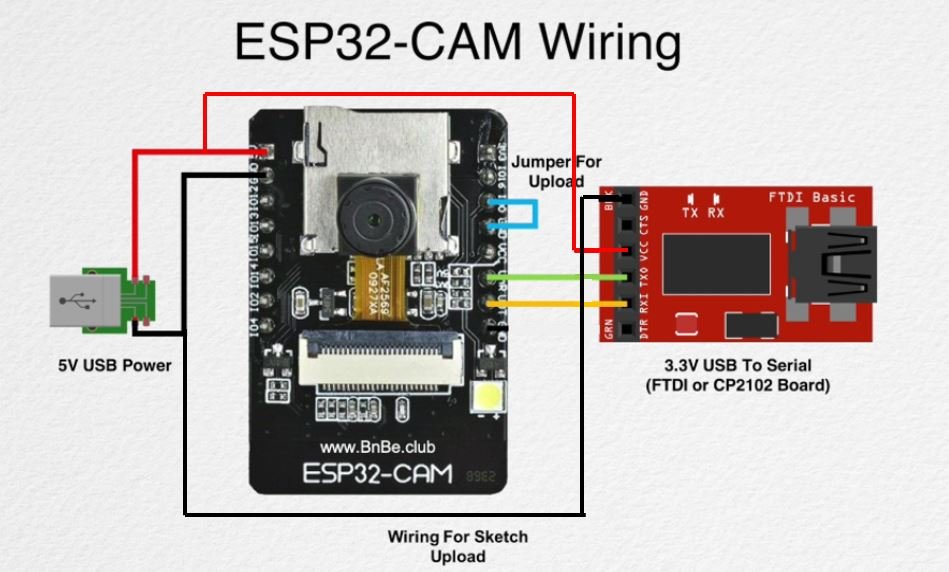
The table shows the connections between the ESP32-CAM and FTDI programmer:
| ESP32-CAM | FTDI Programmer |
| 5V | VCC |
| UOR (GPIO3) | TX |
| UOT (GPIO1) | RX |
| GND | GND |
Connect the 5V pin of ESP32-CAM with the VCC pin of the FTDI programmer to power up. Both grounds of the two devices will be connected in common. The TX pin of the FTDI programmer will be connected with UOR (GPIO3) of ESP32-CAM. Likewise, the RX pin will be connected with the UOT (GPIO1) of the ESP32-CAM module.
Additionally, you will need to connect GPIO0 with GND to enable the ESP32-CAM module to go in flashing mode. Remove this connection after uploading the program sketch to the module.
On some ESP32-CAM boards, you will get a brown-out detector error which is due to the insufficient voltage provided by the FTDI cable. In that case, you should connect an external 5V power supply to ESP32 as shown below:
Setting up Arduino IDE for ESP32-CAM CCTV Camera
We will use Arduino IDE to program our ESP32 development board. Thus, you should have the latest version of Arduino IDE. Additionally, you also need to install the ESP32 plugin. You can visit the link shown below to have a look.
CCTV Camera ESP32 CAM Arduino Sketch
We will use the source code available on GitHub to create the live streaming video web server. Go to this link. The following web page will open up. Go to Code > Download Zip and download the zip file.

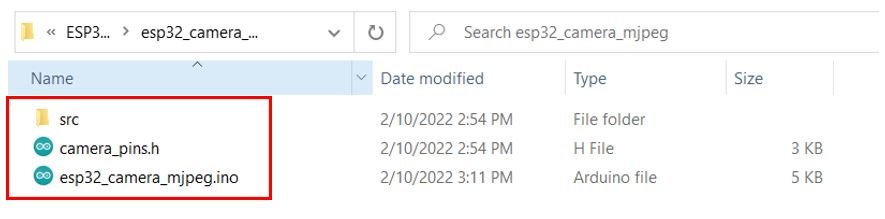
After the download is complete, extract all the files in the folder. These are all the files that should be present after extraction.

We will need the esp32_camera_mjpeg folder for this project. Click to open its contents. It consists of these two Arduino files and a src folder. Open esp32_camera_mjpeg.ino
The .ino file will open in Arduino IDE. We will use this Arduino code to program our ESP32-CAM for the MJPEG streaming server.
Programming ESP32-CAM
However, we have to modify a few lines of code.
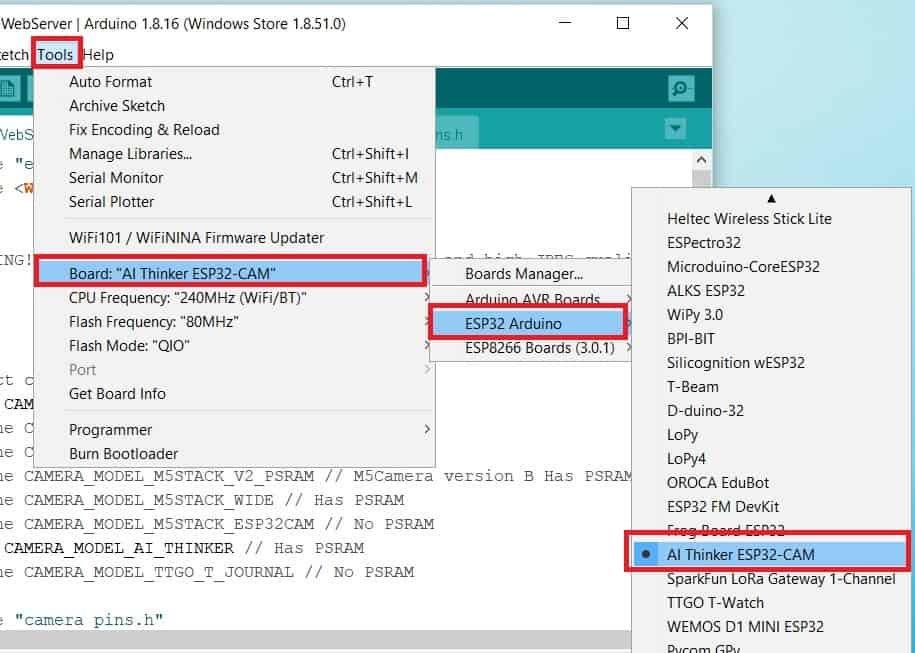
First head over to the definitions of the ESP32-CAM board. We are using Al Thinker ESP32-CAM so uncomment CAMERA_MODEL_AI_THINKER and comment CAMERA_MODEL_ESP_EYE which was set as default.
// Select camera model
//#define CAMERA_MODEL_WROVER_KIT
//#define CAMERA_MODEL_ESP_EYE
//#define CAMERA_MODEL_M5STACK_PSRAM
//#define CAMERA_MODEL_M5STACK_WIDE
#define CAMERA_MODEL_AI_THINKER
Next specify the SSID and password of your WiFi in the following variables. This will help us connect with the web server.
#define SSID1 "WRITE_YOUR_SSID"
#define PWD1 "WRITE_YOUR_PASSWORD"
Now, we are ready to compile and upload the code to our ESP32-CAM. Make sure the FTDI programmer is properly connected with the module and GPIO0 is grounded as well.
Choose the correct board and COM port before uploading your code to the ESP32-CAM board. Go to Tools > Board and select ESP32 AI Thinker.
Next, go to Tools > Port and select the appropriate port through which your board is connected.
Click on the upload button to upload the code into the ESP32-CAM board.
If you view Connecting….._____….._____….. in the error window, press the RESET button present on the ESP32-CAM as shown below:

After you have successfully uploaded your code to the board, remove the connecting wire from GPIO0 and GND.
Now open the serial monitor and press the RESET button on the ESP32-CAM.
You will be able to view the following messages including the IP address and the address we use to access the MPJEG streaming server. It is highlighted below:
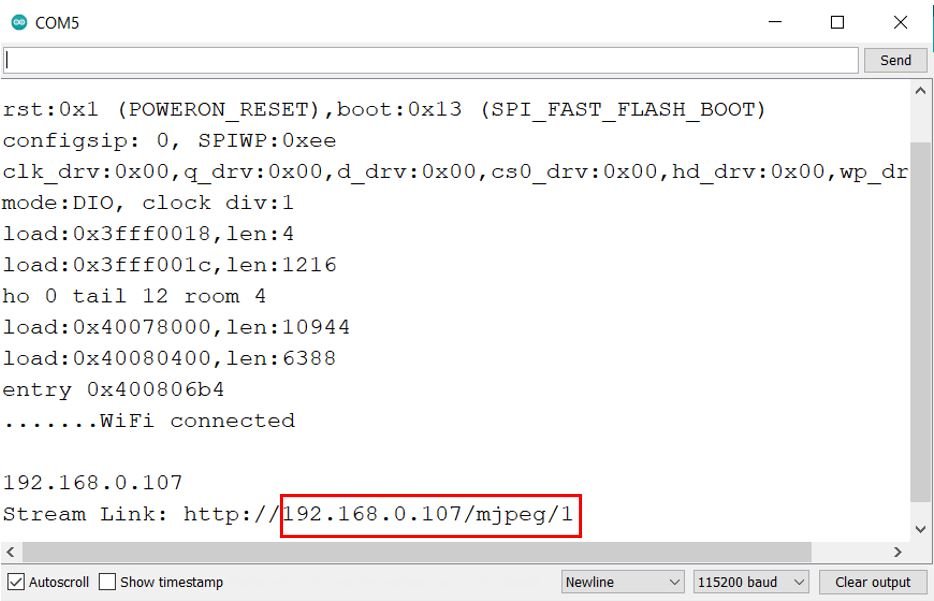
In a computer connected with the same WiFi connection as the ESP32-CAM, open a new web browser. Type this address: IP address/mjpeg/1 and press enter. The ESP32-CAM live streaming web server will open up.
Here we have set the ESP32-CAM near our fish aquarium and will monitor it through live video streaming.

Live Video Streaming (CCTV Camera) Set up on Blynk Application
Now let us see how to view our ESP32-CAM live streaming video in our Blynk application.
Blynk is a highly accessible smartphone-based application available for both Android and iOS operating systems. It provides an interactive dashboard where the user can build their own IoT projects by placing components. This will as a result create a mobile app through which the user will be able to control microcontrollers connected through WIFI. You can control LEDs, relays, electric motors, and many more. No internal programming is required to build your project in Blynk. You only need to drag and place your electronic components and it is as easy as that. Thus, building your IoT projects through Blynk is extremely easy and requires very little effort.
Installing and Getting Ready
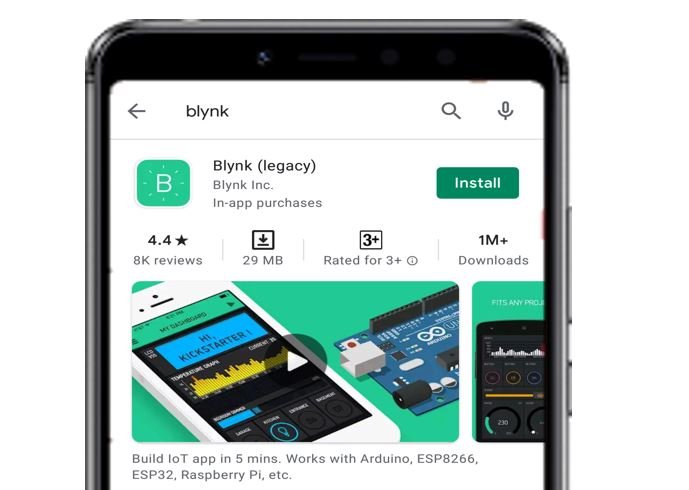
We will use an Android smartphone for this project. So go to Google Play or Apple Store (if using an iPhone).

Search for ‘Blynk’ and install the application.
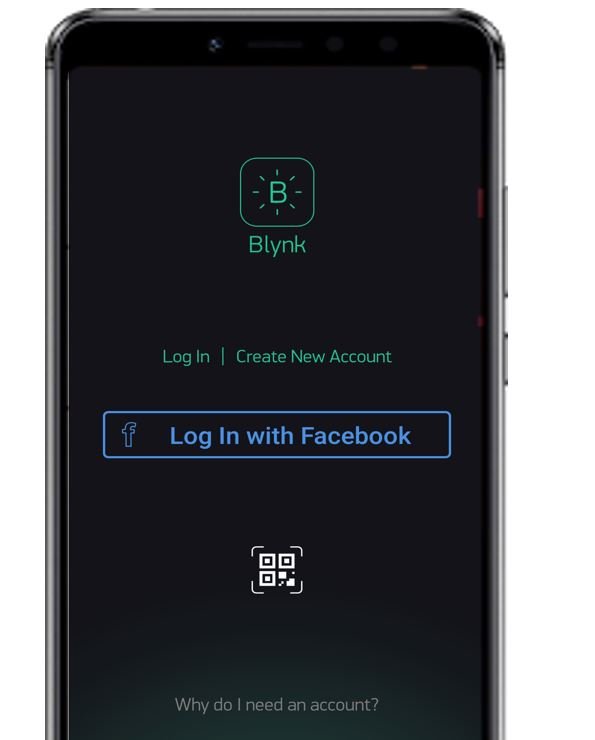
You will have to create an account to proceed further. You can also log in with your Facebook account if you possess that.
Creating Project
After you have successfully signed in the following window will appear. Click ‘New Project.’

Now specify the name of your project, device and connection type. After that press the ‘Create’ button.

You will receive a notification regarding your Authorization token. This can be accessed from the email account you signed in with and also through Project Settings. We do not require it for this project.
Now the Blynk canvas will open as shown below:

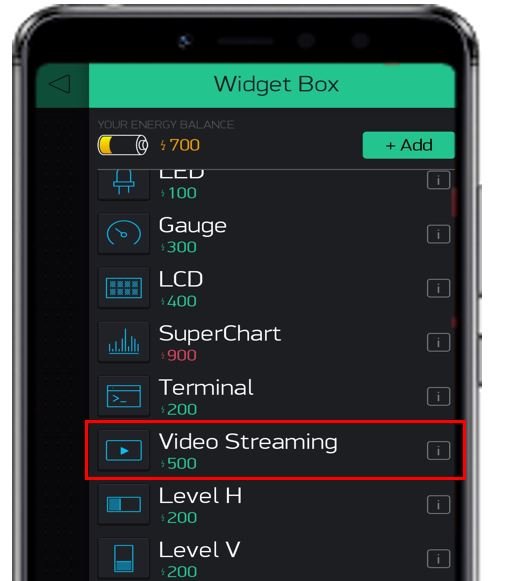
Press on the screen. The widget box will appear. Now we will build our project. Click on the Video Streaming icon.
This is how it looks in the canvas now:

Press the widget again on the canvas to change its parameters. In the URL address, add the address we obtained and used to access the ESP32 MPJEG Streaming web server. Leave the output as it is.

This is how the project should be set. Now press the ‘Play’ button.

After a few moments, the live video streaming will start on the Blynk application.
You can set up the ESP32-CAM in different areas to get the view you want. Here are two screenshots of the live streaming video from two different angles.

Watch the video below:
You may also like to read:
Hello
After the rst button, it does not give the IP code in the serial monitor and gives the error code 0X00024
Thank
hello use Blynk 2.0 Blynk legency no more Thanks
Thanks we will update all our articles for Blynk 2.0
Creating an IoT CCTV Camera using ESP32 CAM and the Blynk App for live streaming is a remarkable fusion of hardware and software innovation. This project not only showcases the versatility of ESP32 CAM but also highlights the power of Blynk for remote monitoring. The live streaming feature adds a dynamic dimension to traditional CCTV setups, allowing users to access real-time footage conveniently. This DIY approach not only provides a cost-effective solution but empowers enthusiasts to delve into the realm of IoT, learning and implementing cutting-edge technologies in the process. A commendable project for those exploring the intersection of IoT, surveillance, and live streaming.
but we can’t see the live video streaming in others network or internet