In this user guide, we will learn how to publish sensor readings from Raspberry Pi Pico W using MicroPython and Thonny IDE to Google Sheets using IFTTT as a third-party service. This guide will be helpful for users who want to access data for a predetermined amount of time and also store it appropriately. Any preferred sensor, such as DS18B20, BME680, and MPPU6050, can be used but for this article, we will use a BME280 sensor which will be used to measure temperature, pressure, and humidity. The sensor readings will be accessed from the BME280 sensor connected to the Raspberry Pi Pico W. These readings will get updated on Google Sheets after every few minutes. To integrate Google Sheets with Raspberry Pi Pico W, we will use IFTTT which is an open-source web service. Via IFTTT, it will become extremely simple to publish updated sensor data to Google Sheets promptly.

Recommended Components
The following components are used in this project or are helpful for getting started with Raspberry Pi Pico development.
| Component | How it’s used in this project | Buy on Amazon |
|---|---|---|
| Raspberry Pi Pico W | The Wi-Fi-enabled RP2040 board used in this project. | Check Price |
| BME280 Sensor | Temperature, humidity, and pressure sensor logged to Google Sheets. | Check Price |
| Breadboard | Solderless breadboard for wiring the sensor to the board. | Check Price |
| Jumper Wires | Connecting wires for the I2C and power connections. | Check Price |
As an Amazon Associate we earn from qualifying purchases. Prices and availability are accurate as of the date/time indicated and are subject to change.
This article is divided into these sub-topics:
- Introduction of BME280 Sensor Module and interfacing it with Raspberry Pi Pico W
- Setting up and testing IFTTT webhook for Google sheet
We have a similar guide with ESP32 and ESP8266 using Arduino IDE:
- ESP32/ESP8266: Publish Sensor Readings to Google Sheets via IFTTT
- ESP32 MicroPython Publish Sensor Readings to Google Sheets via IFTTT
Prerequisites
In order to start, make sure you have performed the following procedures already:
- Downloaded and installed the latest version of Python 3 on your PC.
- Downloaded and installed the latest version of Thonny IDE.
- Set up MicroPython in Raspberry Pi Pico.
If you want to know how to perform above steps, you can follow this step-by-step guide:
- Getting Started with Raspberry Pi Pico using Thonny IDE
- Getting Started with Raspberry Pi Pico using uPyCraft IDE
Project Overview – MicroPython Send Sensor Readings to Google Sheet
This project starts by booting Raspberry Pi Pico W and connecting it to the local WiFi network. The BME280 sensor will be connected to the ESP board through the I2C GPIO pins which we will specify later. When Raspberry Pi Pico W boots, the BME280 sensor gets readings of temperature, pressure, and humidity. After that, it makes an HTTP request to IFTTT API to log sensor readings to Google Sheets. The Google Sheets will be linked to the user’s Google Drive.
Create IFTTT Webhook for Google Sheets
IFTTT means ‘If this, then that.’ It is an open-source service that gives the user the freedom to program a response to an event according to their likes. We can create an applet which are chains of conditional statements by a combination of several app services and add triggering parameters. For our project, we will be using this service, whenever the ESP board makes a request and hence send the sensor readings to our email. To work with this web service, we will have to follow a series of steps to ensure the proper functionality.
Creating an Account
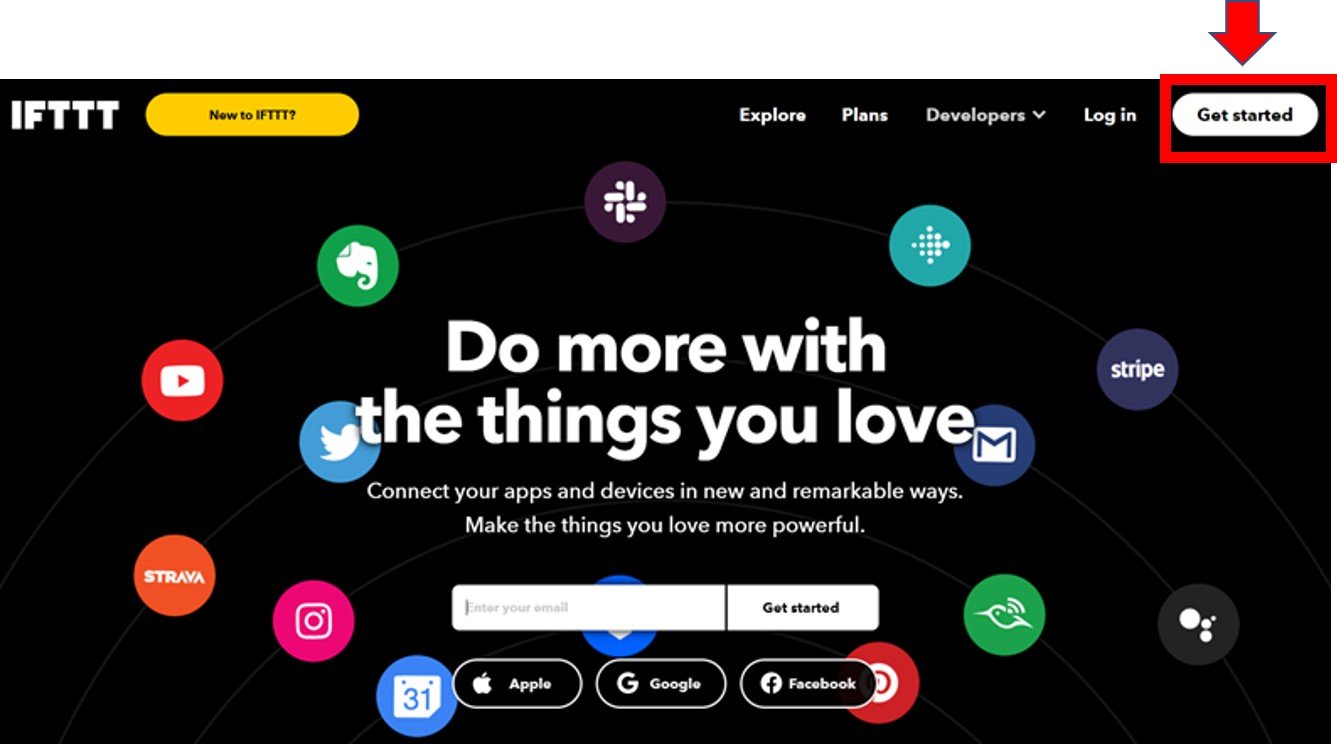
Although the IFTTT service is free to use, we will have to create an account. First go to the following website: https://ifttt.com/
The following window will appear. Click on the ‘Get Started’ button.
The following window will appear. You can select any one from these three options (Apple, Google or Facebook) to connect. Or you can simply ‘sign up’ with your own given email. We will be following this scheme.
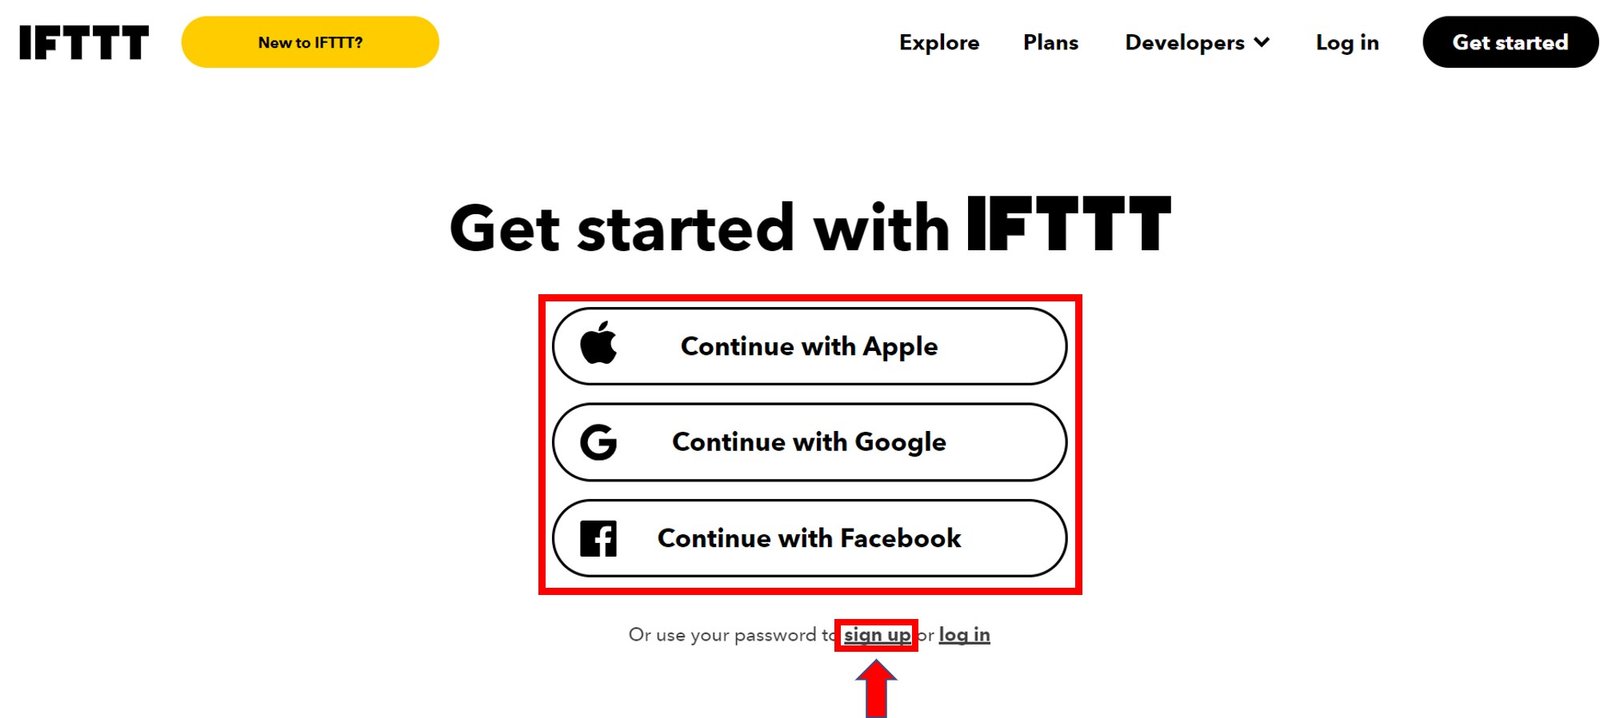
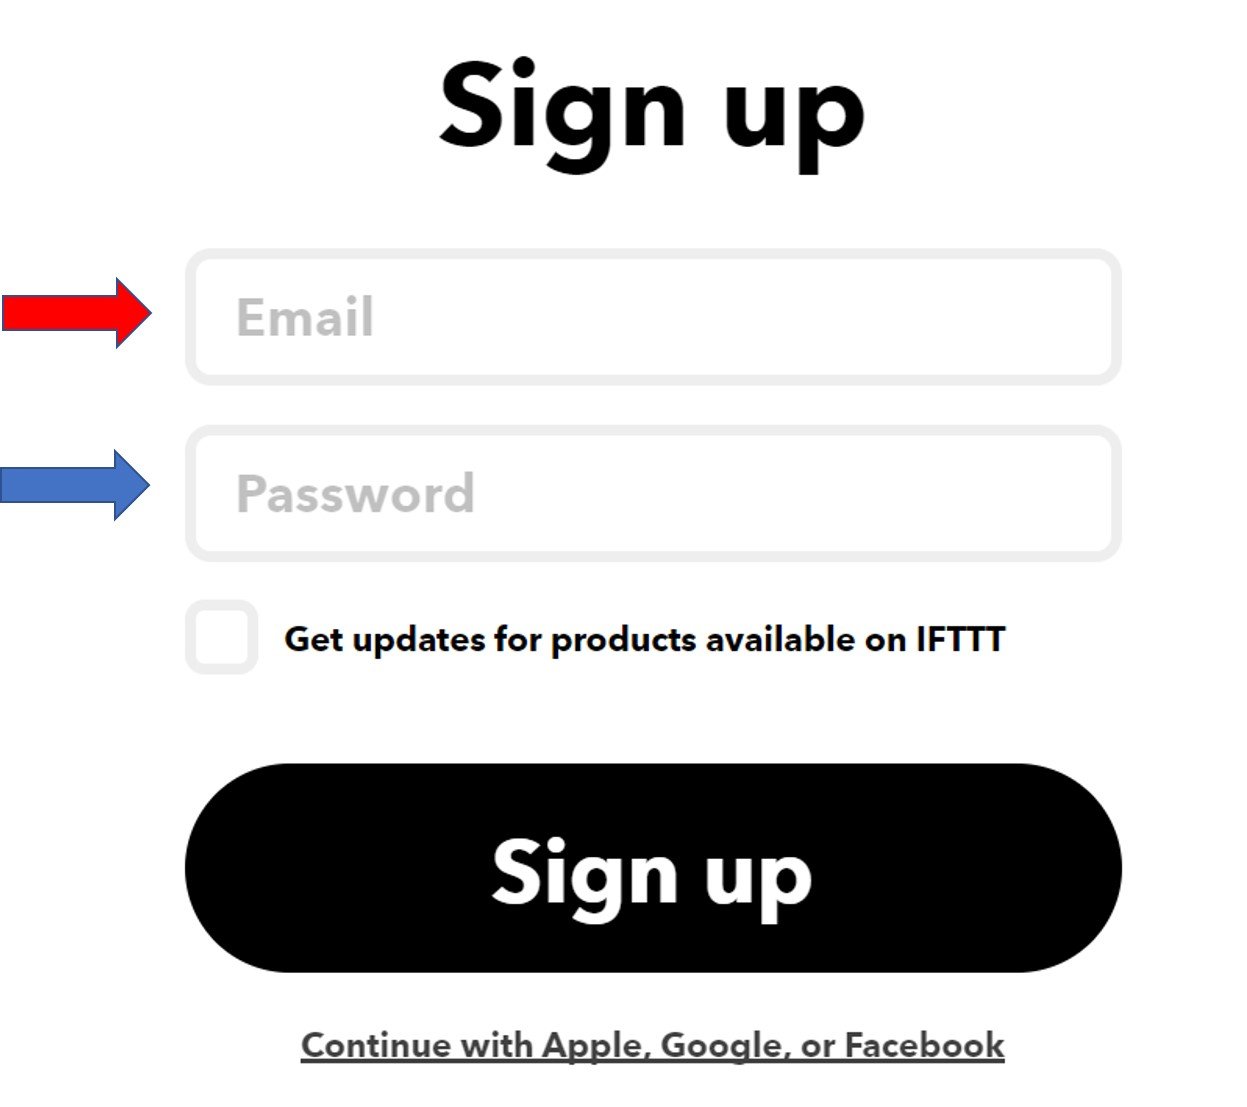
Click the ‘sign up’ tag. You will see the following window pop up. Enter your email address and password to start working in IFTTT. This whole process is free of cost for the first three applets.
Creating an Applet
After you have created your account, we will be directed to the page where we will create our applet. Click on ‘Create.’
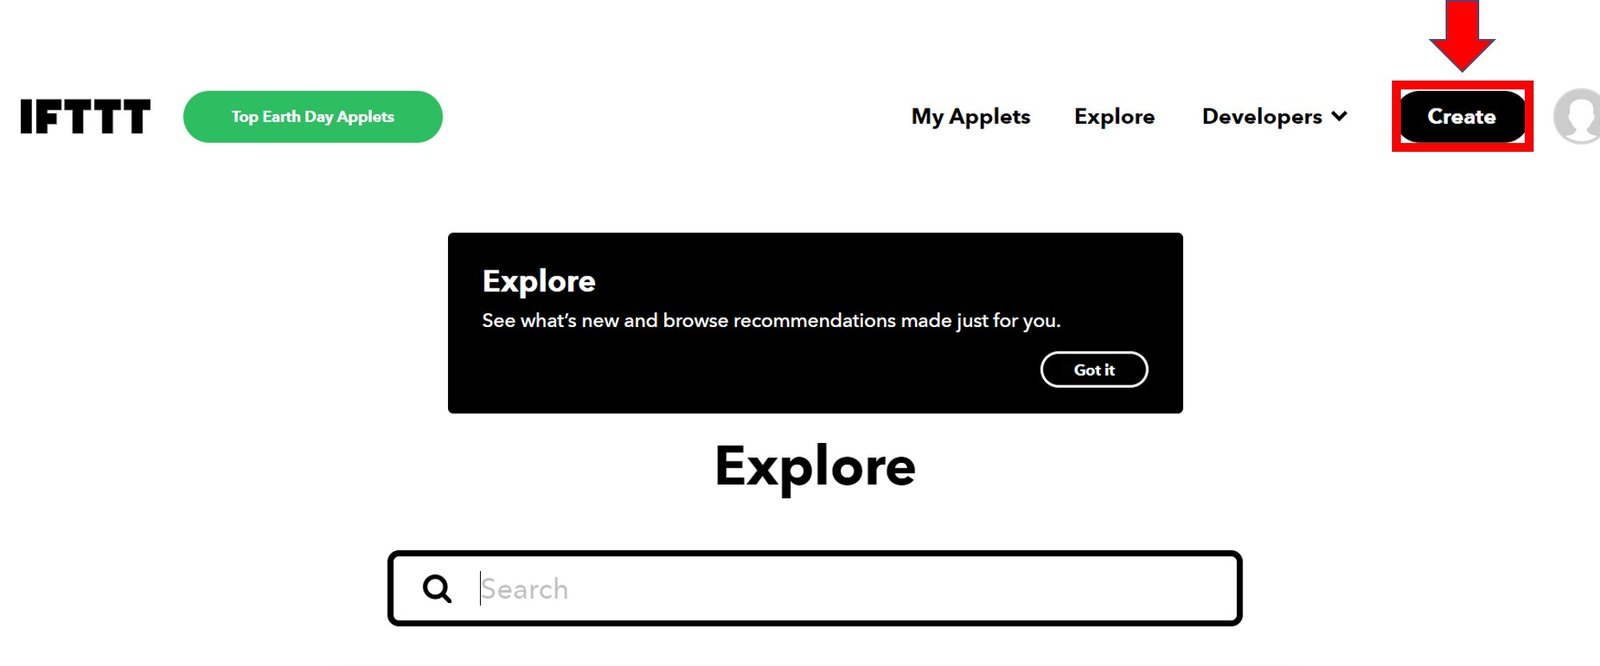
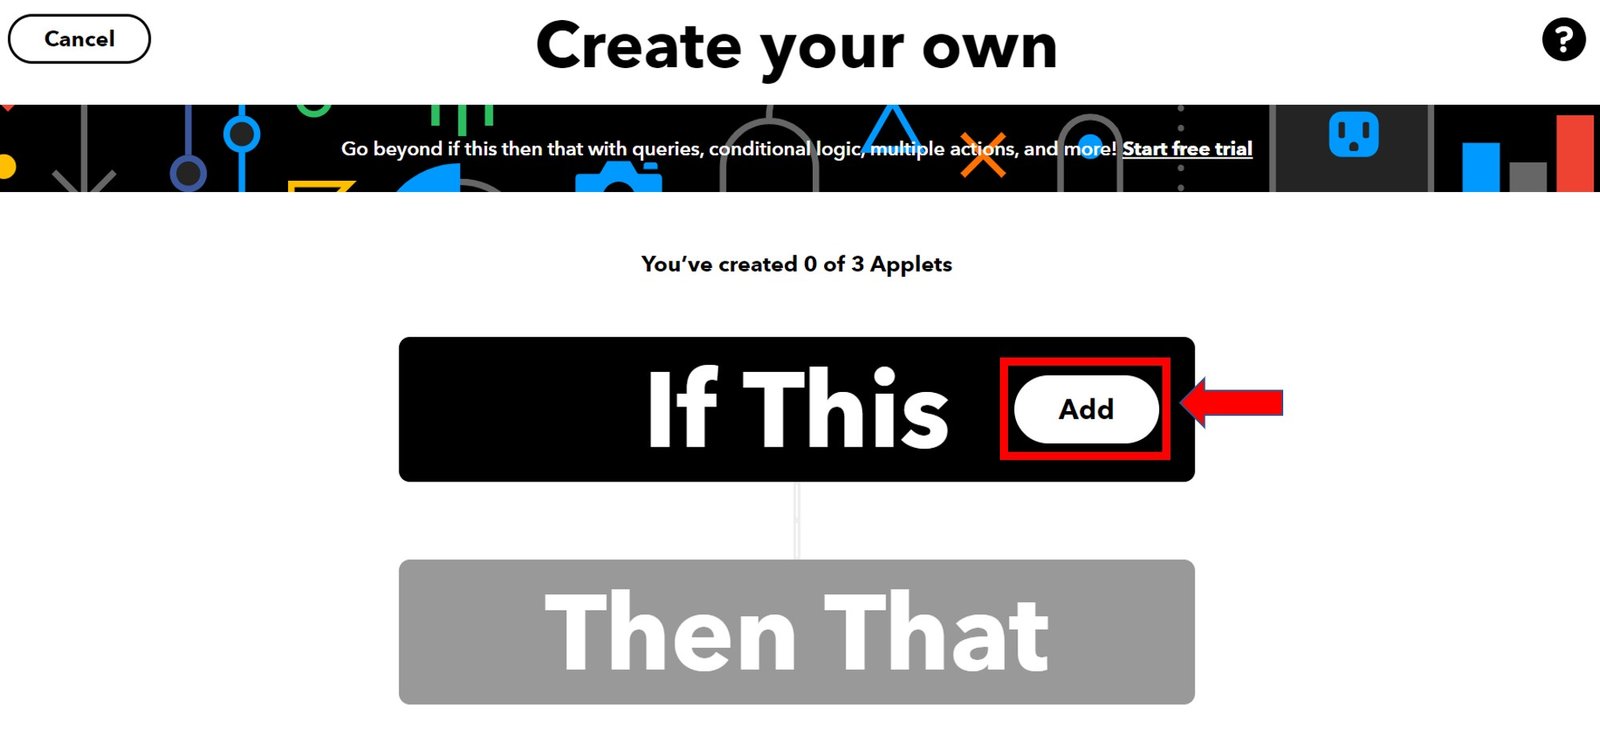
The following window opens up. Click the following Add button in the ‘If This’ section.
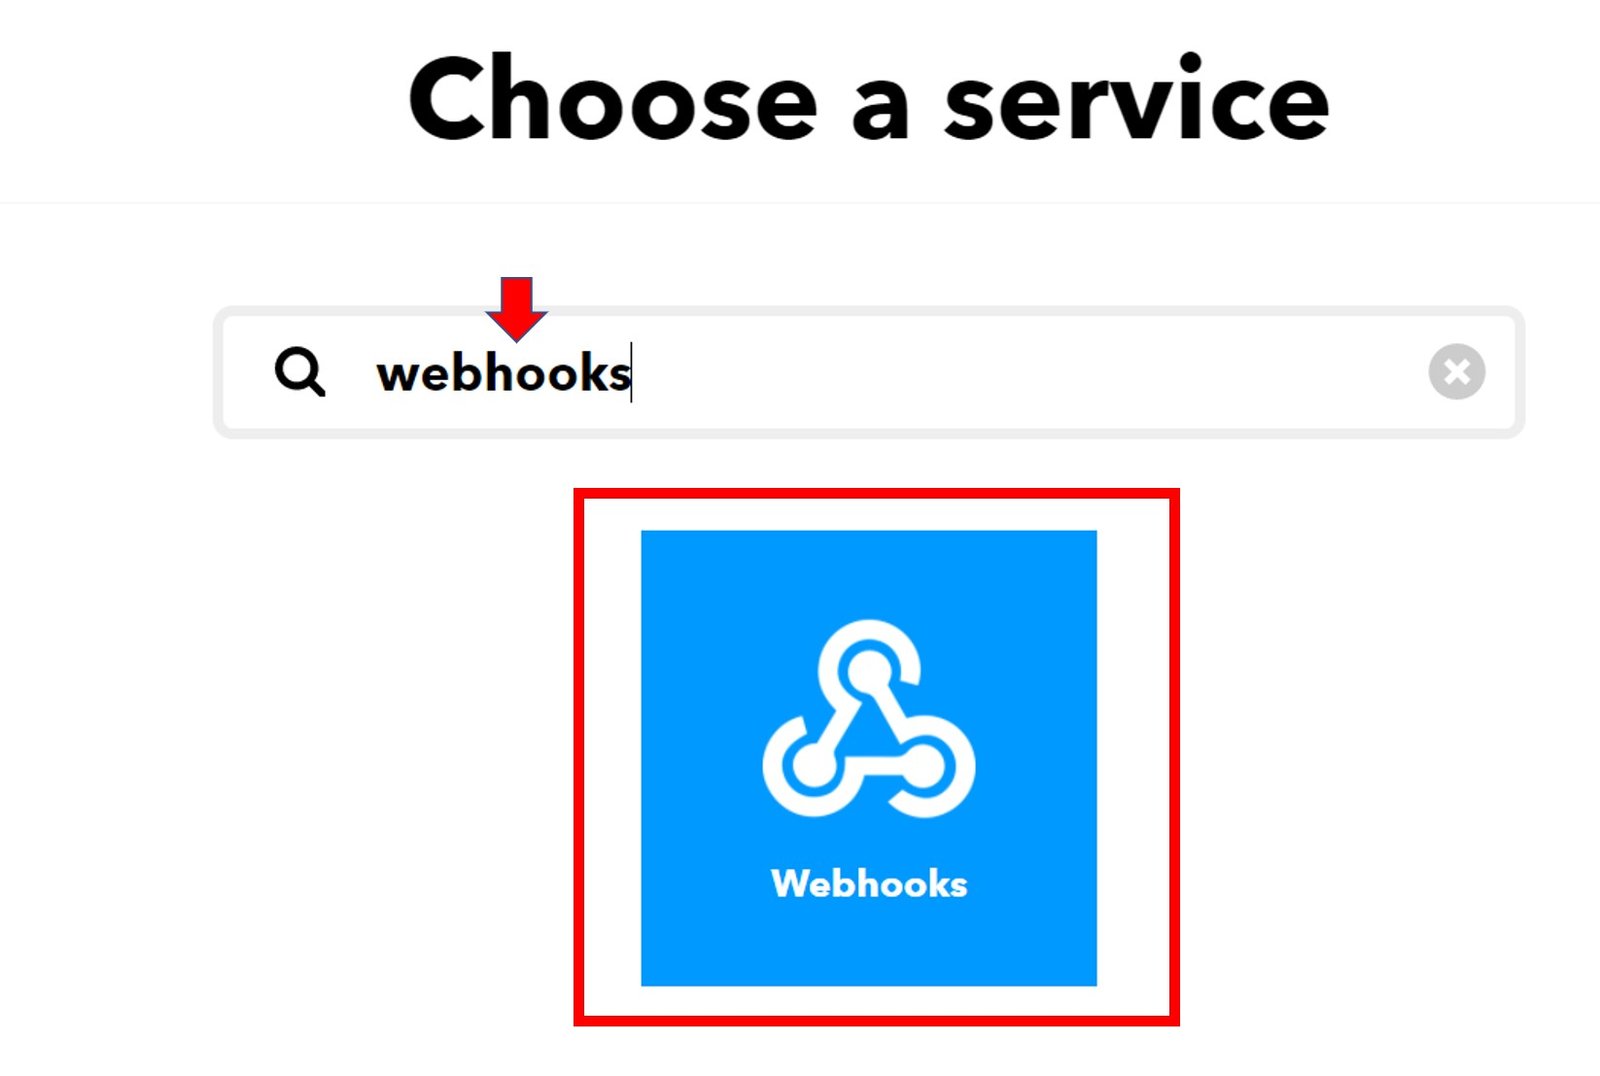
Another page will open in which we will have to choose our service. There is a lot of options to choose from. Write down ‘webhooks’ in the search option and its icon will appear:
Select Trigger
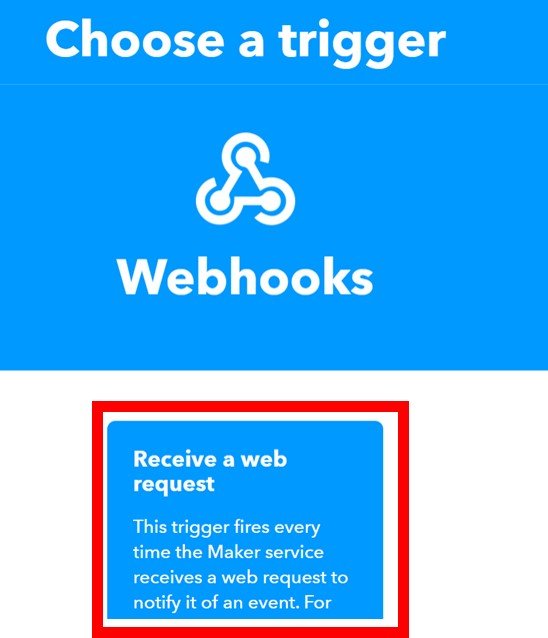
Next, choose the trigger as: ‘Receive a web request’ by clicking on it. Whenever webhooks will receive a web request, some action will take place. This we will define in the ‘THAT’ section.
After clicking the Receive a web request, the following window will open up. We will write down BME280_Sensor_Readings as the event name for the web request. You can use any other name of your choice. Click ‘Create Trigger’ button.

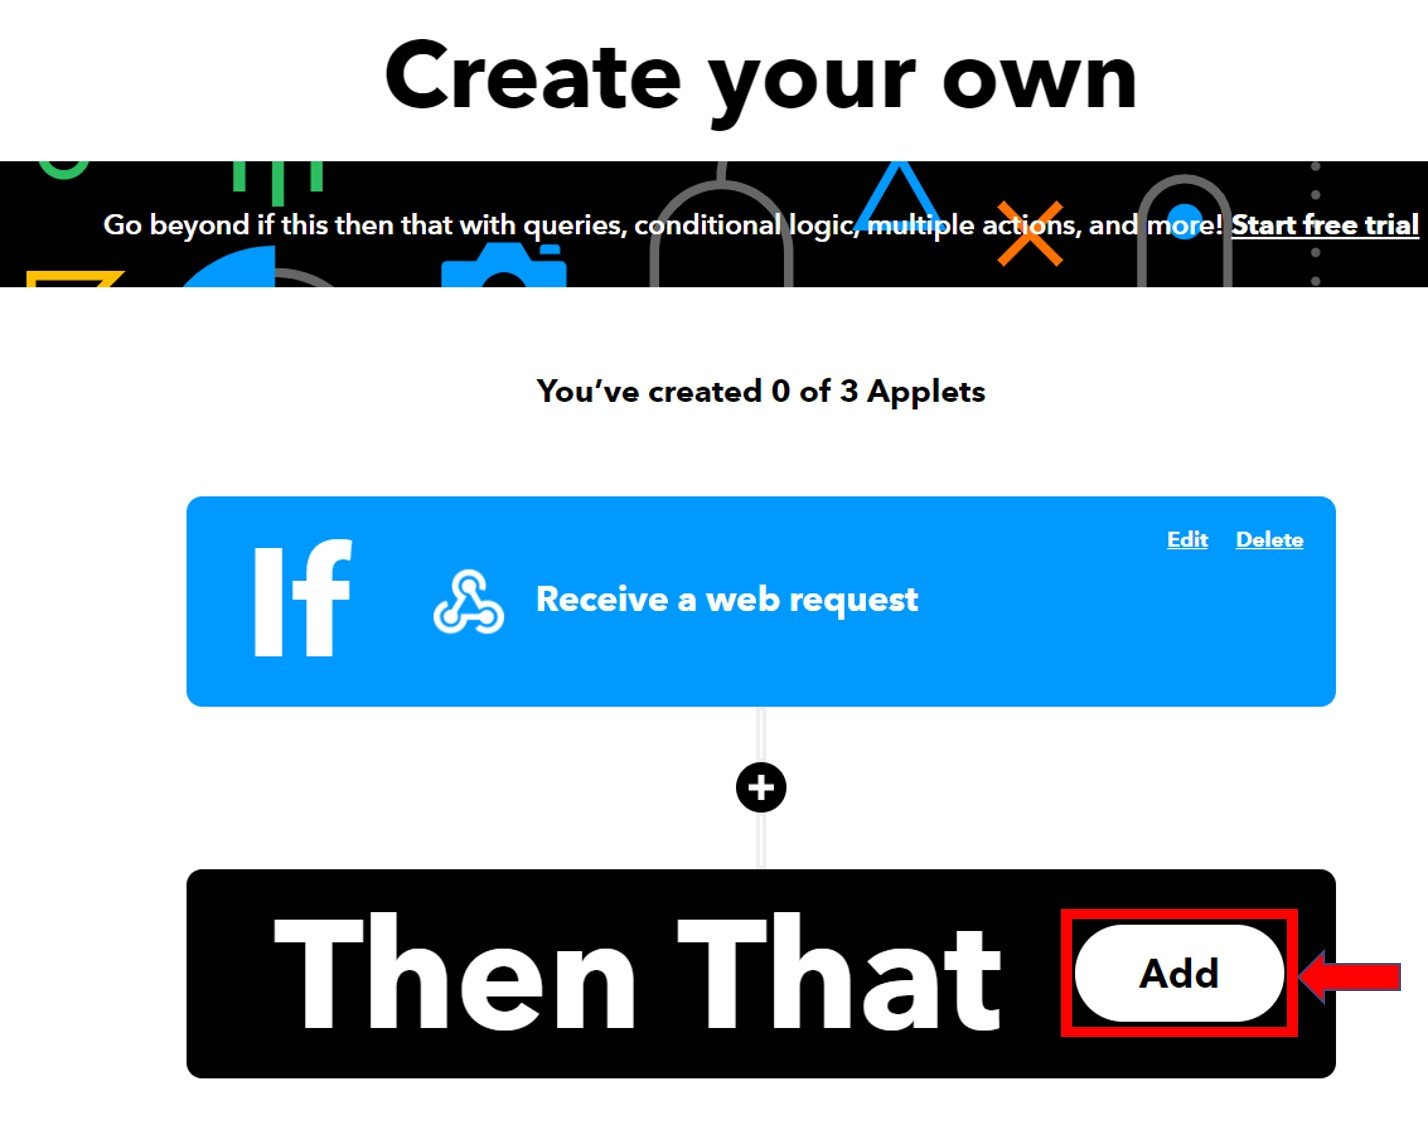
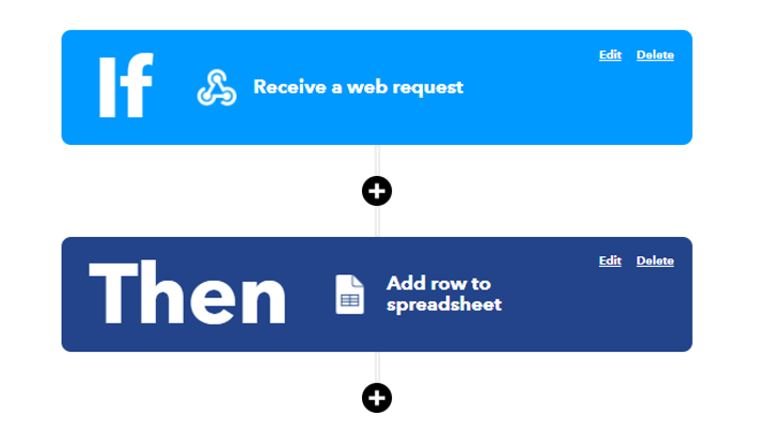
After the trigger is created, we are taken back to the web page where we first added the service for the ‘IF THIS’ section. Now we will click the ADD button for the ‘THEN THAT’ section.
Now we will choose the service. We have to choose what will happen if a web request is received. Thus, we will type ‘google sheets’ in the search option and click on its icon. This is because we want to publish updated sensor reading to Google Sheets send whenever a web request is received.

The following window opens up where we will choose ‘Add row to spreadsheet.’

Next click ‘Connect.’

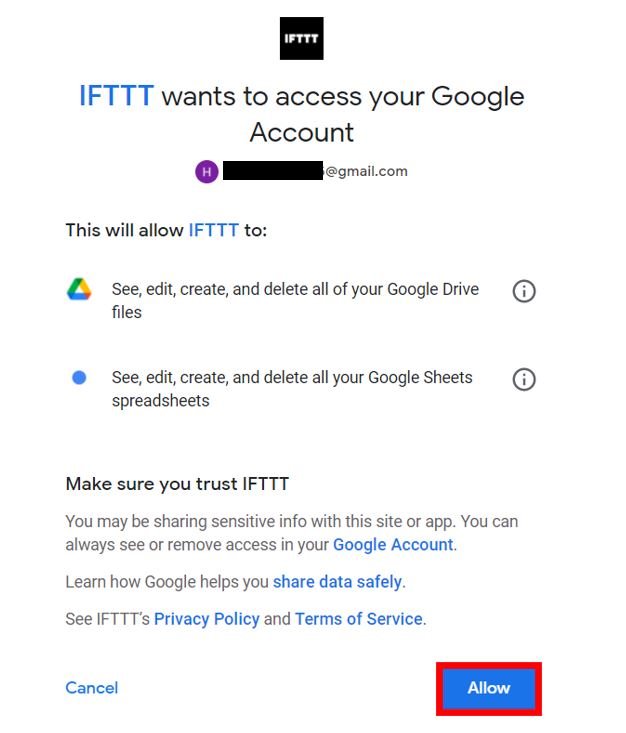
Another window will open which will prompt you to choose an email account and then will ask for your permission. Click “Allow” to proceed.
Now fill in all the entries as given below and click ‘Create Action.’

After we have created the action, we will be guided towards the initial web page of IFTTT. Click Continue to proceed.
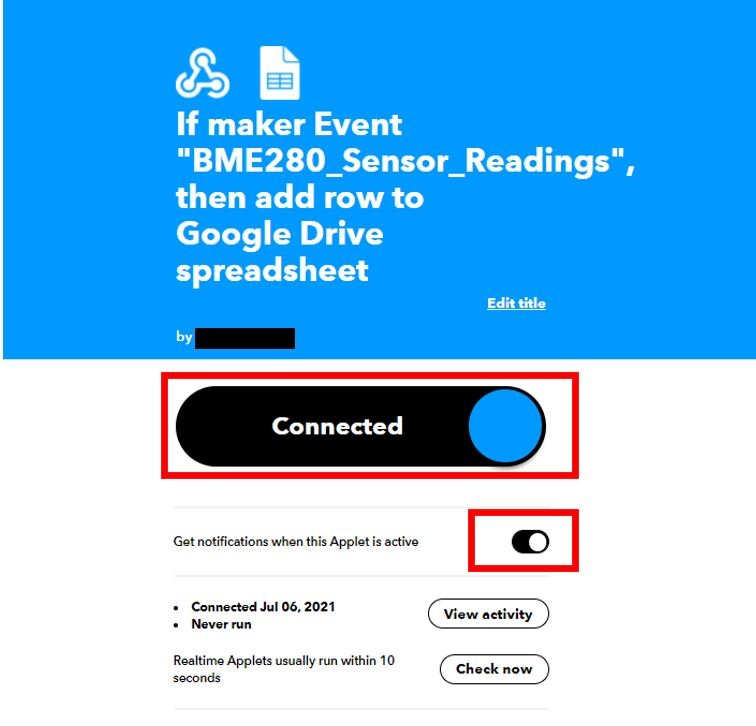
You have successfully created the applet. Make sure to turn on the notifications whenever the applet becomes active.
Testing the Applet
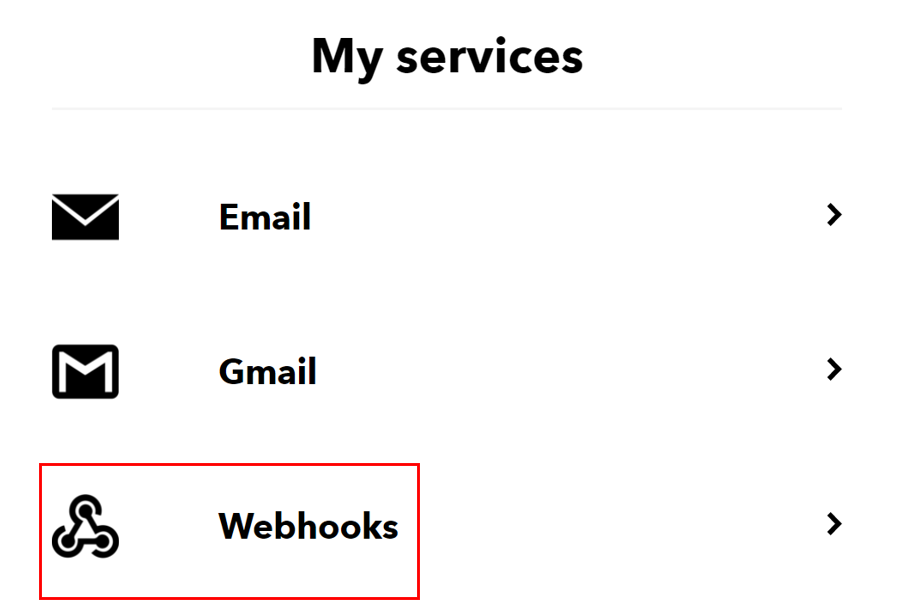
Before we proceed further with our project, let us first test our applet. Go to your applet and select “My Services” or open a webpage with the link: ifttt.com/my_services. The following windows will appear. Afterward, click on Webhooks.
This will take you to the following web page. Click on ‘Documentation.’

You will receive a key that should be secure with you. Next, enter the details as shown to trigger the event. We will give hypothetical values for the three variables for now. At the end click, ‘Test it.’
Note: Save the URL highlighted in the blue box. This is the IFTTT URL resource which we will use later on in our program code.

You will get a notification on top of the web page: ‘Event has been triggered.’ Now go to your google drive and you will find a folder named ‘IFTTT.’ Open it and you will find the spreadsheet inside it.
Click to open it. You will be able to see the same hypothetical values that you entered. This means that the applet is running successfully. Now let us learn how to incorporate real sensor readings from the BME280 sensor.

Interfacing BME280 with Raspberry Pi Pico W
This section shows how to connect Raspberry Pi W Pico with BME280 sensor.

We will require the following components:
- Raspberry Pi Pico W
- BME280 Sensor
- Connecting Wires
- Breadboard
The connection of BME280 with the Raspberry Pi Pico W is very simple. We have to connect the VCC terminal with 3.3V, ground with the ground (common ground), SCL of the sensor with SCL of the board, and SDA of the sensor with the SDA pin of the board.
Raspberry Pi Pico W I2C Pins
Raspberry Pi Pico W has two I2C controllers. Both I2C controllers are accessible through GPIO pins of Raspberry Pi Pico. The following table shows the connection of GPIO pins with both I2C controllers. Each connection of the controller can be configured through multiple GPIO pins as shown in the figure. But before using an I2C controller, you should configure in software which GPIO pins you want to use with a specific I2C controller.
| I2C Controller | GPIO Pins |
|---|---|
| I2C0 – SDA | GP0/GP4/GP8/GP12/GP16/GP20 |
| I2C0 – SCL | GP1/GP5/GP9/GP13/GP17/GP21 |
| I2C1 – SDA | GP2/GP6/GP10/GP14/GP18/GP26 |
| I2C1 – SCL | GP3/GP7/GP11/GP15/GP19/GP27 |
The connections between the two devices which we are using can be seen below.
| BME280 | Raspberry Pi Pico W |
|---|---|
| VCC | 3.3V |
| SDA | GP20 (I2C0 SDA) |
| SCL | GP21 (I2C0 SCL) |
| GND | GND |
We have used the same connections as specified in the table above. However, you can use other combinations of SDA/SCL pins as well but remember to change them in the MicroPython script.
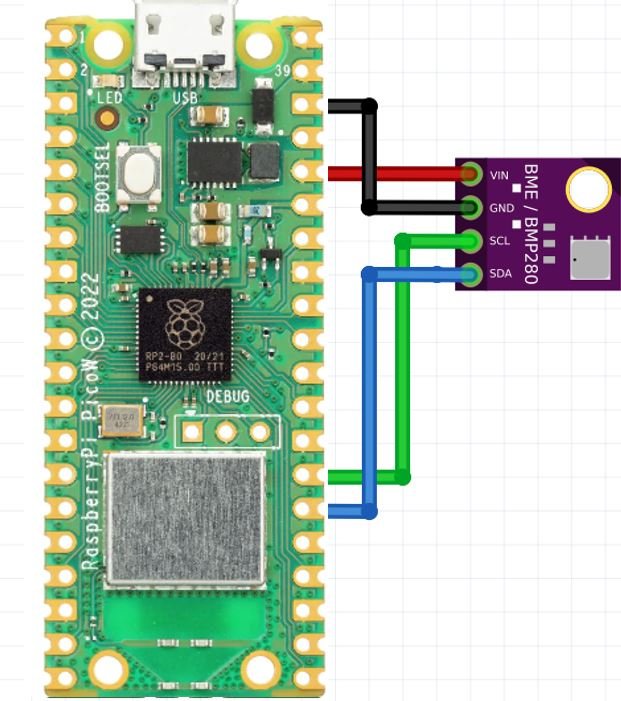
Connection Diagram Raspberry Pi Pico W with BME280
We have used the same connections as given in the tables above. All devices will be commonly grounded and will be powered with the same 3.3V pin of Raspberry Pi Pico W.
The diagram below shows the connection diagram of Raspberry Pi Pico W with BME280 sensor.
Install BME280 Libraries in Thonny IDE
We will have to install the BME280 library for MicroPython to continue with our project.
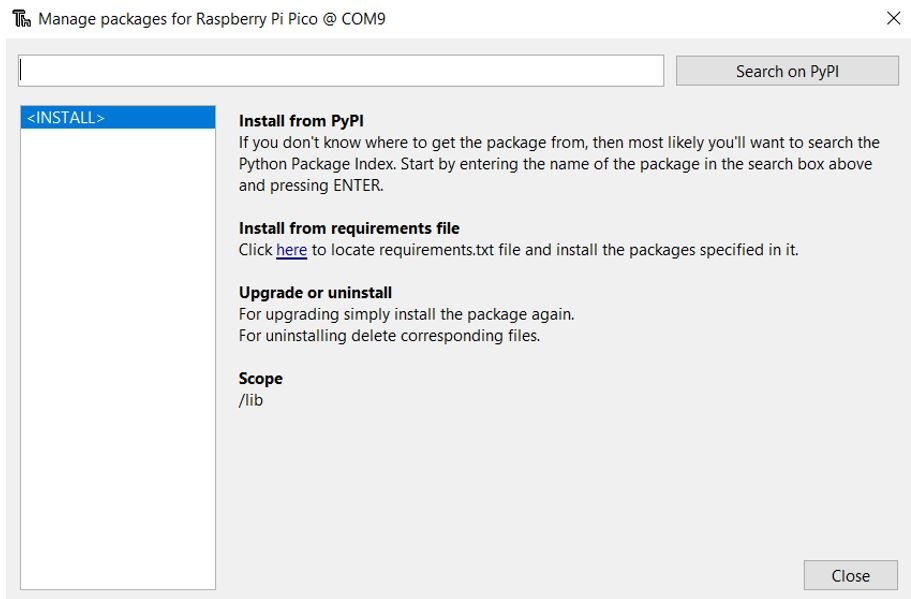
To successfully do that, open your Thonny IDE with your Raspberry Pi Pico W plugged in with your laptop. Go to Tools > Manage Packages. This will open up the Thonny Package Manager.
Search for “bme280” in the search bar by typing its name and clicking the button ‘Search on PyPI.’ From the following search results click on the one highlighted below micropython-bme280. Install this library.
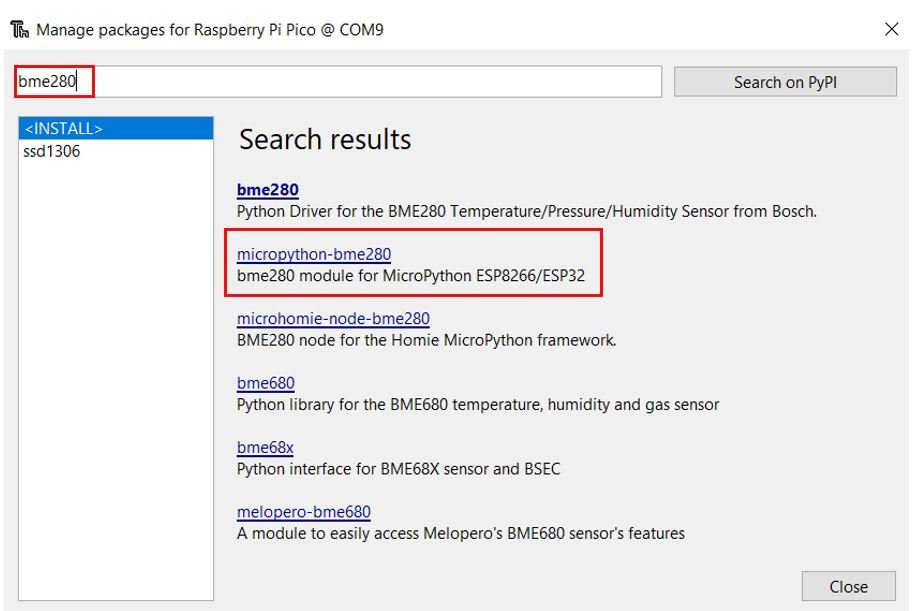
After a few moments, this library will install successfully.
Raspberry Pi Pico W MicroPython Code to Send Sensor Readings to Google Sheets
This Raspberry Pi Pico W MicroPython code reads sensor data from a BME280 sensor and sends the data to Google Sheets using IFTTT as a third-party service. It imports the required libraries, sets up network credentials, initializes the I2C method, and reads the BME280 sensor for temperature, humidity, and pressure values. It then connects to a network and sends the sensor data to Google Sheets.
# Import necessary libraries
import urequests
import time
import ubinascii
import machine
import network
from machine import Pin, I2C
import bme280        #importing BME280 library

ssid = 'replace_with_your_wifi_ssid'  # Write your SSID
password = 'replace_with_your_wifi_password'  # Write your Password

IFTTT_URL = '/trigger/BME280_Sensor_Readings/with/key/enter_your_key_here'
server = 'maker.ifttt.com'

last_message = 0
message_interval = 10

# Assign pins for BME280 sensor on Raspberry Pi Pico W
i2c = I2C(0, sda=Pin(20), scl=Pin(21), freq=400000)  # initializing the I2C method
bme = bme280.BME280(i2c=i2c)

# Define function to connect to WiFi network
def connect_wifi(ssid, password):
  # Connect to your network
  station = network.WLAN(network.STA_IF)
  station.active(True)
  station.connect(ssid, password)
  while station.isconnected() == False:
    pass
  print('Connection successful')
  print(station.ifconfig())

def make_ifttt_request():
    print('Connecting to', server)
    json_data = '{"value1":"' + bme.values[0] + '","value2":"' + bme.values[1]  + \
        '","value3":"' + bme.values[2] + '"}'
    headers = {'Content-Type': 'application/json'}
    response = urequests.post('https://' + server + IFTTT_URL, data=json_data, headers=headers)
    print('Response:', response.content.decode())
    response.close()
    print('Closing Connection')
while True:
    if (time.time() - last_message) > message_interval:
        print('Sensor reading in progress...')
        connect_wifi(ssid, password)
        make_ifttt_request()
        last_message = time.time()
Before uploading the above MicroPython script to Raspberry Pi Pico W replace ssid, password, and IFTTT key with your own details.
How MicroPython Script Works?
First import the necessary libraries for this MicroPython script to run. This includes libraries for network connectivity, timekeeping, I2C communication, HTTP requests, and BME280 sensor.
# Import necessary libraries
import urequests
import time
import ubinascii
import machine
import network
from machine import Pin, I2C
import bme280        #importing BME280 library
Set the SSID and password of the WiFi network to which the Raspberry Pi Pico W will connect.
ssid = 'replace_with_your_ssid' # Replace with the name of your network
password = 'replace_with_your_password' # Replace with your network password
Next, we will connect the Raspberry Pi Pico W to the Wi-Fi network. The network.WLAN() is used to create a WLAN network interface object.
Supported interfaces are:
- network.STA_IF (station mode)
- network.AP_IF (Soft access point mode)
After that, activate the station by passing the “True” argument to the sta_if.active() method. The connect() method is used to connect to the specified wireless network using the specified Wi-Fi name (SSID) and password.
In station mode, isconnected() method returns “True” if Raspberry Pi Pico W successfully connects to a Wi-Fi network and a device also assigned a valid IP address. Otherwise, it returns “False”. This statement checks if the Raspberry Pi Pico W connects to the Wi-Fi or not. The code does not move to the next step till the board is not connected to the Wi-Fi network.
After a Wi-Fi connection is established on the Raspberry Pi Pico W, an IP address gets assigned. The ifconfig() method provides an IP address assigned to the Raspberry Pi Pico W. In this statement, we print the IP address using the ifconfig() method on the station object which we created previously.
# Define function to connect to WiFi network
def connect_wifi(ssid, password):
  # Connect to your network
  station = network.WLAN(network.STA_IF)
  station.active(True)
  station.connect(ssid, password)
  while station.isconnected() == False:
    pass
  print('Connection successful')
  print(station.ifconfig())
Call the “connect_wifi” function to connect to the network.
# Connect to your network
connect_wifi(ssid, password)
Initialize BME280 Sensor Pins
Now, we initialize the I2C method by giving it three arguments. The first argument specifies the GPIO pin for SCL. This is given as GPIO20 for Raspberry Pi Pico W. The second parameter specifies the GPIO pin for the SDA. This is given as GPIO21 for Raspberry Pi Pico W. Keep in mind, these are the default I2C pins for SCL and SDA which we have used for the Raspberry Pi Pico W. The third parameter specifies the maximum frequency for SCL to be used.
# Assign pins for BME280 sensor on Raspberry Pi Pico W
i2c = I2C(0, sda=Pin(20), scl=Pin(21), freq=400000)  # initializing the I2C method
bme = bme280.BME280(i2c=i2c)
Send Sensor Reading to Google Sheet
These lines set the URL and server address for the IFTTT web service.
IFTTT_URL = '/trigger/BME280_Sensor_Readings/with/key/enter_your_key_here'
server = 'maker.ifttt.com'
Next define a method make_ifttt_request(). This MicroPython functions sends BME280 sensor data to a service called IFTTT (If This Then That). It starts by printing a message to the console to show that it’s connecting to the IFTTT server. It then creates a JSON-formatted string that contains the sensor readings for temperature, pressure, and humidity. The JSON string is sent to the IFTTT server using the HTTP POST method, with the correct headers set. Once the data has been sent, the function prints the server’s response to the console and then closes the connection.
def make_ifttt_request():
    print('Connecting to', server)
    json_data = '{"value1":"' + bme.values[0] + '","value2":"' + bme.values[1]  + \
        '","value3":"' + bme.values[2] + '"}'
    headers = {'Content-Type': 'application/json'}
    response = urequests.post('https://' + server + IFTTT_URL, data=json_data, headers=headers)
    print('Response:', response.content.decode())
    response.close()
    print('Closing Connection')
This line prints the string “Connecting to” followed by the value of the variable server to the console.
print('Connecting to', server)Next, create a JSON-formatted string with three key-value pairs for temperature, pressure, and humidity values from BME280 sensor. The values for the keys “value1”, “value2”, and “value3” are taken from the bme.values list output of bme object.
json_data = '{"value1":"' + bme.values[0] + '","value2":"' + bme.values[1] + \ '","value3":"' + bme.values[2] + '"}'Create a dictionary called headers with one key-value pair. The key is “Content-Type” and the value is “application/json” which is used to set headers for HTTP requests to IFTTT API.
headers = {'Content-Type': 'application/json'}This line makes an HTTP POST request to the IFTTT service using the urequests MicroPython library. The URL for the request is constructed by concatenating the server variable and the IFTTT_URL constant. The json_data and headers variables are used as the payload and headers for the request, respectively. The response from the request is stored in the response variable.
response = urequests.post('https://' + server + IFTTT_URL, data=json_data, headers=headers)Next print the content of the response from IFTTT server to the console.
print('Response:', response.content.decode())At the end close the response object.
response.close()This line prints the string “Closing Connection” to the console.
print('Closing Connection')In the end, create an infinite loop that calls the connect_wifi and make_ifttt_request functions. This loop will continue to run until the script is interrupted. In other words, it will send the BME280 sensor values to Google Sheets every 10 seconds.
while True:
    if (time.time() - last_message) > message_interval:
        print('Sensor reading in progress...')
        connect_wifi(ssid, password)
        make_ifttt_request()
        last_message = time.time()
Demonstration
Copy the above code to Thonny IDE and save it with the name of main.py and save it to Raspberry Pi Pico W board.
After uploading main.py file to Raspberry Pi Pico W, click on the run button on Thonny IDE.
As soon as you click on the run button and if everything goes well, you will see a success message on the Thonny ID console as shown below:

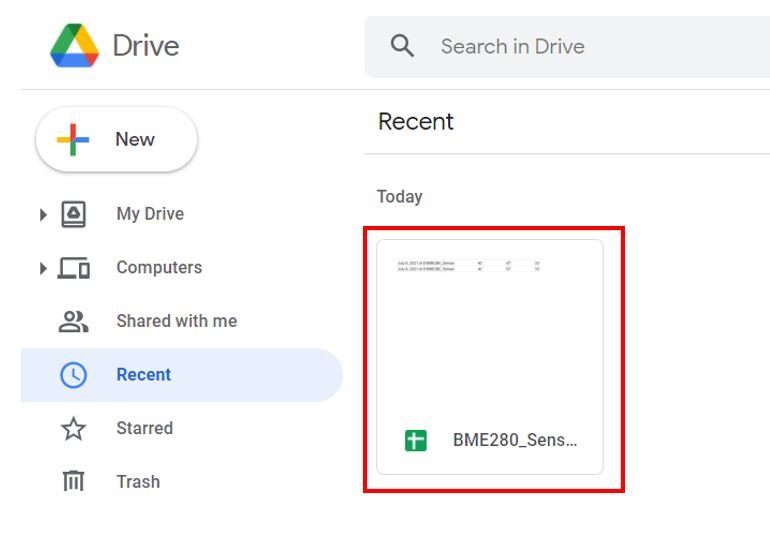
Now go to your Google Drive and open the IFTTT folder. Inside it, you will find the Google spreadsheet. Open it to view a set of sensor readings.
After a few seconds, you will sensor readings in google sheets in your google drive as shown below:
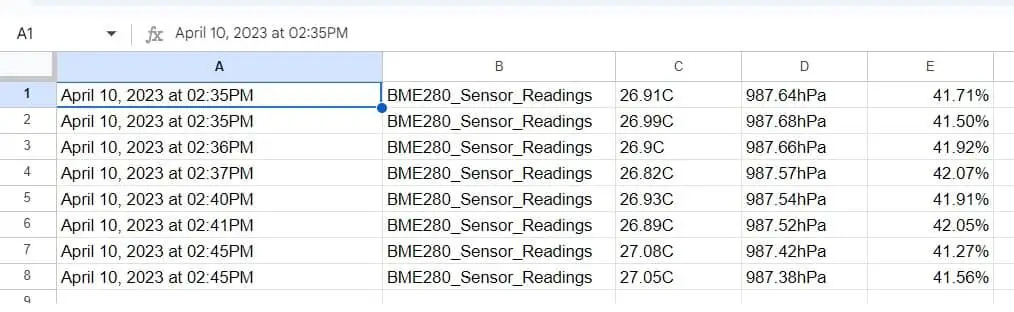
The sensor values will be sent to Google Sheets after every 10 seconds, but you can change the interval according to your requirment.
In summary:
In this tutorial, we have learned how to send sensor readings to Google Sheets with Raspberry Pi Pico W using MicroPython and IFTTT as a third-party service.
You may also like to read:
- Raspberry Pi Pico W SMTP Client Send Sensor Readings via Email
- Raspberry Pi Pico W Send Emails with SMTP Client and MicroPython
- MicroPython: Send SMS with Raspberry Pi Pico W and Twilio
- Send Messages to WhatsApp with Raspberry Pi Pico W MicroPython
- Raspberry Pi Pico W Publish Sensor Readings to Node-Red Dashboard through MQTT