In this tutorial, we will explain how to create a library in Simulink. Up until now, we have been working with the library browser in Simulink. Whenever we open the library browser, there are a number of blocks to choose from. Each of these blocks does a specific task, and that task is designed and defined by the programmer. In this tutorial, we will design a block similar to that present in the library browser. The purpose of this tutorial is solely to familiarize ourselves with how to create that block. Examples included will not do any specific task; they will just be simple input and output blocks, and we will explain how to design a simple block.
Introduction to Custom Library in Simulink
A custom library streamlines the modeling process via reusable components and subsystems for specific project requirements. Using a custom library is the best approach for constructing and managing tools to optimize and enhance our design workflows in Simulink.
Some examples of custom libraries are the control system library to store PID controllers, state-space controllers, and other control blocks. Signal processing library for applications such as audio processing, image processing, and data filtering via custom filters, FFT blocks, and various other signal processing algorithms.
Whether we’re designing control systems, signal processing algorithms, or any other complex engineering system, creating a custom library will be the key to achieving greater efficiency and consistency in our Simulink projects.
How to Create Custom Library in Simulink
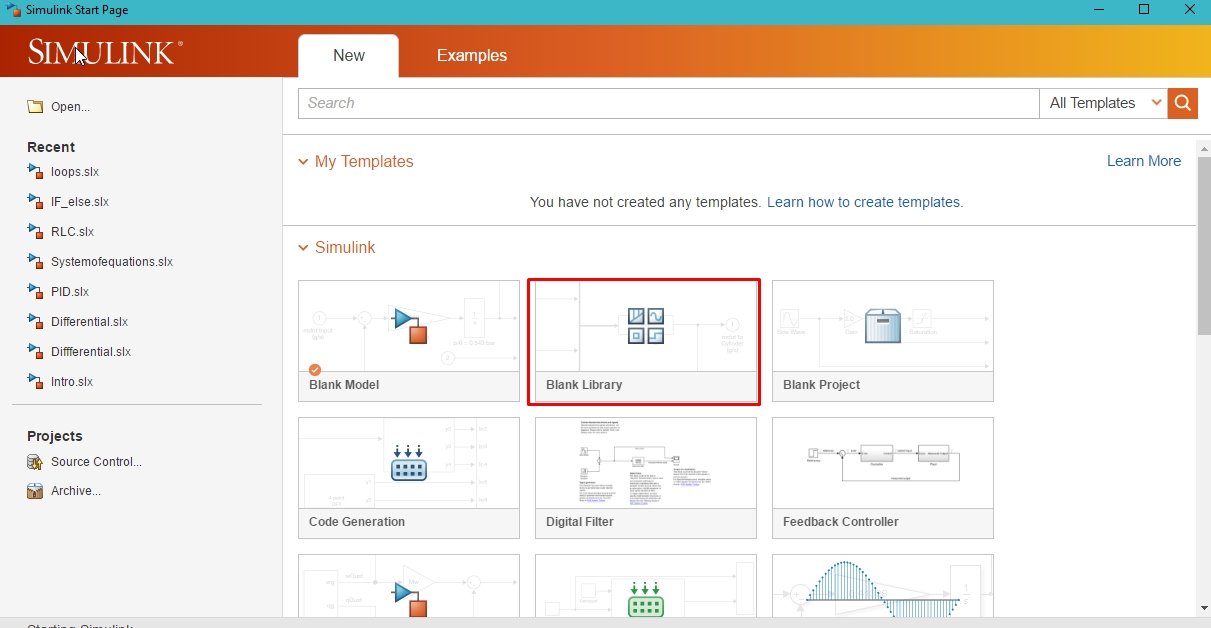
Open MATLAB and then Simulink, as we have been doing in all previous tutorials. But instead of creating a new model, we will create a new library. Click on the blank library block, as shown in the figure below.
Placing Components
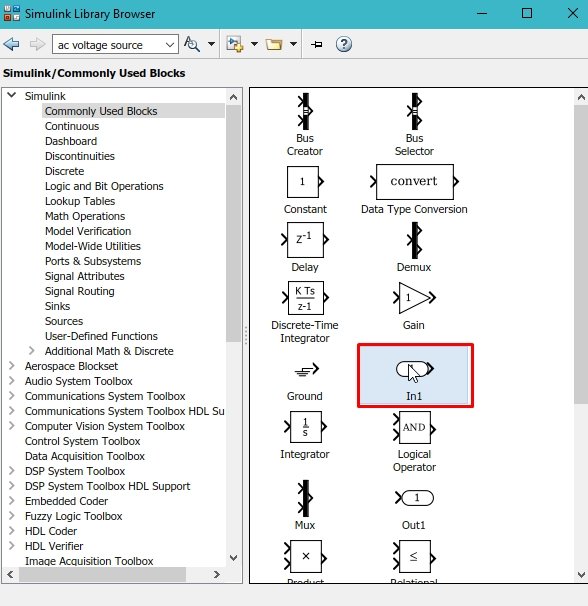
On this new blank library, click on the library browser icon. As we mentioned earlier, we are not going to design a library for a specific purpose. It will be just a general-purpose library that will receive an input and show it on the output. Therefore, from the library browser, select the commonly used block section and then select the input block as shown in the figure below.
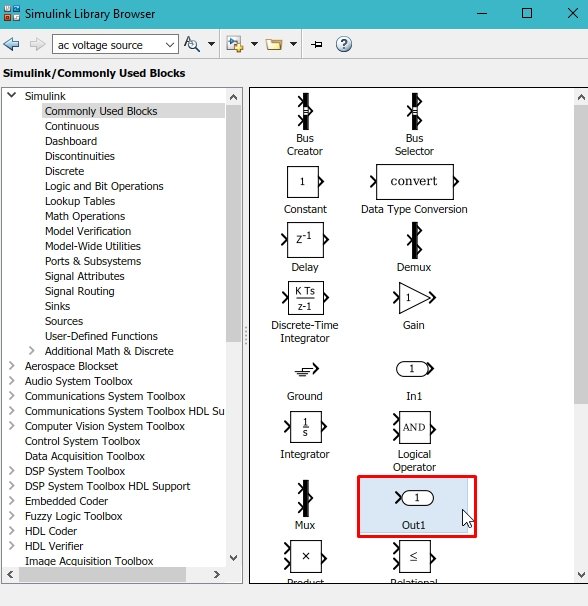
Add this block to the newly created library. From the same section of the library browser, select the output block as shown in the figure below.
Simulink Model
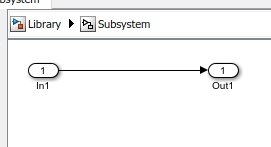
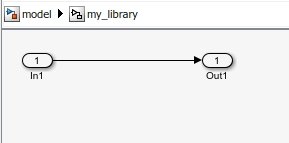
Add this block to the library we created and place it in front of the input block. Connect both blocks with each other as shown in the figure below.

Creating Subsystem
Select the complete block diagram and right-click on the selection. A drop-down menu will appear, and from that menu, select Create subsystem from selection. Refer to the figure below.

We can also create the subsystem by pressing the short key Ctrl +G. After clicking on the subsystem, the complete block diagram will be converted to a block, as shown in the figure below.

After the subsystem is created, we can remove the input and output blocks. The input and output ports will be there to provide input and get output, as shown in the figure below.

When we double-click on the subsystem or newly created block inside the subsystem, as shown in the figure below.
Formatting Block
We can change the format of the block or the subsystem we created by right-clicking on the block. We can also change the colors and styles of blocks in the same way. Right-click on the block, then click on format, and then click on foreground color. A list will appear; from that list, we can select the color of our choice, as shown in the figure below.

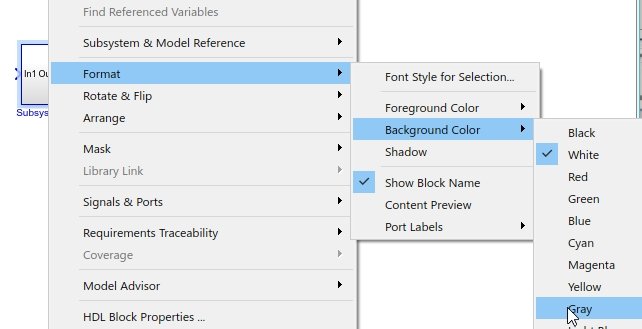
Again, do the same for the background color by right-clicking on the block, clicking on format, and then clicking on background color. A list will appear; from that list, we can select the color of our choice, as shown in the figure below.
Now we want to mask our newly created library, or block. Right-click on the newly created block, and from the drop-down menu, select Mask. A submenu will appear. From that submenu, select Create Mask, as shown in the figure below.

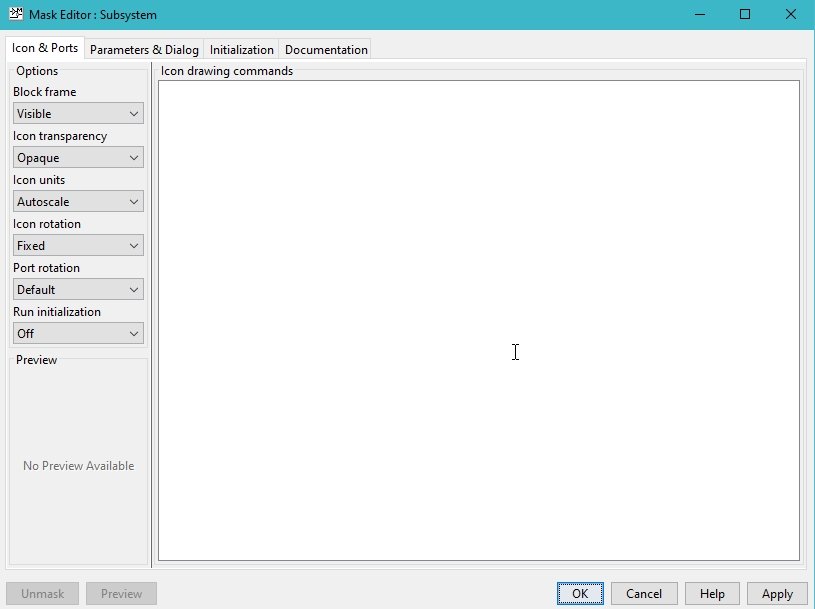
The mask created will look like the one shown in the figure below.
Block Labels
Anything we write in this icon drawing command will appear on the block we created. For instance, if we want the name of the block to appear on the block, we write it here in a disp command, and that will appear on the block itself. Now, we write the command as shown in the figure below.
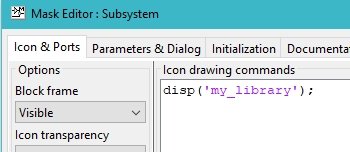
And click on Apply, and then OK. This name, “my_library”, will appear in the center of the block, as shown in the figure below.

We can also create an input label for the block by writing the command given in the figure below.
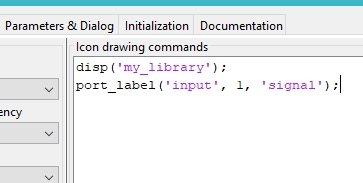
The input label will appear at the input port of the block, as shown in the figure below.

Figure 16: Input port label
The same can be done for the output port. By writing the command shown in the figure below on the icon drawing command, we can write it on the output port.

This will display a label at the output port of the block, as shown in the figure below.

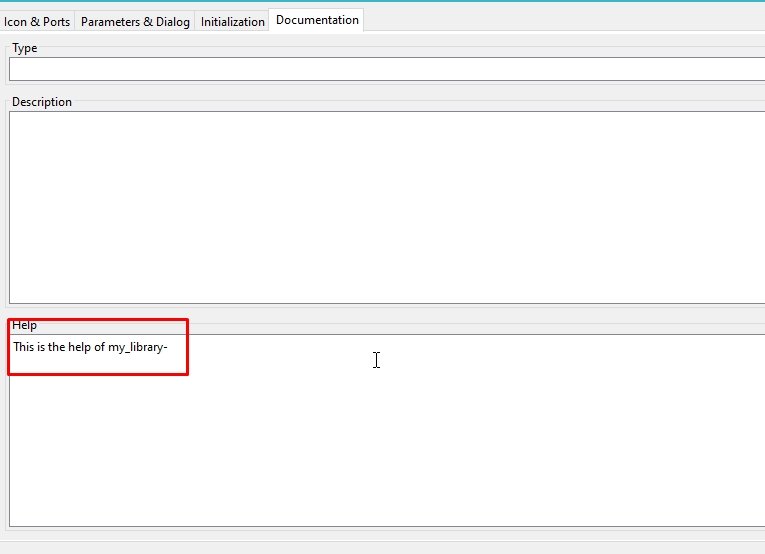
We can also write in the help menu of the block using this mask editor. Go to the documentation section of the mask edition, as shown in the figure below.

Help Command
In the help section of the documentation, whatever we write will appear in the help web of the block. For example, we write in the help section, “This is the help of my_library”, as shown in the figure below.
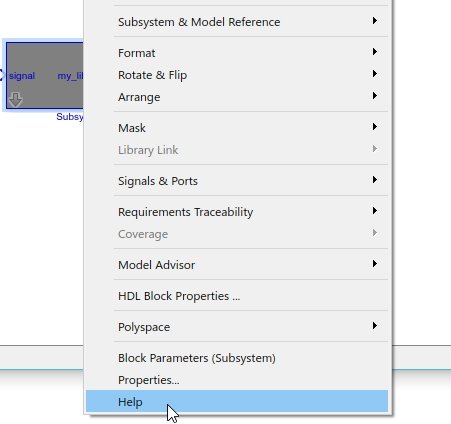
Now go back to the Simulink main page, right-click on the block we created, and from the dropdown menu, select the help button as shown in the figure below.
This will open the help browser of the block, and in that help browser will appear the command we entered previously in the help section, as shown in the figure below.

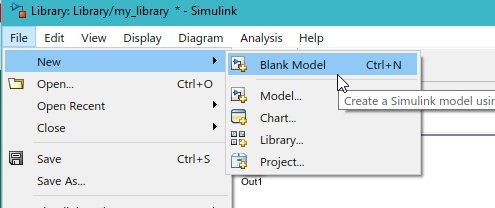
Now comes the part about testing the library we created. Click on file in the Simulink window, then click on new, and then on blank model, as we will test the library in the model. Refer to the figure below.
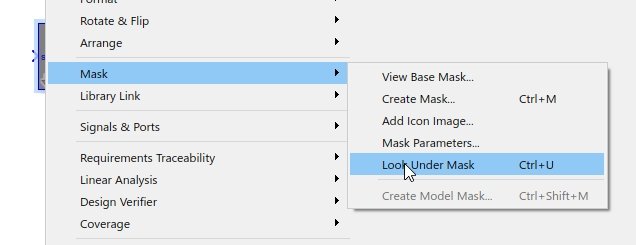
In the blank model, drag and drop the block from the library window you created previously. After that, right-click on the block placed, then click on mask, and then on look under mask, as shown in the figure below.
Updating Block Diagram
We can also do this by pressing the shortcut key Ctrl+U. The block diagram under the mask is shown in the figure below.
We can only edit this diagram in the library folder and not in the model. We can change the diagram in the library we created, as shown in the figure below.
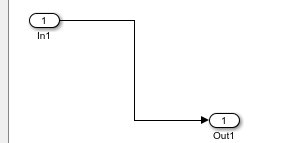
This will also update the diagram in the model, as we can see in the figure below.

However, this library cannot be updated in the model.
Exercise:
- Create a library block with 2 inputs and 1 output. The inputs will take two integers, and at the output, the sum of the integers is returned.
Conclusion
In conclusion, this tutorial provides an in-depth overview of designing custom libraries for Simulink. It covers step-by-step procedures along with an example of explanation to help us better understand the concept. You can utilize this to develop more custom blocks and libraries according to your requirements. At last, we have provided an exercise to reinforce the concept of this tutorial. Hopefully, this was helpful in expanding your knowledge of Simulink.
You may also like to read:
- FOD3180 MOSFET Gate Driver Optocoupler
- CD4012 Dual Four Input NAND Gate IC
- D Flip Flops Simulation using PSpice: Tutorial 12
- Displaying Images in ESP32 and ESP8266 Web Server
- LittleFS Introduction & Install ESP8266 NodeMCU Filesystem Uploader in Arduino IDE
- Introduction to Power Line Communication
- ATMEGA328P Microcontroller
This concludes today’s article. If you face any issues or difficulties, let us know in the comment section below.
thank you.
you are welcome. please check our other tutorial on simulink also and keep visiting our website for more information related to simulink.