In this tutorial, you will learn how to use this for programming microcontrollers. For programming the AVR microcontroller, we needed a simple but powerful programmer. For this, PonyProg was our choice. PonyProg is serial device programming software with a user-friendly GUI framework available for Windows 95/98/ME/NT/2000/XP and Intel Linux. Its purpose is to read and write every serial device. At the moment, it supports I²C Bus, Microwire, SPI EEPROM, the Atmel AVR, and Microchip PIC microcontrollers. SI-Prog is the programmer hardware interface for this compiler. It is free-to-use software for AVR microcontrollers and PIC microcontrollers. You can download it for free or even modify it. To download it, click on the following link: avr microcontroller.
Recommended Components
The following parts and reference books are useful for building and learning AVR microcontroller projects.
| Component | How it’s used in your AVR projects | Buy on Amazon |
|---|---|---|
| ATmega32 (AVR) microcontroller | The 8-bit AVR MCU used across these tutorials (LED, LCD, motors, timers, etc.). | Check Price |
| USBasp programmer (ISP) | Burns the compiled HEX file into the AVR over the ISP header. | Check Price |
| Breadboard | Solderless base for wiring the AVR and the project’s components. | Check Price |
| Jumper Wires | Make the connections between the MCU, components and power rails. | Check Price |
| Book: The AVR Microcontroller & Embedded Systems (Mazidi & Naimi) | AVR programming in Assembly & C — timers, USART, ADC, SPI, I2C and PWM. | Check Price |
| Book: AVR Programming (Elliot Williams, Make:) | A hands-on, project-based guide to bare-metal AVR programming. | Check Price |
As an Amazon Associate we earn from qualifying purchases. Prices and availability are accurate as of the date/time indicated and are subject to change.
PonyProg Introduction
PonyProg is a serial device programming software that provides a user-friendly GUI framework for programming microcontrollers. It is compatible with Windows operating systems (Windows 95/98/ME/NT/2000/XP) and Intel Linux. The software supports various types of microcontrollers, including I²C Bus, Microwire, SPI EEPROM, Atmel AVR, and Microchip PIC microcontrollers.
PonyProg is a free-to-use software that allows users to read and write data to serial devices. It offers flexibility as it can be downloaded for free and even modified according to specific requirements.
To download PonyProg, you can visit the following link: avr microcontroller.
In the next sections, we will provide a step-by-step guide on how to use PonyProg for programming microcontrollers.
How to use PonyProg
For running and using following steps are used:
- Start the PonyProg program by clicking on:
Start Software
Start->Programs->PonyProg->PonyProg2000
Once the program has started, the following screen will appear:
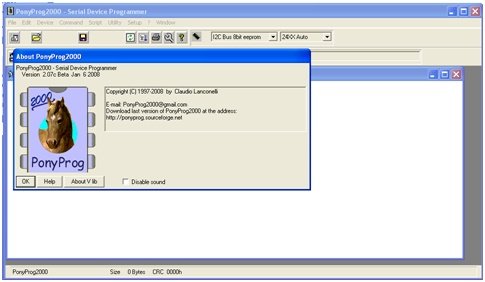
Next is This dialog box appears the first time it is run. After it has been installed on the computer. if this does not appear then skip it.

Access calibration through the Setup menu: Setup >> Calibration

Select Device
Set the device by selecting “AVR Micro” then “ATmega16” from “Device”

In the Interface setup, a serial cable is connected to the computer’s COM port (COM1) to program the Atmega16. To do this, navigate to the “Interface board Setup” window by selecting “Interface Setup…” from the “Setup” menu.

“I/O port setup” should be set to “Serial”. The drop-down should be set to “SI Prog API” and “COM1” selected. Leave all “Polarity of the Control lines” checkboxes.

Now, press the “Probe” button on the “Interface board Setup” If all goes well, you should see the following message appear. Press “OK” and “OK” again on the “Interface board Setup” window.

Load Program
If you get the following message, something is not configured correctly. Work through this section, Interface Setup, again and if the probe test still fails, consult a tutor.
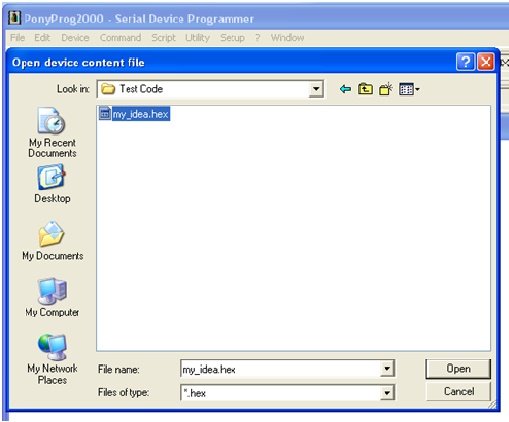
For loading the program file select “Open Device ..” from the “File” menu.

You will then get the “Open Device content file” dialog. Go to the “File of type” drop-down and select *.hex. Navigate to the folder that contains the required hex file, select the filename, and press the “Open” button.
- The window changes to show the contents of the hex program file. Displayed down the left side in red are the address offsets of each line of data. The addresses are displayed in hexadecimal. Each line contains 16 bytes of data, so the address offsets increment by 16 (10 in hex) for each line.
- For programming the device, before the device can be programmed, it must be selected. Select “Program Options” from the “Command” menu and choose options such as erase, write program flash, and write security configuration bits.
- The device can now be programmed. Select “Program” from the “Command” menu.

- If the program is successfully burned following dialog is shown:

Conclusion
In conclusion, PonyProg is a reliable and user-friendly software for programming microcontrollers. It offers a wide range of features and supports various types of microcontrollers, making it a versatile tool for programmers. With its intuitive GUI framework, PonyProg provides easy navigation and allows users to read and write data to serial devices effortlessly. It is a cost-effective solution as it is free to use and can be downloaded or modified according to individual requirements. Whether you are programming AVR microcontrollers or PIC microcontrollers, PonyProg is a powerful tool that simplifies the programming process. By following the step-by-step guide provided in this tutorial, you will be able to utilize the full potential of PonyProg and achieve successful programming results.
Related content:
- Program STM32 Blue Pill through USB Port
- Program Raspberry Pi Pico with Arduino IDE
- Program ESP32 and ESP8266 with MU Editor and MicroPython
- CP2102 UART Module – How to use it to Program Arduino Pro Mini
- MPLAB XC8 Compiler – Write your First Program
- Getting started with Keil uVision: Write your first Program for Tiva LaunchPad