In this tutorial, we will learn about matrices in LabView. LabView provides us with the option of MathScript, in which we can write code and run it. If we want to manipulate matrices, we can use the MathScript window, which we have used before for the basic introduction to MathScript. This is because it is way easier than manipulating 2D arrays in a block diagram. In this tutorial, we will discuss how to add, subtract, and multiply two matrices in LabView with the help of MathScript code. At the end of the tutorial, we have provided an exercise for you to do on your own, and in the next tutorials, we will assume that you have done those exercises and not explain the concept regarding them. See our tutorial on using MathScripts in LabVIEW.
Matrix operations LabVIEW
Let’s see how basic mathematical operations work in the matrix. First, we will look at matrix addition. It involves adding the corresponding elements of two matrices to create a new matrix of the same dimensions. We can achieve this by simply adding each element from the first matrix to the corresponding element in the second matrix.
Now let’s look at matrix subtraction. It follows a similar principle, where corresponding elements are subtracted to form a new matrix. Both addition and subtraction require matrices with identical dimensions.
Finally, we have matrix multiplication. This, on the other hand, involves combining rows from one matrix with columns from another. The element at the intersection of a row from the first matrix and a column from the second matrix is calculated by taking the dot product of those row and column vectors. We can determine the resulting matrix’s dimensions by the number of rows in the first matrix and the number of columns in the second matrix.
In the next section, we will see how to perform basic matrix operations in LabVIEW with the help of MathScript code.
Matrix Addition, Subtraction, and Multiplication in LabVIEW
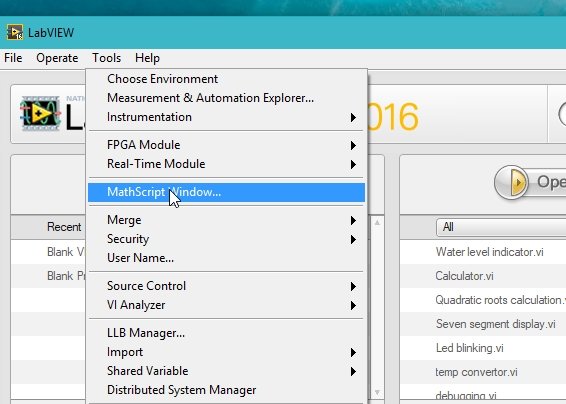
Let’s move to the coding portion and try to work with matrices in MathScript LabView. From the main page, after opening LabView, click on the Tools button on the top bar. A dropdown menu will appear, and from that menu, click on the MathScript window as shown in the figure below.
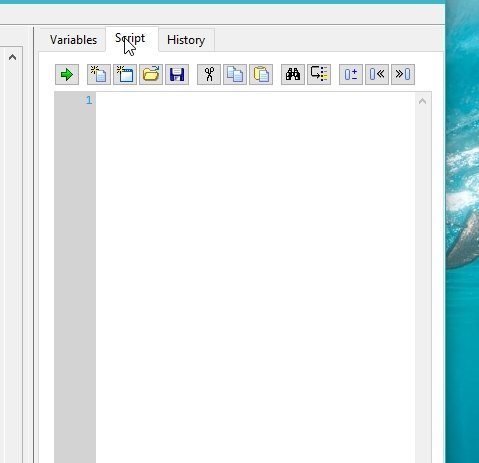
Now, in the MathScript window, press left-click on the script button next to the variables section. Refer to the figure below.
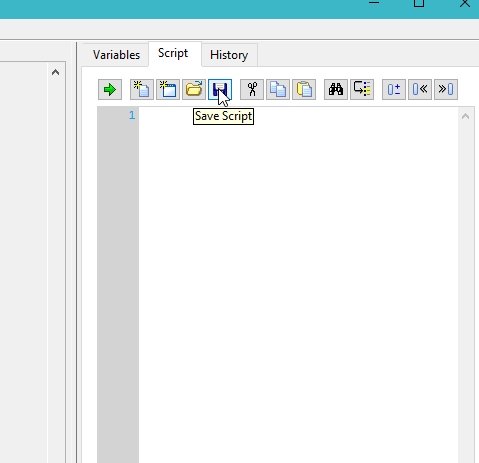
This will create a script in MathScript. Save it for future use by pressing <Ctrl+S> or by pressing the save button made on the top of the script, as shown in the figure below.
Matrix Definition
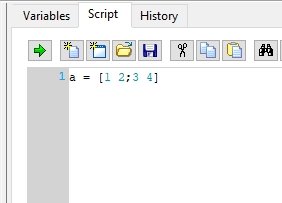
In the previous tutorial about the introduction to MathScript, we explained the working of arrays; matrices operate in the same way as an array. We can define or initialize a matrix by separating two columns with a semicolon (;), as shown in the figure below.
We can run this script by pressing <Ctrl+R> or by clicking on the green arrow button on the top of the script, as shown in the figure below.
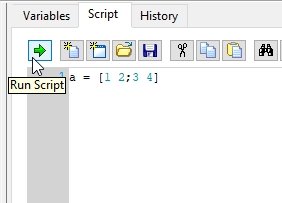
After pressing the green arrow, the output of this line of code will be displayed in the output window. As shown in the figure below.
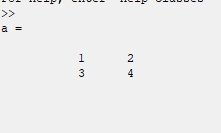
This implies that separating two arrays with a semicolon (;) will generate a matrix. The array before the semicolon is the first row of the matrix. Whereas the array after the semicolon is the second row of the matrix. We can see this from the output window.
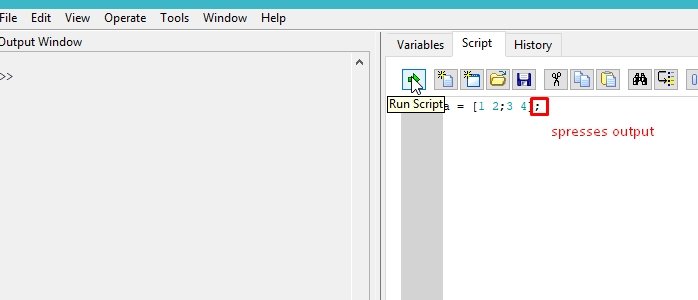
If we don’t want each line of our code to be displayed on the output window, we can simply place a semicolon at the end of the line. This will prevent the command from being displayed on the output window.
By default, every MathScript command line has a printing option with it, and the semicolon will tell LabView to suppress the printing option of the command, as shown in the figure below.
Matrix Addition
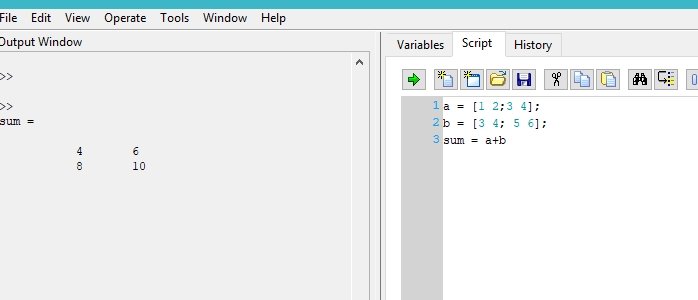
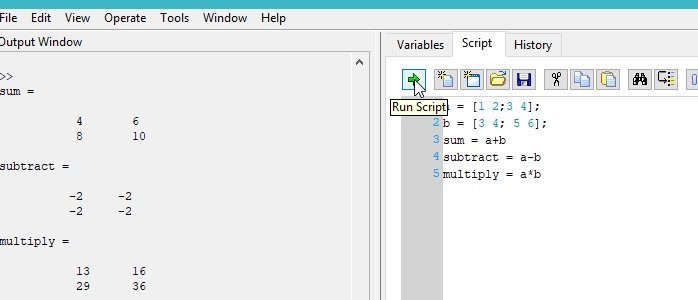
First, in order to do mathematical operations on a matrix, we have to define another matrix, i.e., a matrix ‘b’. Hence, if we are interested in adding to a matrix, a simple plus (+) sign will do the task for us; this is the major benefit of using MathScript in LabView. So, by placing a ‘+’ sign between two matrices LabVIEW will add these according to matrix rules of addition, as shown in the figure below.
Matrix Subtraction
We can do the matrix subtraction in a similar manner, but using a minus (-) sign instead of the plus (+) sign. Thus, simply placing a ‘-’ sign between two matrices will subtract one matrix from the other matrices according to matrix rules of subtraction, as shown in the figure below.

Matrix Multiplication
Lastly, coming over to the matrix multiplication part, we all know that matrix multiplication is not as straight-forward as simple addition and subtraction. In order to evaluate matrix multiplication, we have to take into account the rules defined for multiplying two matrices.
One of the major benefits of using MathScript is that we can evaluate matrix multiplication by simply placing an asterisk (*) sign between two matrices. Placing a ‘*’ sign between two matrices will multiply one matrix with the other matrices according to the matrix rules of multiplication, as shown in the figure below.
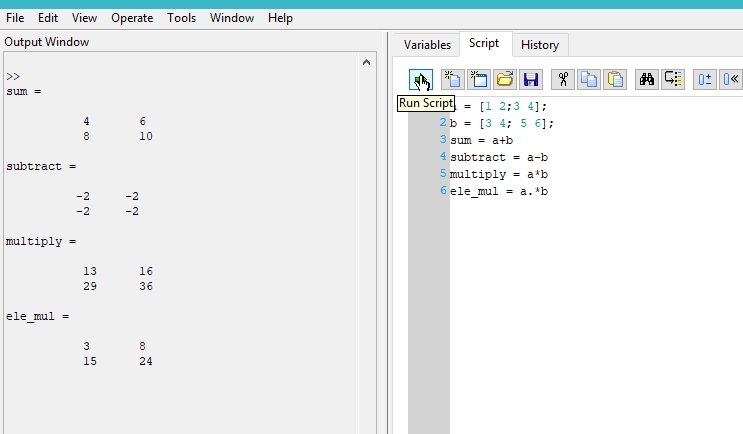
But what if we don’t want to implement matrix multiplication and are only interested in multiplying the corresponding elements of two matrices?
Mathscript also allows us to do so using a dot (.) in conjunction with the asterisk (*) sign. Placing ‘.*’ signs between two matrices will multiply the corresponding elements of one matrix with the other matrices, as shown in the figure below.
Exercise:
- Do all the tasks we have done in this tutorial using a matrix of size 3×3.
Conclusion
In conclusion, this tutorial covers an in-depth overview of basic mathematical operations using matrices. We have provided step-by-step procedures for addition, subtraction, and multiplication using MathScript in LabVIEW. You can utilize this concept to complete more advanced matrix calculations using MathScript. At last, we have also provided an exercise to further reinforce the concept of matrix operations using LabVIEW. We hope that this tutorial is helpful in broadening your knowledge of LabVIEW.
You may also like to read:
- Beginner’s Guide In Creating A Sustainable Home
- Displaying Images in ESP32 and ESP8266 Web Server
- Calculate Factorial of a Number in LabView: Tutorial 35
- Design Three Phase Inverter using Simulink MATLAB
- MCP16252 Boost Regulator IC
This concludes today’s article. If you face any issues or difficulties, let us know in the comment section below.