In this tutorial, we will see the different properties of a VI, and we will also learn the basics of how to customize a VI. We cannot explain all the properties in a single tutorial; hence, we encourage the reader to learn the remaining properties through self-study.
VI Properties LabVIEW Front Panel
To customize the properties of a VI in LabVIEW, there are several ways. For customizing the properties of a VI, select File and then select VI Properties, or follow the steps given below.
- Right-click on the upper-right corner of the block diagram of a VI.
- From the shortcut menu, select VI properties.
We can also customize the properties during a call to a subVI by using the node setup dialog box or programmatically.
Explanation using a VI
Open a blank VI, as done in Tutorial 1. The main task of this tutorial is to study the customizable properties of a VI.
Hence, there will be no such program to explain the properties but only the process of customizing them. We can access the VI properties dialog box by right-clicking on the upper-right VI icon on the block diagram, as shown in the figure below.
VI Properties
We can also access the properties dialog box by clicking on the file and then selecting VI properties from the dropdown, as shown in the figure below.

Or the keyboard shortcut to access VI properties is Ctrl+I. The dialog box that will appear after clicking on the VI properties is shown in the figure below.

The first customizable property of a VI is the general section. It shows the location and the current revision of the particular VI whose properties we are customizing. It also gives the option to edit the icon of the VI, as shown in the figure below.
This option opens a dialog box that can change the size and graphics of the VI icon. We customize the icon based on the options given in it. The figure below shows the edit icon dialog box.
Revision History
There is also a revision history present in the general block, as can be seen from the figure.

This will allow us to see the LabVIEW history according to the setting we have assigned to the revision history in the revision history block (to be discussed later). The figure below shows all the properties of a VI that we can customize in LabVIEW.

Memory Usage
The property block next to the general block is “Memory Usage”. The memory usage block is shown in the figure below.
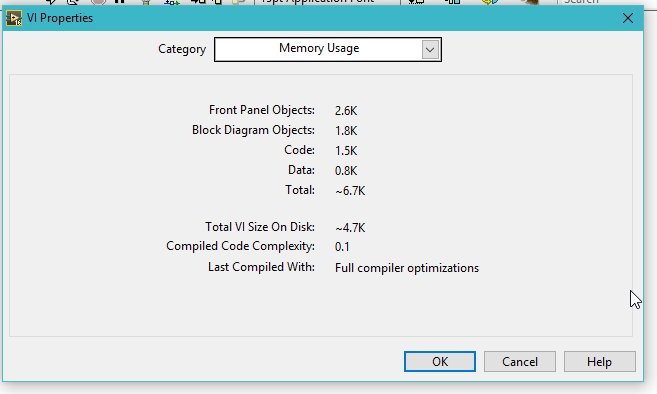
This block provides us with information about how much memory is being consumed by the current VI. This includes the memory used by the blocks and objects of the front panel and block diagram, and most importantly, how much memory on the disk is used by the complexity of the code. This also provides us with information on the total memory usage of the VI.
Documentation Block
The next property is “Documentation”. This property allows us to write the description of the VI in words. See the figure below.

This allows us to add the help tags as well. We can also change the help feature we want to use, i.e., whether we want to use the local help from the built-in LabVIEW help feature or take help from the web, as shown in the figure below.

There is also a help path insertion box available. We can add the path of the file or feature from where we want to get help during coding at the time of the call.
The next property from the dropdown is “Revision History”. The revision history property box is shown in the figure below.
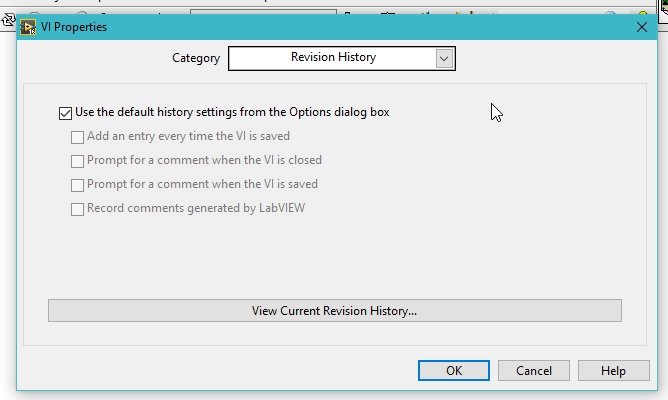
This block allows us to choose whether we want the history of the program to be generated at every runtime instant by the default LabVIEW settings or if we want to override these properties according to our own choice. By unchecking the block shown in the figure below, we can change the settings of the revision history, which was the default initially.

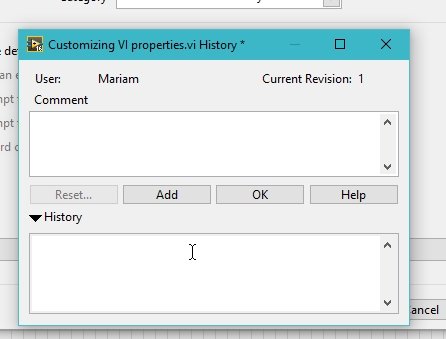
These properties allow us to add the history of every new VI, as we can see from the figure above. We can also view the current revision history of a LabVIEW VI using the button shown in the figure of the revision history block, as shown in the figure below.
Edit Options
The next property is Edit Options. The Edit option property window is shown in the figure below.
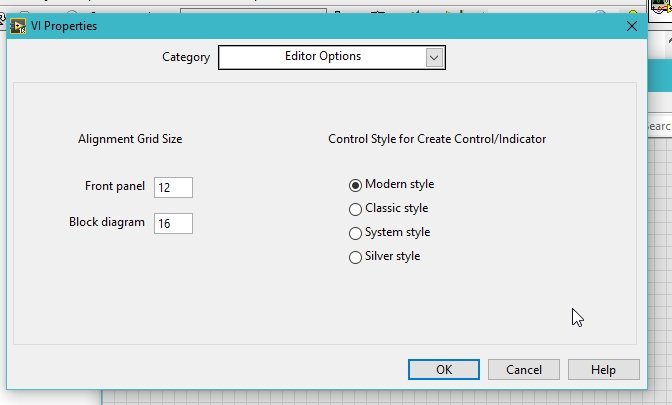
This block allows us to change the view or icons of the block diagram’s or front panel’s objects. We can change the front panel and block diagram size as well as their style.
The next property is “Protection”. Protection is the most interesting property of the VI. We can lock and unlock our VI and also make it password-protected. See the figure below.
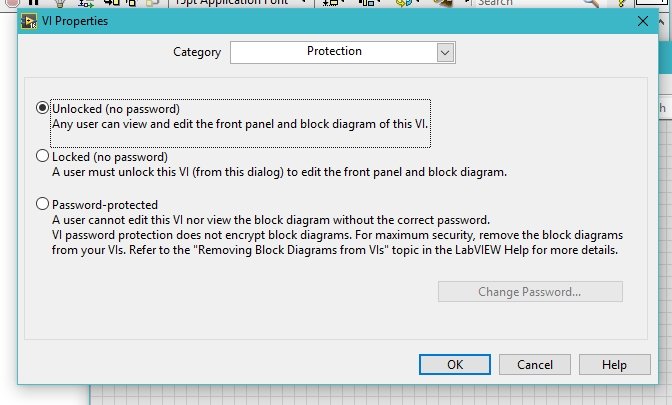
We can also lock our VI (the user will have to unlock the VI to view it) by checking the Locked button from the protection section, as shown in the figure below.

We can also make our VI password protected by selecting the option shown in the figure below.
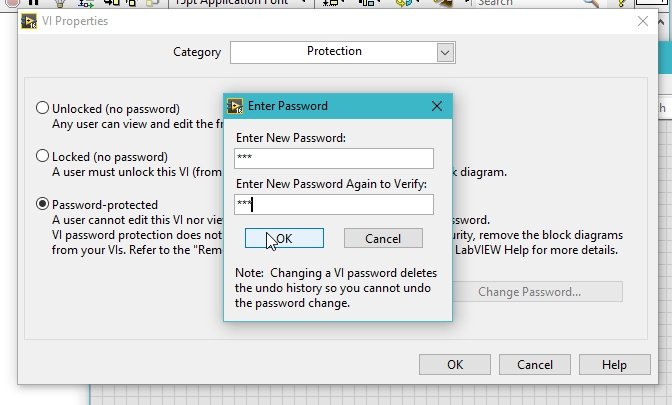
By using this feature, the user can only run the VI and see its results; No one will be able to see the block diagram or its functionality without entering the password with which we have locked the VI.
Windows Appearance
The next property of VI is “Window Appearance”. This property allows us to change the appearance of our window, as shown in the figure below.

We can also customize the appearance of the window by using the customized block shown below.
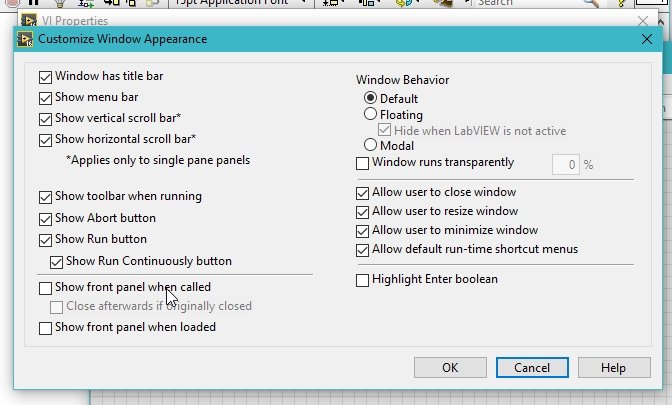
All these properties are very straight-forward, and we can use them on our own.
The next property is “window size”, which allows us to change the size of the window. Refer to the figure below.
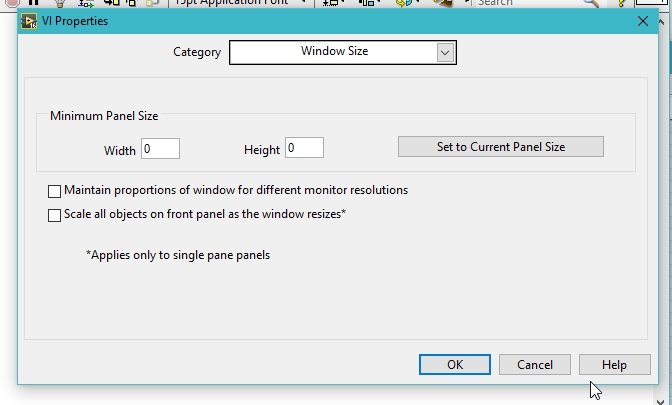
As the name suggests, it deals with the size of the window in our current VI.
Next is the “Window Runtime Position”. The block of window runtime positions is shown in the figure below.

It allows us to maintain the position of the window during runtime. By default, it provides us with five different positions, but we can also customize the runtime position of the window, as shown in the figure below.

Execution Property
The next property is “Execution”. The block of execution property is shown in the figure below.
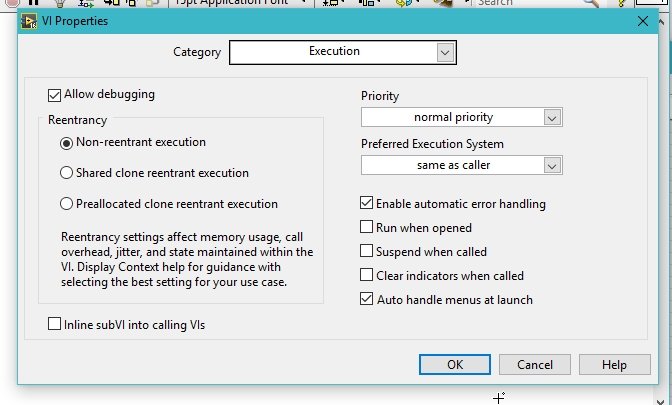
This property block will allow us to change the priority of the execution according to our choice.

It is our choice to set the priority of tasks during runtime so that complicated tasks are done at a higher priority as compared to simpler tasks. It also allows us to select preferred tasks, which determine the processor we want to use for our execution.
The next and last property is the “Print Option”. This block allows us to select the printing properties of the VI we made. See the figure below.
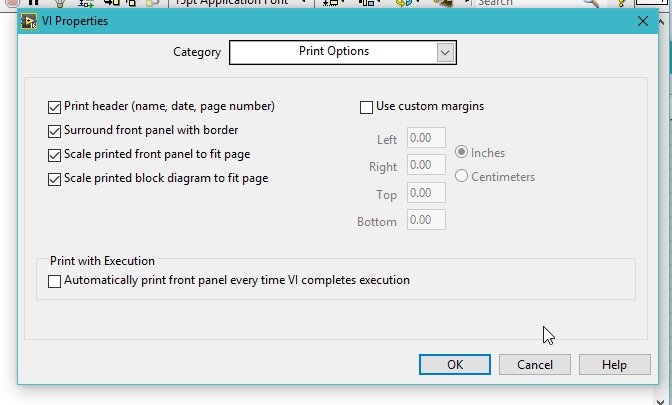
This will change the printing settings of the VI we just designed in this section. It also allows us to select the setting where the system automatically prints the VI every time the code is compiled, as shown in the figure below.

Conclusion
In conclusion, this tutorial provided an in-depth understanding of the customizable properties of a VI in LabVIEW. We explored various sections such as general properties, memory usage, documentation, revision history, edit options, protection, window appearance, window size and runtime position, execution properties, and print options. Each property offers unique ways to tailor the VI to specific needs, from changing the VI icon to locking it with a password. By leveraging these properties, LabVIEW users can enhance the functionality, aesthetics, and security of their VIs. With this newfound knowledge, readers are encouraged to further explore and experiment with the remaining properties to expand their expertise in LabVIEW customization.
You may also like to read:
- FIR Filter Design in Simulink Matlab
- TCA9548A I2C Multiplexer Arduino Use Same Address I2C Devices
- Arduino LED Slider Brightness Control Android App with MIT App Inventor
- Set ESP32 Custom Hostname with Arduino IDE
- Guess the number game in Labview: tutorial 30
This concludes our tutorial. If you face any issues or difficulties, let us know in the comment section below.