In this tutorial, we will focus on learning the workings of a 1D array. We will try to be brief and precise with the description of every little concept. First, there is the introduction, and then a program explaining the functionality of a simple 1D integer-type array in LabVIEW. After that, there is the functionality description and a small note on how it works with some of the function blocks related to it. At the end of the tutorial, you are provided with an exercise to do it by yourself, and in the next tutorials, we will assume that you have done those exercises and not explain the concept regarding them.
Introduction to Arrays in LabVIEW
An object holder that can store a fixed number of values of a specific data type (discussed in previous tutorials) is known as an “array”. At the time of its creation, we define its length, which remains fixed during the run time. In the second tutorial’s example, we used a string saying “Hello World!!” which was quite simple with respect to an array of data type ‘String’. However, in LabView, we have different definitions of it. A sequence of objects of the same size and type stored in one variable or at one place is defined as an array. The objects or individual data stored in them are called elements of an array. In a VI, one can have an array of integers, floats, or strings as well.
In computer VIs or programs, the purpose of an array is to organize data in such a way that the related set of values can easily be accessed or searched at the time of need. For example, at airports, arrays can be used to store the list of passengers. Similarly, a librarian can use arrays to store the titles of all the books currently present in the library. Arrays are mostly used in data structures, a subject studied by almost every electrical or software engineer. Its use in data structures is to make stacks and queues. But the concepts of stacks and queues have nothing to do with LabView; it’s just one of the applications of arrays.
LabVIEW Programming Including Arrays
In this section, we will look at programming using array blocks in LabVIEW. All the steps and details are explained below:
Let’s now move toward the programming part. Create a program using the information provided in previous tutorials and save it by using the path file>>save as or by pressing <Ctrl+S>.
Placement of Array Block
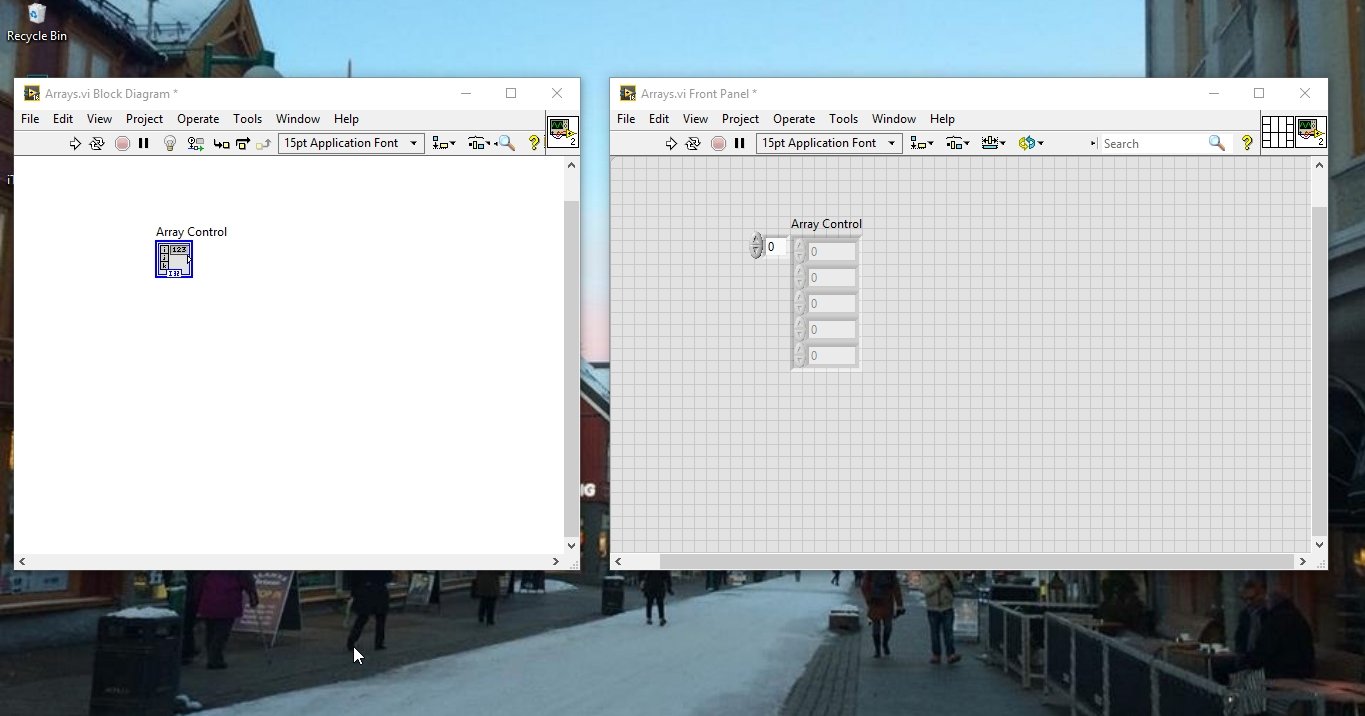
From the Control Palette in the Front Panel, select Arrays, Matrix, and Clusters, and then select Array. The associated block on the block diagram will be black, and it will change its color as soon as we choose the type of data to be stored in the arrays (we have seen this thing in previous tutorials on data types in LabVIEW).

The purpose of this block is to initialize the array (as we do in every programming language). We can change the number of array elements in this array block, as we have done in the previous tutorial.
Do yourself: Change the type of the array to numeric control and set the number of elements of the array to 5.
- After doing the above task, the block diagram will look like the one shown in the figure below.
Vertical Fill Slide Array and Indicator
Now let’s create a similar array of type integer, but this time instead of using integer control, use a different indicator. Right-click on the array and, from numeric, select Vertical Fill Slide. Now, drag and drop it inside the array, as shown in the figure below.
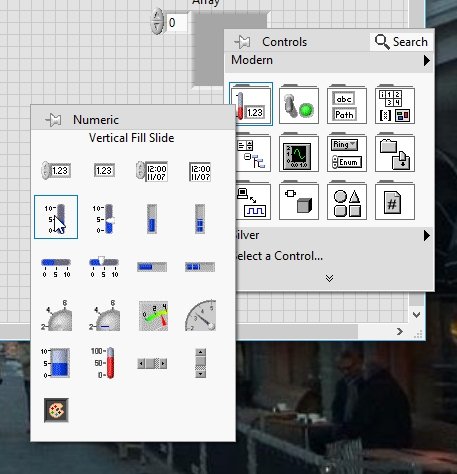
This bar will act similar to an indicator, and we are just using it to familiarize you with some of the new terms in LabView and not just stick to a few terms that we have already used.
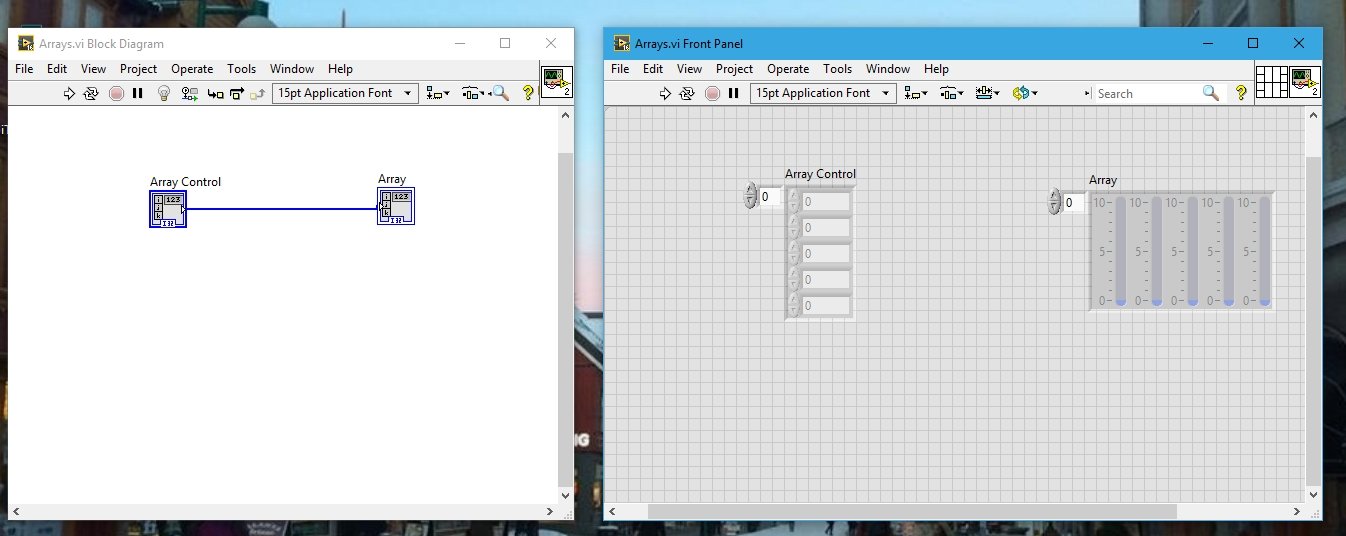
Do yourself: Set the number of elements equal to 5in this indicator array too.
- You can change the type of control to a variable by right-clicking on the block. After this, select Change to Indicator, as shown in the figure below.

Now connect both blocks through a wire, and the resulting block diagram will look like the one shown in the figure below.
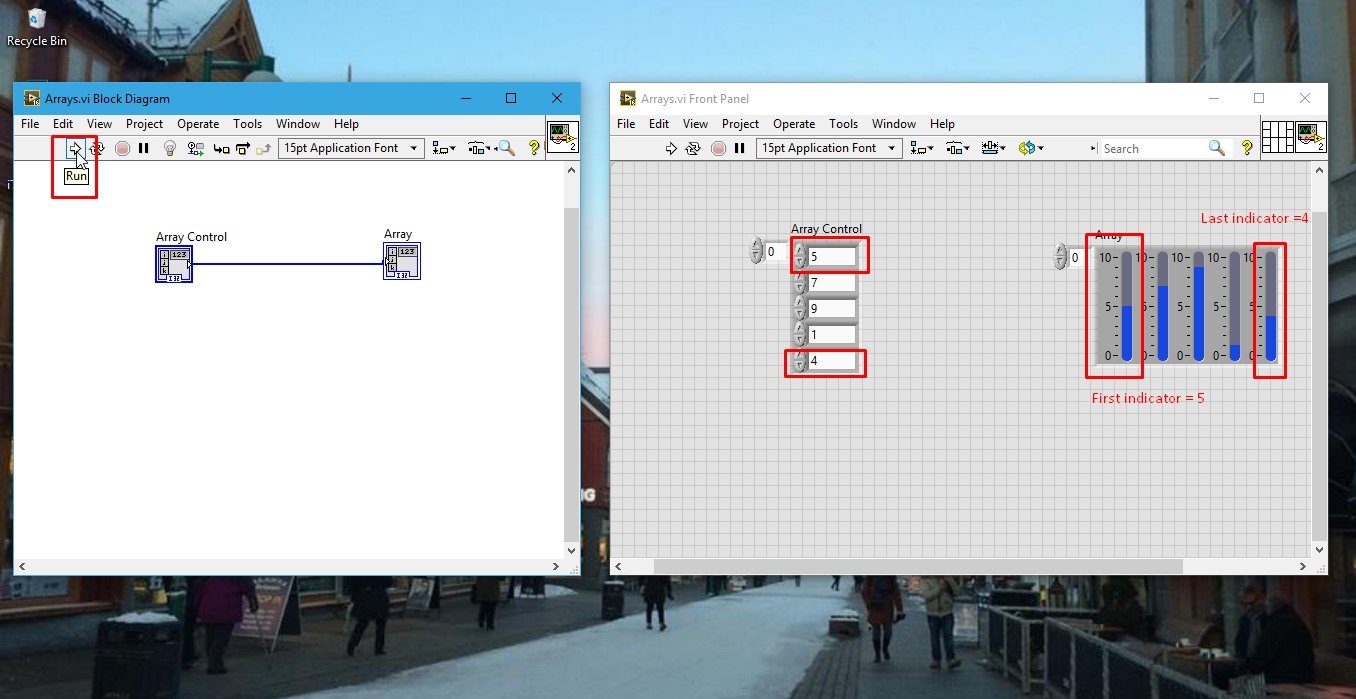
Now we will see how to update the values of the array’s elements. To do this, just enter the values in the array panel shown on the front panel, as shown in the figure below.

Run the program from the run button or press <Ctrl+R>. The output of the array constants will be displayed in LabVIEW on the array indicator, as shown in the figure below. The first indicator in the indicator array represents the value of the first element of the array, and the last element of the array is indicated by the last indicator.
Array Size Block
This is the basic program to understand the workings of array constants and indicators. Now let’s do some more work with the above program to understand the workings of different blocks related to arrays.
From the Function Palette on the block diagram select Array and then select Array Size as shown in the figure below.

Connect the input terminal of this block with the output of the array constant block, and at the output of this block, connect an integer type indicator and give it a proper label (we have learned in previous tutorials how to place an integer type indicator), using the techniques we have learned previously, and connect the indicator with the output of the size block. The resulting block diagram will look like the one shown below.

Array Index Block
Use another block, namely the array index block. It is placed in the function block in the array section named index array. This is shown in the figure below.

Connect the upper input of this index array block to the output of the array constant and the lower input to the constant integer type. Then connect the output of this index array block to an integer type indicator, as you have done previously for the case of array size block.

Change the value of the constant at the input of the index array block to 3, and then run the program from the run button or by pressing <Ctrl+R>.
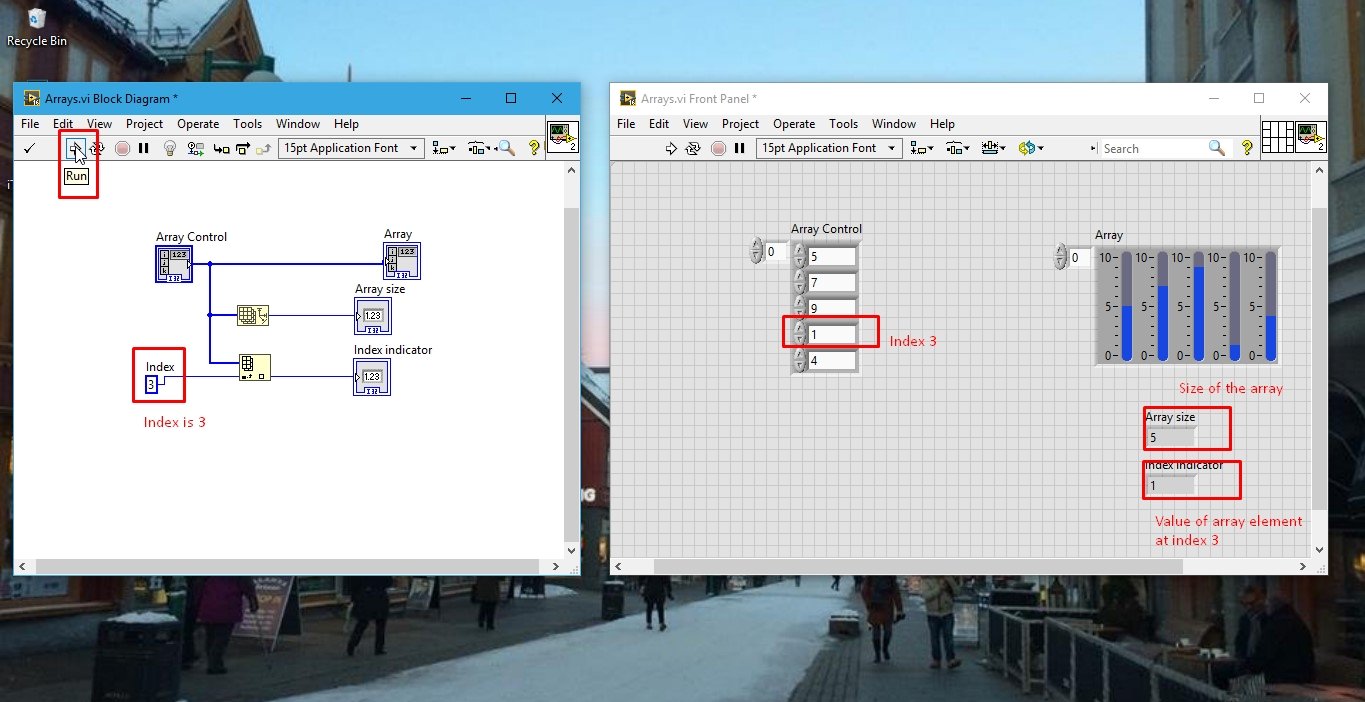
The results of the program reminded us to talk about the indexes of the arrays. The index of arrays starts at zero and ends at array-1. As we have seen in the above example, giving the index 3 returns the value of the 4th element. Tying zero in the index constant, whereas, will return us the value of the first element, and so on.
Exercise for Array using LabVIEW
- Try using the block, namely the reverse ID array, and understand its functionality.
- Hint: It is present in the function palette’s array section.
- Instead of using integer arrays, try to work with 1D booleans and floats to increase your understanding of arrays.
Conclusion
In conclusion, this tutorial provided a comprehensive introduction to arrays in LabVIEW. It explained the concept of arrays, their purpose in organizing data, and their use in LabVIEW programming. The tutorial covered various array blocks, such as array size and array index, and demonstrated how to work with different types of arrays. Additionally, an exercise was given to further practice working with arrays. Overall, this tutorial serves as a solid foundation for anyone looking to understand and utilize arrays in LabVIEW programming.
Related Articles:
- INTRODUCTION TO FIELD PROGRAMMABLE GATE ARRAYS (FPGA)
- ESP32 with MPU6050 Accelerometer, Gyroscope, and Temperature Sensor ( Arduino IDE)
- ESP32 Bluetooth Low Energy (BLE) using Arduino IDE
- Sum of N numbers project in labview: tutorial 34
- Matrix Addition subtraction and multiplication in Labview: tutorial 29
- ESP32/ESP8266 Control Outputs with Web Server and Push Button Simultaneously
This concludes our article today. In case you face any issues or difficulties while following this tutorial, let us know in the comment section below.