In this tutorial, we will learn about enumerated data type controls in LabVIEW. Those who are familiar with any other text-based programming language must have used enumerated types before. The explanatory discussion on enumerated data types is, however, given in the introduction section. After that, the use and functionality of enumerated data types in LabVIEW are explained with the help of a VI. At the end of the tutorial, we have provided an exercise to do by yourself, and in the next tutorials, we will assume that you have done those exercises and not explain the concept regarding them.
Introduction to Enumerated Data Types in LabVIEW
An enumeration can be declared using the keyword “enum”. An enumerator list is a distinct type that consists of a set of named constants. Defining it directly within a namespace is the best way to initialize an enumerator so that all classes in the namespace can access it with equal convenience.
An enumerated data type is a type consisting of a set of named values called enumerals, members, or elements (same as we define a set in mathematics) or an enumerator of the type in computer programming. Identifiers that act as normal constants are enumerator names or elements in a programming language. A degenerately tagged union of unit types can also be defined as an enumerated data type. All elements of an enumerator set are distinguishable, i.e., no two elements of the same data set can be similar in an enumeration. All the elements of a single enumerator are different from each other and therefore can be compared and assigned, but they are not specified; however, compilers and interpreters can represent them arbitrarily.
An enumerated-type control provides the user with a list of items from which the data is selected for further processing. Information about the numeric values and the string labels in the control, however, is included in the data type of an enumerated type control. The numeric data type is by default assigned to the ring control.
In LabVIEW, the user is not allowed to enter the undefined values in enumerated type controls, and the items in enumerated type controls cannot be assigned specific numeric values, as we will explain in the VI section. An enumerated type control can also be used to select the cases of a case structure in LabVIEW.
Examples of Enumerated Data Types in LabVIEW
Let’s explain the workings of enumerated data types using a VI. We have tried our best to explain the workings and functionality of enumerated controls individually and their use with case structures as well.
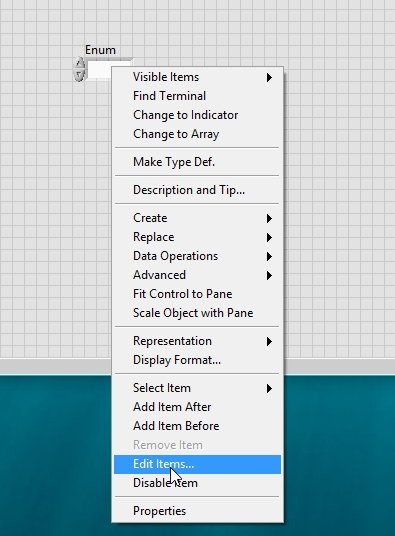
Create a VI as we have discussed in Tutorial 1 and save it as we have done in all previous tutorials. On the Front Panel, right-click, and from the Control Palette, select “Ring & Enum”, and then select Enum as shown in the figure below.

Enum Block
We are looking for an enumerated control here to understand its working; below is shown the front panel block of an enum block.

Currently, this block has no variables stored in it. If we want to edit the variables of the enumerated block, i.e., the elements or enumerals of the data type, right-click on the block, and a dropdown will appear. Select edit items from the dropdown as shown in the figure below.
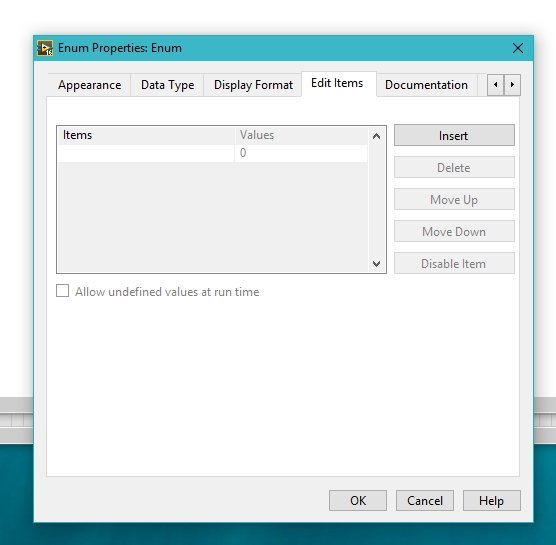
After we click on this block, an edit window will appear, as shown in the figure below.
Insert Variables
This window will let us edit the elements of the Enum. As the picture shows, we can insert, delete, or move up an element in this window. If we want to insert an element in the Enum, simply click on the insert button. It will let us enter the name of the variable we want the element to be, as shown in the figure below.

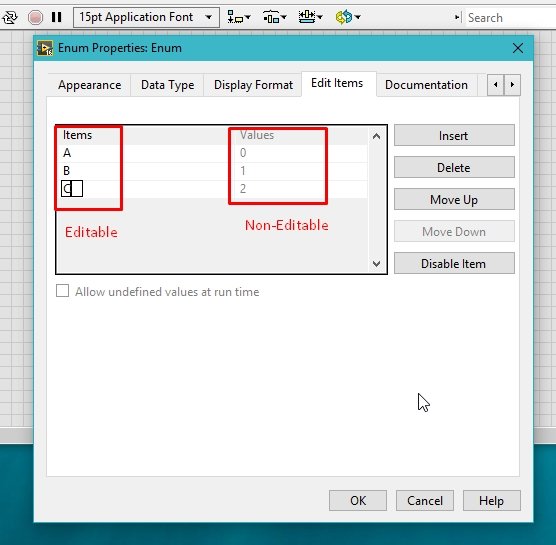
We can write the desired name of our element and not the value because in the enumerated data type, the numeric value assigned to the elements is not editable. We can, however, change the sequence of the enumerals but not their value. See the figure below.
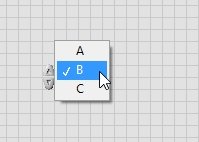
From the block available on the front panel, we can select which variable to access from the enum. We can only access one of the elements of the enum at a time. By clicking on the front panel’s block on enum, we can select which element to access. See the figure below.
Now, if we want to place an indicator to see the output of the enum, there is no need to look for it in the control palette. Simply right-click on the block diagram window’s block of the enum and select create, and then select indicator as shown in the figure below.

Enum Indicator
This will create an indicator of type enum, as shown in the figure below.
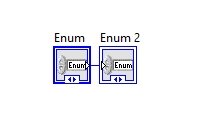
The front panel blocks of the enum control indicator pair are shown in the figure below.
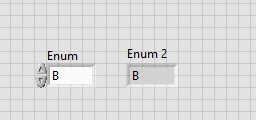
We can change the variable to any other element, as shown in the figure below.

Now if we run the VI, the indicator will display the name of the variable we assigned to the enum control.

The question here may arise: how do I access the integer values assigned to the elements of the enum control? It is not a difficult task. From the function palette, select numeric, then conversion, and then long integer. This will convert our value from an enumerated type to an integer type.

Block Diagram
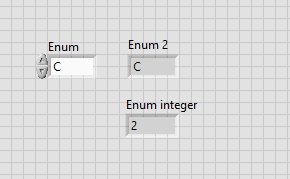
Connect the input side of this block to the output of the enum control, and at the output of the conversion block, create an indicator as we have been doing in all previous tutorials. The resulting figure will look like the one shown below.

This indicator block on the front panel will display the integer value of the particular selected enum element after running the VI. The figure below shows the results of the VI after running it.
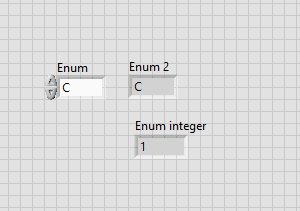
From the edit item window, we can also change the place of the variables and hence the integer number assigned to them. By clicking on the move-up button after selecting a particular element, we can move its integer values, as shown in the figure below.

Now if I run the VI, the output at the integer indicator will not be the same as shown in the figure below.
After we move an element up or down, our VI might give us an error. This error could be removed by deleting the enum indicator block from the block diagram and creating a new indicator because an indicator cannot be used for different sequences of elements.
Exercise
- Use the enum variable we just created as a case selector of a case structure and perform three different operations, i.e., add, subtract, and multiply.
(Hint: You may need to add a case for third element as we have done in case structure tutorial)
Conclusion
In conclusion, this tutorial provided an in-depth exploration of enumerated data types in LabVIEW. Enumerated data types allow for the creation of distinct sets of named constants, offering a convenient way to organize and utilize data in LabVIEW programs. The tutorial covered the basics of declaring and initializing an enumerated data type, as well as the use and functionality of enumerated type controls. Examples and step-by-step instructions were provided to help readers understand how to work with enumerated data types in LabVIEW. By mastering this concept, readers will be able to effectively use enumerated data types in their LabVIEW projects, enhancing the efficiency and organization of their programs. Further resources and links were also provided for readers who wish to explore related topics and expand their knowledge.
You may also like to read
- ESP32 with MPU6050 Accelerometer, Gyroscope, and Temperature Sensor ( Arduino IDE)
- ESP32 Save Data to Flash Permanently using Preferences Library
- IoT Protocols: A Comprehensive Guide to Different Smart Home Protocols
- Raspberry Pi Pico W MicroPython Publish Sensor Readings to Google Sheets
- Micro SD Card Module with ESP8266 NodeMCU
This concludes today’s article. If you face any issues or difficulties let us know in the comment section below.
Very useful notes