In this user guide, we will learn to perform over-the-air (OTA) updates to ESP32 using the AsyncElegantOTA library with VS Code and PlatformIO.This means that the ESP32 module like other Wi-Fi enabled microcontrollers has the feature to update the firmware or update files to the filesystem wirelessly. There are several ways to accomplish the OTA updates but we will use the AsyncElegantOTA library to achieve it. Through this library, a web server will be created that will allow us to upload new firmware/ files to the ESP32’s SPIFFS without any physical connection. All the updating will occur wirelessly (OTA) without physically connecting the ESP32 module to a computer via a USB cable. We will use VS Code with PlatformIO IDE to program our ESP32 board.

We have a similar guide in Arduino IDE as well. Follow the link given below to access it:
ESP32 OTA (Over-The-Air) Updates using AsyncElegantOTA Library and Arduino IDE
OTA Introduction
In embedded systems and especially in IoT applications, the devices are usually deployed at remote locations. Therefore, it is very inconvenient to get physical access to these devices to perform applications updates. Over the air or OTA is a commonly used process to update the firmware of these devices wirelessly without having physical access to devices. For example, you have developed a new IoT device and deployed thousands of such devices at different remote locations. After some time, your customer asked you to add a new feature to the device.
You have created a new feature as per the demand of the client. But the question is how will you update the new firmware to these thousands of devices that are already deployed at remote locations? Performing updates one by one by getting physical access to each device will be a wastage of time and resources. By using OTA, we can simply update the firmware of all devices with one click from a remote server wirelessly.
ESP32 OTA Updates using AsyncElegantOTA library
Through OTA programming, the ESP32 board will wirelessly update new sketches. With the help of the AsyncElegantOTA library, there will also be a feature to upload files onto the ESP32 SPIFFS. No physical access is required. Only a stable internet connection will be the requirement. Thus, without any serial connection, we will perform OTA updates. One major inconvenience of using OTA is that we would have to manually add additional code for the OTA functionality for every sketch.

The AsyncElegantOTA library will allow the user to access a web server through which new firmware could be uploaded as well as files could also be uploaded to the ESP32’s filesystem wirelessly. The files will be converted in .bin format before uploading them with this method. Additionally, we will use the ESPAsyncWebServer library to create the OTA web server which is compatible with the AyncElegantOTA library. By the end of this article, you will be able to add the OTA functionality in all the web servers which you previously created using the ESPAsyncWebServer library.
Key Advantages of using AsyncElegantOTA Library
- Easy to integrate with asynchronous web server projects created through the ESPAsyncWebServer library
- Provides an interactive and visually pleasing interface for the web server
- Can update new sketches to the ESP32 module as well as upload files to the ESP32 SPIFFS
How to use AsyncElegantOTA Library to Upload Files
- Firstly, we will create a sketch in PlatformIO for the OTA web updater. This will be uploaded to the ESP32 through a serial connection with the computer via a USB cable. You will require the AsyncElegantOTA library, AsyncTCP and the ESPAsyncWebServer libraries for this step.
- Inside the sketch, you will have to include the following lines of code to easily incorporate the OTA updates via the AsyncElegantOTA library:
- 1. Include the library: #include <AsyncElegantOTA.h>
- 2. Add this line before starting the server: AsyncElegantOTA.begin(&server).
- 3. Lastly, in the loop() function add the line: AsyncElegantOTA.loop().
- Th OTA web updater sketch will create a web browser that we can access by typing http://IP_Address/update in the search bar. Through this web updater, we will be able to upload new firmware/ add files onto the ESP32 filesystem.
- Afterwards, for every sketch you upload, you will have to add the additional code for the OTA functionality to upload files/sketches wirelessly.
Setting up PlatformIO IDE with VS Code
We will use PlatformIO IDE to program our ESP32 development board. To learn more about how to use PlatformIO IDE with VS Code follow the getting started user guide given below.
Recommended Reading: Getting Started with VS Code and PlatformIO IDE for ESP32 and ESP8266 (Windows, macOS, Linux)
Installing AsyncElegantOTA and ESPAsyncWebServer Library in PlatformIO IDE
You can install libraries by adding libs_deps for a particular library that you want to install for your project in its platformio.ini file. For this project, we will add two libraries: AsyncElegatOTA and ESPAsyncWebServer library. Previously, while working in Arduino IDE we had to install the dependencies for the ESPAsyncWebServer library as well but in this case. In PlatformIO IDE, all the dependencies come already installed with the particular library. Now, in the platformio.ini file add the following line of code to include the two libraries necessary for this project.
lib_deps = ESP Async WebServer
  ayushsharma82/AsyncElegantOTA @ ^2.2.6
Example 1: Basic Sketch AsyncElegantOTA ESP32
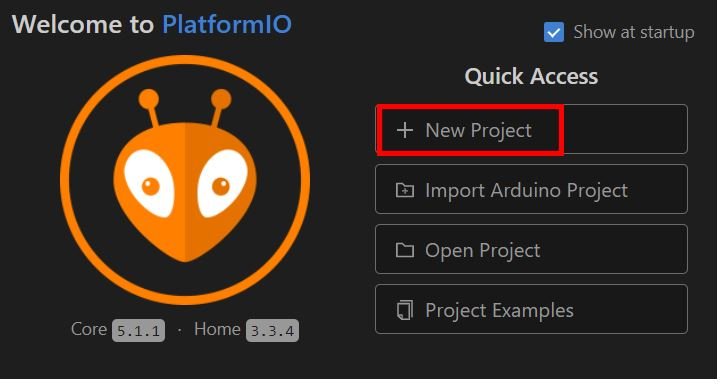
On the PIO Home page go to ‘+New Project.’
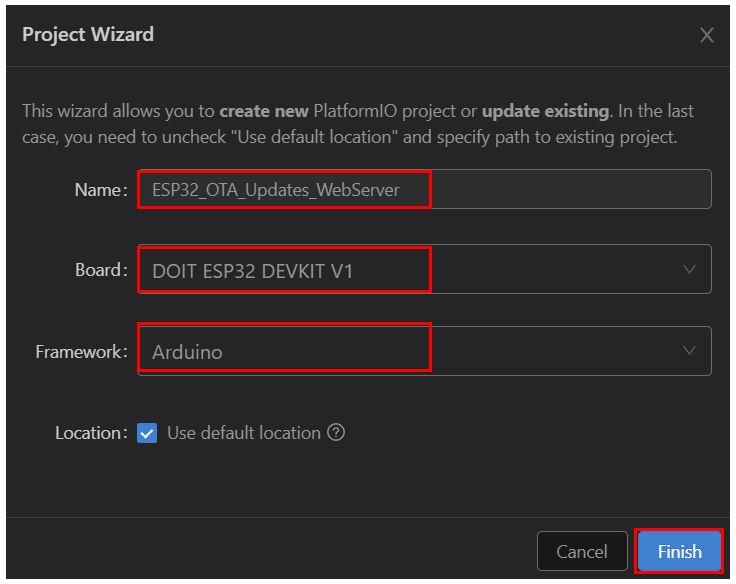
Now add the details. Give the name of your project, the type of your development board and the framework. We have named our project ‘ESP32 Blinking LED.’ For the board, we have selected ‘DOIT ESP32 DEVKIT V1.’ The framework will be Arduino. You can use any other name according to your choice. If you want to use ESP8266 instead, choose it appropriately from the drop-down list in the board section. We will save this project in the default location which is set as Documents/PlatformIO/Projects. You can also specify your preferred location. Click the Finish button to create your project.
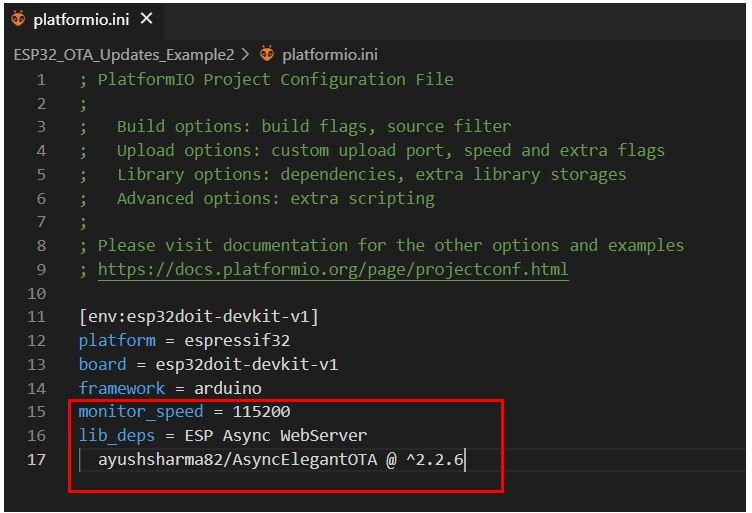
Go to the Explorer tab and open the platformio.ini file. Add the following lines of code as highlighted below. We are configuring the baud rate of the serial monitor to 115200 and adding the two libraries.
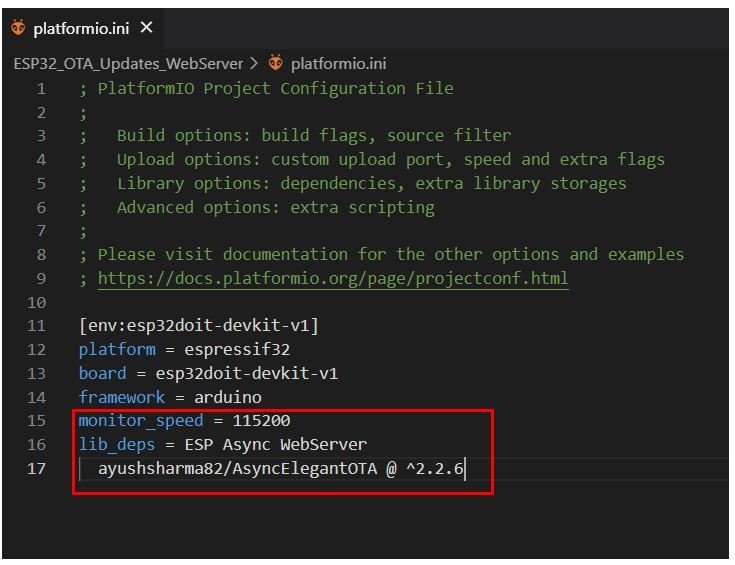
Press Ctrl + S to save the changes.
Now go to Explorer > src > main.cpp and open it. Replicate the code given below in that file. This sketch creates an ESP32 web server that displays a simple text message on the /root URL and the ElegantOTA web page on the /update URL. The web page will allow the user to update new firmware/upload files to ESP32 SPIFFS.
#include <Arduino.h>
#include <WiFi.h>
#include <AsyncTCP.h>
#include <ESPAsyncWebServer.h>
#include <AsyncElegantOTA.h>

const char* ssid = "Your_SSID";
const char* password = "Your_Password";

AsyncWebServer server(80);

void setup(void) {
  Serial.begin(115200);
  WiFi.mode(WIFI_STA);
  WiFi.begin(ssid, password);
  Serial.println("");

  while (WiFi.status() != WL_CONNECTED) {
    delay(500);
    Serial.print(".");
  }
  Serial.println("");
  Serial.print("Connected! ");
  Serial.print("IP address: ");
  Serial.println(WiFi.localIP());

  server.on("/", HTTP_GET, [](AsyncWebServerRequest *request) {
    request->send(200, "text/plain", "Hello! This is a simple text message sent from ESP32. Microcontrollerslab");
  });

  AsyncElegantOTA.begin(&server);
  server.begin();
  Serial.println("HTTP server started!");
}

void loop(void) {
  AsyncElegantOTA.loop();
}
How the Code Works?
Including Libraries
Firstly, we will include the necessary libraries. For this project, we are using five of them. Arduino.h, WiFi.h, ESPAsyncWebServer.h, AsyncTCP.h and AsyncElegantOTA.h. As we have to connect our ESP32 to a wireless network hence we need WiFi.h library for that purpose. The other libraries are the ones that we recently downloaded and will be required for the building of the asynchronous web server as well as for the OTA functionality.
#include <Arduino.h>
#include <WiFi.h>
#include <AsyncTCP.h>
#include <ESPAsyncWebServer.h>
#include <AsyncElegantOTA.h>
Setting Network Credentials
Next, we will create two global variables, one for the SSID and the other for the password. These will hold our network credentials which will be used to connect to our wireless network. Replace both of them with your credentials to ensure a successful connection.
const char* ssid = "Your_SSID";
const char* password = "Your_Password";
Creating the AsyncWebServer Object
The AsyncWebServer object will be used to set up the web server. We will pass the default HTTP port which is 80, as the input to the constructor. This will be the port where the server will listen to the requests.
AsyncWebServer server(80);setup() function
The following section of code will connect our ESP32 board with the local network whose network credentials we already specified above. After the connection will be established, the IP address of the ESP board will get printed on the serial monitor. This will help us to make a request to the server.
WiFi.mode(WIFI_STA);
  WiFi.begin(ssid, password);
  Serial.println("");
  while (WiFi.status() != WL_CONNECTED) {
    delay(500);
    Serial.print(".");
  }
  Serial.println("");
  Serial.print("IP address: ");
  Serial.println(WiFi.localIP());
ESP32 Handling Requests
We will deal with the /root URL request which the ESP32 board will receive. The handling function will respond to the client by using the send() method on the request object. This method will take in three parameters. The first is 200 which is the HTTP status code for ‘ok’. The second is “text/plain” which will correspond to the content type of the response. The third input is the content of the text which will be displayed.
 server.on("/", HTTP_GET, [](AsyncWebServerRequest *request) {
    request->send(200, "text/plain", "Hello! This is a simple text message sent from ESP32. Microcontrollerslab");
  });
Starting Connection
In the next line we will initiate ElegantOTA.
AsyncElegantOTA.begin(&server); To start the server, we will call the begin() on our server object. On the Serial Monitor, you will be able to view the message: ‘HTTP server started!’
  server.begin();
 Serial.println("HTTP server started!");
loop()
Inside the infinite loop() function, we will call AsyncElegantOTA.loop() to continue the connection indefinitely.
AsyncElegantOTA.loop();Demonstration
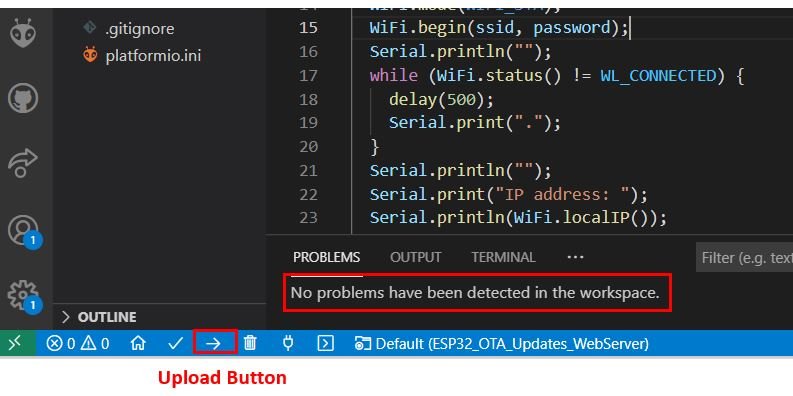
Now press Ctrl + S or go to File > Save to save the main.cpp file. One big advantage of using PlatformIO instead of Arduino IDE is that before compiling the sketch the errors are already indicated. So we can always rectify them before uploading to the ESP board.
Go to the PIO icon > Project Tasks > Upload or the Upload icon in the bottom taskbar to upload the program code to the ESP32 module.
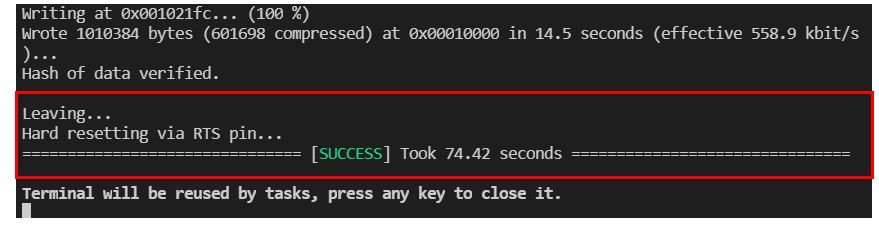
In the terminal, you will see the following message after a successful upload took place.
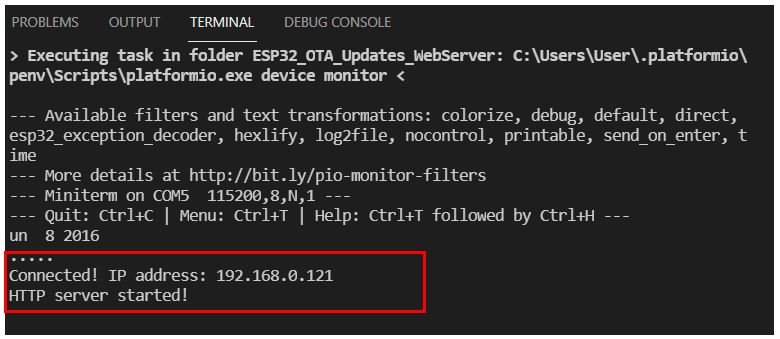
Now click the serial monitor icon in the taskbar.

You can view the messages on the serial monitor as shown below. You will be able to see the IP address of your ESP32 module.
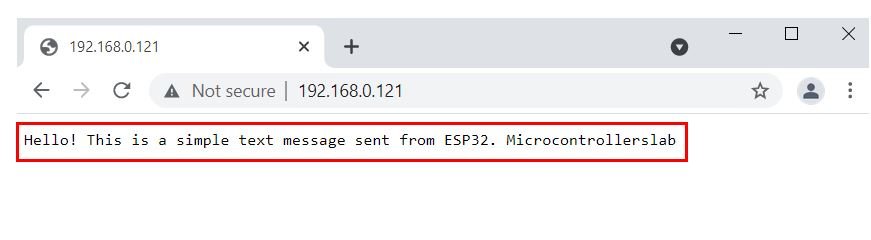
Copy that address into a web browser and press enter. The following web page will open displaying the plain text:
Now type /update beside the IP Address in the search tab and press enter. The following ElegantOTA web server will open.

In the next two examples, we will learn how to use this web server to:
- Upload new firmware wirelessly (Example 2)
- Upload files on the ESP32 filesystem wirelessly (Example 3)
Example 2: Uploading new firmware (ESP32 OTA Updates)
Now, we will show you how to upload new sketches to the ESP32 board over the air using the OTA web server which we created above. For demonstration purposes, we will take the program code from a previous article: ESP32 WebSocket Server using Arduino IDE – Control GPIOs and Relays. In that tutorial, we created an ESP32 web server by using a WebSocket communication protocol. The web server controlled the onboard LED of the ESP32 module. We will take that project a step ahead and include OTA functionality inside it using PlatformIO IDE. Previously, we used a serial connection between the ESP32 board to upload the code. Now, we will create the same WebSocket web server but upload the code to ESP32 wirelessly. With the help of the AsyncElegantOTA library it will become very easy. Let us learn how to implement it.
As we previously mentioned, to upload firmware via ElegantOTA we have to make sure that the file we upload is in .bin format. In VS Code it is extremely easy to generate the .bin file. After compiling the code, the .bin file is automatically generated and is called firmware.bin. This can be found at the path: .pio/build/esp32doit-devkit-v1/firmware.bin according to your board.
Arduino Sketch AsyncElegantOTA Uploading new sketch
Now we will create a new project. In the main.cpp file replace the code which is given below. Remember to replace the network credentials with your values.
Press Ctrl + S or go to File > Save to save the main.cpp file.
// Import required libraries
#include <WiFi.h>
#include <AsyncTCP.h>
#include <ESPAsyncWebServer.h>
#include <AsyncElegantOTA.h>

// Replace network credentials with your own WiFi details
const char* ssid = "PTCL-BB";
const char* password = "********";

bool GPIO_State = 0;
const int Led_Pin = 2;

// Create AsyncWebServer object on port 80
AsyncWebServer server(80);
AsyncWebSocket ws("/ws");

const char html_page[] PROGMEM = R"rawliteral(
<!DOCTYPE HTML><html>
<head>
  <title>ESP32 Web Server</title>
  <meta name="viewport" content="width=device-width, initial-scale=1">
  <link rel="icon" href="data:,">
  <style>
  html {
    font-family: New Times Roman;
    text-align: center;
  }
  h1 {
    font-size: 1.8rem;
    color: white;
  }
  h2{
    font-size: 1.5rem;
    font-weight: bold;
    color: #612b78;
  }
  .topnav {
    overflow: hidden;
    background-color: #612b78;
  }
  body {
    margin: 0;
  }
  .content {
    padding: 30px;
    max-width: 600px;
    margin: 0 auto;
  }
  .button {
    padding: 15px 50px;
    font-size: 24px;
    text-align: center;
    outline: none;
    color: #fff;
    background-color:#fa0f0f;  //green
    border: none;
    border-radius: 5px;
    -webkit-touch-callout: none;
    -webkit-user-select: none;
    -khtml-user-select: none;
    -moz-user-select: none;
    -ms-user-select: none;
    user-select: none;
    -webkit-tap-highlight-color: rgba(0,0,0,0);
   }
  .button:active {
     background-color:#fa0f0f ;
     transform: translateY(2px);
   }
   .state {
     font-size: 1.5rem;
     color:#120707;
     font-weight: bold;
   }
  </style>
<title>ESP32 Web Server</title>
<meta name="viewport" content="width=device-width, initial-scale=1">
<link rel="icon" href="data:,">
</head>
<body>
  <div class="topnav">
    <h1>ESP32 WebSocket Server</h1>
  </div>
  <div class="content">
      <h2>ONBOARD LED GPIO2</h2>
       <p><button id="button" class="button">Click to Toggle</button></p>
      <p class="state">State: <span id="state">%STATE%</span></p>
  </div>
  </div>
<script>
  var gateway = `ws://${window.location.hostname}/ws`;
  var websocket;
  window.addEventListener('load', onLoad);
  function initWebSocket() {
    console.log('Trying to open a WebSocket connection...');
    websocket = new WebSocket(gateway);
    websocket.onopen    = onOpen;
    websocket.onclose   = onClose;
    websocket.onmessage = onMessage; // <-- add this line
  }
  function onOpen(event) {
    console.log('Connection opened');
  }
  function onClose(event) {
    console.log('Connection closed');
    setTimeout(initWebSocket, 2000);
  }
  function onMessage(event) {
    var state;
    if (event.data == "1"){
      state = "ON";
    }
    else{
      state = "OFF";
    }
    document.getElementById('state').innerHTML = state;
  }
  function onLoad(event) {
    initWebSocket();
    initButton();
  }
  function initButton() {
    document.getElementById('button').addEventListener('click', toggle);
  }
  function toggle(){
    websocket.send('toggle');
  }
</script>
</body>
</html>
)rawliteral";

void notifyClients() {
  ws.textAll(String(GPIO_State));
}

void handleWebSocketMessage(void *arg, uint8_t *data, size_t len) {
  AwsFrameInfo *info = (AwsFrameInfo*)arg;
  if (info->final && info->index == 0 && info->len == len && info->opcode == WS_TEXT) {
    data[len] = 0;
    if (strcmp((char*)data, "toggle") == 0) {
      GPIO_State = !GPIO_State;
      notifyClients();
    }
  }
}

void onEvent(AsyncWebSocket *server, AsyncWebSocketClient *client, AwsEventType type,
             void *arg, uint8_t *data, size_t len) {
  switch (type) {
    case WS_EVT_CONNECT:
      Serial.printf("WebSocket client #%u connected from %s\n", client->id(), client->remoteIP().toString().c_str());
      break;
    case WS_EVT_DISCONNECT:
      Serial.printf("WebSocket client #%u disconnected\n", client->id());
      break;
    case WS_EVT_DATA:
      handleWebSocketMessage(arg, data, len);
      break;
    case WS_EVT_PONG:
    case WS_EVT_ERROR:
      break;
  }
}

void initWebSocket() {
  ws.onEvent(onEvent);
  server.addHandler(&ws);
}

String processor(const String& var){
  Serial.println(var);
  if(var == "STATE"){
    if (GPIO_State){
      return "ON";
    }
    else{
      return "OFF";
    }
  }
}

void setup(){
  // Serial port for debugging purposes
  Serial.begin(115200);

  pinMode(Led_Pin, OUTPUT);
  digitalWrite(Led_Pin, LOW);

  // Connect to Wi-Fi
  WiFi.begin(ssid, password);
  while (WiFi.status() != WL_CONNECTED) {
    delay(1000);
    Serial.println("Connecting to WiFi..");
  }

  // Print ESP Local IP Address
  Serial.println(WiFi.localIP());

  initWebSocket();

  // Route for root / web page
  server.on("/", HTTP_GET, [](AsyncWebServerRequest *request){
    request->send_P(200, "text/html", html_page, processor);
  });

AsyncElegantOTA.begin(&server);
  server.begin();
}

void loop() {
  AsyncElegantOTA.loop();
  ws.cleanupClients();
  digitalWrite(Led_Pin, GPIO_State);

}
To understand how the code works you can have a look at the article here. All the code is the same except for the additional three lines we have added to include the OTA updates functionality via the AsyncElegantOTA library.
Now go to your platformio.ini file and add the following lines of code to include the libraries and the serial monitor baud rate.
Demonstration
Before proceeding further, make sure your ESP32 is powered ON and has the sketch from Example 1 uploaded.
After saving both the platformio.ini file and main.cpp file click the Build button to compile the code.
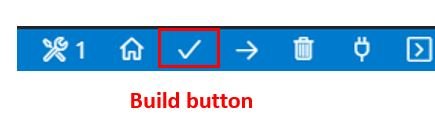
In the Explorer tab, go to your project folder > .pio > build > esp32doit-devkit-v1 > firmware.bin This the file which we will upload on our ElegantOTA web server.

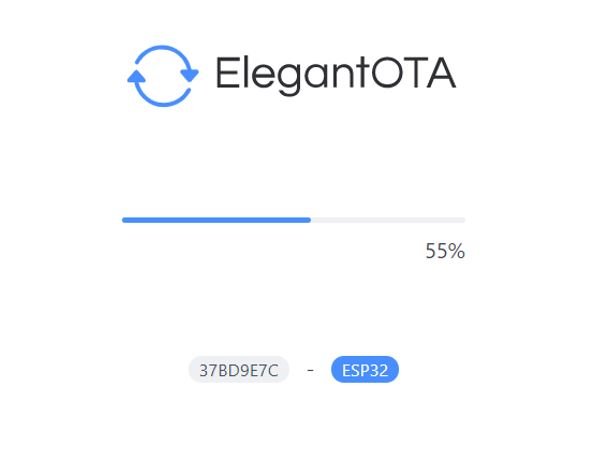
In a new browser type IP address/update and press enter. You will use the IP address for your own ESP32 module. After pressing enter, the ElegantOTA web page will be displayed. Check Firmware and upload the firmware.bin file by clicking Choose File and selecting it from the destination path. The process will start.
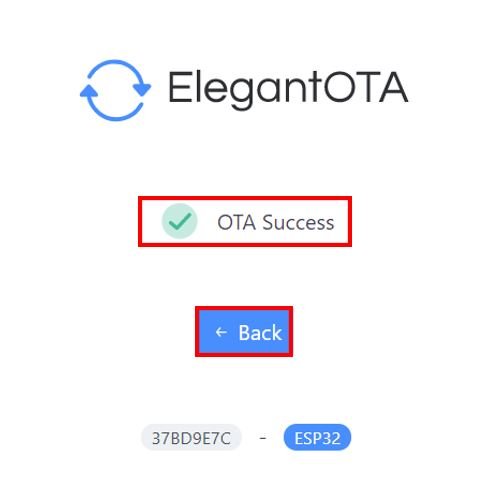
After a few moments the process will be completed. Click the Back button to go back to the main web page.
Now type the /root URL in a new browser and press enter. The ESP32 WebSocket web server will open.
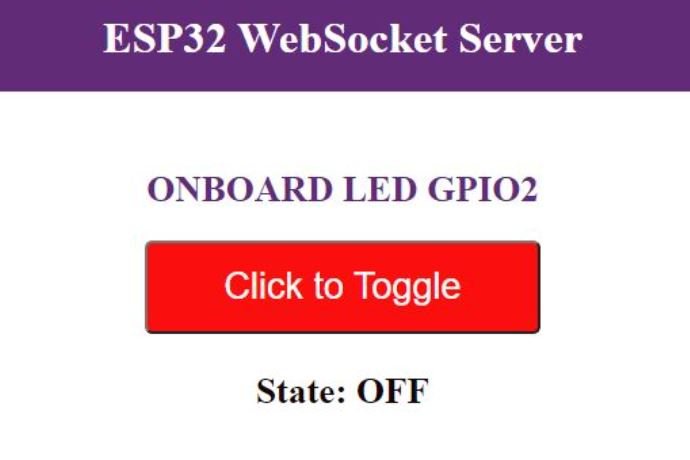
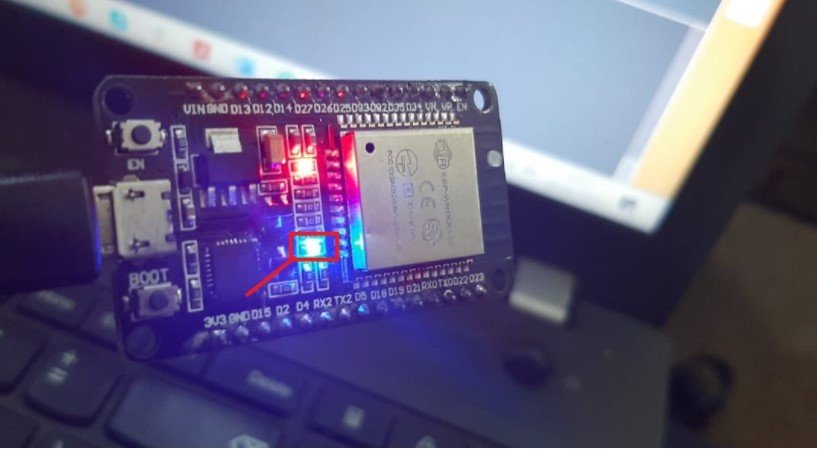
Now click the toggle button. The onboard LED of the ESP32 board will light up. At the same moment, the state will also be updated to ‘ON’. Now keep on clicking the button and the state will automatically update accordingly and the LED will turn on/off.
Thus, we were able to successfully upload a new sketch to our ESP32 board wirelessly through ElegantOTA using VS Code.
Example 3: Uploading files to ESP32 filesystem via ElegantOTA
Now, we will learn how to upload files to the ESP32’s filesystem SPIFFS wirelessly using the OTA web server which we created in Example 1. For demonstration purposes, we will take the program code from a previous article: ESP32 Web Server with SPIFFS (SPI Flash File System). In that tutorial, we created a web server with ESP32 using SPIFFS and Arduino IDE. This was done by storing the CSS and HTML files in the SPI flash file system of ESP32 and building a web server through those files. Instead of hard coding the HTML as string literals which takes up a lot of memory, the SPIFFS helped us access the flash memory of the ESP32 core.
Thus, we will take that project a step ahead in this example and include OTA functionality and use PlatformIO IDE instead of Arduino IDE. Previously, we used a serial connection between the ESP32 board to upload the code. Now, we will create the same SPIFFS web server but upload the files to the ESP32’s filesystem as well as the sketch via OTA. With the help of the AsyncElegantOTA library, it will become very easy. Let us learn how to implement it.
Recommended Reading: Upload Files to ESP32 SPIFFS FileSystem with VS Code and PlatformIO IDE
Creating Files for SPIFFS
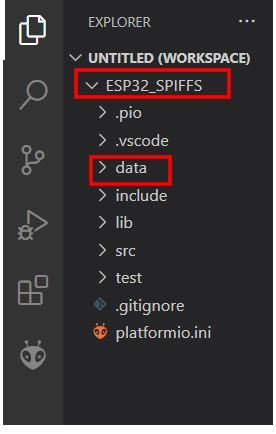
With SPIFFS, we can save HTML, CSS, and JavaScript files in ESP32 flash file system. Whenever a web client makes an HTTTP request, we can serve these files directly from SPIFFS. To build an ESP32 web server using SPIFFS, we will create two different files: HTML and CSS files and organize them inside our project folder. Both the CSS and HTML files will be placed inside the ‘data’ folder. This ‘data’ folder will be created inside the project folder.
Go to the Explorer tab on the left side where all the folders are specified. Right-click on the name of your new project folder (ESP32_SPIFFS) and create a new folder. Name this new folder ‘data.’ Make sure to name it ‘data,’ otherwise the files will not upload onto SPIFFS properly.
Now create the following two files inside this data folder.
HTML file
Create an index.html file inside the data folder and replicate the code given below in that file. Inside our HTML file, we will include the title, a paragraph for the GPIO state, and two on/off buttons.
<!DOCTYPE html>
<html>

<head>
  <title>ESP32 WEB SERVER</title>
  <meta name="viewport" content="width=device-width, initial-scale=1">
  <link rel="icon" href="data:,">
  <link rel="stylesheet" href="https://use.fontawesome.com/releases/v5.7.2/css/all.css"
    integrity="sha384-fnmOCqbTlWIlj8LyTjo7mOUStjsKC4pOpQbqyi7RrhN7udi9RwhKkMHpvLbHG9Sr" crossorigin="anonymous">
  <link rel="stylesheet" type="text/css" href="style.css">
</head>

<body>
  <h2>ESP32 WEB SERVER</h2>
  <div class="content">
    <div class="card-grid">
      <div class="card">
        <p><i class="fas fa-lightbulb fa-2x" style="color:#c81919;"></i>     <strong>GPIO2</strong></p>
        <p>GPIO state: <strong> %GPIO_STATE%</strong></p>
        <p>
          <a href="/led2on"><button class="button">ON</button></a>
          <a href="/led2off"><button class="button button2">OFF</button></a>
        </p>
      </div>
    </div>
  </div>
</body>

</html>
CSS File
Next, create another file “style.css” in the same folder as the HTML file and replicate the code given below in that file.
html {
  font-family: Arial;
  display: inline-block;
  margin: 0px auto;
  text-align: center;
}
h1{
  color: #070812;
  padding: 2vh;
}
.button {
  display: inline-block;
  background-color: #b30000; //red color
  border: none;
  border-radius: 4px;
  color: white;
  padding: 16px 40px;
  text-decoration: none;
  font-size: 30px;
  margin: 2px;
  cursor: pointer;
}
.button2 {
  background-color: #364cf4; //blue color
}
.content {
  padding: 50px;
}
.card-grid {
  max-width: 800px;
  margin: 0 auto;
  display: grid;
  grid-gap: 2rem;
  grid-template-columns: repeat(auto-fit, minmax(200px, 1fr));
}
.card {
  background-color: white;
  box-shadow: 2px 2px 12px 1px rgba(140,140,140,.5);
}
.card-title {
  font-size: 1.2rem;
  font-weight: bold;
  color: #034078
}
Note: You should place HTML and CSS files inside the data folder. Otherwise, SPIFFS library will not be able to read these files.
Arduino Sketch SPIFFS OTA Web Server
Now open your main.cpp file and copy the code given below in that file. Remember to replace the network credentials with your values.
#include "WiFi.h"
#include "ESPAsyncWebServer.h"
#include "SPIFFS.h"
#include <AsyncElegantOTA.h>


const char* ssid = "PTCL-BB"; //Replace with your own SSID
const char* password = "*********"; //Replace with your own password

const int ledPin = 2;
String ledState;

// Create AsyncWebServer object on port 80
AsyncWebServer server(80);

// Replaces placeholder with LED state value
String processor(const String& var){
  Serial.println(var);
  if(var == "GPIO_STATE"){
    if(digitalRead(ledPin)){
      ledState = "ON";
    }
    else{
      ledState = "OFF";
    }
    Serial.print(ledState);
    return ledState;
  }
  return String();
}

void setup(){

  Serial.begin(115200);
  pinMode(ledPin, OUTPUT);

  // Initialize SPIFFS
  if(!SPIFFS.begin(true)){
    Serial.println("An Error has occurred while mounting SPIFFS");
    return;
  }

  // Connect to Wi-Fi
  WiFi.begin(ssid, password);
  while (WiFi.status() != WL_CONNECTED) {
    delay(1000);
    Serial.println("Connecting to WiFi..");
  }

  // Print ESP32 Local IP Address
  Serial.println(WiFi.localIP());

  // Route for root / web page
  server.on("/", HTTP_GET, [](AsyncWebServerRequest *request){
    request->send(SPIFFS, "/index.html", String(), false, processor);
  });

  // Route to load style.css file
  server.on("/style.css", HTTP_GET, [](AsyncWebServerRequest *request){
    request->send(SPIFFS, "/style.css", "text/css");
  });

  // Route to set GPIO to HIGH
  server.on("/led2on", HTTP_GET, [](AsyncWebServerRequest *request){
    digitalWrite(ledPin, HIGH);
    request->send(SPIFFS, "/index.html", String(), false, processor);
  });

  // Route to set GPIO to LOW
  server.on("/led2off", HTTP_GET, [](AsyncWebServerRequest *request){
    digitalWrite(ledPin, LOW);
    request->send(SPIFFS, "/index.html", String(), false, processor);
  });

// Start ElegantOTA
  AsyncElegantOTA.begin(&server);
  // Start server
  server.begin();
}

void loop(){
  AsyncElegantOTA.loop();

}
To understand how the code works you can have a look at the article here. All the code is same except for the additional three lines which we have added to include the OTA updates functionality via AsyncElegantOTA library.
Now let us proceed further.
Go to your platformio.ini file and add the following lines of code to include the libraries and the serial monitor baud rate.
[env:esp32doit-devkit-v1]
platform = espressif32
board = esp32doit-devkit-v1
framework = arduino
monitor_speed = 115200
lib_deps  =  ESP Async WebServer
    arduino-libraries/Arduino_JSON @ 0.1.0
    ayushsharma82/AsyncElegantOTA @ ^2.2.6
Save all the files by pressing Ctrl + S.
Updating new sketch
After saving both the platformio.ini file and main.cpp file click the Build button to compile the code.
Open the ElegantOTA web server and upload this sketch as we did in Example 2.
Updating Filesystem
Now after you have created both the HTML and CSS files and placed them inside the data folder it is time to upload them to the filesystem via the ElegantOTA web server.
Click the PlatfromIO icon and head over to the project tasks tab. Under the project tasks, click esp32doit-devkit-v1 or the type of board which you selected for your project. Then go to Platform > Build Filesystem Image. After that click Upload Filesystem Image.

After you built the filesystem image, the spiffs.bin file will get generated in the following path: .pio/build/esp32doit-devkit-v1/spiffs.bin. This is the file which we have to upload on the filesystem in the ElegantOTA web server.
Demonstration
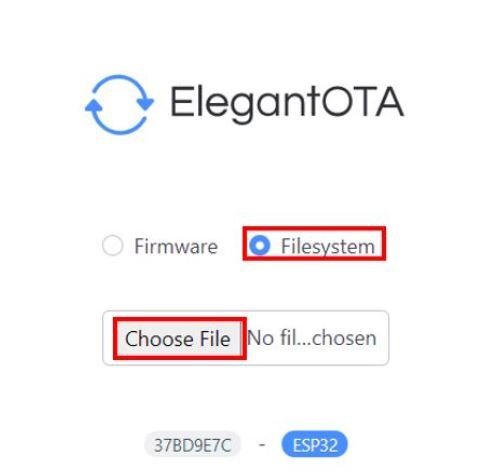
In a new browser type IP address/update and press enter. After pressing enter the ElegantOTA web page will be displayed. Check Filesystem and upload the spiffs.bin file by clicking Choose File and selecting it.
After few moments, the process will be completed. Click the Back button to go back to the main web page.
Now type the /root URL in a new browser and press enter. The ESP32 SPIFFS web server will open.
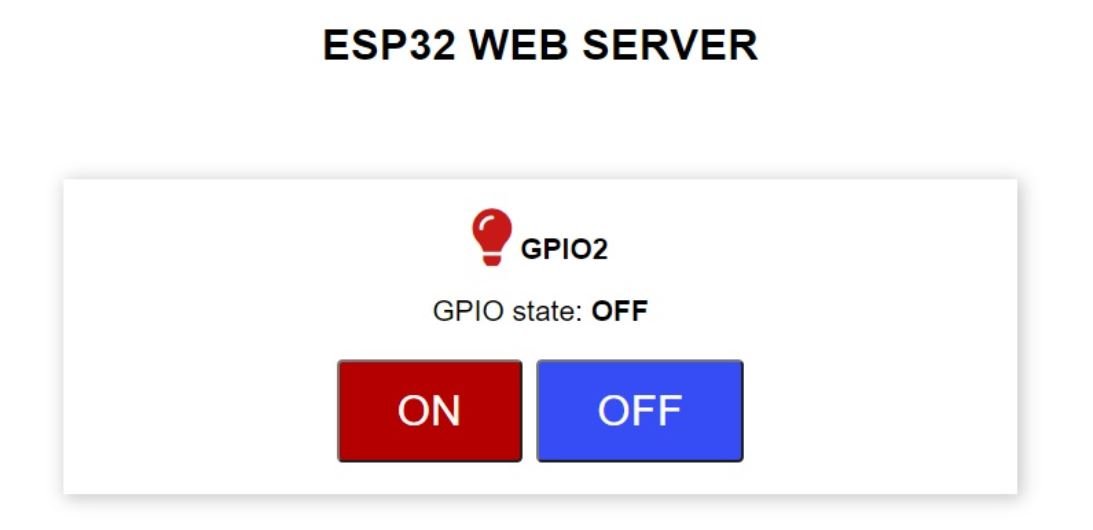
Now, press the ON and OFF buttons and the on-board LED will turn on and off accordingly. The GPIO state on the web server will also change and get updated.
To go back to the ElegantOTA web server type /update with the root / URL. Thus, we were successfully able to upload HTML and CSS files to the ESP32 filesystem to create a web server in PlatformIO IDE.
Conclusion
In conclusion, we were able to learn a very useful feature of ESP32 through this article today. In this comprehensive guide, we learned how to update new firmware in ESP32 via OTA using the AsyncElegantOTA library in PlatformIO IDE using VS Code. Not only were we able to upload new sketches, but we were also able to upload files to the ESP32’s SPIFFS. We incorporated examples from previously performed projects where we created asynchronous web servers using the ESPAsyncWebServer library.
is it possible to use elegant OTA with ESP32-cam in soft-AP mode?
Yes you can.
I use easytarget/esp32-cam-webserver with usage of fhessel/esp32_https_server.
Which this WiFi-Library there is no server object.
Now I work to modify elegant OTA . Beginning with the Web-Page defined in ELEGANT_HTML.
If there is an example, I have it easier.
Thanks for this great tutorial. All went smooth 🙂