In this tutorial, we will learn how to read or write data in a spreadsheet file in Excel using LabVIEW. We can also create a spreadsheet file using LabView, as we will see shortly in this tutorial. At the start, we have provided an introduction to spreadsheet files, why they are used, and what their use is in LabView. After that, a VI is designed to create a spreadsheet file, write data to it, and, at the end, read data from the same spreadsheet. At the end of the tutorial, we have provided an exercise for you to do on your own, and in the next tutorials, we will assume that you have done those exercises and not explain the concept regarding them.
Reading and Writing Data to Excel files in LabVIEW
Data can be stored in organized cells, such as rows and columns, using a spreadsheet file. Certain types of data can be stored in each cell of the spreadsheet, such as numeric, text, string, date, etc. Spreadsheet files can also be composed of cells that use formulas referring to other cells. A simple spreadsheet file extension is .xlsx, .ods, .numbers, and.csv.
Text files also have a subset specified as text-based spreadsheet files. Formatting a string of data on a spreadsheet file is a must when we want to write data to this file. Which might include inserting delimiters in a string such as tabs and commas.
In LabView, we can design a VI that can write different data types to a text file or a .csv file in the form of a spreadsheet such as Excel. Writing data to a spreadsheet requires string-type data separated by a delimiter (a parameter provided to the write-to-spreadsheet block). The function takes the value from the function in the form of timestamp data, numeric data, and delimiters and writes the data in the form of strings in a spreadsheet file or a text file with the data separated by the delimiter specified.
Read and Write Data to Excel Files in LabVIEW Example
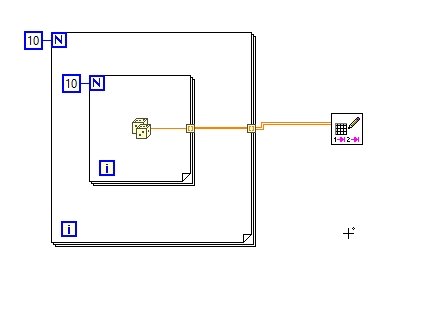
We will now try to explain working with an Excel spreadsheet in LabVIEW VI. Create a VI, as we have been doing since Tutorial 1, and save it for future use. Create a nested loop that will return a 2D array of size 10×10 containing random numbers generated between 0 and 1, as shown in the figure below.

These loops will generate a 2D array at the auto-indexing terminal of the outer loop. Now, from the Function Palette on the block diagram, select File I/O and then select Write Delimiter Spreadsheet, as shown in the figure below.
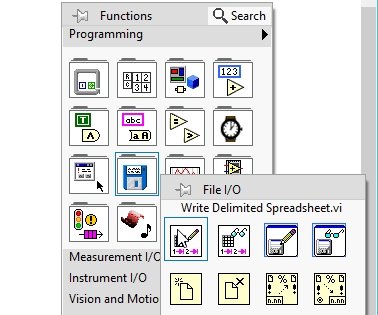
Write to Spread Sheet Block
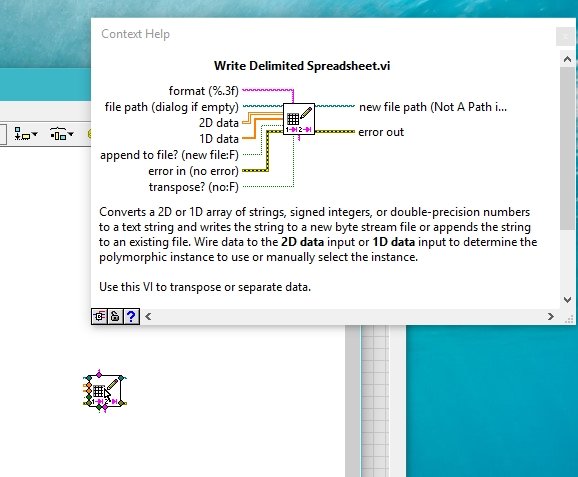
The write-delimited spreadsheet block is shown in the figure below.

If we want to know the pin description of the write to spreadsheet block, simply open the context help window as we did in the previous tutorial and hover over the block of write to spreadsheet. The pin description of the write-to-text block is shown in the figure below.
Block Diagram
Connect the output of the nested loops we created at the start with the pin of the write to spreadsheet block named as 2D data in the pin description help window as shown in the figure below,
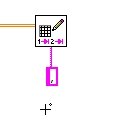
On the pin of the write to spreadsheet block named delimiter, create a constant to provide the delimiter between the strings. By default in LabVIEW, the delimiter is set to tab (\t), but if we want to write data to an Excel sheet file, we must provide a delimiter comma (,) because tab (\t) is not used for Excel sheets. Create a constant at the delimiter, as shown in the figure below.

And place a comma inside the constant for to create a .csv file as shown in the figure below,
Creating Spreadsheet File
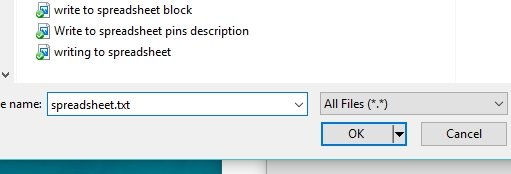
To the pin named file path, specify the path of the file you want to write to. Otherwise, a dialog box will appear, as we will see shortly, asking us to create a spreadsheet file. This is the default property of a comma-delimited spreadsheet block. Run the VI, and the VI will ask where to save the spreadsheet it created. Select the folder where to save the spreadsheet and write the name of the spreadsheet with the file extension, as shown in the figure below.

This will create a .csv file in the selected destination folder, as shown in the figure below.

Spread Sheet File
The saved file will have the same extension as the one we gave it previously. Open the file; a 10×10 2D array will be stored in the spreadsheet file with the extension .csv as shown in the figure below.

Using the same block, we can also write our spreadsheet data to a text file, changing the delimiter. We can also write data to a text file with the same delimiter, but in the case of a text file, the tab (\t) delimiter is preferred because it increases the understanding ability of the data. Change the delimiter of the write to spreadsheet block from comma to tab (\t) as shown in the figure below.

Now run the program again; a dialog box will appear. Select the destination folder, write the name of the file to create, and this time save the file with the file extension .txt, as shown in the figure below.
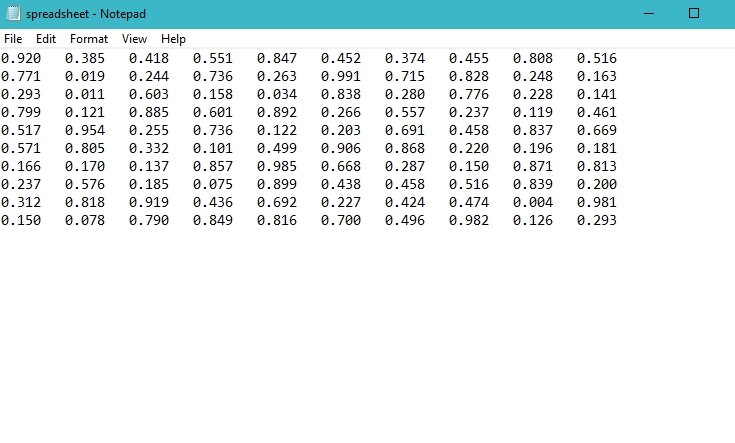
This will save the same data, i.e., a randomly generated 2D array, in a text file with the delimiter as a tab (\t) space between two entries. The file will be saved in the folder you designated for it, as shown in the figure below.

Opening this file will show us the 2D randomly generated array of size 10×10 and the delimiter as a tab space, as shown in the figure below.
Read Data from Excel Spread Sheets File in LabVIEW
We can also read data from a spreadsheet file we just created. From the Function Palette on the block diagram window, select File I/O and then select Read Delimited Spreadsheet, as shown in the figure below.

The block of read-delimited spreadsheets is shown in the figure below.

Pins Description
If we want to see the pin description of the read block, again use the context help window, as we have done in the case of seeing the write block pin description. Open the help window and then hover over the read-delimited spreadsheet block, as shown in the figure below.
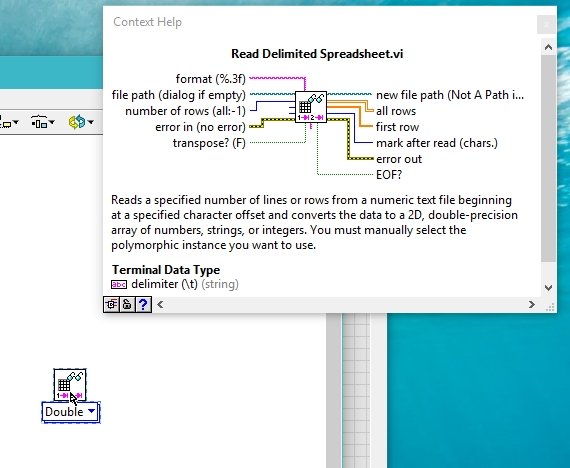
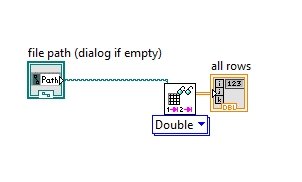
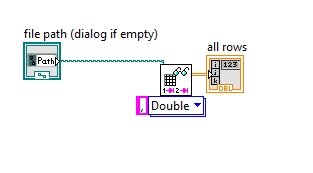
If we want to read all the rows from our spreadsheet file, create an indicator at the all rows pin, and if we are interested in reading only one row, we will create an indicator at the first row pin. Also, create a constant at the file path, as shown in the figure below. If we leave this pin at default, then after running the VI, the program will give us a dialog box and ask us to select the spreadsheet file whose data we want to read.
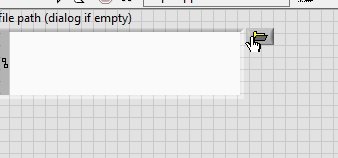
On the front panel, browse the path of the file you want to read data from.
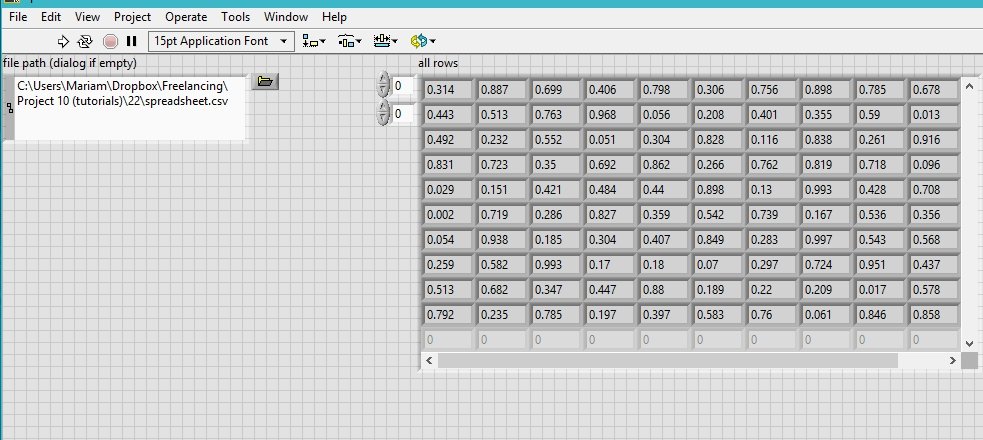
If you want to read data from the .csv file, select a comma as a delimiter of the read-delimited spreadsheet block, as shown in the figure below.
Output
- When we run the VI, the output will display the data from the spreadsheet file, as shown in the figure below.
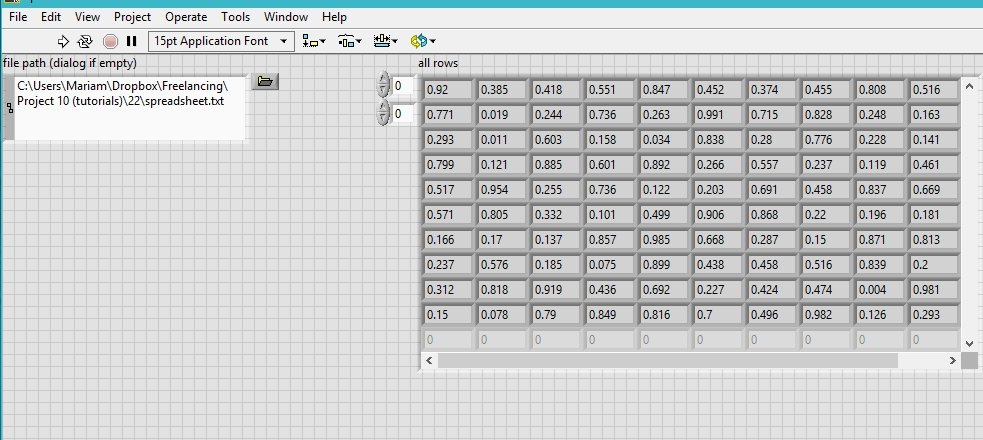
By default, the delimiter of the read block is also set to tab (\t). For reading data from the text file we created previously, set the delimiter to tab (\t) or else leave it empty, as shown in the figure below.

When we run the VI by changing the path in the file path block to a .txt file, the output of the all rows indicator will display the data of the text file you created previously, as shown in the figure below.
Exercise:
- Create and open a file using the open/create/replace block. Now write data into it using the comma-delimited spreadsheet block. We can also read data from it using the read-delimited spreadsheet file block. Finally, close it using the close file block in the same VI.
(Hint: Use the context help window to see the pin names of the blocks you haven’t used already)
Conclusion
In this tutorial, we learned how to read and write data in a spreadsheet file in Excel using LabVIEW. We explored the concept of spreadsheet files and their importance in LabVIEW programming. We saw how to create a spreadsheet file, write data to it using the “Write Delimited Spreadsheet” block, and read data from it using the “Read Delimited Spreadsheet” block. Additionally, we discussed different file extensions, delimiters, and file paths. Overall, this tutorial provided a comprehensive understanding of working with spreadsheet files in LabVIEW and equipped readers with the necessary knowledge to implement data manipulation tasks effectively.
You may also like to read:
- Piezoelectric sensor interfacing with Arduino Uno R3
- Advanced Informative Blind Stick Using GPS and GSM Module
- Counter Type ADC – Staircase Approximation Analog to Digital Converter
- IOT based projects for final year engineering students
- ESP8266 NodeMCU Motion Detection Notification on WhatsApp Number
This concludes today’s article. If you face any issues or difficulties, let us know in the comment section below.