In this tutorial, we will learn about Hypertext Transfer Protocol Secure commonly known as HTTPS, and SSL/TLS encryption with ESP32 and ESP8266 boards. This guide includes a description of HTTPS and SSL/TLS encryption, why it is used, the working of SSL/TLS encryption, communicating over a network using HTTPS, and finally generating HTTPS requests with ESP32/ESP8266 boards. So let’s begin!
Recommended Components
The following components are used in this project or are helpful for building it with the ESP32.
| Component | How it’s used in this project | Buy on Amazon |
|---|---|---|
| ESP32 Development Board | The Wi-Fi capable board used to make secure HTTPS requests over SSL/TLS. | Check Price |
| ESP8266 NodeMCU | An alternative Wi-Fi board that can also issue HTTPS requests as shown in this guide. | Check Price |
| Micro USB Cable | Connects the board to your computer for uploading code and powering it. | Check Price |
| Breadboard | Provides a solderless base for prototyping your ESP32/ESP8266 setup. | Check Price |
| Jumper Wires | Used to make quick connections while wiring up your development board. | Check Price |
As an Amazon Associate we earn from qualifying purchases. Prices and availability are accurate as of the date/time indicated and are subject to change.
HTTPS Protocol Introduction
Unlike HTTP, which is the primary protocol responsible for exchanging data between a client and server, HTTPS is the secure alternative to HTTP. In this protocol, communication is encrypted using TLS ( transport layer security) or Secure Sockets Layer (SSL). That means HTTPS is equivalent to HTTP with added security layer of TLS/SSL.
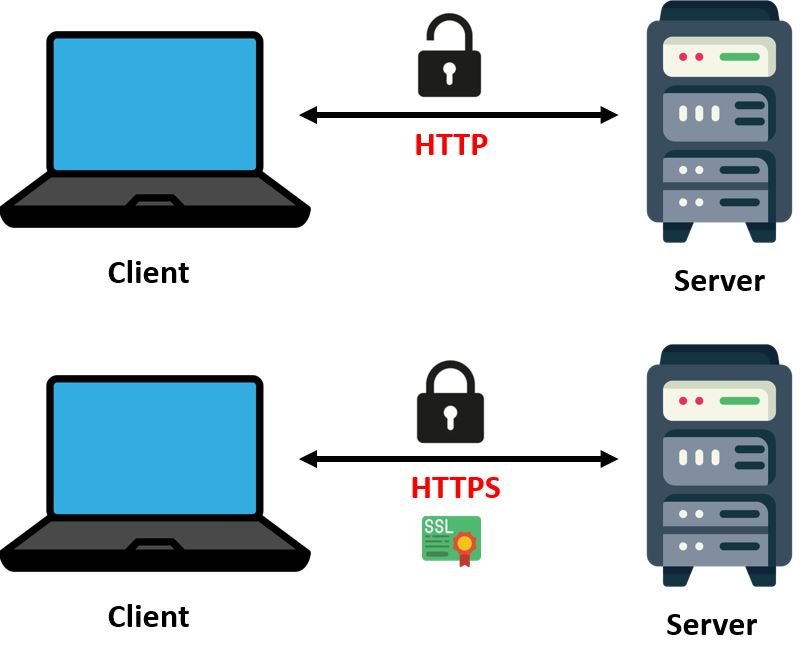
Known as Hypertext Transfer Protocol Secure, HTPPS provides secure communication over the network and is vastly used while accessing the internet. The message in this communication protocol is encrypted using Transport Layer Security (TLS) which was previously known as the Secure Sockets Layer(SSL). Fundamentally, it enhances the security of data while transferring data, encryption is used with HTTPS. This is extremely important for websites that require login details, cell phone numbers, addresses, and bank account numbers.
Why HTTPS is Important?
- HTTPS provides security and trust to users who need to send sensitive data between servers and web browsers
- HTTPS ensures data privacy and integrity and proper identification using SSL certificates
- Provides protection against different attacks such as man-in-the-middle (MitM) attacks that can easily be launched in the case of HTTP.
Although in recent years, many researchers introduced various attacks against different encryption algorithms which can compromise the HTTPS protocol also. But the chances and success of those attacks are very less as compared to HTTP and those attacks require specific conditions and made some assumptions.
SSL/TLS Encryption
As mentioned previously, HTTPS uses the TLS encryption protocol to secure communications. Formerly known as SSL, Transport Layer Security (TLS) is the most widely used secured encrypted protocol used nowadays for web communication.
TLS uses asymmetric public key infrastructure to secure communications. The asymmetric security system consists of two different asymmetric keys for encrypting the communications. These are known as:
- Public Key: This is the key which is accessed by anyone who uses the server in a secure manner. The private key is able to decrypt the information which is encrypted by the public key.
- Private Key: This is the key which is only available for the owner of a website and is therefore known as the private key. It is able to decrypt the information which is encrypted by the corresponding public key.
The figure below demonstrates how the public and private keys work together to provide Asymmetric Key Encryption.
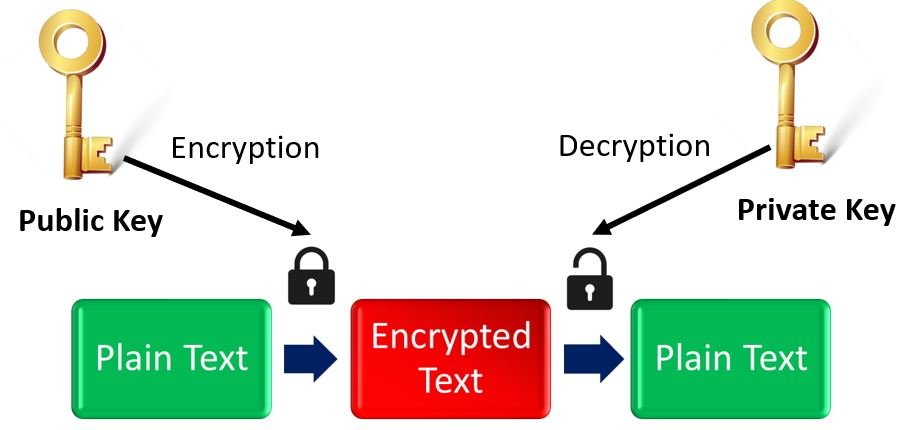
What happens is that when the client contacts the server, the server in return transmits a public key to the client. This is done through the SSL certificate of the server. Now the client transmits encrypted information to the server along with the public key. The server which possesses the private key is able to decrypt the information and access it successfully.
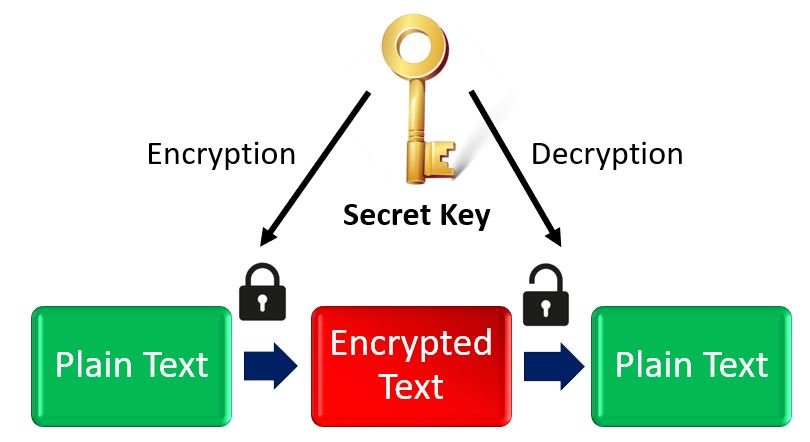
Whereas, on the other hand Symmetric Key Encryption, uses a single ‘Secret Key’ for both encryption and decryption purposes. In this case, the server and client both need to possess the same key. Therefore it is disadvantageous to use this type of key encryption algorithm due to the fact that the user will have to share the key.
HTTPS Communication
Let us look into how client server communication occurs over HTTPS protocol. There are a number of steps involved. Lets list them out one by one.
- Firstly, the client starts the communication by connecting with the server.
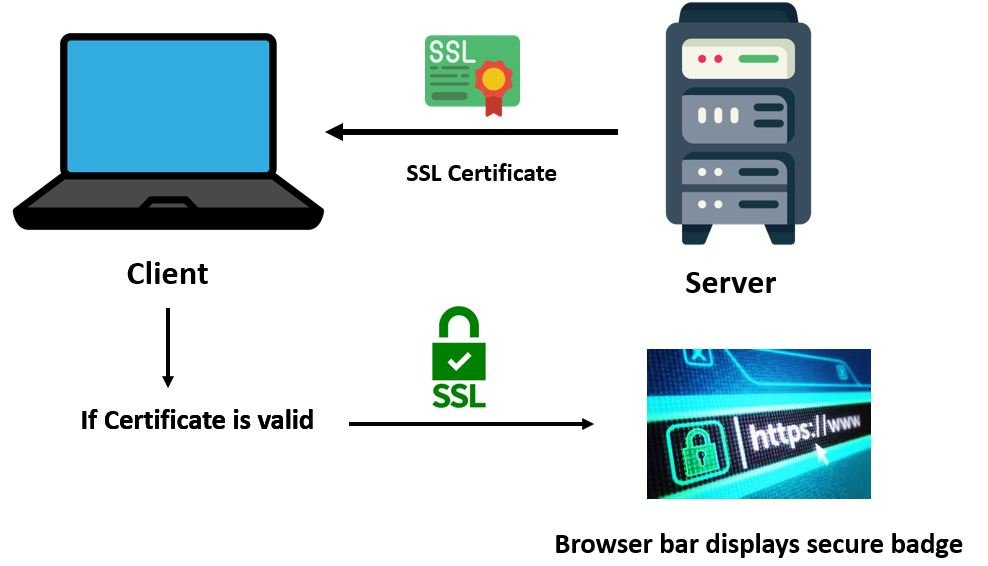
- At this point, when the client initiates the connection, the server transmits the SSL certification to the client. The SSL certificate includes the public key.
- The client now checks whether the SSL certificate is valid or not.
- If the certificate is authentic, then a session key is produced by the client. This key is important as well as it is responsible for encrypting the communication between the server and client.
- The public key which was sent by the server previously is now used by the client to encrypt the session key. The encrypted session key is now sent to the server.
- When the server obtains the encrypted session key, it decrypts the information using the private key which it possesses. Remember a server has the possession of the corresponding private key which is able to decrypt the information.
- Now another session key is generated which is used to keep the encrypted communication going on between the client and server.
The figure below illustrates these points:

SSL Certification
SSL certificates are very important in HTTPS client server communication. As mentioned previously, whenever the client requests a session, the server responds back by sending the SSL certificate. This SSL certificate is then checked by the browser to determine its validity. Each SSL certificate is issued by proper Certificate Authorities (CA) such as LetsEncrypt, GeoTrust, Comodo etc. These authorities store, sign and issue digital Secure Sockets Layer certificates. They are responsible for providing the proof of validity of the certificate along with the identity of the owner of the certificate.
Whenever a certificate is provided by the CA, it contains the root certificate which is signed by the authority. This is very vital because when the browser checks for the validity of the SSL certificate, it in fact checks whether it contains the root certificate on the database of the trusted root certificates or not. If it does, then a lock icon is seen on the browser bar.
One important point to note is that SSL certificates which have been expired cannot be used.
Self Signed SSL Certificates
SSL certificates can also be self-signed and are free to use. These are public key certificates which are not issued by any certificate authority (CA). In other words, these are not issued by any trusted third-party CA. But they can be used in internal network websites.
Although self-signed certificates grant the same level of encryption as the certificates issued by Certificate Authorities, but the browser does not trust the server when it checks the validity of the certificate. Hence the website displays a warning message “Your connection is not private.” This is because the browser was not able to recognize its owner. The browser had a certificate but was self signed hence it was not verified. In simple terms, the communication between the client and server in this case will be encrypted but the identity of the website it belongs to is not certain.
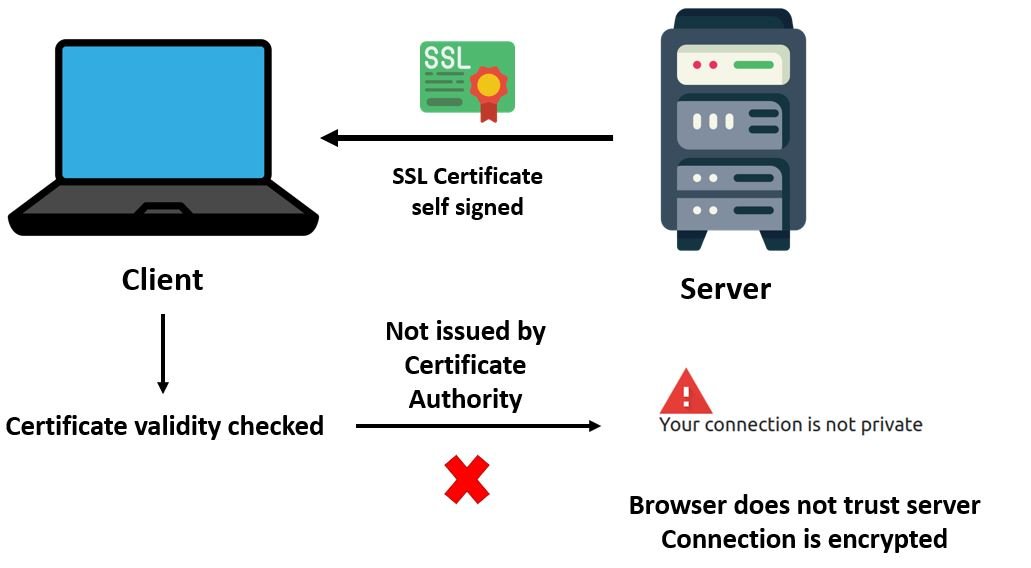
We can use Self-signed certificate in our DIY IoT projects or in local network. But if your project need to be accessed outside your local host or anywhere remotely, you should use certificates from a trusted certificate Authority.
ESP32 and ESP8266 HTTPS Requests and Web Server in Arduino IDE
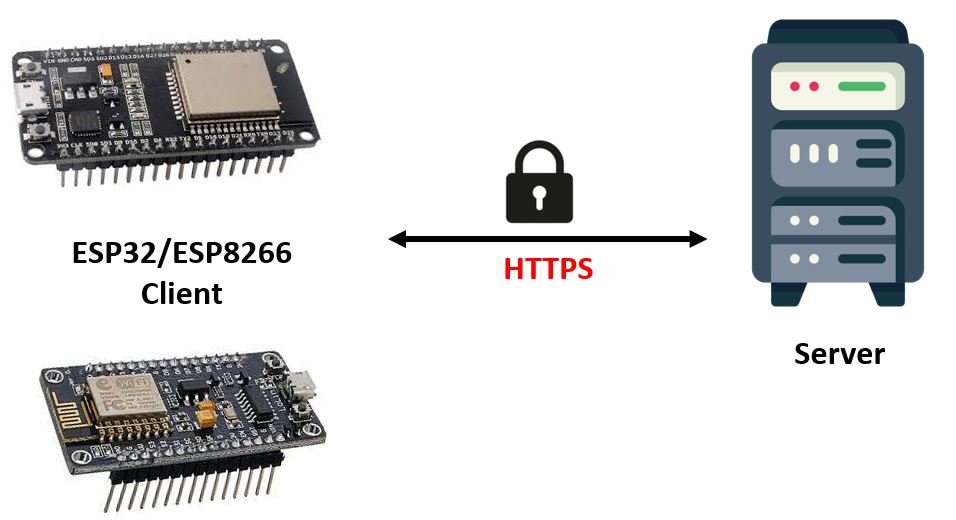
After introducing you to HTTPS communication protocol, let’s show you how to make HTTPS requests using ESP32 and ESP8266 in Arduino IDE. Just like HTTP, HTTPS requests work in a similar manner in Arduino IDE.
ESP32
There are several examples available in Arduino IDE for ESP32 using HTTPS requests. Some of them include:
- File > Examples > WiFiClientSecure
- File > Examples > HTTPClient > BasicHttpsClient
Some examples use WiFiClientSecure.h library which is used for HTTPS instead of WiFiClient.h library which is used for HTTP. The port is changed to 443 and the host URL is now ‘https.’ The rest of the code is similar to the one in which HTTP requests were generated. In HTTPS however, the client server communication is encrypted.
To create an HTTPS web server using ESP32, esp32_https_server library is used. This HTTPS server library that can be used with the ESP32 Arduino Core and supports both HTTP and HTTPS. Other than this library, there is not much support for building HTTPS web server with ESP32 in Arduino IDE.
ESP8266
There are several examples available in Arduino IDE for ESP8266 using HTTPS requests. Some of them include:
- File > Examples > ESP8266HTTPClient > BasicHttpsClient (This uses the ESP8266HTTPClient.h library)
- File > Examples > ESP8266WiFi > HTTPSRequest (This uses the WiFiClientSecure.h library)
One important point to note here is that in order to generate successful HTTPS requests with ESP8266, make sure the certificates are not expired.
It is a bit difficult to build HTTPS web server using ESP8266 and there are not many libraries available that support it. The ESP8266WebServerSecure.h library is used to create a basic HTTPS server with ESP8266. You can refer to that example from this link.
When using ESP32 or ESP8266 for HTTPS communication, what are the best practices for managing SSL/TLS certificates, especially for long-term projects, to avoid issues with certificate expiration or self-signed certificates?