In this tutorial, we will learn how to utilize the ESP32 with the Arduino IDE to create HTTP GET requests for commonly used APIs like ThingSpeak and OpenWeatherMap.org. The ESP32 development board is quite powerful and also has built-in WiFi capability, which makes it an ideal choice for IoT projects. When working on IoT projects, we need to integrate a web server into our project to facilitate communication, simplify automation, or even control devices remotely. Web services and APIs are crucial in IoT projects, and we will show you how you can incorporate ThingSpeak and IFTTT into your project with this tutorial.
This tutorial is adaptable to any other web service or API other than the ones discussed here. You just have to change the server’s name and parameters according to the service API documentation.
We have a similar guide with ESP8266:
ESP8266 NodeMCU HTTP GET with Arduino IDE (OpenWeatherMap.org and ThingSpeak)
Prerequisites
We will program our ESP32 board in the Arduino IDE. Thus, you should have the latest version of the Arduino IDE. Additionally, you also need to install the ESP32 plugin. If your IDE does not have the plugins installed, you can visit the link below:
Installing ESP32 library in Arduino IDE and upload code
What is a HTTP GET Request
HTTP (Hyper-Text Transfer Protocol) is a very common request-response-based protocol between a server and a client. This protocol ensures smooth communication between the server and the client. The HTTP protocol has many methods, but the two most widely used are GET and POST.
| HTTP function | Working of function |
| GET | The HTTP GET method requests data from a specified resource, which is indicated by a URL. |
| POST | The HTTP POST method sends data to be processed on a specified resource on the web server. |
In this user guide, we will focus on the GET method of the HTTP protocol. We can use it to receive information from the server. The GET request of the HTTP protocol will include this information in the URL. This makes the HTTP GET protocol less secure in terms of security concerns for IoT projects. For example:
GET/UpdatingSensorReadings?sensor_reading1=value1&sensor_reading2=value2
We will use HTTP GET requests to obtain values (a JSON object) from OpenWeatherMap.org, and we will also use HTTP GET requests to update values in the ThingSpeak API.
Note: Make sure not to request any passwords or images for safety measures on the HTTP GET method to avoid security concerns.
Recommended Reading
If you are interested in learning more about the HTTP POST method and how to incorporate it into your project, check out this tutorial:
ESP32 HTTP POST using Arduino IDE (ThingSpeak and IFTTT)
GET Requests Features
Here we will discuss some of the key features of HTTP GET requests:
- The data is not sent from the server in a message body; rather, it is sent through the resource’s URL.
- An HTTP GET request is limited in the data it can receive from the resource; this is because the browser’s URL does not allow more than 255 characters of data for an HTTP GET request.
- The received request information remains in the browser’s history, and the most common data type for receiving requests is a string.
- This method can easily cache and save your data in the browser.
- The data can be bookmarked in the browser.
- The performance of the HTTP GET request is greater than that of the HTTP POST method; this is due to the simplified nature of the HTTP GET request.
- The HTTP GET request is commonly used to receive data from the address bar.
Required Components
- ESP32 Development Board
Since this is a server-based tutorial, we won’t be requiring other components and modules in this project.
Project Overview
Now, moving on to our project, we will learn how to request JSON data and update data readings on our ESP32 development board using the following APIs:
Working Process
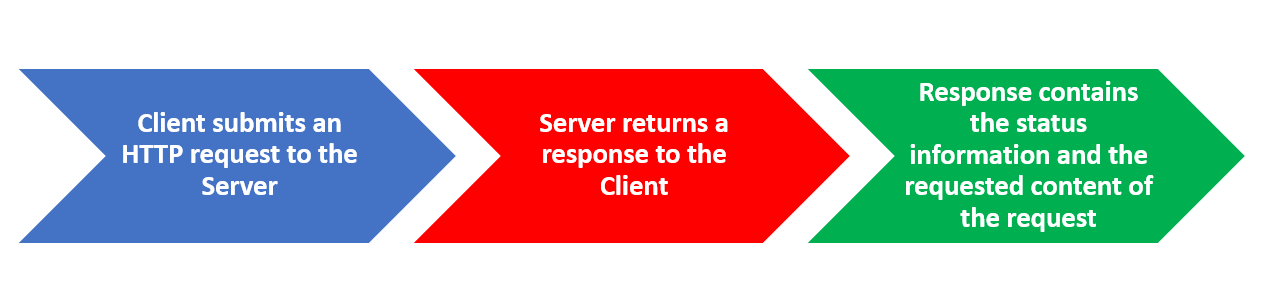
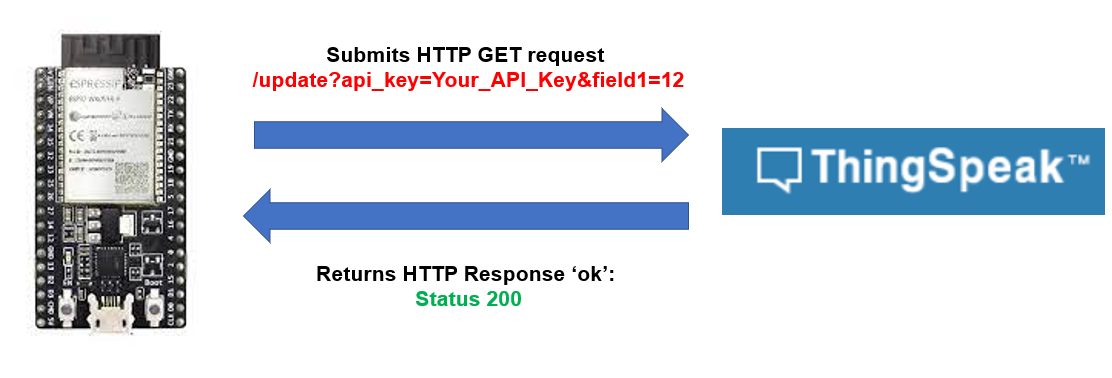
The working of our project is a three-step process; you can check the list below to understand the complete working:
- At first, the client (ESP32) will submit an HTTP request to the server (ThingSpeak/OpenWeatherMap.org).
- Then, after receiving the request, the server will return a response to the client.
- On the last step, the ESP32 will receive a response that will contain the status information and the requested content from the server.
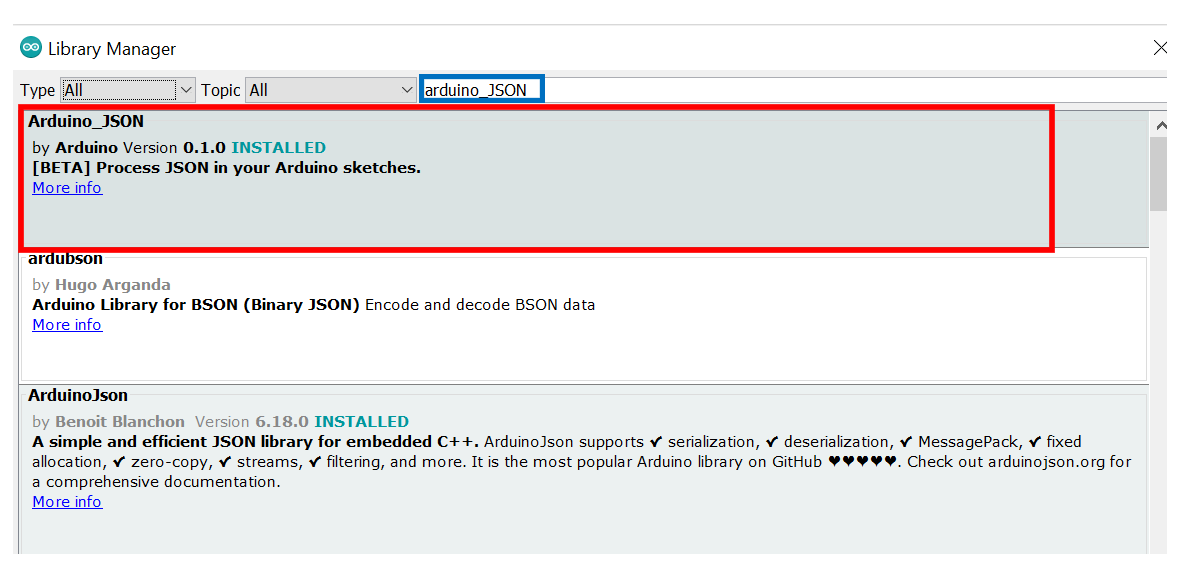
Installing Arduino_JSON Library
You will also have to install the Arduino_JSON library, as we will be dealing with JSON scripts. Open your Arduino Library Manager by clicking Sketch > Include Library > Manage Libraries. Type “Arduino_JSON” in the search tab and press enter. Install the library, which is highlighted below.
ESP32 HTTP GET in OpenWeatherMap.org (Acquiring JSON Object)
In this section, we will look at how to request weather parameter data using ESP32 from the OpenWeatherMap.org API. OpenWeatherMap is an online webpage that provides weather parameter data for any given location. These parameters include temperature, precipitation, humidity, pressure, wind, and weather forecast, to name a few. This webpage has an accurate and fast API to perform this functionality. We will use this API to request weather forecast values for our specified location.
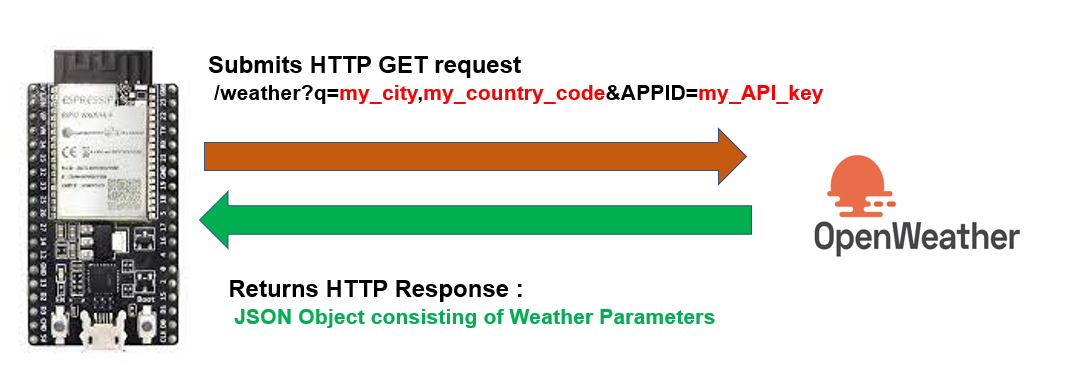
Our ESP32 (client) will make an HTTP GET request to receive the weather parameter data from the OpenWeatherMap API server. We will receive a string consisting of a JSON object with details regarding the weather for our set location.
Setting up OpenWeatherMap API
Before we proceed further, we first have to set up an account on the OpenWeatherMap. Follow the steps below to successfully create an OpenWeatherMap account.
- First, we go to the following webpage: https://openweathermap.org/appid/ to open the API. After opening this link, the following web page shown below will load. We will click on “here” link as shown in the red box to sign up.

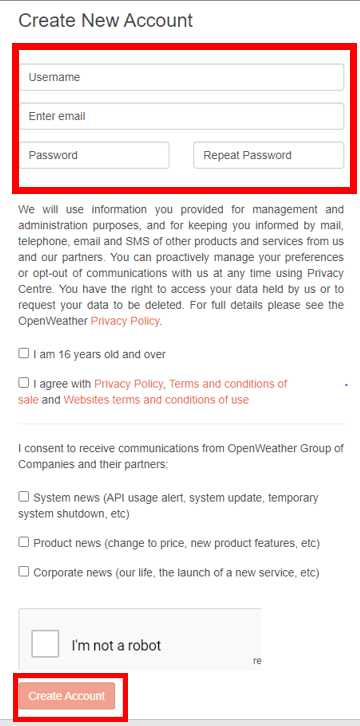
- Now, we will be redirected to another page. Account creation is easy; we simply need to add our username, password, and some other details. Once we have completed all the details, we will tick the relevant fields and then click on the “Create Account” button.
- At this step, the webpage will send a confirmation link to the email address we have provided. After confirmation, the following webpage will appear:

- Now, we will go to the “API keys” tab, and the window shown below will appear. This window has our unique API key. Likewise, we can go to https://home.openweathermap.org/api_keys to access our unique API key.
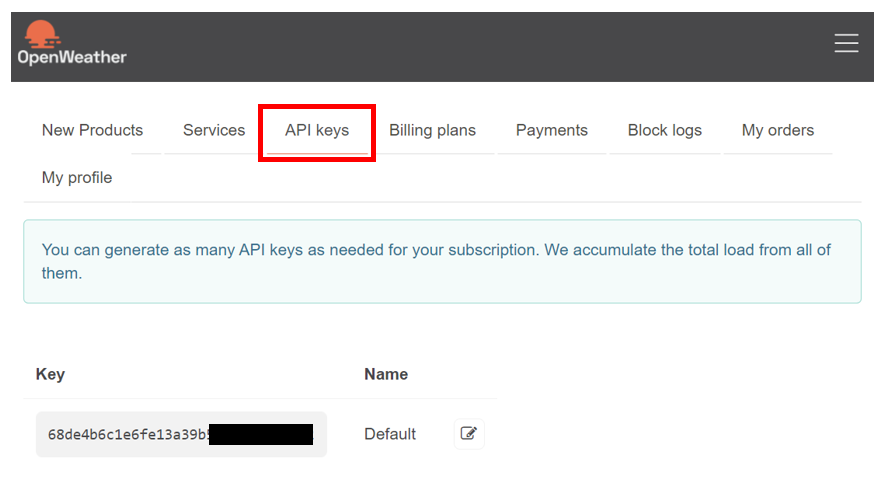
- The key in the grey box is our unique key, which we will be using later. Save this key, and for security reasons, do not share it with anyone.
Obtaining the Weather Update
Now that we have set up our account with OpenWeatherMap and have also obtained our key, let’s have a look at how to get weather updates for a location of our choice. For this, we will have to type the following URL in a new tab:
http://api.openweathermap.org/data/2.5/weather?q=city_code,
country_code&APPID=your_API_key
There are three parameters that we are specifying in the URL.
| Parameter | Function |
| “q=city_code” | This parameter will hold the name of the city whose weather update we will be acquiring from the OpenWeatherMap. |
| “country_code” | This parameter will hold the 2-digit country code of the specified city. |
| “API_key” | This parameter will hold our API key, which we got from OpenWeatherMap. |
Let us look at a simple example. In case we want to know about the weather update for the city of Lahore in Pakistan, we will enter the following URL:
http://api.openweathermap.org/data/2.5/weather?q=Lahore,
PK&APPID=68de4b6c1e6fe13a39b55bf36b42****
Copy the following URL in a new window, and the following parameters will pop up. This is the current weather update for Lahore, Pakistan (same time report).
{“coord”:{“lon”:74.3436,”lat”:31.5497},”weather”:[{“id”:800,”main”:”Clear”,”description”:”clear sky”,”icon”:”01d”}],”base”:”stations”,”main”:{“temp”:307.14,”feels_like”:308.07,”temp_min”:306.21,”temp_max”:307.14,”pressure”:1003,”humidity”:38},”visibility”:6000,”wind”:{“speed”:6.17,”deg”:70},”clouds”:{“all”:5},”dt”:1622811705,”sys”:{“type”:1,”id”:7585,”country”:”PK”,”sunrise”:1622764679,”sunset”:1622815452},”timezone”:18000,”id”:1172451,”name”:”Lahore”,”cod”:200}
As we can see above, the information is given in a JSON script. Now we will need to decipher this data in an easily readable format. For this, we will use the Arduino sketch provided below.
Arduino Sketch
First, we will open the Arduino IDE. Then we will go to File > New and open a new file. We will copy the code given below into that file. For this code to work with your ESP32 board, you will have to replace the following parameters in the program code given below:
- Network credentials
- API key
- City and Country code
- The server (domain name) for the URL path
#include <WiFi.h>
#include <HTTPClient.h>
#include <Arduino_JSON.h>

const char* ssid = "Write_your_WIFI_name";
const char* password = "Write_your_password";

String my_Api_Key = "68de4b6c1e6fe13a39b55bf36b42****";

String my_city = "Lahore"; //specify your city
String my_country_code = "PK"; //specify your country code

unsigned long last_time = 0;
unsigned long timer_delay = 10000;

String json_array;

void setup() {
  Serial.begin(115200);

  WiFi.begin(ssid, password);
  Serial.println("Connecting to WIFI...");
  while(WiFi.status() != WL_CONNECTED) {
    delay(500);
    Serial.print(".");
  }
  Serial.println("");
  Serial.print("IP Address: ");
  Serial.println(WiFi.localIP());

  Serial.println("First set of readings will appear after 10 seconds");
}

void loop() {

  if ((millis() – last_time) > timer_delay) {

    if(WiFi.status()== WL_CONNECTED){
      String server = "http://api.openweathermap.org/data/2.5/weather?q=" + my_city + "," + my_country_code + "&APPID=" + my_Api_Key;

      json_array = GET_Request(server.c_str());
      Serial.println(json_array);
      JSONVar my_obj = JSON.parse(json_array);

      if (JSON.typeof(my_obj) == "undefined") {
        Serial.println("Parsing input failed!");
        return;
      }

      Serial.print("JSON object = ");
      Serial.println(my_obj);
      Serial.print("Temperature: ");
      Serial.println(my_obj["main"]["temp"]);
      Serial.print("Pressure: ");
      Serial.println(my_obj["main"]["pressure"]);
      Serial.print("Humidity: ");
      Serial.println(my_obj["main"]["humidity"]);
      Serial.print("Wind Speed: ");
      Serial.println(my_obj["wind"]["speed"]);
    }
    else {
      Serial.println("WiFi Disconnected");
    }
    last_time = millis();
  }
}

String GET_Request(const char* server) {
  HTTPClient http;
  http.begin(server);
  int httpResponseCode = http.GET();

  String payload = "{}";

  if (httpResponseCode>0) {
    Serial.print("HTTP Response code: ");
    Serial.println(httpResponseCode);
    payload = http.getString();
  }
  else {
    Serial.print("Error code: ");
    Serial.println(httpResponseCode);
  }
  http.end();

  return payload;
}
How the Code Works?
Now, let us understand how each part of the code works.
Importing Libraries
First, we will import the relevant libraries that are necessary for this project. We are using three libraries: WiFi.h, HTTPClient.h, and Arduino_JSON.h.
The WiFi.h library is used to connect our ESP32 module with the local WiFi network. Also, the HTTPClient.h will help us make the HTTP GET requests easily, and the Arduino_JSON.h will be used to decipher the JSON script.
#include <WiFi.h>
#include <HTTPClient.h>
#include <Arduino_JSON.h>
Setting Network Credentials
Next, we will create two global variables to save the SSID and the password values. Replace both of the variables with your network credentials to successfully connect the ESP32 to the router.
const char* ssid = "Write_your_WIFI_name";
const char* password = "Write_your_password";
Configuring the API key
Now, we will create a string variable to hold our unique API key. This is the key that we saved previously.
String my_Api_Key = "68de4b6c1e6fe13a39b55bf36b42****";Setting City and Country Code
Next, we will create two string variables. The first variable will hold the city name whose weather update is needed. The second variable will hold the two-digit country code for that particular city. In our case, we will access the current weather parameters for the city of Lahore, located in Pakistan (PK).
String my_city = "Lahore"; //specify your city
String my_country_code = "PK"; //specify your country code
Setup() function
Inside the setup() function, we will open a serial connection at a baud rate of 115200.
Serial.begin(115200);Next, we will connect our ESP32 board to the local network with the network credentials we already specified above using the WiFi.begin() function. After the connection is established, the IP address of the ESP32 board will be printed on the serial monitor.
WiFi.begin(ssid, password);
  Serial.println("Connecting to WIFI...");
  while(WiFi.status() != WL_CONNECTED) {
    delay(500);
    Serial.print(".");
  }
  Serial.println("");
  Serial.print("IP Address: ");
  Serial.println(WiFi.localIP());

  Serial.println("First set of readings will appear after 10 seconds");
Loop() function
Inside the loop() function, we will make the HTTP POST request. We will create another variable named “server”. This will hold the URL path of the HTTP GET request that we will use.
String server = "http://api.openweathermap.org/data/2.5/weather?q=" + my_city + "," + my_country_code + "&APPID=" + my_Api_Key;After every 10 seconds, the ESP32 module will make a request to the API by calling the GET_Request() function.
 json_array = GET_Request(server.c_str());
 Serial.println(json_array);
The following section of code defines the Get_Request() function. This function takes the server’s URL as a parameter. Then we create an instance of the HTTPClient library called “http” and request the API for a weather update. This information (“the payload”) is saved as a JSON object in the string datatype. The JSON object contains complete information regarding the weather parameters for our set location.
String GET_Request(const char* server) {
  HTTPClient http;
  http.begin(server);
  int httpResponseCode = http.GET();

  String payload = "{}";

  if (httpResponseCode>0) {
    Serial.print("HTTP Response code: ");
    Serial.println(httpResponseCode);
    payload = http.getString();
  }
  else {
    Serial.print("Error code: ");
    Serial.println(httpResponseCode);
  }
  http.end();

  return payload;
}
The following code section helps us transform the JSON script into a readable format and displays it on our serial monitor. This data will be stored in the string variable “json_array”. We will then create an object called “my_obj” in JSONVAR and use it to access individual temperature, pressure, humidity, and wind speeds.
JSONVar my_obj = JSON.parse(json_array);

      if (JSON.typeof(my_obj) == "undefined") {
        Serial.println("Parsing input failed!");
        return;
      }

      Serial.print("JSON object = ");
      Serial.println(my_obj);
      Serial.print("Temperature: ");
      Serial.println(my_obj["main"]["temp"]);
      Serial.print("Pressure: ");
      Serial.println(my_obj["main"]["pressure"]);
      Serial.print("Humidity: ");
      Serial.println(my_obj["main"]["humidity"]);
      Serial.print("Wind Speed: ");
      Serial.println(my_obj["wind"]["speed"]);
    }
    else {
      Serial.println("WiFi Disconnected");
    }
    last_time = millis();
  }
Demonstration
After we have uploaded the code to the ESP32 development board, we will press its ENABLE/RESET button.

We will open up the serial monitor in the Arduino IDE and look for the IP address of our ESP module. Additionally, the time delay between messages will also be displayed.
Now, if successful client-server communication took place, the server would send the response code 200. The ESP32 responds with an “OK” message, which means the connection is successful. This will be printed on our serial monitor.
Then we will receive the weather update for our city in the form of JSON data, as shown below:
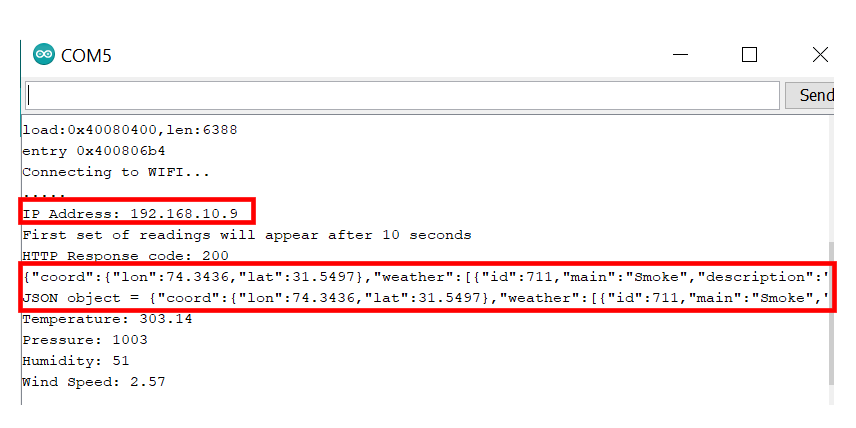
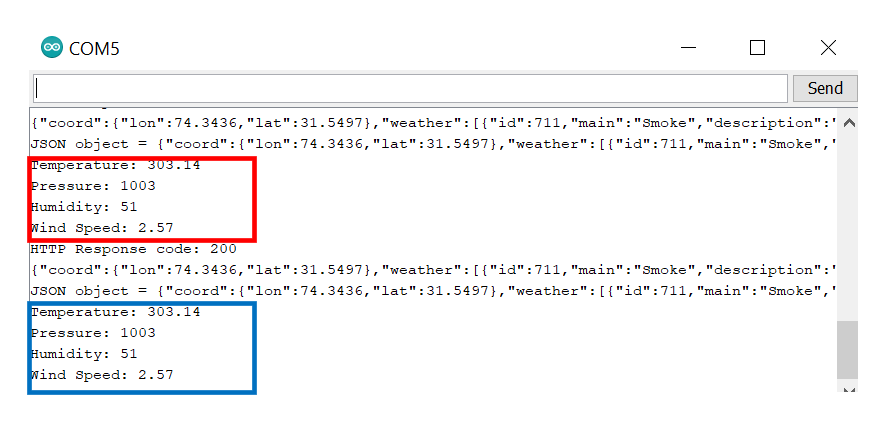
This data also gets decoded into individual temperature, pressure, humidity, and wind speed values, as seen in the red rectangle. After every 10 seconds, we will receive a new set of readings for all the parameters.
ESP32 HTTP GET in ThingSpeak (Updating Values)
In this section, we will look at how to make an HTTP GET request using ESP32 to the ThingSpeak API. ThingSpeak is an open-source API that stores or retrieves data using the HTTP or MQTT protocols. This takes place over the Internet or through a LAN connection. We will use this API to publish random values for simplicity’s sake.
For practicality, the same procedure can be used to publish sensor values, e.g., data readings from the BME280 temperature sensor integrated with the ESP32 board.
Our ESP32 (client) will make an HTTP POST request to send different random values to the server, which is ThingSpeak in this case. We will receive data in the form of a graph that will keep updating every 10 seconds.
Setting up ThingSpeak API
The ThingSpeak API is free to use, but we will have to create a MathWorks account. Follow the steps below to successfully create a MathWorks account.
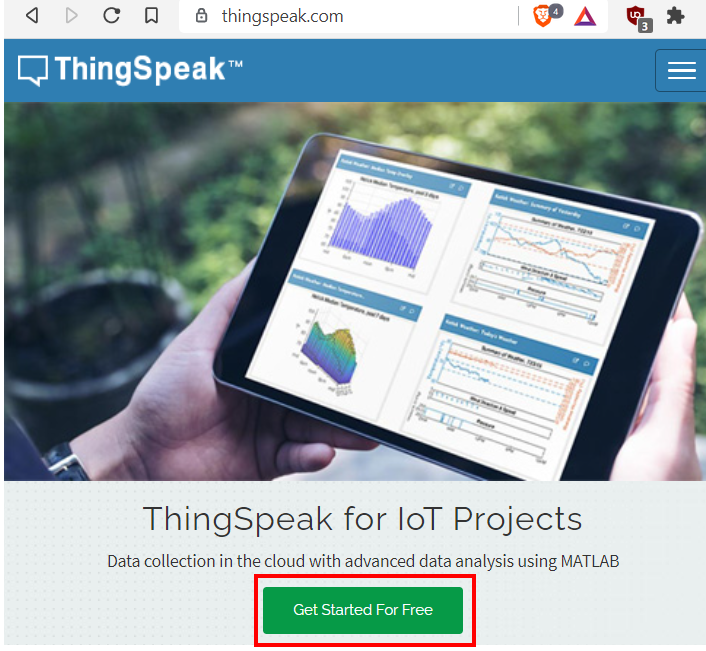
- First, open the following website using this link: https://thingspeak.com/.
- Click on the “Get Started for Free” button. The following window will appear:
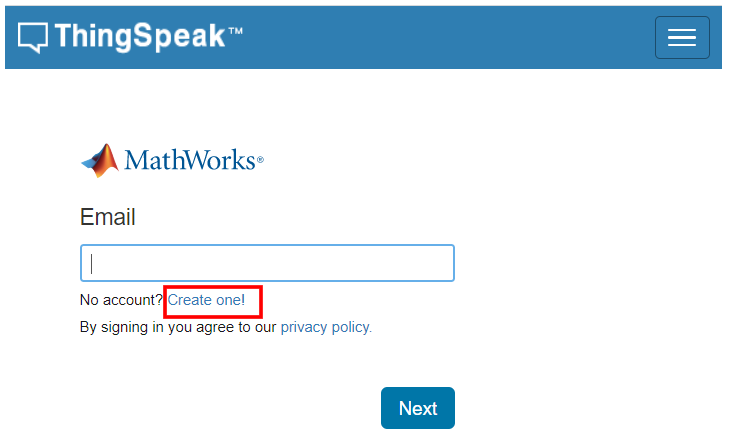
- Now ThingSpeak will redirect us to a login window. If you already have an existing MathWorks account, you can use it to log in. Otherwise, we will show you how to create a new one. Click the “Create One!” option to make a new MathWorks account.
- When we have successfully signed in, we will receive the following notification. Click on the “OK” button.
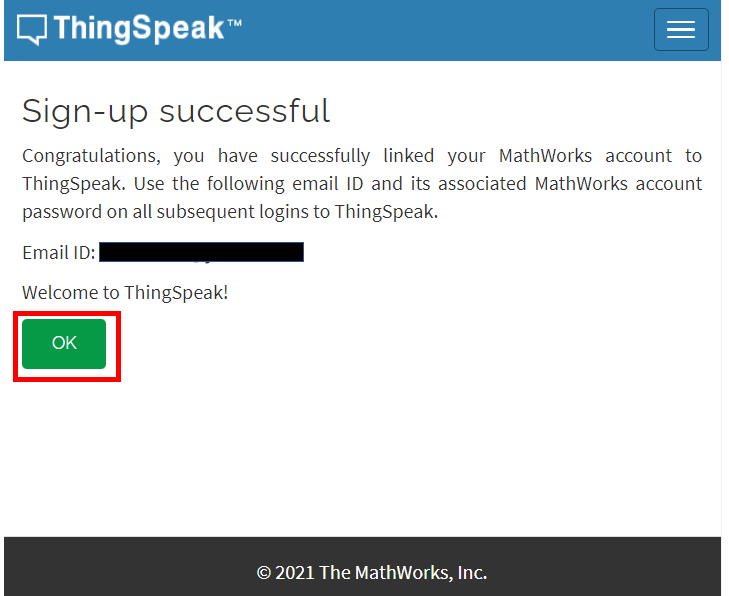
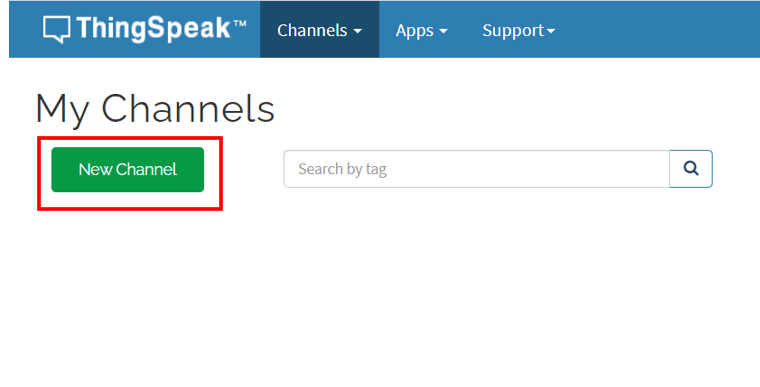
- Now go to the “New Channel” button and click it.
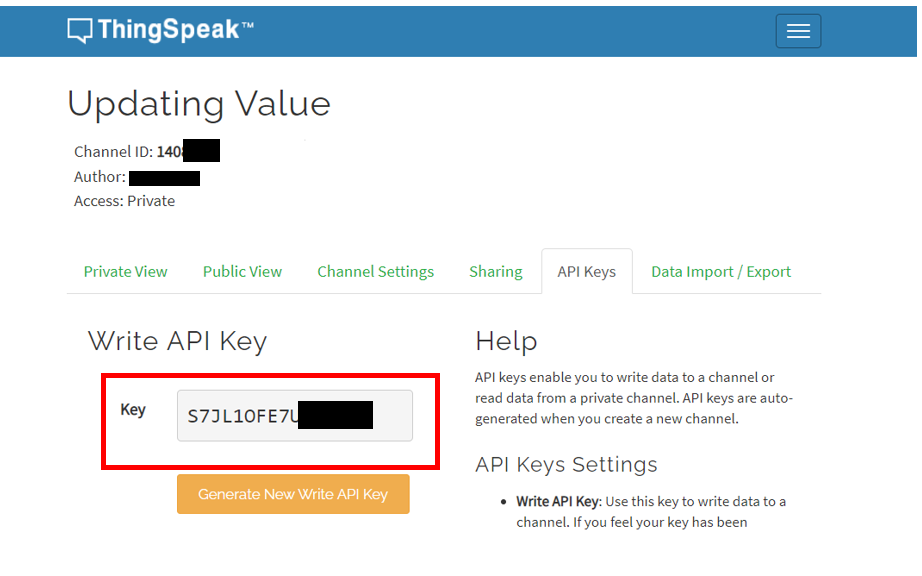
- After creating the channel, go to the API key tab and click it. We will now be able to access your unique API key. Save it and keep it secure, as we will need it later in the program code.
ThingSpeak Arduino Sketch
Now we will open the Arduino IDE and go to File > New to open a new file. Then we will copy the code given below in that file. This code will work with any ESP32 board. You just have to replace the network credentials and the API key according to your configuration.
#include <WiFi.h>
#include <HTTPClient.h>

const char* ssid = "Write_your_WIFI_name";
const char* password = "Write_your_password";


String server = "http://api.thingspeak.com/update?api_key=Your_API_Key";

unsigned long last_time = 0;
unsigned long timer_delay = 10000;

void setup() {
  Serial.begin(115200);

  WiFi.begin(ssid, password);
  Serial.println("Connecting to WIFI..");
  while(WiFi.status() != WL_CONNECTED) {
    delay(500);
    Serial.print(".");
  }
  Serial.println("");
  Serial.print("IP Address: ");
  Serial.println(WiFi.localIP());

  Serial.println("The first reading will display after 10 seconds");

  // Random number generator
  randomSeed(analogRead(23));
}

void loop() {
  if ((millis() – last_time) > timer_delay) {
    if(WiFi.status()== WL_CONNECTED){
      HTTPClient http;

      String server_path = server + "&field1=" + String(random(50));
      http.begin(server_path.c_str());

      // Send HTTP GET request
      int httpResponseCode = http.GET();

      if (httpResponseCode>0) {
        Serial.print("HTTP Response code: ");
        Serial.println(httpResponseCode);
        String data = http.getString();
        Serial.println(data);
      }
      else {
        Serial.print("Error code: ");
        Serial.println(httpResponseCode);
      }

      http.end();
    }
    else {
      Serial.println("WiFi is Disconnected!");
    }
    last_time = millis();
  }
}
How the Code Works?
Now, let us understand how each part of the code works.
Importing Libraries
In the first part, we will import the relevant libraries that are necessary for this project. We are using two libraries: WiFi.h and HTTPClient.h.
The WiFi.h library connects our ESP32 module with the local WiFi network. Also, HTTPClient.h will help us make HTTP POST requests easily.
#include <WiFi.h>
#include <HTTPClient.h>
Setting Network Credentials
Next, we will create two global variables to save the SSID and password of our wireless network. You have to replace both of them with your network credentials to successfully connect to your wireless router. Otherwise, the ESP32 will not be able to connect to the network and receive requests from the server.
const char* ssid = "Write_your_WIFI_name";
const char* password = "Write_your_password";
Setting up the Server
After importing all the necessary libraries and configuring your network credentials, you will have to enter the server’s name. We will create a string variable and call it “server”. We will include the API key that we saved before on our server, as shown below:
String server = "http://api.thingspeak.com/update?api_key=Your_API_Key";Make sure to replace your API key in the place specified. For example, our key is “S7JL1OFE7U******”. Hence, we will specify the server as:
String server = "http://api.thingspeak.com/update?api_key= S7JL1OFE7U******";Setup() function
Inside the setup() function, we will open a serial connection at a baud rate of 115200.
Serial.begin(115200);Moreover, we will connect our ESP32 board with the local network whose network credentials are already specified above using the WiFi.begin() function. After establishing the connection, the serial monitor will print the IP address of our ESP32 on the serial monitor of our Arduino IDE.
  WiFi.begin(ssid, password);
  Serial.println("Connecting to WIFI..");
  while(WiFi.status() != WL_CONNECTED) {
    delay(500);
    Serial.print(".");
  }
  Serial.println("");
  Serial.print("IP Address: ");
  Serial.println(WiFi.localIP());

  Serial.println("The first reading will display after 10 seconds");
Here, we will use the randomSeed() function to initiate a random number from a given starting point, which is known as the seed. The analogRead() function will be set to GPIO 23; this GPIO is not connected, and we will use it as a reference for the starting point.
randomSeed(analogRead(23));Loop() function
Inside the infinite loop() function, we will make an HTTP GET request. After every 10 seconds, the URL-encoded data will be sent from the client to the server (ESP32 to ThingSpeak). Inside the “server_path”, we will send our configured server and API key along with a random number between 0 and 49. The server path will hold the domain name for the GET request.
if ((millis() – last_time) > timer_delay) {
    if(WiFi.status()== WL_CONNECTED){
      HTTPClient http;

      String server_path = server + "&field1=" + String(random(50));
      http.begin(server_path.c_str());

      // Send HTTP GET request
      int httpResponseCode = http.GET();
We will show here how to make a GET request where we will be updating a value. The ESP32 will make an HTTP GET request using the following URL:
http://api.thingspeak.com/update?api_key=Your_API_Key&field1=12
In the above GET request, we are updating “field1” with a new value, which is 12.
The following section of the code will print the response code and the random number on the serial monitor.
if (httpResponseCode>0) {
        Serial.print("HTTP Response code: ");
        Serial.println(httpResponseCode);
        String data = http.getString();
        Serial.println(data);
      }
      else {
        Serial.print("Error code: ");
        Serial.println(httpResponseCode);
      }

      http.end();
    }
Demonstration
After we have uploaded our code to the ESP32 development board, we will press its ENABLE/RESET button.
We will open up the serial monitor in the Arduino IDE and look for the IP address of our ESP module. The code will also display the time delay between the messages.
Now, if successful client-server communication took place, the server would send the response code 200. The ESP32 responds with an “OK” message, which means the connection is successful. This will be printed on our serial monitor.
Then we will receive the weather update for our city in the form of JSON data, as shown below:

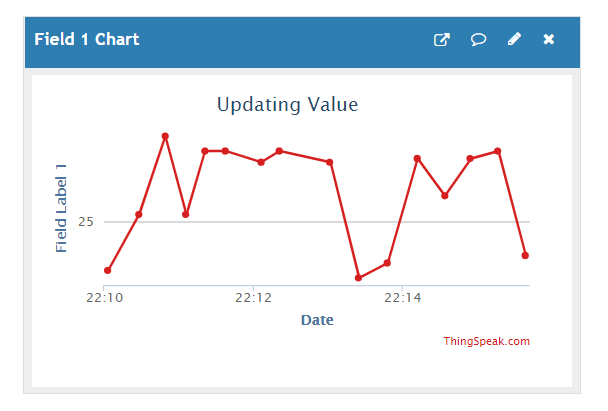
Next, open the ThingSpeak API, and we can see that different random values are updating every 10 seconds in our dashboard.
Conclusion
To summarize everything we have learned in this tutorial, a list is provided below.
- HTTP GET Request Introduction
- HTTP GET Request Examples
- ESP32 HTTP GET to OpenWeatherMap.org (Acquiring JSON Object)
- ESP32 HTTP GET to ThingSpeak API
You may also like to read our articles on following topics
Both of these worked after I replaced the minus operator in the line:
if ((millis() – last_time) > timer_delay) {
Also, why are the temperature #s so high? It’s 303.14 in your example. I got similar #s.
In the ThinkSpeak example, are the random #s plotted the same #s shown in the serial output? It doesn’t seem so.
temperature is in degrees Kelvin.
Substract 273.15 to get it in degrees Celcius