In this tutorial, we will learn to program ESP32 and ESP8266 boards with VS code by using the PlatformIO extension available in visual studio code. As we have seen in previous tutorials, we have learned to program ESP32 and ESP8266 boards using various IDEs.
Previously we looked upon Thonny IDE and uPyCraft IDE when programming our ESP boards using MicroPython. You can refer to them here:
- Getting Started with Thonny MicroPython IDE for ESP32 and ESP8266
- Getting Started with UpyCraft IDE MicroPython on ESP32 and ESP8266
We also introduced our readers to the Pymakr extension in VS Code and dedicated a separate article on how to use VS Code with the Pymakr plugin. You can access it here:
But through this user guide, we will look upon how to use Visual Studio Code (VS Code) to program our ESP32/ESP8266 development boards using PlatformIO instead. VS Code is a source code editor designed for Windows, macOS, and Linux which is used in building and debugging applications. PlatformIO IDE enhances the programming experience in VS Code and makes it very interactive and high level.
To successfully implement the above-mentioned points, the following steps will be performed in this guide:
- Installing the VS Code Editor.
- Installing the PlatformIO extension in VS code.
- Connecting our ESP32 and ESP8266 boards with the IDE
- Creating a simple LED blinking project in our ESP boards with VS code and PlatformIO.
Recommended Components
The following components are used in this project or are helpful for building it with the ESP32.
| Component | How it’s used in this project | Buy on Amazon |
|---|---|---|
| ESP32 Development Board (DevKit V1) | Programmed in VS Code with PlatformIO using the Arduino framework. | Check Price |
| ESP8266 NodeMCU (ESP-12E) | Alternative board you can program with the same VS Code + PlatformIO setup. | Check Price |
| Micro USB Cable | Connects the ESP board to your computer for programming and power. | Check Price |
| Breadboard | Holds the ESP board while testing the blink example. | Check Price |
| Jumper Wires | Connect the ESP board to other components on the breadboard. | Check Price |
As an Amazon Associate we earn from qualifying purchases. Prices and availability are accurate as of the date/time indicated and are subject to change.
Installing Python in Windows, Linux and MacOS)
Before we start the installation of the PlatformIO IDE, make sure you have the latest version of Python 3.7 or the latest installed on your windows-based. If you don’t have the python 3 packages installed on your Windows, follow these steps to install one:
First of all, go to this link here and download the latest version of Python3 according to the operating system on your computer.
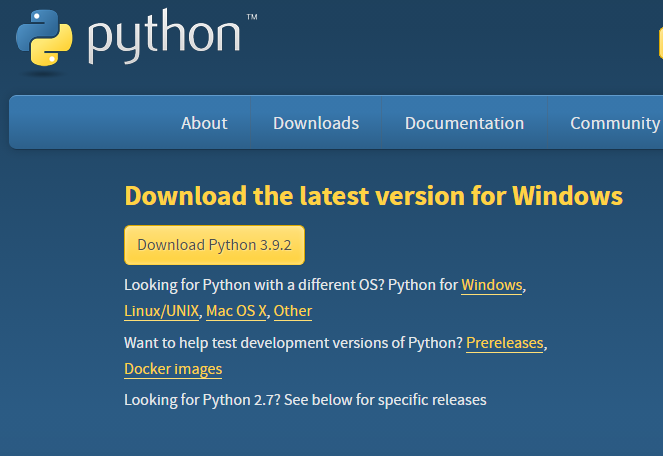
After you click the Download Python 3.9.2 button an .exe file will start downloading. After the download is completed click on it and the following appears.
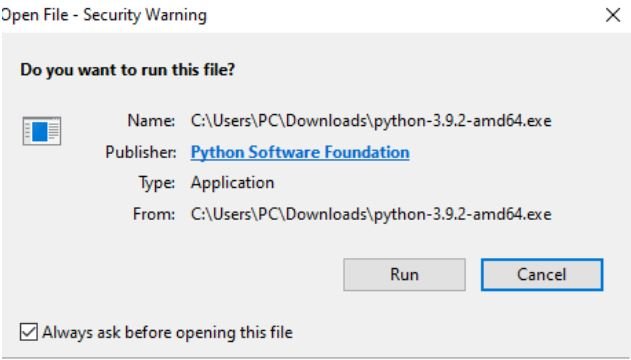
Press the run button. The following screen appears. Make sure to tick Add Python 3.9 to a path and then click Install Now.

After a few moments, the installation will be complete.
To install Python in MacOS, execute the following commands one by one in terminal:
$ /bin/bash -c "$(curl -fsSL https://raw.githubusercontent.com/Homebrew/install/master/install.sh)"
$ brew install python3
To install Pyhton in Linux, run the followings commands in terminal:
$ sudo apt install python3$ sudo apt install python3-distutils
To check which version of Python is installed and if it is installed successfully, run the following command:
python3 --versionInstalling VS Code in Windows
To download and install the visual code editor IDE, click here. This will open the window as shown below.

Click on the ‘Download for Windows’ button which is shown in the red rectangular box. You can choose your system bit type by clicking on the drop-down arrow. If you are using another operating system example Linux or macOS then click the ‘Download’ button in the top right corner.
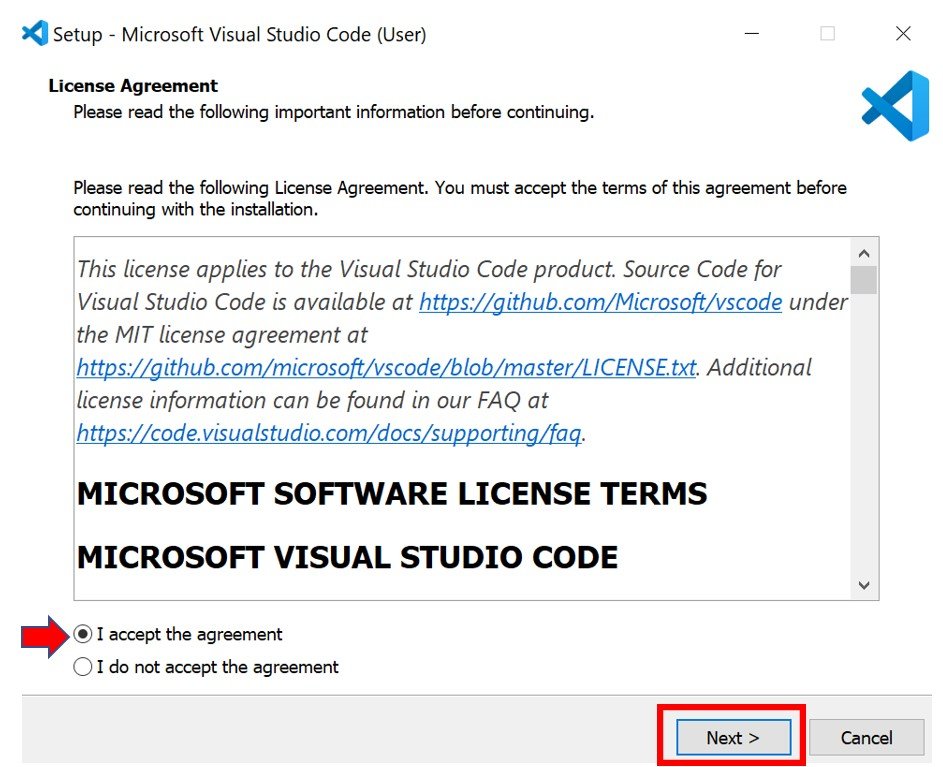
A few moments later, after specifying the directory your download will start. After opening the setup .exe file you will see the window asking for your agreement. Click ‘I accept the agreement’ and then go to the ‘Next’ button.
Then, choose your desired location to install the editor by specifying it as shown below.

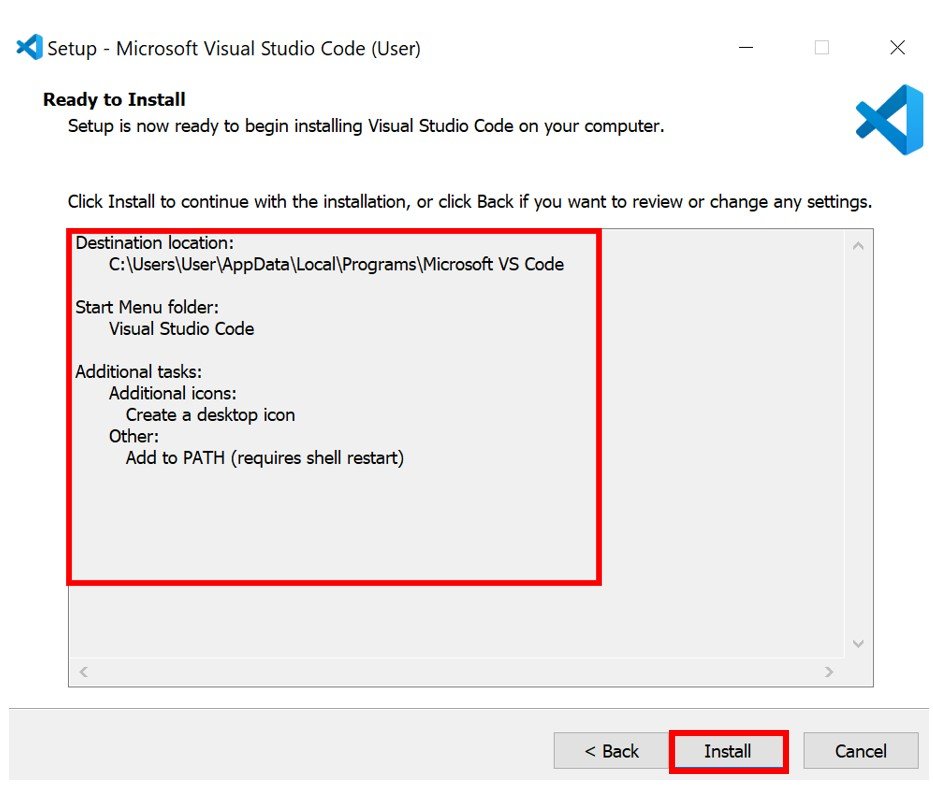
After clicking ‘Next,’ choose any additional tasks you want to add.

Then, click on the ‘Install’ button. You can view all the features we ticked along the way in the red rectangular box above.
After the installation is completed, click ‘Finish’ to launch the application.

The following ‘Getting Started-Visual Studio Code’ window will open up indicating a successful installation.

Installing VS Code in MacOS X
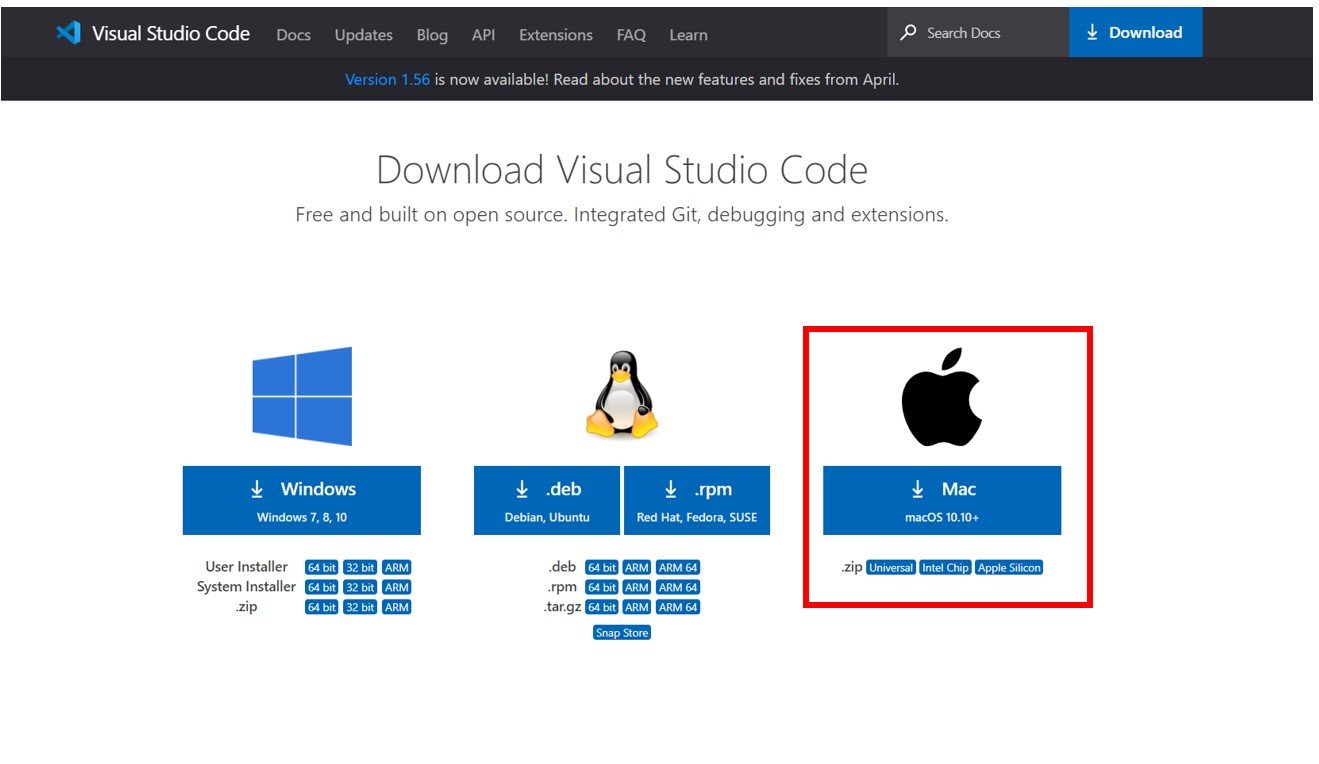
To install VS Code in your macOS X click here. This will open a window containing various download options. Go to the download option for Mac and choose the .zip file according to your machine type.
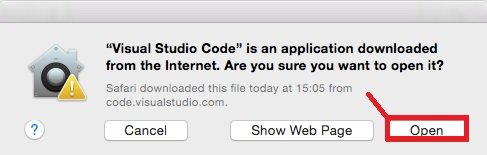
After downloading the setup file, the following pop-up appears. Click on ‘Open’ to launch the editor.
Alternatively, you can also open the editor through the Downloads folder. You will receive the following welcome page in VS Code initiating a successful installation in macOS X.

Installing VS Code in Linux Ubuntu
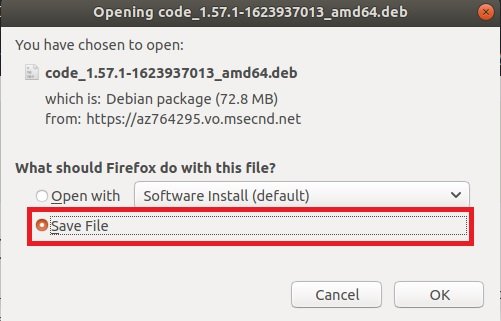
To install VS Code in your Linux Operating system, click here. This will open a window containing various download options. Go to the download option for Linux and choose the one shown in the red rectangular box.

After downloading, save the installation file by clicking ‘Save File’ and then ‘OK.’
To install the file, copy the command and run it on your Linux terminal.
$ cd Downloads
$ sudo apt install ./code_1.49.1-1600299189_amd64.deb
This command will install the VS Code in your system which after the process has completed will be seen in the installed applications. Click the VS Code icon and open it to reveal the following welcome screen on your monitor.
The easiest way to install VS code in Linux is through the software store of Ubuntu. Simply go to the software store and search for VS code.

After that click on install button, it will install visual studio code on Linux Ubuntu:

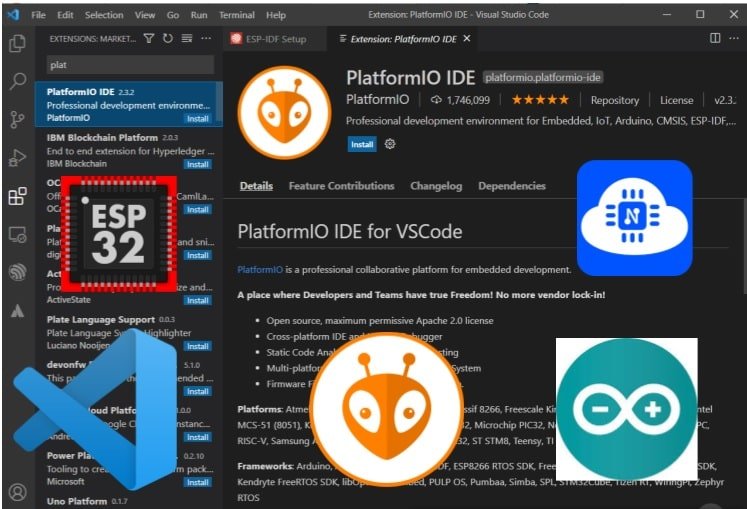
Installing PlatformIO extension in VS Code (Visual Studio Code)
To start programming your ESP32/ESP8266 boards in VS Code we will first install the PlatformIO plugin. Follow the steps to successfully install the extension.
Open VS Code. Then, go to extensions by pressing Ctrl + Shift + X or click its icon.

Type ‘PlatformIO’ in the search bar and install it.

It will take a few minutes for the installation to complete. Make sure the plugin is enabled. You will receive a notification to reload. Click it to proceed further.

After the process is finished, you will be able to view the icon of PlatformIO in the left sidebar. Make sure that the plugin is enabled as highlighted below.
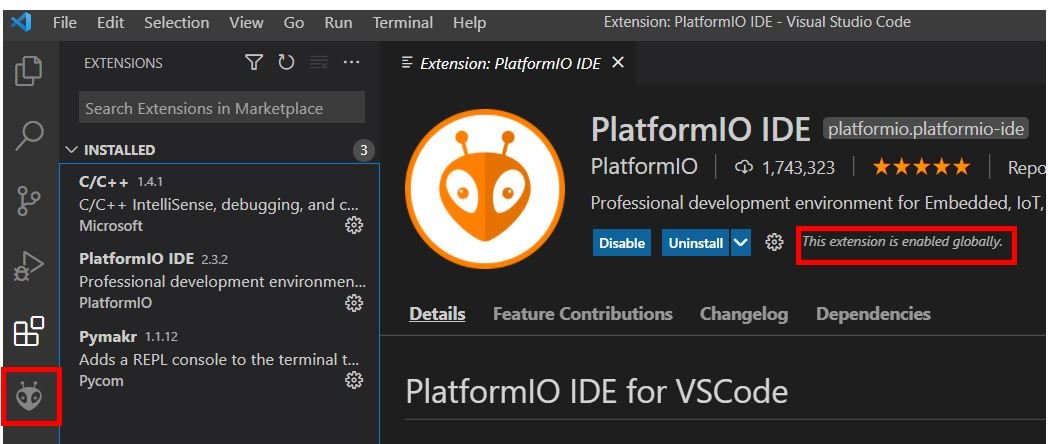
PlatformIO extension is successfully installed in our VS Code. Restart your VS Code for the PlatformIO to reload properly. Now let us move further and learn more about it.
Click the PlatformIO icon and then go to PIO Home > Open or click the home icon found at the bottom of the page. This will open up the PIO Home page.

Creating New Project: ESP32/ESP8266 LED Blinking example
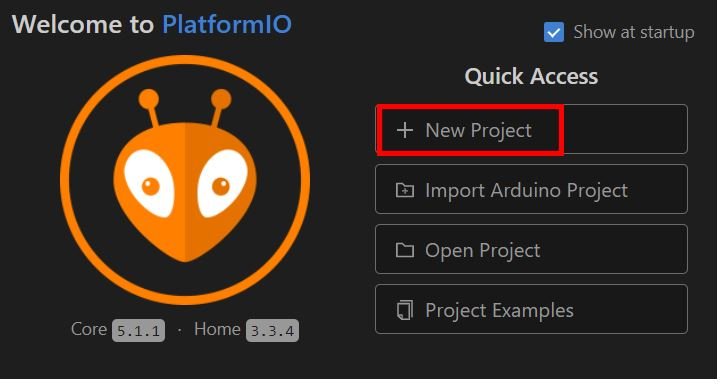
Now we will learn how to create a new project and upload it to our ESP module to see it in action. We aim to toggle the onboard LED of our ESP32/ESP8266 board. Firstly, on the PIO Home page go to ‘+New Project.’
Now add the details. Give the name of your project, the type of your development board and the framework. We have named our project ‘ESP32 Blinking LED.’ For the board, we have selected ‘DOIT ESP32 DEVKIT V1.’ The framework will be Arduino. You can use any other name according to your choice. If you want to use ESP8266 instead, choose it appropriately from the drop-down list in the board section. We will save this project in the default location which is set as Documents/PlatformIO/Projects. You can also specify your preferred location. Click the Finish button to create your project.

EXPLORER Tab
The following window will open. At the far left, we will be able to view our newly created project ‘ESP32 Blinking LED’ under the Explorer tab.

As you can see there are several folders inside our project folder (ESP32 Blinking LED). This is the same for every project which you will create through PlatformIO IDE.
Note: Do not attempt to move/modify/delete any folders/files for your respective project otherwise it will not compile properly.
.pio: This is a hidden folder that consists of builds. The binary files inside it are generated by the compiler.
lib: This folder contains all the libraries which are necessary for that particular project.
src
This folder contains the source code meaning the main.cpp file will be found here. Inside the main.cpp we will write our program code. Go to src > main.cpp and open it. As you can see below it consists of the generic setup() and loop() functions. We will define the functions and the program code here.

Platformio.ini
This is the PIO configuration file for our project. It displays three parameters for our project: the platform, the board and the framework. The platform corresponds to the system on a chip (SoC). Whereas the board and framework correspond to the development board and software environment that we will use to run the program code respectively. Notice that the board and framework are the ones which we selected ourselves while first creating the project.

You can also add other parameters inside the platformio.ini file including libraries, serial monitor speed, baud transfer speed, COM port etc. For this LED blinking project, we want to use a baud rate of 115200 in our Serial Monitor so we will add the following line inside the platformio.ini file:

This will configure the baud rate of the serial monitor to a particular value. Press Ctrl+S to save the changes.
TOOLBAR
Now let us discuss some helpful functions related to PlatformIO IDE. In the bottom bar of your window you can view the following icons:

- Errors/problems: This indicates any problems in your program code.
- Show running tasks: This shows the number of tasks currently running.
- PlatformIO Home: Clicking this icon will take you to the homepage of the PlatformIO IDE. This could also be accessed by clicking the PlatfromIO icon from the left sidebar.
- PlatfromIO Build: This will compile the program code and will help in checking for potential errors.
- Upload: This will upload the program code to your board.
- Clean: This cleans the build folder but has no impact on the main.cpp file.
- PlatformIO Serial Monitor: This will open the serial monitor.
- PlatformIO New Terminal: Clicking on this icon opens the terminal. If the terminal was already opened then it refreshes the terminal.
You can also use shortcuts instead of the toolbar. Press Ctrl+ Shift+P or go to View > Command Palette to open the palette. Write ‘platformio’ in the search tab and you will be able to view all the commands.

Similarly, you will also be able to view the tasks by clicking the PIO Icon > PROJECT TASKS

How to upload code using PlatformIO for ESP32/ESP8266?
Now, as we have created our project ‘ESP32 Blinking LED’ let us proceed further and learn how to save and upload the program code to our ESP module.
First, go to Explorer > src > main.cpp and open it. Replicate the code given below in that file.
This code is compatible with the ESP32 development board. For ESP8266, the onboard LED works on an opposite logic as compared to ESP32. To turn the onboard LED ON, a low signal is sent, and to turn it OFF, a high signal is sent. This is the opposite in the case of ESP32.
#include <Arduino.h>
#define LED 2

void setup() {
  Serial.begin(115200);
  pinMode(LED, OUTPUT);
}

void loop() {
  digitalWrite(LED, HIGH);
  Serial.println("LED is ON!");
  delay(1000);
  digitalWrite(LED, LOW);
  Serial.println("LED is OFF!");
  delay(1000);
}
How does the Code Work?
First, we will define LED to save the GPIO pin through which the onboard LED is connected i.e., GPIO2.
#define LED 2Inside the setup() function, we will open a serial connection at a baud rate of 115200.
Serial.begin(115200);By using the pinMode() function, the LED (GPIO2) will be passed as a parameter inside the function which will be configured as the output pin.
pinMode(LED, OUTPUT);Inside the loop() function, we will toggle the onboard LED continuously. By using the digitalWrite() function, the onboard led will turn ON/OFF by passing the LED pin and the state inside the function. If the ‘HIGH’ state is passed the LED will turn ON and if the ‘LOW’ state is passed inside the function then the LED will turn OFF. Likewise, the serial monitor will also display a message indicating whether the LED is ON or OFF.
digitalWrite(LED, HIGH);
  Serial.println("LED is ON!");
  delay(1000);
  digitalWrite(LED, LOW);
  Serial.println("LED is OFF!");
  delay(1000);
For ESP8266 board: To turn the onboard LED ON, in the digitalWrite() make sure to pass the second parameter as ‘LOW’ because of the logic for input in ESP8266 NodeMCU works on an inverted logic.
Recommended Reading: LED Blinking ESP32
Demonstration
Now press Ctrl + S or go to File > Save to save the main.cpp file.
Then go to the PIO icon > Project Tasks > Upload or the Upload icon in the bottom taskbar to upload the program code to the ESP32 module.

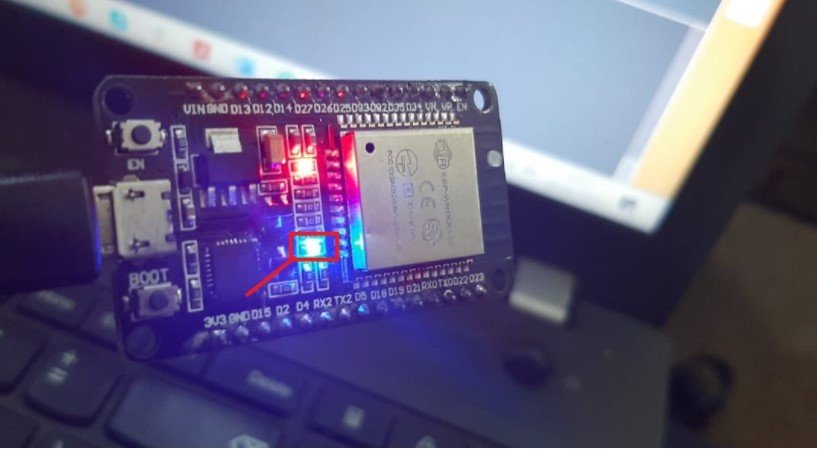
During the upload process if you notice Connecting….____……____…… as highlighted below then press the BOOT button of your ESP32 module and hold it so that the ESP board goes into flashing mode during the upload process.

In the terminal, you will see the following message after a successful upload took place.

The onboard LED will start blinking. After every second the LED will toggle.
Now click the serial monitor icon in the taskbar.

You can view the messages on the serial monitor as shown below.

Detecting COM Port
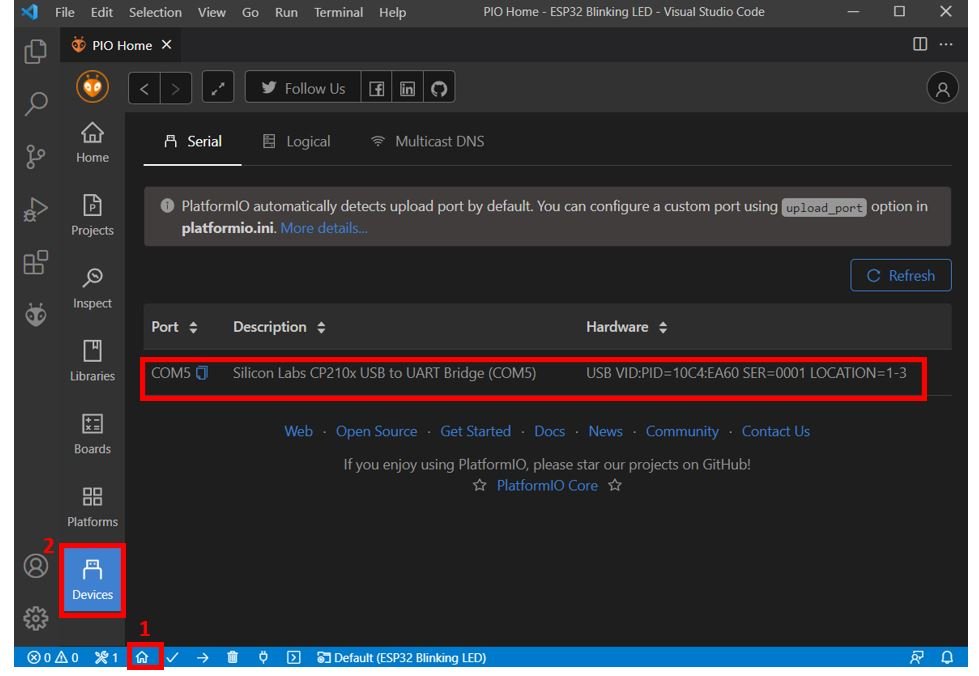
As you would have noticed while working in PlatformIO, there is no need to specify the COM Port through which your microcontroller is attached. The COM Port is automatically detected. To view the COM port through which our ESP32 is connected we can do the following:
- Go to PIO Home > Devices. You will be able to view all the connected devices.
Installing ESP32/ESP8266 Libraries
Now, if your project requires additional libraries then go to Home icon > Libraries and type the name of the library in the search bar. For example, we will show you the procedure to install the Adafruit Unified Sensor library for our project.

Method 1:
Click the library. The following page will open. Click ‘Add to Project.’

Now link it with your project by selecting the project from the drop-down list. Click ‘Add.’

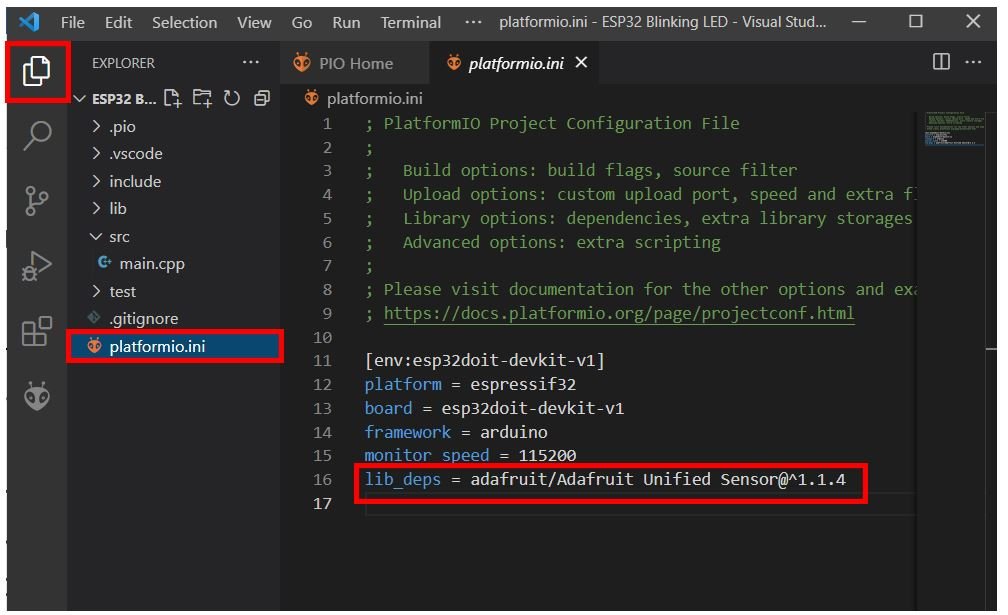
Go to Explorer > platformio.ini. Inside your platformio.ini file you will see that the library identifier has already been added as shown in the figure below:
Method 2:
Likewise, you can install libraries by adding libs_deps for a particular library that you want to install for your project in its platformio.ini file. Select the library which you want to install and the following page will open. Click ‘Installation’ and go down. You can view all the library identifiers associated with this particular library.
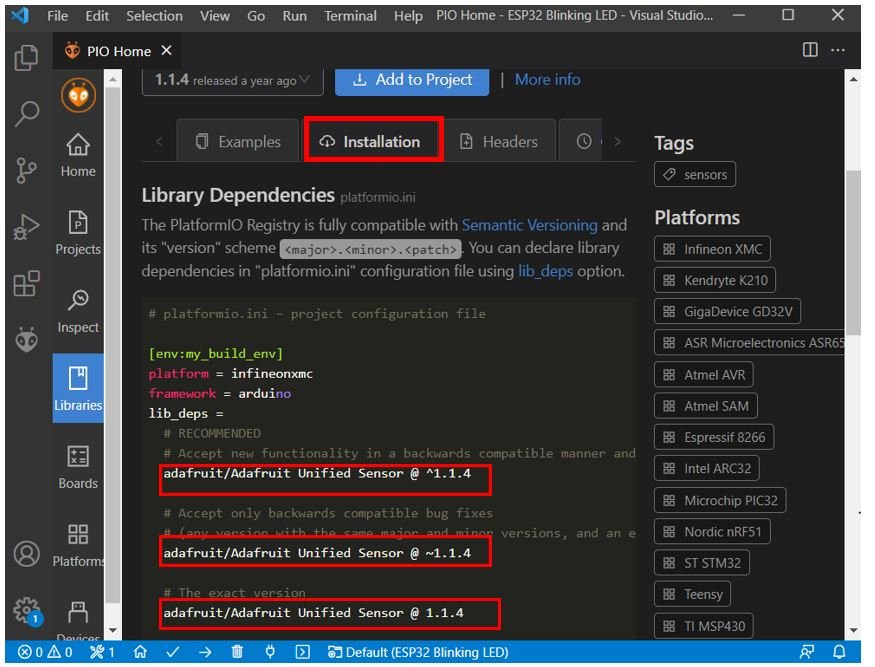
Now go to the platformio.ini file associated with your project. Replicate one of the library identifiers inside the file e.g., lib_deps = adafruit/Adafruit Unified Sensor@^1.1.4
This will automatically install that particular library and link it with your project. To add multiple libraries, create a single lib_deps variable and include the library identifiers with commas in between them or use a separate line for each identifier. For example:
lib_deps =
adafruit/Adafruit SSD1306 @ ^2.4.6
adafruit/DHT sensor library @ ^1.4.2
Conclusion
In conclusion, we have learned how to use PlatfromIO IDE with VS Code and also programmed our ESP32/ESP8266 development board with a simple project using the Arduino framework. PlatformIO IDE provides a great programming environment for professional high-level codes. It incorporates IntelliSense, automatic COM port detection, determining errors before compiling, and much more to make your programming experience better.
Hello, I’m wondering if you are still maintaining this page. I’m trying to do the simple blink sketch on a DOIT ESP RS8286 board with PlatformIO on my MAC Mini(M1 chip). I can get the sketch to compile but I’m getting a upload error because it keeps timing out. This simple sketch of course works fine on Arduino 2.0 of course.
This is the platformio.ini file:
[env:esp8285]
platform = espressif8266
board = esp8285
framework = arduino
This is the error message:
Error PlatformIO and DevKit 8286 board
> Executing task in folder BlinkESP8266: platformio run –target upload ESP-Mx DevKit (ESP8285)
HARDWARE: ESP8266 80MHz, 80KB RAM, 1MB Flash
PACKAGES:
– framework-arduinoespressif8266 3.30002.0 (3.0.2)
– tool-esptool 1.413.0 (4.13)
– tool-esptoolpy 1.30000.
201119 (3.0.0)
– tool-mklittlefs 1.203.210628 (2.3)
– tool-mkspiffs 1.200.0 (2.0)
– toolchain-xtensa 2.100300.210717 (10.3.0)
LDF: Library Dependency Finder -> https://bit.ly/configure-pio-ldf
LDF Modes: Finder ~ chain, Compatibility ~ soft
Found 35 compatible libraries
Scanning dependencies…
No dependencies
Building in release mode
Retrieving maximum program size .pio/build/espmxdevkit/firmware.elf
Checking size .pio/build/espmxdevkit/firmware.elf
Advanced Memory Usage is available via “PlatformIO Home > Project Inspect”
RAM: [=== ] 34.3% (used 28100 bytes from 81920 bytes)
Flash: [=== ] 34.9% (used 265757 bytes from 761840 bytes)
Configuring upload protocol…
AVAILABLE: espota, esptool
CURRENT: upload_protocol = esptool
Looking for upload port…
Auto-detected: /dev/cu.usbserial-110
Uploading .pio/build/espmxdevkit/firmware.bin
esptool.py v3.0
Serial port /dev/cu.usbserial-110
Connecting…….._____….._____….._____….._____….._____….._____….._____
A fatal error occurred: Failed to connect to ESP8266: Timed out waiting for packet header
*** [upload] Error 2
============================================== [FAILED] Took 11.66 seconds ==============================================
The terminal process “platformio ‘run’, ‘–target’, ‘upload'” terminated with exit code: 1.
Terminal will be reused by tasks, press any key to close it.
Any Help will be appreciated.
Make sure the target is properly connected to the PC or check with the device manager.