In this short guide, we will learn how to upload files to the ESP32 SPIFFS (flash file system) using VS Code with PlatformIO IDE. To show the working of the SPIFFS in VS Code, we will create and store a simple .txt file in the filesystem.
Recommended Reading: Getting Started with VS Code and PlatformIO IDE for ESP32 and ESP8266 (Windows, macOS, Linux)
If you are using Arduino to program ESP32, you can refer to this tutorial:
Install ESP32 Filesystem Uploader in Arduino IDE
Recommended Components
The following components are used in this project or are helpful for building it with the ESP32.
| Component | How it’s used in this project | Buy on Amazon |
|---|---|---|
| ESP32 Development Board (DevKit V1) | The board whose SPIFFS flash file system the files are uploaded to. | Check Price |
| Micro USB Cable | Connects the ESP32 to your computer to upload the filesystem image. | Check Price |
| Breadboard | Holds the ESP32 while you develop and test. | Check Price |
| Jumper Wires | Connect the ESP32 to other components on the breadboard. | Check Price |
As an Amazon Associate we earn from qualifying purchases. Prices and availability are accurate as of the date/time indicated and are subject to change.
SPIFFS Filesystem Introduction
ESP32 supports the SPI flash file system or Serial Peripheral Interface Flash File System (SPIFFS). It is a file system created by partitioning the SPI NOR flash of ESP32 into binary file region and file system region. We can use SPIFFS to store files in SPI flash without having to use any external memory with ESP32.
SPIFFS allows users to read and write files to/from the flash memory of microcontrollers. But write operation is not recommended to use frequently due to the limited number of write cycles of flash memory. Nevertheless, we can use it to read, write, delete and close files saved on SPIFFS.
Key Applications
The use of SPIFFS with ESP32 becomes very handy in various applications such as:
- Saving mesh and network configuration settings in permanent memory without any SD card.
- While using EPS32 as a Bluetooth mesh Node, its provisioning and configuration data must store in permanent memory.
- In the case of ESP32 web server, server HTML and CSS files from SPIFFS.
- Saving look-up tables to perform the query and retrieve data from the PHP database.
In most of our web server projects with ESP32, we have included HTML and CSS files inside our Arduino sketch. We save these HTML documents inside Arduino sketch by converting them into strings. Whenever a web client makes an HTTTP request, we send this string as a response which is basically a web page.
On the contrary, with SPIFFS, we can save HTML, CSS, and JavaScript files into the ESP32 flash file system. Whenever a web client makes an HTTTP request, we can serve these files directly from SPIFFS. In this project, however, we will keep it simple and store a .txt file in the ESP32’s SPIFFS. This time we will see how to do that in VS Code using PlatformIO IDE.
Uploading Files to ESP32 SPIFFS
Now let us learn how to upload files to ESP32’s filesystem using VS Code in PlatformIO IDE. Follow the steps in the correct order to successfully store the files. For this article, we will keep it keep and show you how to upload a simple .txt file. You can follow the steps and upload files of different types easily.
Creating Data Folder
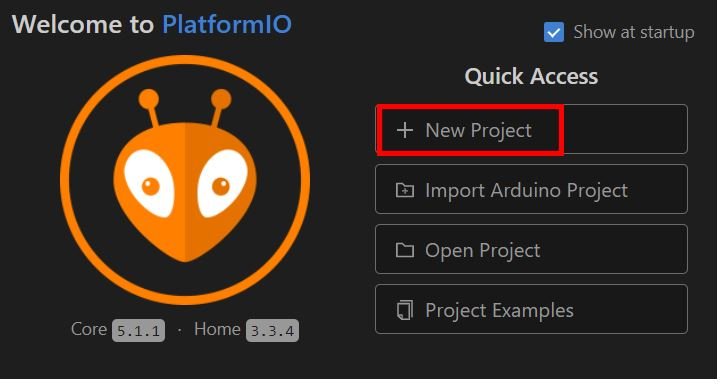
Open VS Code with PlatfromIO IDE and go to the PIO Home page click ‘+New Project.’
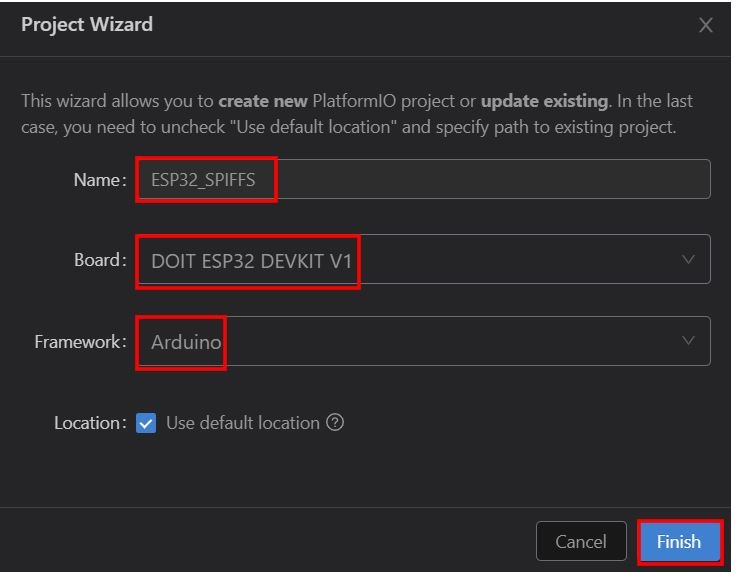
Now add the details. Give the name of your project, the type of your development board and the framework. Click the Finish button to create your project.
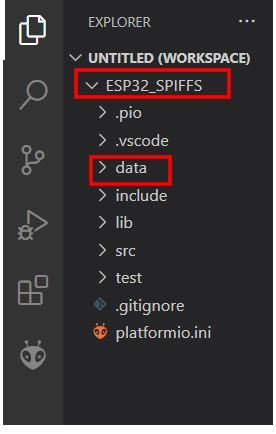
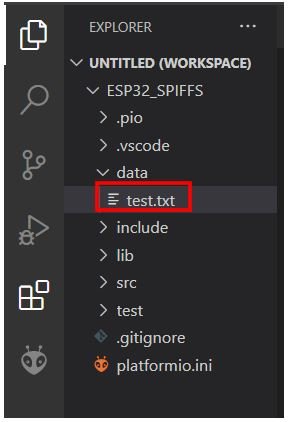
Go to the Explorer tab on the left side where all the folders are specified. Right-click on the name of your project folder and create a new folder. Name this new folder ‘data.’ Make sure to name it ‘data,’ otherwise the file will not upload onto SPIFFS properly.
Now click the data folder and add files inside it by right-clicking it and choosing New File. We will upload a .txt file named ‘test.txt.’
Fill in the test.txt file with some sample text as shown below. Press Ctrl + S to save the changes. Make sure that the test.txt file is inside the data folder.
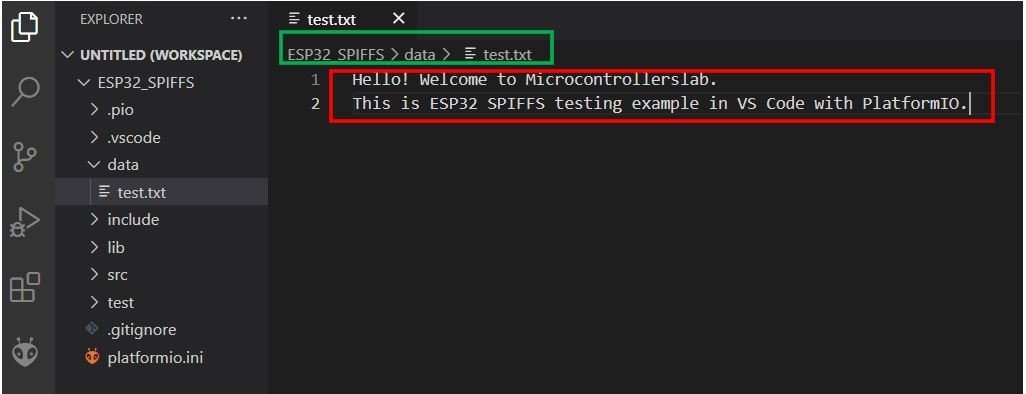
You can add more files of various types (.html,.css,.png etc.) inside the data folder. For this project, we will only create a single .txt file.
Note: You should place all the files inside the data folder. Otherwise, the SPIFFS library will not be able to read the files.
Uploading Filesystem Image
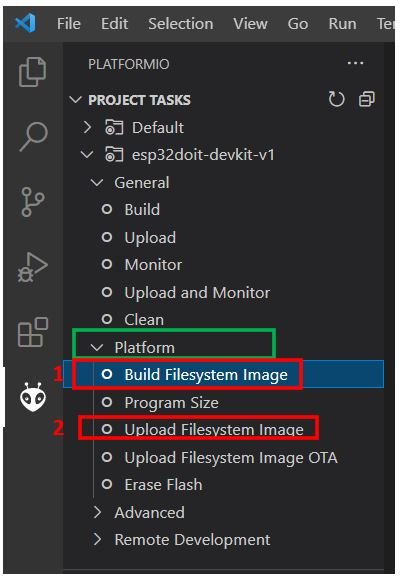
After you have created your files inside the data folder click the PlatfromIO icon and head over to the project tasks tab.
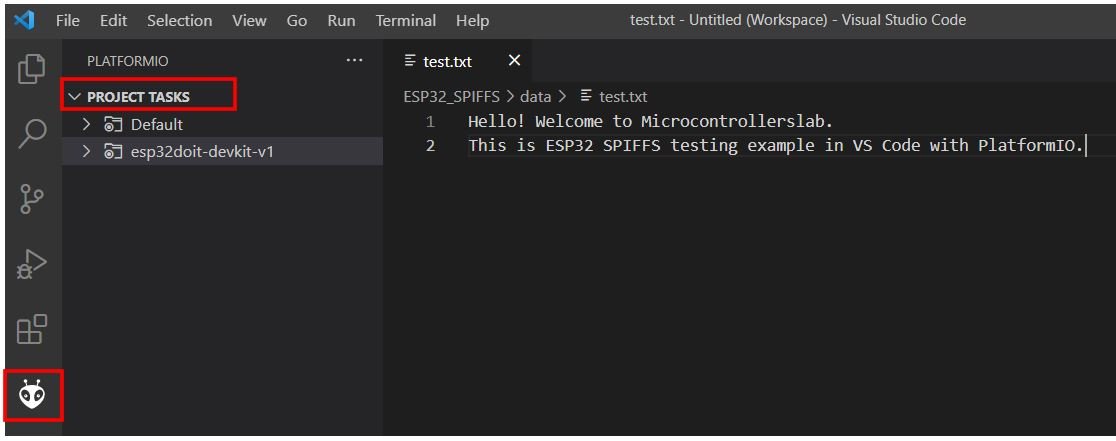
Under the project tasks, click esp32doit-devkit-v1 or the type of board which you selected for your project.
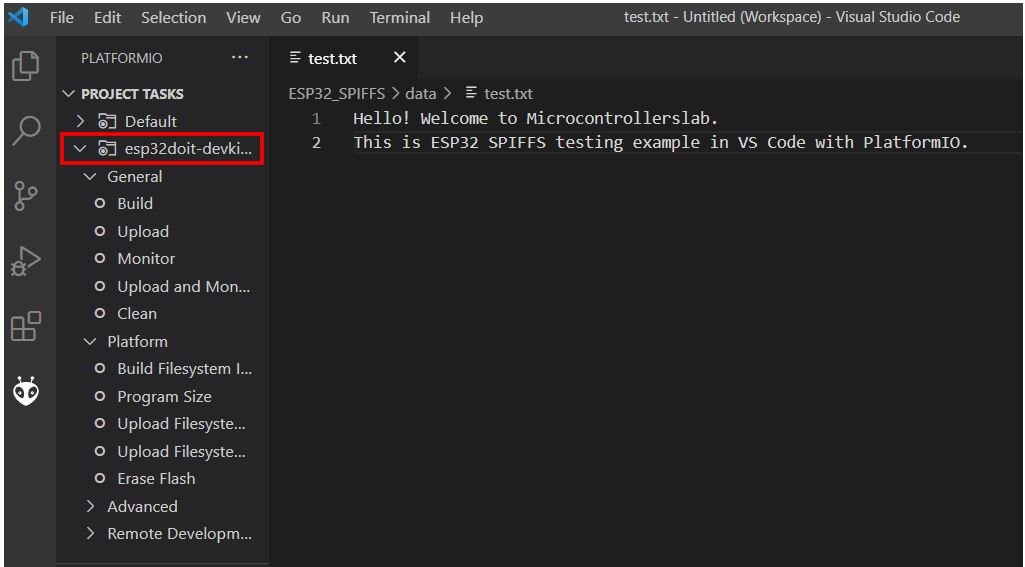
Then go to Platform > Build Filesystem Image. After that click Upload Filesystem Image.
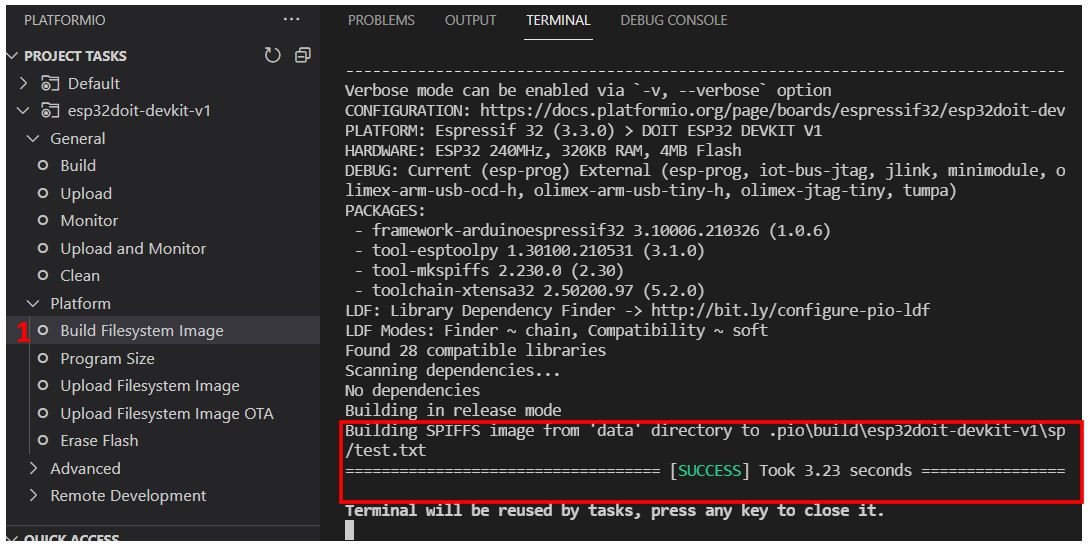
In the terminal, you will be able to see the following messages when you click Build Filesystem Image.
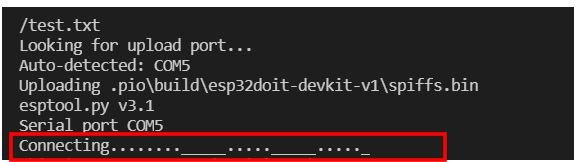
After that click Upload Filesystem Image. During the upload process if you notice Connecting….____……____…… as highlighted below then press the BOOT button of your ESP32 module and hold it so that the ESP board goes into flashing mode during the upload process.
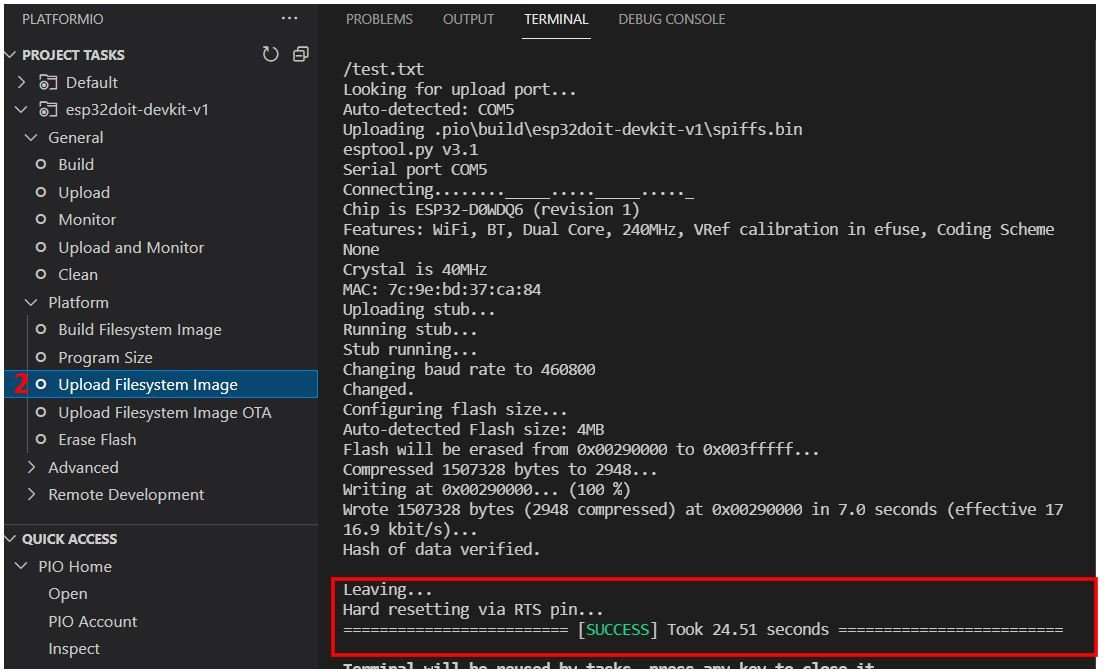
After a few moments, you will receive the success message in the terminal.
Note: Make sure that the total size of the data file is within the flash memory size of the ESP module. Otherwise, you will get an error while uploading the files onto SPIFFS.
Make sure all the serial monitors are closed for a successful upload. Otherwise, there will be an error indicating ‘Could not open ‘Your_COM_PORT’ Access is denied.’ Close all serial connections to proceed smoothly.
Arduino Sketch to check for test.txt file in ESP32 SPIFFS
First, go to Explorer > src > main.cpp and open it. Replicate the code given below in that file.
#include <Arduino.h>
#include "SPIFFS.h"

void setup() {
  Serial.begin(9600);

  if(!SPIFFS.begin(true)){
    Serial.println("An Error has occurred while mounting SPIFFS");
    return;
  }

  File file = SPIFFS.open("/test.txt");
  if(!file){
    Serial.println("Failed to open file!");
    return;
  }

  Serial.println("Content of file:");
  while(file.available()){
    Serial.write(file.read());
  }
  file.close();
}

void loop() {

}
Remember to replace the name of your .txt file in the line:
File file = SPIFFS.open("/test.txt");In our case the name of our .txt file is test.txt
Now press Ctrl + S or go to File > Save to save the main.cpp file. Then go to the PIO icon > Project Tasks > Upload or the Upload icon in the bottom taskbar to upload the program code to the ESP32 module.

In the terminal, you will see the following message after a successful upload took place.

To view the content of your .txt file click the serial monitor icon in the taskbar.

You can view the file content on the serial monitor as shown below.
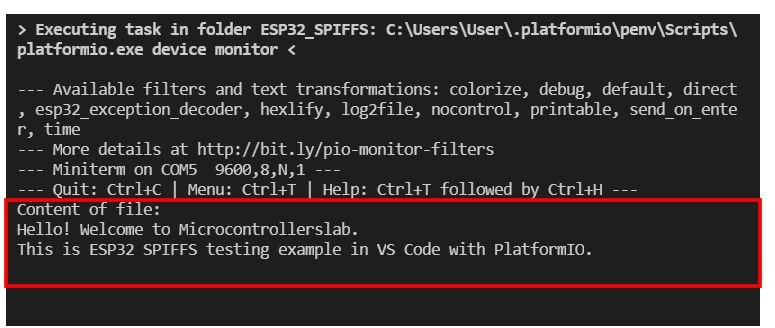
This shows that we have successfully uploaded our test.txt file to ESP32’s filesystem.
Conclusion
In conclusion, we learned a very handy feature of ESP32 in VS Code with PlatformIO today. Through this short guide now you will be able to save any type of file in the ESP32’s filesystem and easily serve them when required. SPIFFS becomes extremely useful when building ESP32 web servers. All the individual HTML, CSS, and JavaScript files can be uploaded on the filesystem and easily served when building the web servers.
We also have an article regarding ESP32 SPIFFS in Arduino IDE which you can access from the link given below:
Other ESP32 projects which use SPIFFS:
Hello,
Great tutorial as usual.
For ESP32, Espressif advices to use FAT file system instead of SPIFFS (deprecated), so I configure in platformio.ini board_build.filesystem = ffat and when I try to Build or Upload Filesystem Image by the PlatformIO icon, task fails saying that mkffat is not recognized as a command.
How could I solve this?
Thanks in advance for any help