As the Internet of Things (IoT) becomes more prevalent in our daily lives, there is a growing need for devices to communicate with each other seamlessly. The ESP32 microcontroller, with its Wi-Fi and Bluetooth capabilities, has become a popular choice for IoT projects. And when it comes to automation, IFTTT (If This Then That) is a go-to platform for many developers. In this article, we will explore how to use the ESP32 with the Arduino IDE to send an email through IFTTT. We will walk through the steps required to set up the ESP32 and IFTTT accounts, create a webhook, and use the Arduino IDE to send a POST request to trigger an email through IFTTT. With this article, you can take your IoT projects to the next level and automate email notifications with ease.
Recommended Components
The following components are used in this project or are helpful for building it with the ESP32.
| Component | How it’s used in this project | Buy on Amazon |
|---|---|---|
| ESP32 Development Board (DevKit V1) | The main board that runs the project firmware. | Check Price |
| Micro USB Cable | Connects the board to your computer to upload code and power it. | Check Price |
| Breadboard | Holds the board and components together while you wire up the project. | Check Price |
| Jumper Wires | Make the connections between the board and any external parts. | Check Price |
As an Amazon Associate we earn from qualifying purchases. Prices and availability are accurate as of the date/time indicated and are subject to change.
How to Use IFTTT API with HTTP Post Request from EPS32
In this article, we will explore how to send HTTP POST data from an ESP32 to IFTTT, which will trigger the IFTTT API to send email notifications based on the data received. IFTTT stands for “If This, Then That”, and it is a popular service that allows users to automate tasks based on conditional statements. Using IFTTT, we can create applets that combine multiple services and trigger actions based on specific parameters. With this functionality, we can easily set up email notifications based on data received by ESP32.
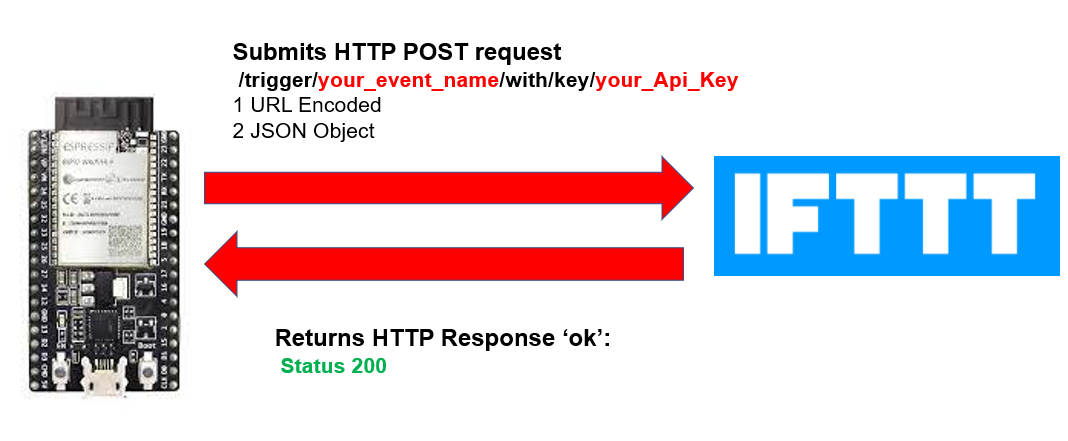
The IFTTT (If This Then That) platform provides an API that allows users to interact with the IFTTT service. One of the most commonly used endpoints is the HTTP POST request, which is used to trigger an applet on IFTTT.
To use the HTTP POST endpoint, you need to first create an applet on IFTTT and obtain a unique webhook URL. This URL can be used to trigger the applet by sending an HTTP POST request with a JSON payload to the IFTTT server.
The JSON payload must include the “value1”, “value2”, and “value3” fields, which correspond to the data that will be passed to the applet. These fields can be used to send any type of data, such as sensor readings, device status updates, or other information.
To send an HTTP POST request to the IFTTT API, we will use the HTTP client library on ESP32 to make an HTTP POST request to a unique webhook URL.
Creating an IFTTT Account
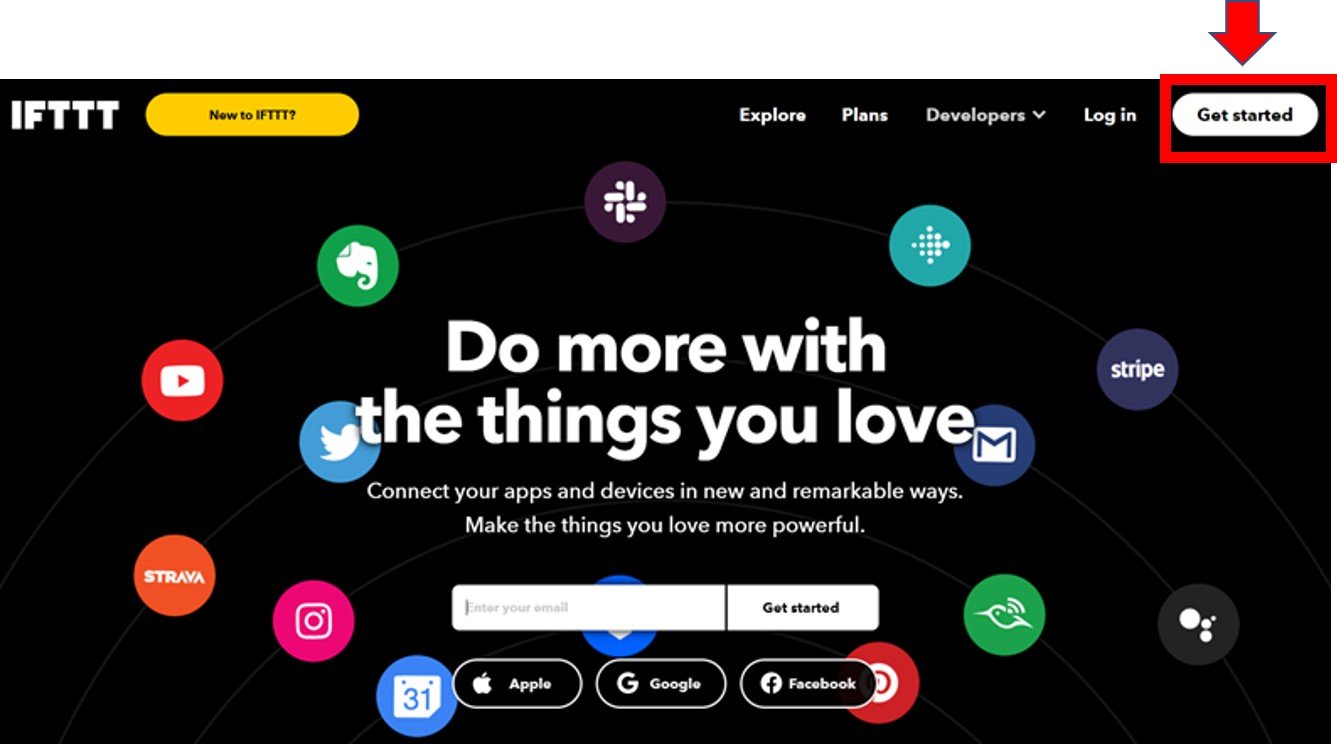
Although the IFTTT service is free to use, we will have to create an account. First go to the following website: https://ifttt.com/
The following window will appear. Click on the ‘Get Started’ button.
The following window will appear. You can select any one from these three options (Apple, Google or Facebook) to connect. Or you can simply ‘sign up’ with your own given email. We will be following this scheme.
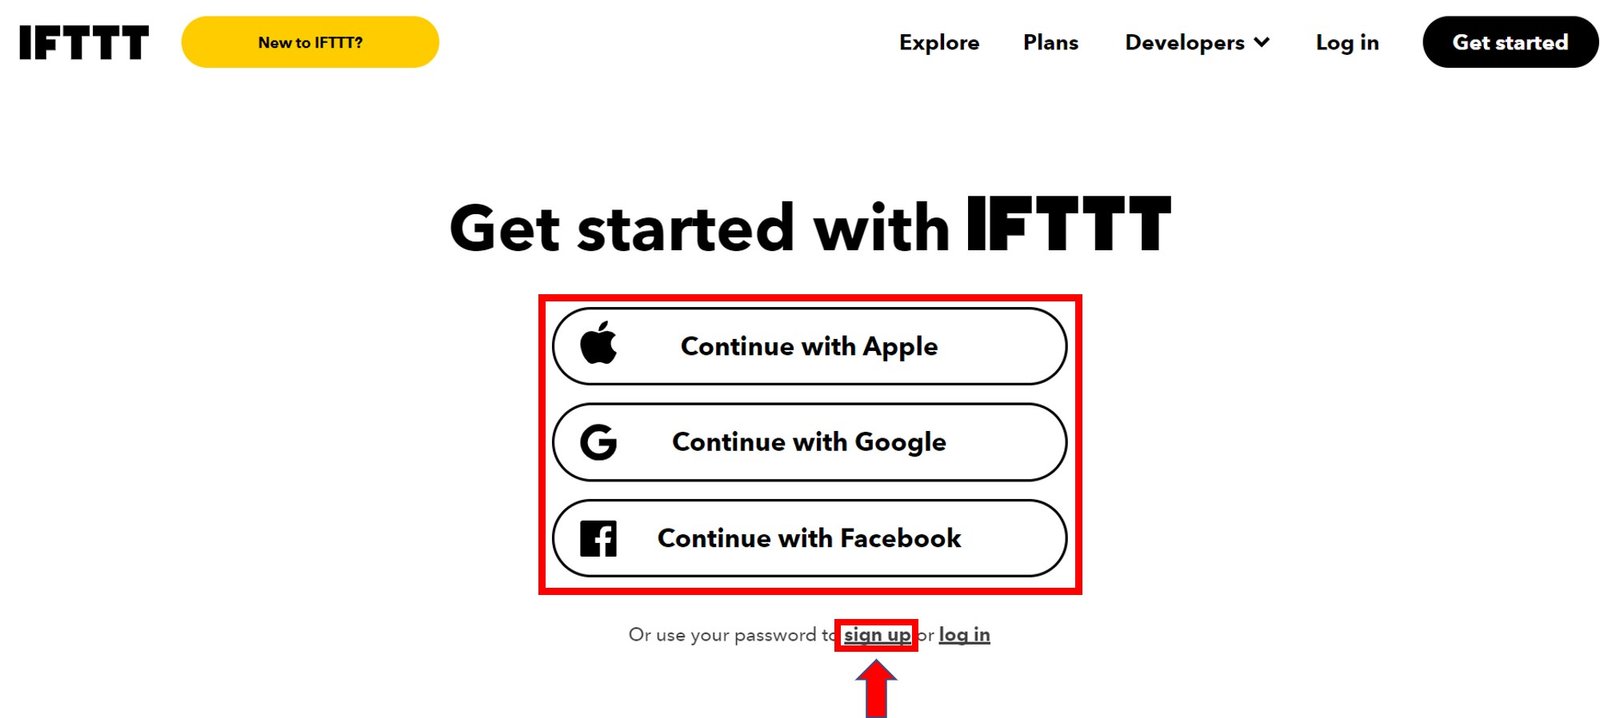
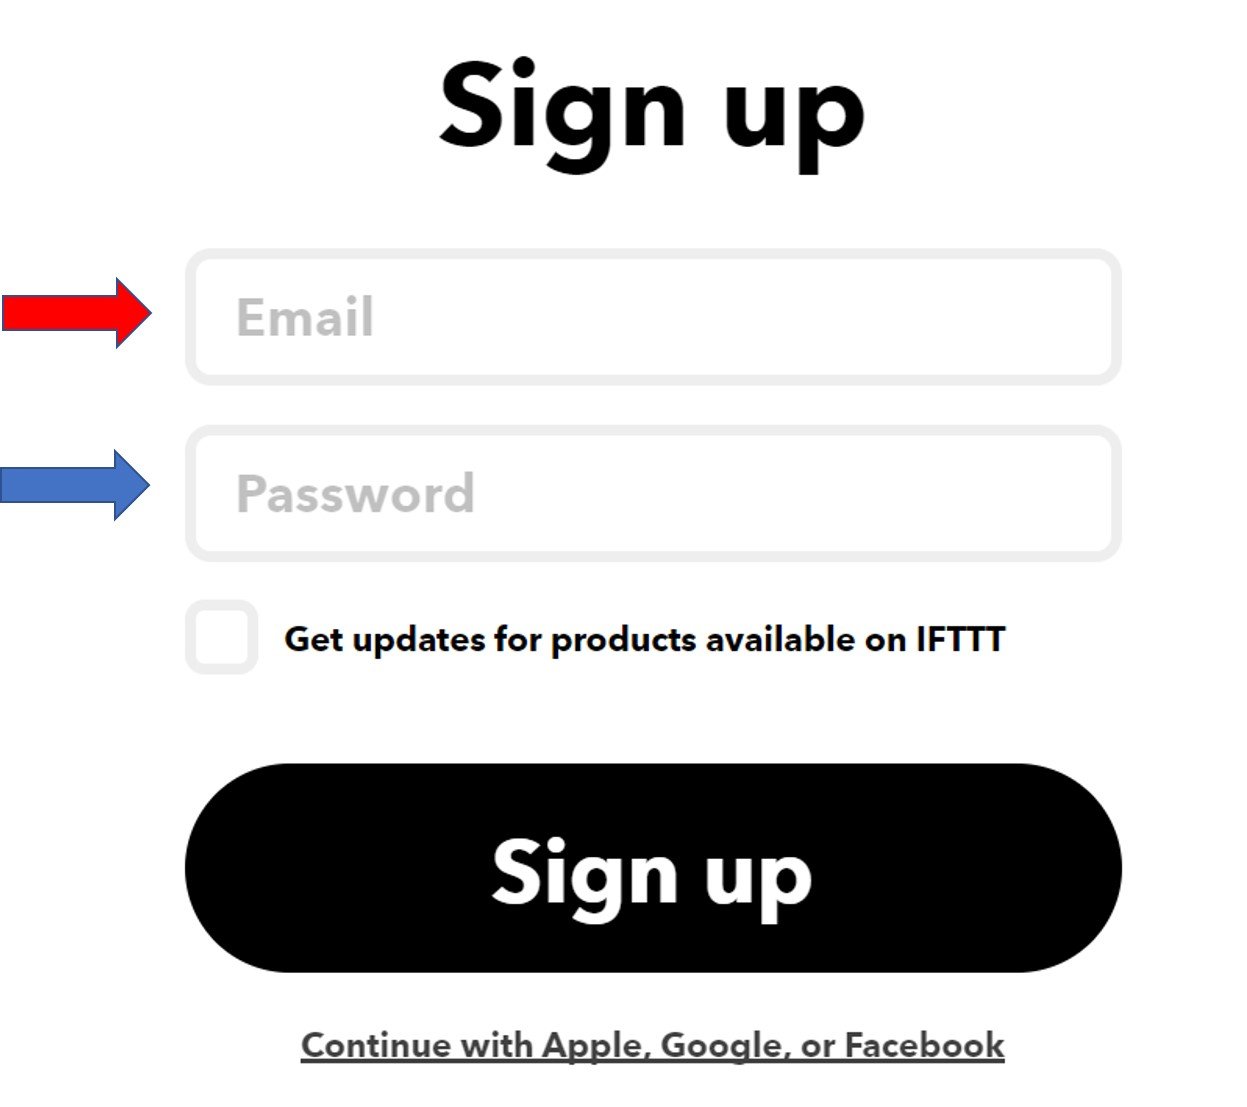
Click the ‘sign up’ tag. You will see the following window pop up. Enter your email address and password to start working in IFTTT. This whole process is free of cost for the first three applets.
Creating an Applet:
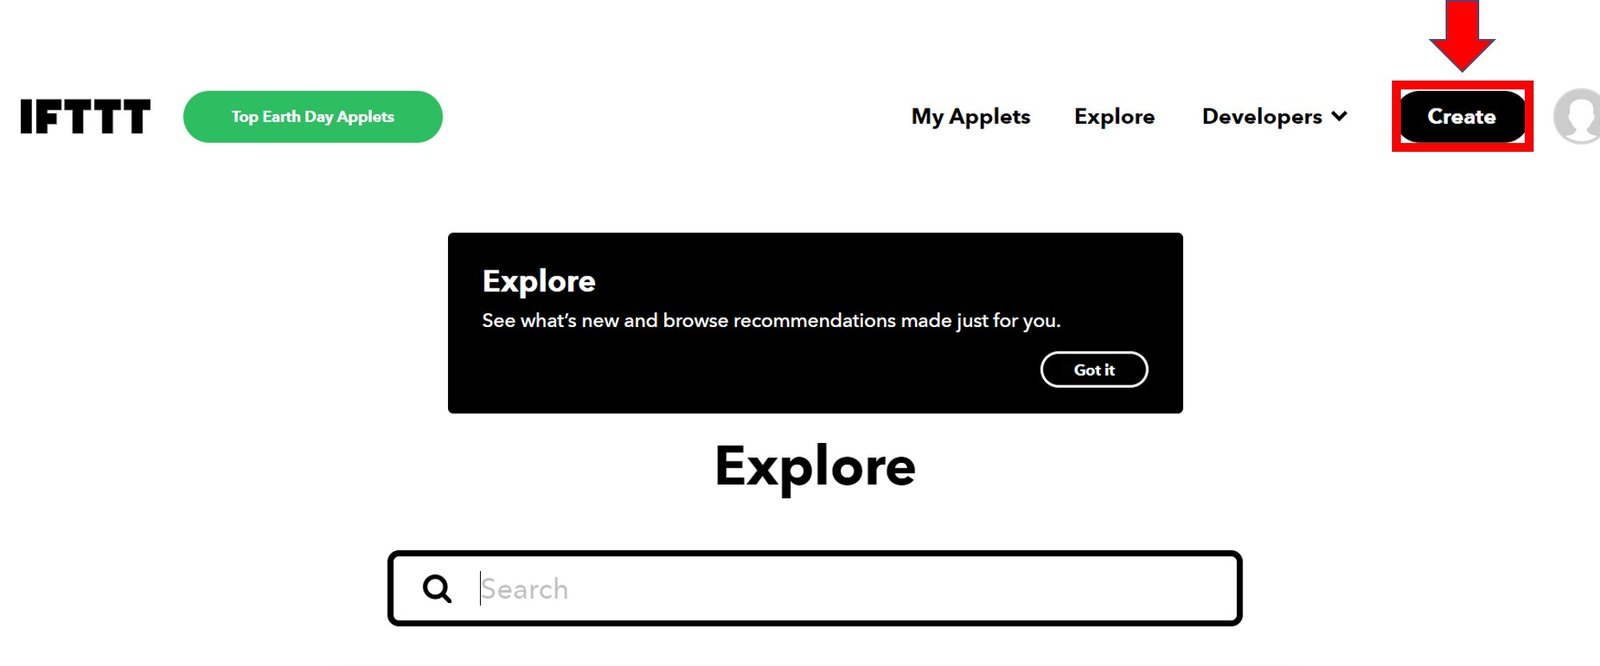
After you have created your account, we will be directed to the page where we will create our applet. Click on ‘Create.’
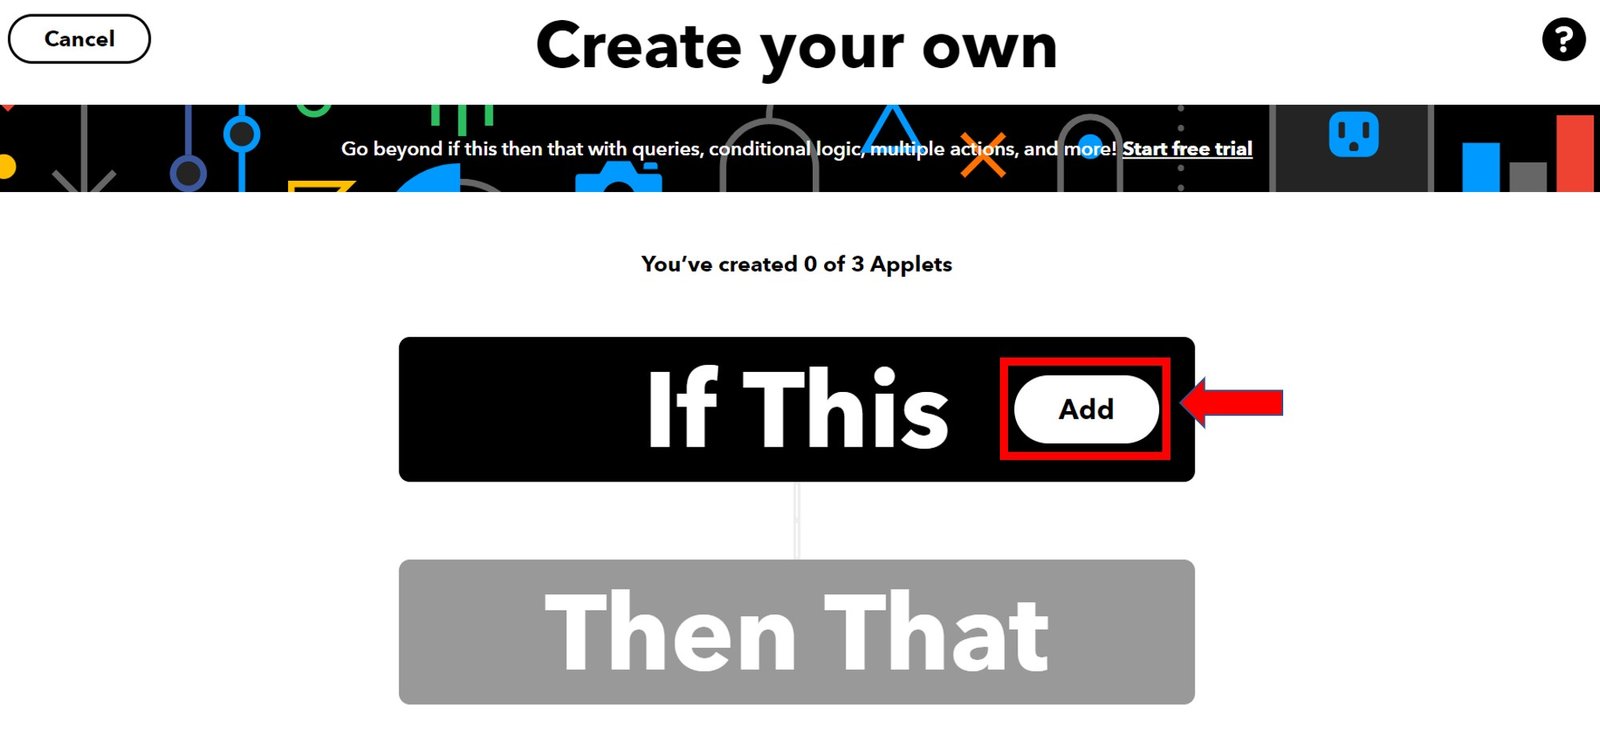
The following window opens up. Click the following Add button in the ‘If This’ section.
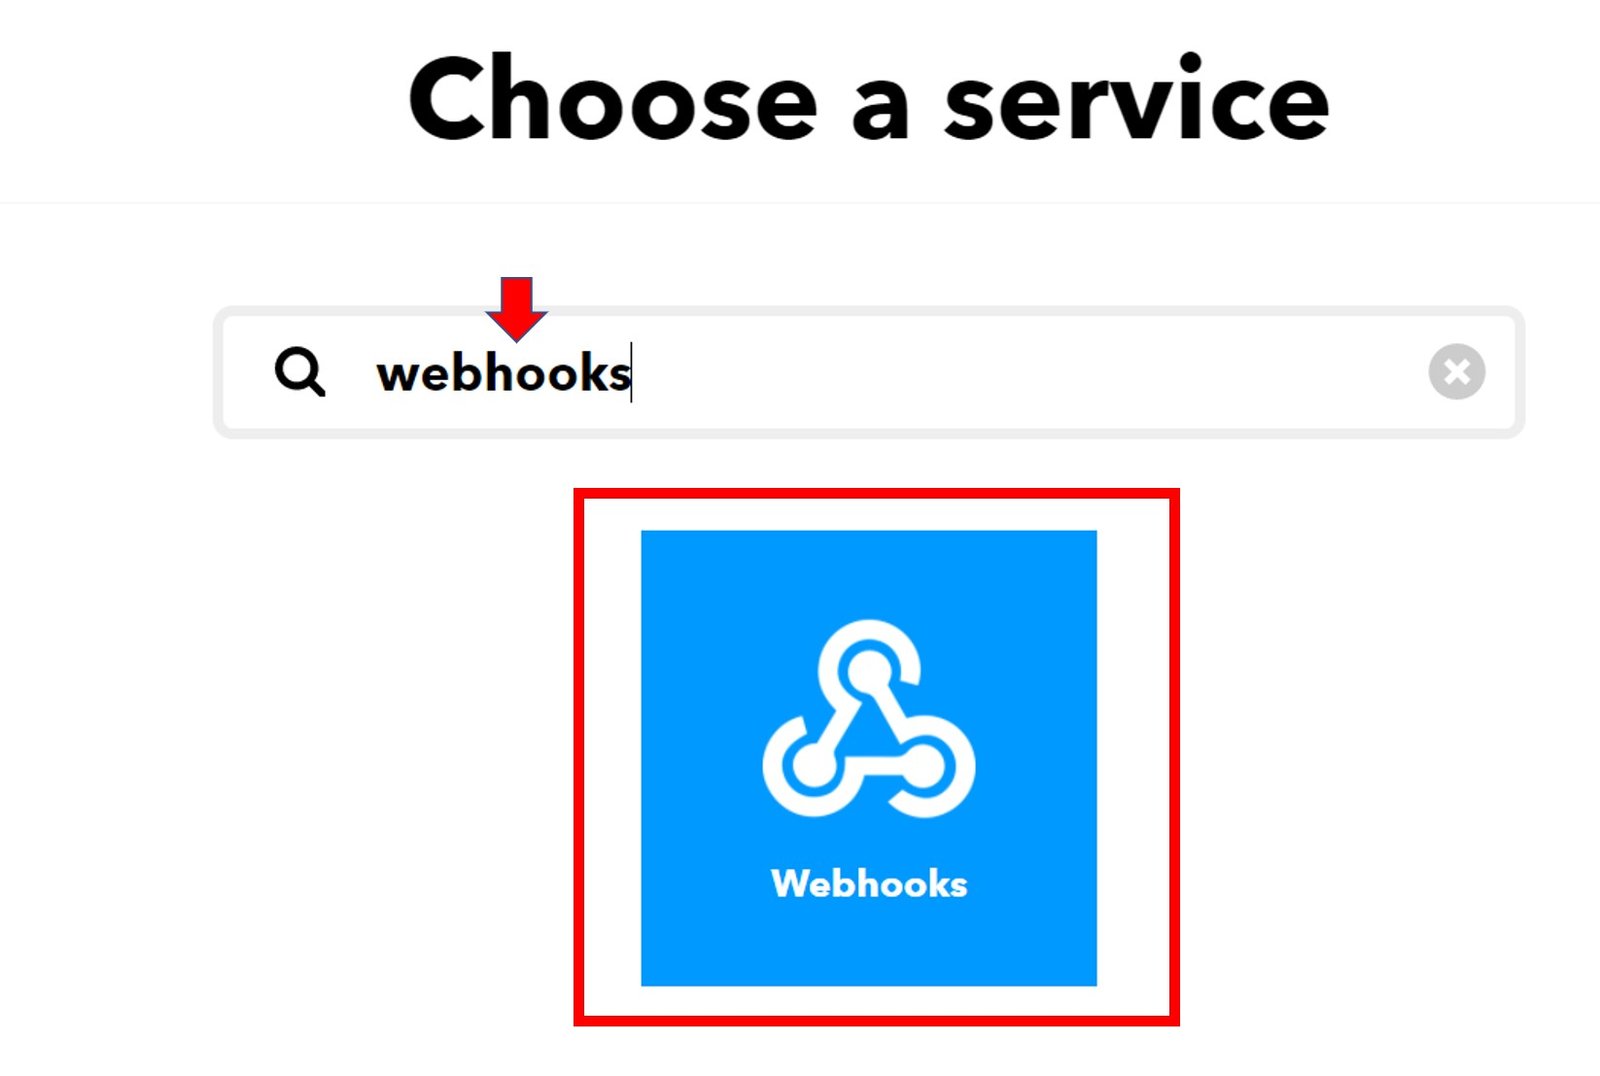
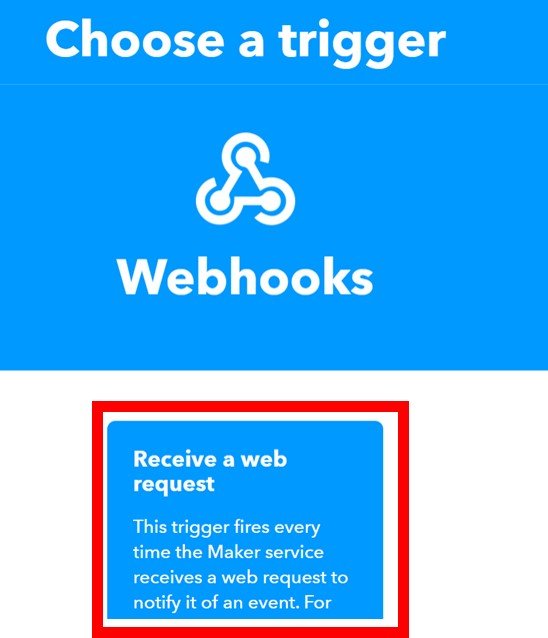
Another page will open in which we will have to choose our service. There is a lot of options to choose from. Write down ‘webhooks’ in the search option and its icon will appear:
Next, choose the trigger as: ‘Receive a web request’ by clicking on it. Whenever webhooks will receive a web request, some action will take place. This we will define in the ‘THAT’ section.
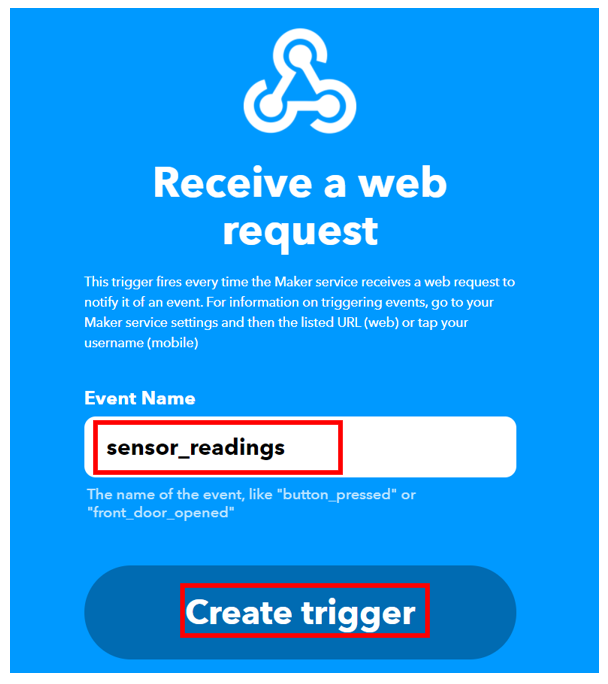
After clicking the Receive a web request, the following window will open up. We will write down sensor_readings as the event name for the web request. You can use any other name of your choice. Click ‘Create Trigger’ button.
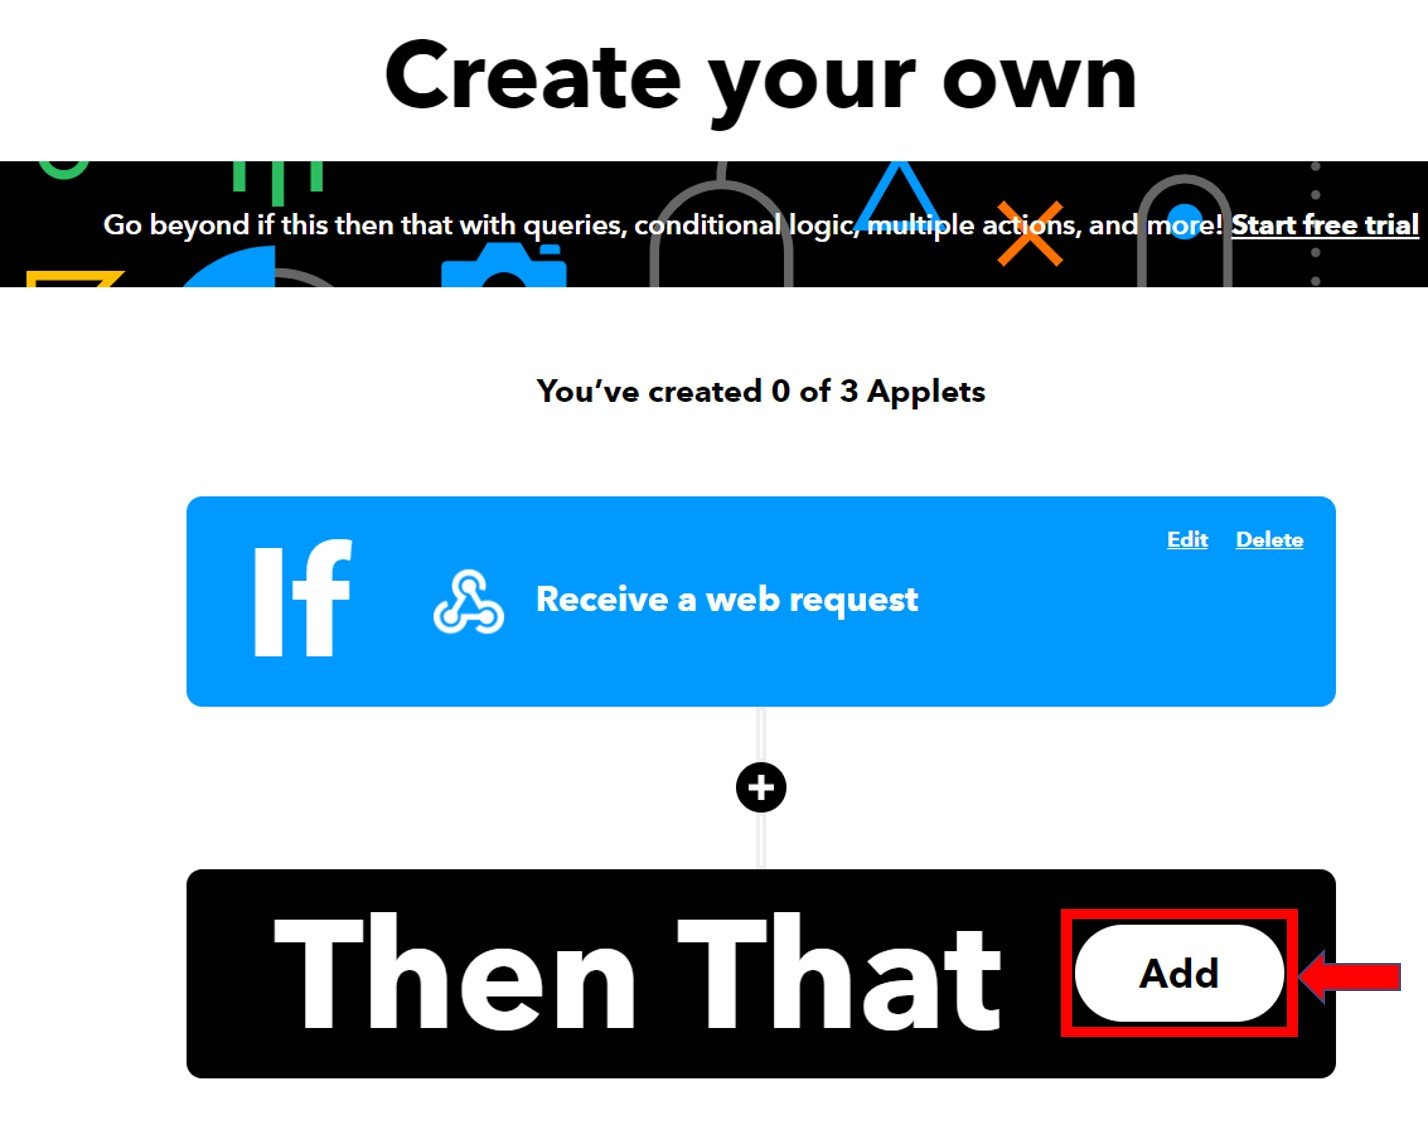
After the trigger is created, we are taken back to the web page where we first added the service for the ‘IF THIS’ section. Now we will click the ADD button for the ‘THEN THAT’ section.
Setting up Service
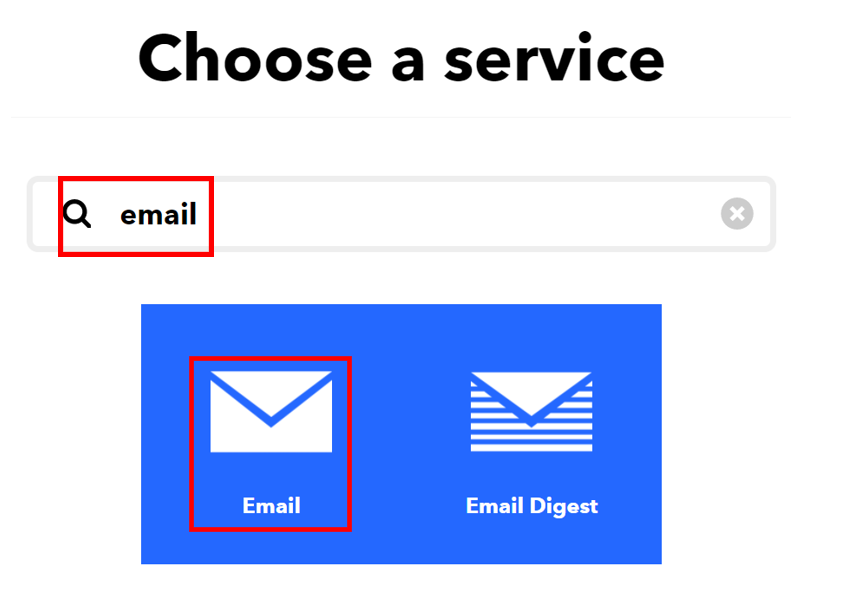
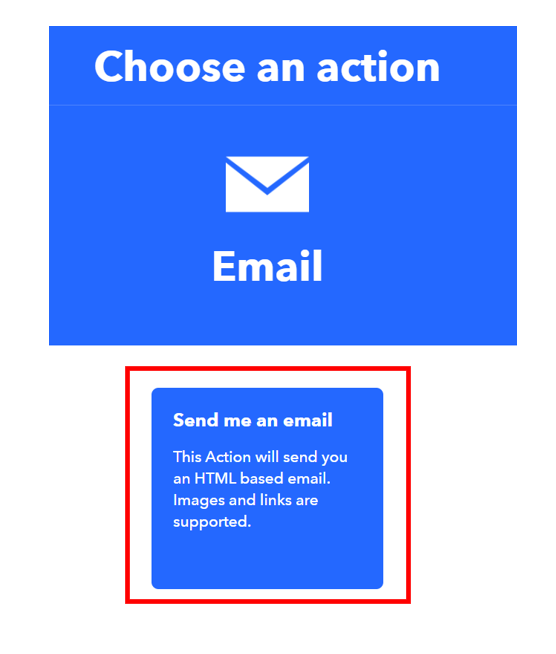
Now we will choose the service. We have to choose what will happen if a web request is received. Thus, we will type ‘email’ in the search option and click on its icon. This is because we want to send an email whenever a POST request is received.
The following window opens up. We will click on ‘Send me an email’ as highlighted in the red box.
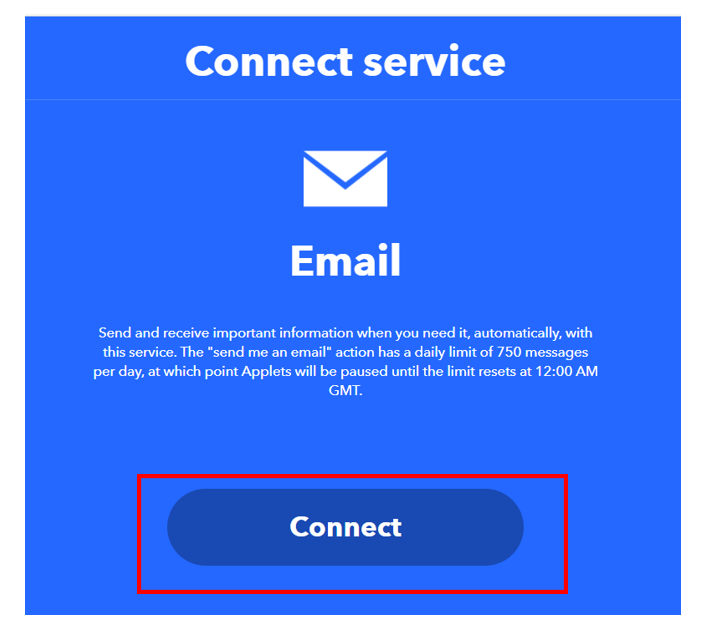
Click on the ‘Connect’ button as shown below.
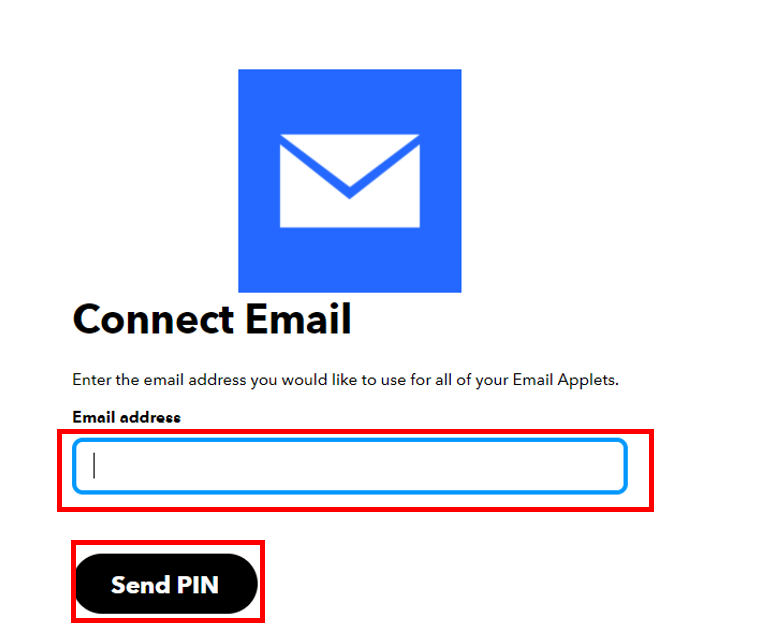
Next, write down your email address and click ‘Send Pin’ as shown below:
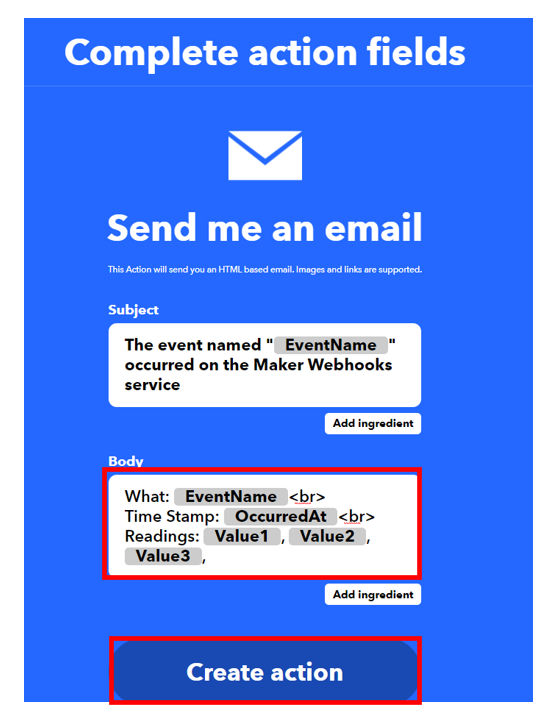
After you successfully enter the PIN, a new window will open up. Fill in all the entries as given below and then click on the ‘Create Action’ button.
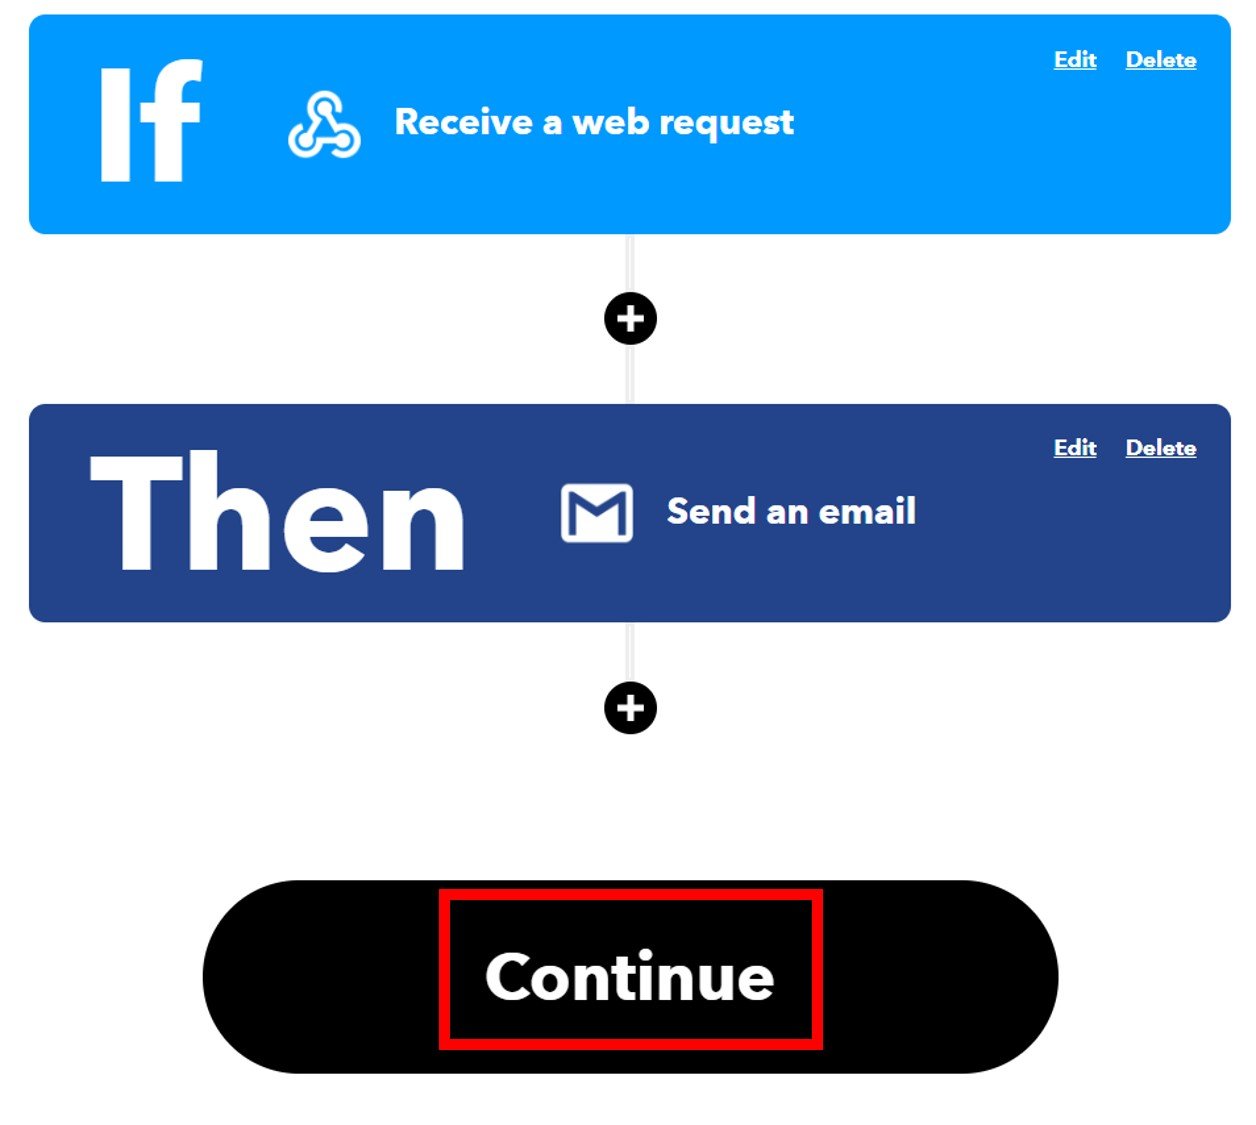
After we have created the action, we will be guided towards the initial web page of IFTTT. Click ‘Continue’ to proceed.
After this click the Finish button. Make sure to turn ON the notifications when the applet is running.
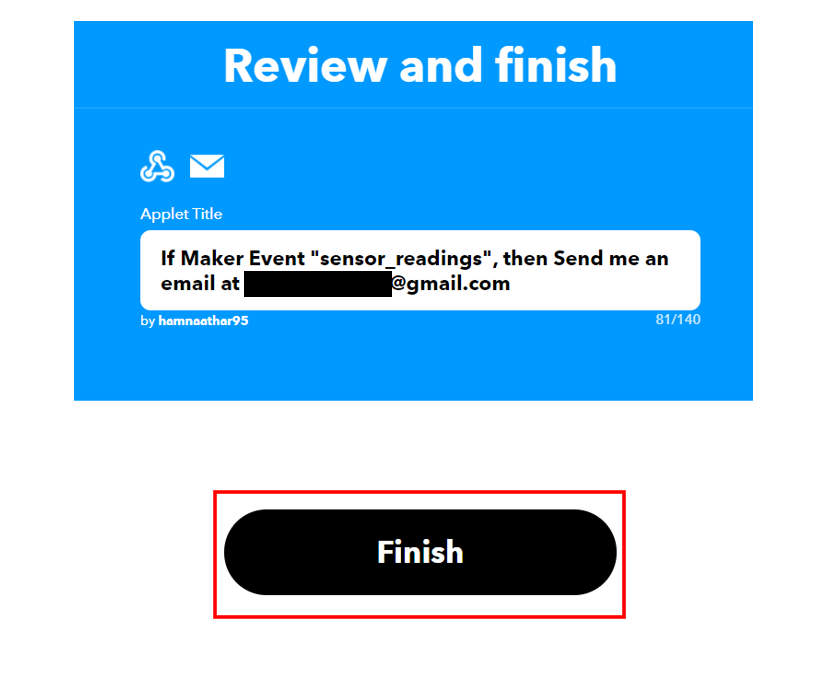
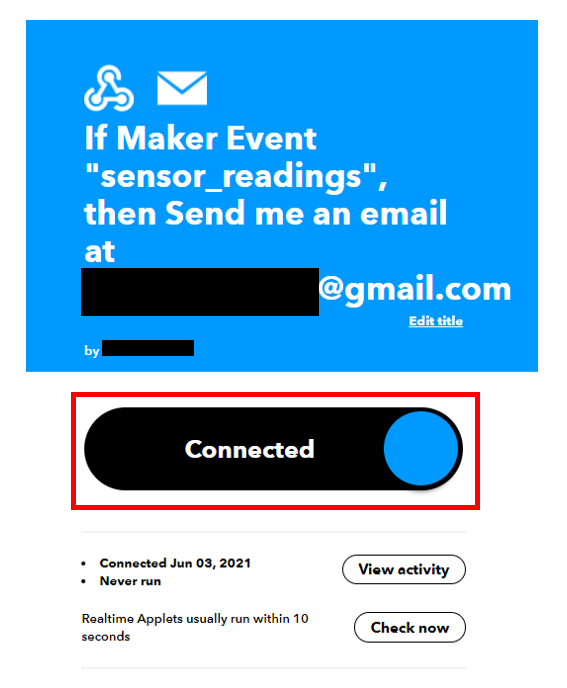
You have successfully created the applet as shown below.
Testing the Applet
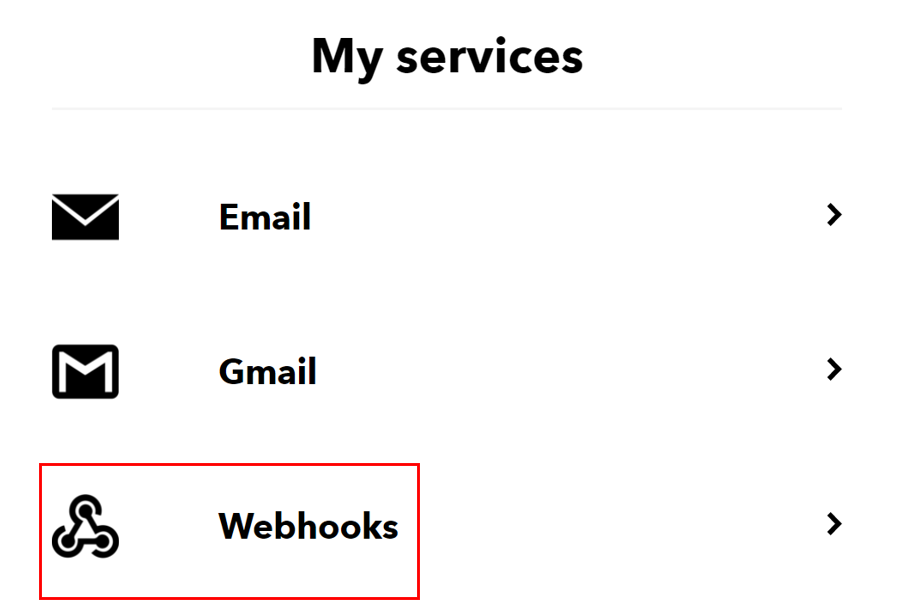
Go to your and select “My Services” or open a webpage with the link: ifttt.com/my_services. The following windows will appear. Afterward, click on Webhooks.
This will take you to the following web page. Click on ‘Documentation.’

You will receive a key which should be secure with you. Next, enter the details as shown to trigger the event. We will give hypothetical values for the three variables for now. At the end click, ‘Test it.’
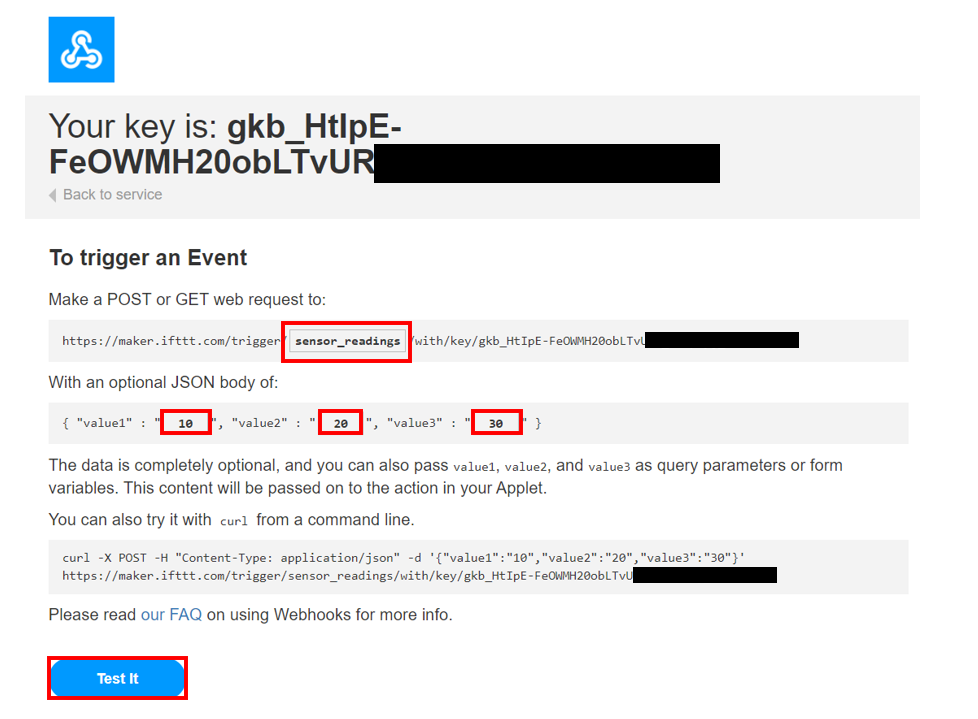
You will get a notification on top of the web page: Event has been triggered. Now go to your email account and check for any notification that came from the IFTTT service. Open the message and it will display the dummy values you entered before.
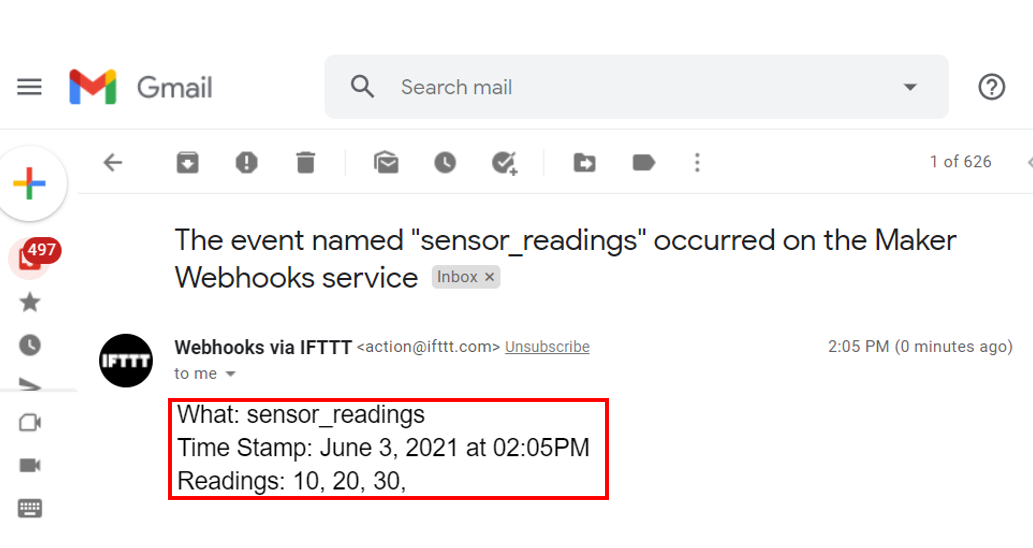
If you also received a message with the same readings that you entered then it means that your applet is running successfully.
ESP32 IFTTT Example Arduino Sketch
Open your Arduino IDE and go to File > New to open a new file. Copy the code given below in that file. This code will work with your ESP32 board. You just have to replace the network credentials and server name.
This ESP32 code makes an HTTP POST request every 10 seconds to the IFTTT server, which triggers an applet that sends an email notification with randomly generated values. The code connects to a Wi-Fi network using the SSID and password provided and then sends the HTTP POST request to the IFTTT API using the specified server name and API key. The JSON payload of the request includes three values, each with a random number between 0 and 50.
#include <WiFi.h>
#include <HTTPClient.h>

const char* ssid = "Write_your_WIFI_name";
const char* password = "Write_your_password";

const char* server_name = "http://maker.ifttt.com/trigger/Replace_with_your_eventName/with/key/Replace_With_Your_Api_Key";

unsigned long last_time = 0;
unsigned long timer_delay = 10000;

void setup() {
  Serial.begin(115200);

  WiFi.begin(ssid, password);
  Serial.println("Connecting to WIFI…");
  while(WiFi.status() != WL_CONNECTED) {
    delay(500);
    Serial.print(".");
  }
  Serial.println("");
  Serial.print("IP Address: ");
  Serial.println(WiFi.localIP());

  Serial.println("After 10 seconds the first set of readings will be displayed");

  // initialize a pseudorandom number
  randomSeed(analogRead(23));
}

void loop() {
  //Send an HTTP POST request every 10 seconds
  if ((millis() – last_time) > timer_delay) {
    //Check WiFi connection status
    if(WiFi.status()== WL_CONNECTED){
      HTTPClient http;

      http.begin(server_name);

      // Specify content-type header
      http.addHeader("Content-Type", "application/x-www-form-urlencoded");
      // Data to send with HTTP POST
      String httpRequestData = "value1=" + String(random(50)) + "&value2=" + String(random(50))+ "&value3=" + String(random(50));
      // Send HTTP POST request
      int httpResponseCode = http.POST(httpRequestData);

     /*
      http.addHeader("Content-Type", "application/json");

      String httpRequestData = "{\"value1\":\"" + String(random(50)) + "\",\"value2\":\"" + String(random(50)) + "\",\"value3\":\"" + String(random(50)) + "\"}";

      int httpResponseCode = http.POST(httpRequestData);
      */

      Serial.print("HTTP Response code is: ");
      Serial.println(httpResponseCode);


      http.end();
    }
    else {
      Serial.println("WiFi Disconnected");
    }
    last_time= millis();
  }
}
How does the Code Work?
Start by adding header files of Wi-Fi and HTTP client libraries:
#include <WiFi.h>
#include <HTTPClient.h>
Setting Network Credentials
Next, we will create two global variables to save the SSID and password values. You have to replace both of them with your own network credentials in order to successfully connect with your router.
const char* ssid = "Write_your_WIFI_name";
const char* password = "Write_your_password";
Configuring API Key
After importing all the necessary libraries and configuring your network credentials you will have to give your server’s name. This part is a little different and the URL path for the HTTP POST request has to be carefully given. We will create a global variable of type char and call it server_name. The server_name will hold the domain name for the POST request. You will need your event name and your API key. To get access to your event name and API key, go to Documentation in https://ifttt.com/maker_webhooks
const char* server_name = "http://maker.ifttt.com/trigger/Replace_with_your_eventName/with/key/Replace_With_Your_Api_Key";You will give the domain name as shown above. Make sure to replace your event name and API key in the places specified. For example, our event name is sensor_readings and our key is gkb_HtIpE-FeOWMH20obLTvUR7_fPipDyj_********
Hence, we will specify the server_name as:
const char* server_name = "http://maker.ifttt.com/trigger/sensor_readings/with/key/ gkb_HtIpE-FeOWMH20obLTvUR7_fPipDyj_********";loop() function
Inside the infinite loop() function we will make the HTTP POST request. After every 10 seconds, the URL-encoded data will be sent.
if ((millis() – last_time) > timer_delay) {
    if(WiFi.status()== WL_CONNECTED){
      HTTPClient http;

      http.begin(server_name);
The following section of code shows the URL-encoded data being sent. Inside the message body, we will send three values with random numbers between 0-49. For practical purposes, these values can be proper readings from a sensor.
http.addHeader("Content-Type", "application/x-www-form-urlencoded");
 String httpRequestData = "value1=" + String(random(50)) + "&value2=" + String(random(50))+ "&value3=" + String(random(50));
  int httpResponseCode = http.POST(httpRequestData);
If you want to send the data in JSON format then uncomment the following block of code and comment on the one above it.
/*
      http.addHeader("Content-Type", "application/json");

      String httpRequestData = "{\"value1\":\"" + String(random(50)) + "\",\"value2\":\"" + String(random(50)) + "\",\"value3\":\"" + String(random(50)) + "\"}";

      int httpResponseCode = http.POST(httpRequestData);
 */
Difference between URL encoded message and JSON format
Example URL encoded POST
POST /trigger/sensor_readings/with/key/gkb_HtIpE-FeOWMH20obLTvUR7_fPipDyj_******** HTTP/1.1
Host: maker.ifttt.com
value1=10&value2=13&value3=6
Content-Type: application/x-www-form-urlencoded
Example JSON POST
POST /trigger/sensor_readings/with/key/gkb_HtIpE-FeOWMH20obLTvUR7_fPipDyj_******** HTTP/1.1
Host: maker.ifttt.com
{value1: 10, value2: 13, value3: 6}
Content-Type: application/json
Displaying Response Code
The following lines of code will print the server response code on our serial monitor.
Serial.print("HTTP Response code is: ");
Serial.println(httpResponseCode);
Demonstration
After you have uploaded your code to the ESP32 development board press its ENABLE button.

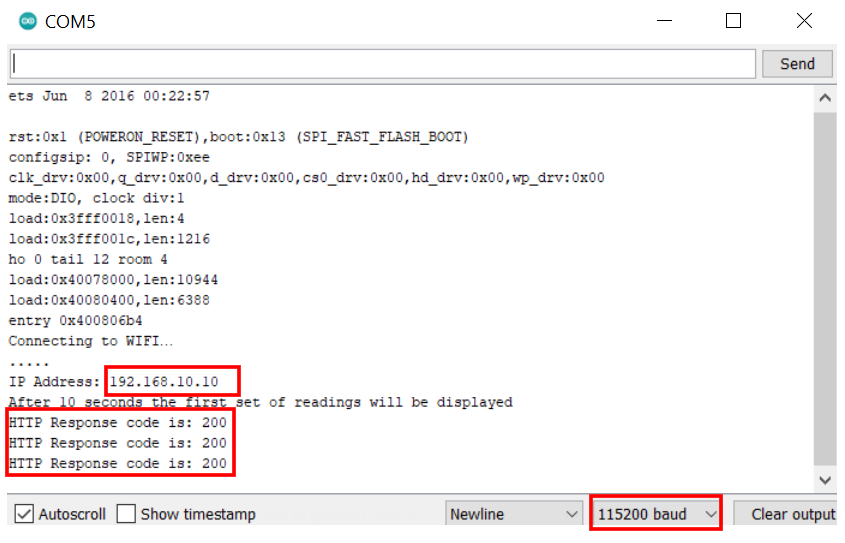
In your Arduino IDE, open up the serial monitor and you will be able to see the IP address of your ESP module. Additionally, the time delay message will also be displayed. Now, if a successful client-server communication took place, then the server would send the response code 200. This code corresponds to ‘OK’ which means successful. This will get printed on your Serial Monitor.
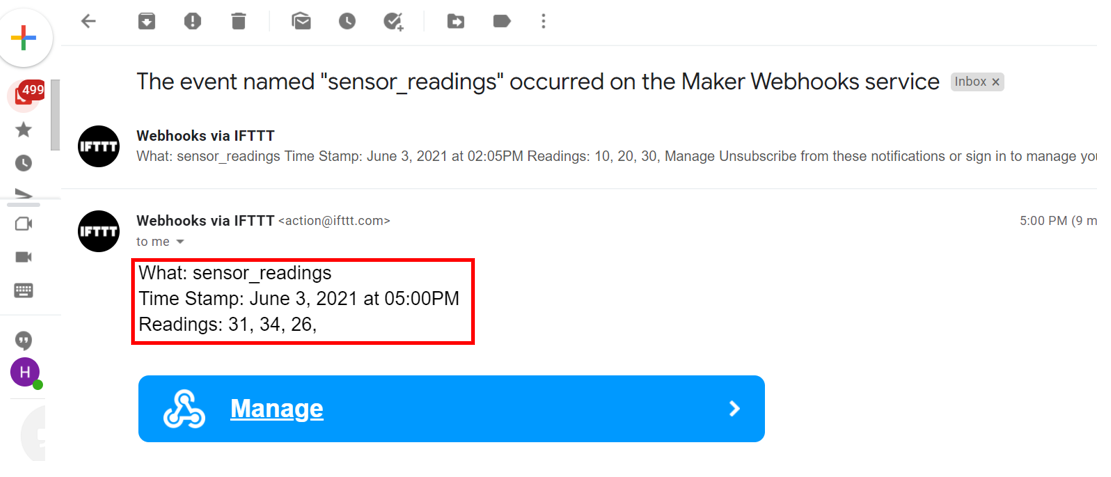
Next, open your email and check for a new email from IFTTT. Inside it, you will be able to view three random values. After every 10 seconds, a new set of readings will be available to us in our email.
You may also like to read:
- Raspberry Pi Pico W Send Sensor Readings via Email with IFTTT
- Arduino Send Email through IFTTT using Ethernet Shield
- ESP32/ESP8266: Publish Sensor Readings to Google Sheets via IFTTT
- MicroPython: Send Sensor Readings via Email (IFTTT) with ESP32 and ESP8266
- ESP32 MicroPython Send Emails with SMTP Client
- Raspberry Pi Pico W Send Emails with SMTP Client and MicroPython
I found the article very impressive and thought-provoking.