In this useful user guide, we will show you how to enable email/password authentication for your ESP32/ESP8266 Google Firebase projects. This will make your projects more secure and even allow enabled users to access the project data through the choice of authentication method chosen.
By the end of this article, you will be able to secure your Firebase project data easily. You can go through other ESP32/ESP8266 Firebase projects we have discussed previously and enable authentication on them as well:
- Google Firebase: Control ESP32
- ESP32 Send Sensor Readings to Google Firebase and Build an Android app to display Data
- ESP8266 Send Sensor Readings to Google Firebase Database and Create Web App
Recommended Components
The following components are used in this project or are helpful for building it with the ESP32.
| Component | How it’s used in this project | Buy on Amazon |
|---|---|---|
| ESP32 Development Board (DevKit V1) | The main controller that runs the project code and connects to the components. | Check Price |
| ESP8266 NodeMCU (ESP-12E) | Alternative Wi-Fi board you can use to follow this tutorial with the ESP8266. | Check Price |
| Micro USB Cable | Connects the ESP32 to your computer for programming and power. | Check Price |
| Breadboard | Lets you build the circuit and wire up parts without soldering. | Check Price |
| Jumper Wires | Make the connections between the ESP32 and the components on the breadboard. | Check Price |
As an Amazon Associate we earn from qualifying purchases. Prices and availability are accurate as of the date/time indicated and are subject to change.
Google Firebase Introduction
Google Firebase is an application development software created by Google. It can be used with any android/IOS application, IoT sensors and web services to create and alter the data obtained from them. It is a helpful software for building mobile/web applications easily and interactively. Paid services include a Real-time database, firebase storage, hosting and test lab. However, you can use Analytics for advanced messaging for free although you will have to create an account before accessing it.
One of the significant attributes of this software is that it is beginner friendly. It is very simple to connect your application to Google Firebase. You have to follow each step carefully. If you have any difficulty or want to access further information, take a look at the official Google Firebase Documentation.
Setting up Google Firebase Console
Before proceeding with the project let us understand the steps which have to be followed to successfully connect with the Google Firebase application.
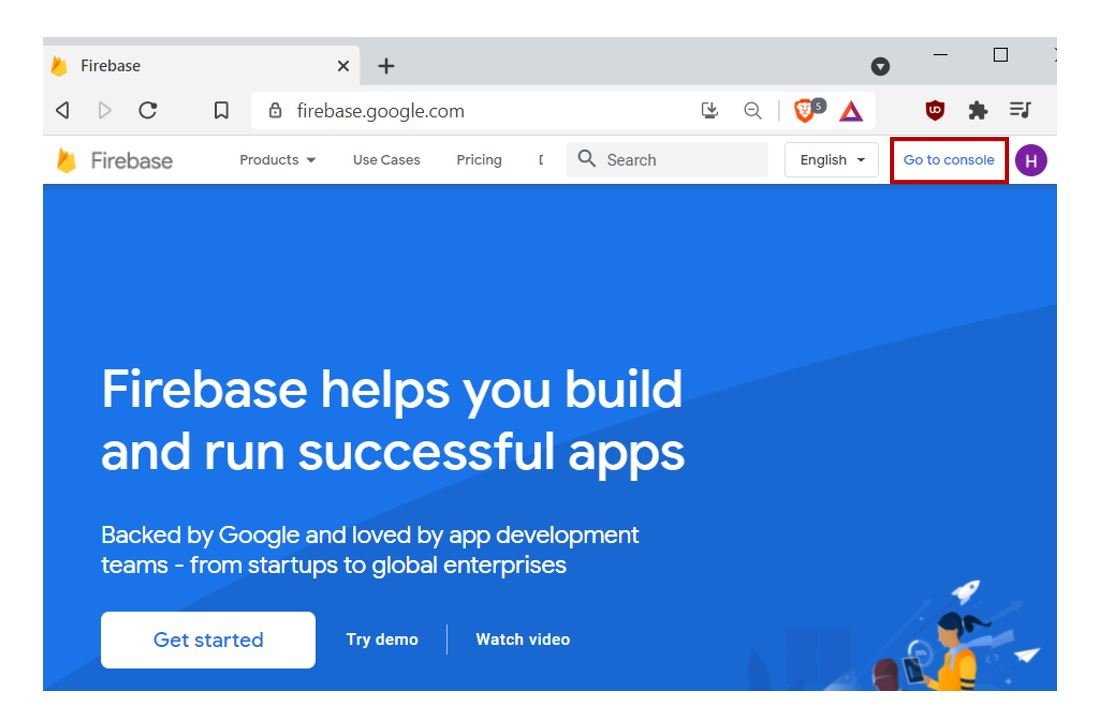
Firstly, type https://firebase.google.com/ in your browser search tab and press enter.
This will open the Firebase main page. Click ‘Go to Console’ as highlighted in the red rectangular box.
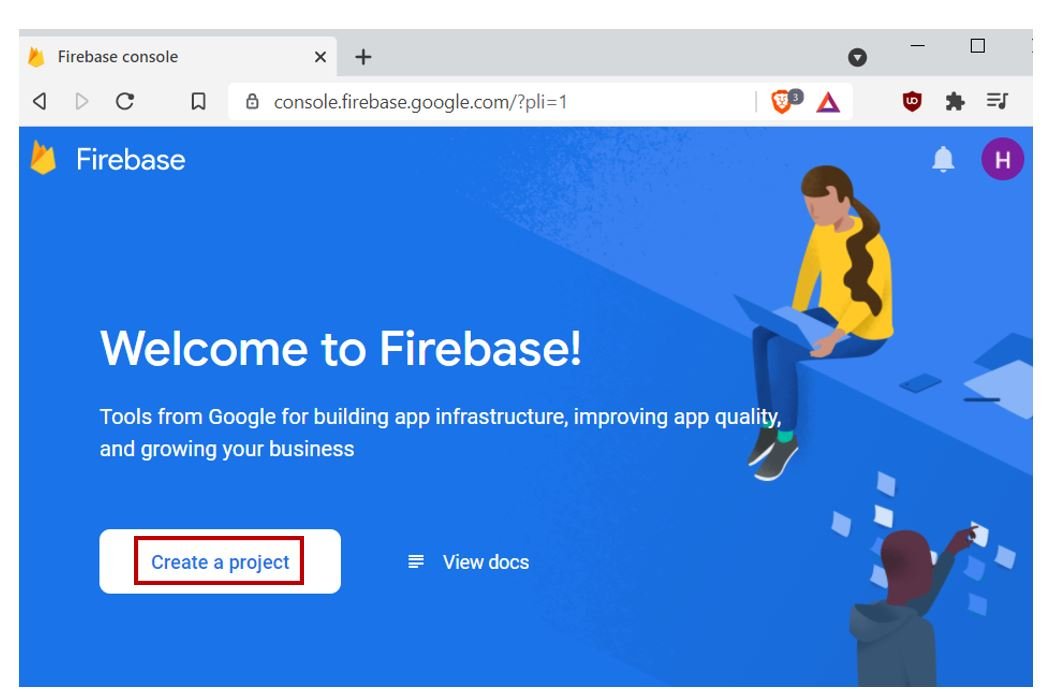
You will be redirected to a new web page with the welcome message. Click the button ‘Create a Project’ as shown below.
The following page opens up.
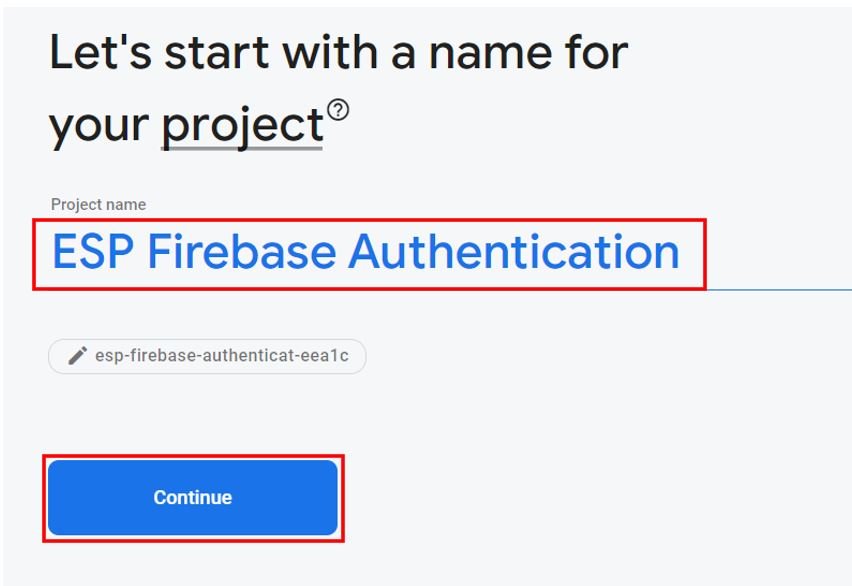
Step 1: Write the name of your project. Remember to tick the Firebase term agreement. Now click ‘Continue.’
Step 2: There is no need to enable ‘Google analytics for this project’ as we do not require it. Click ‘Create project’ to proceed further.

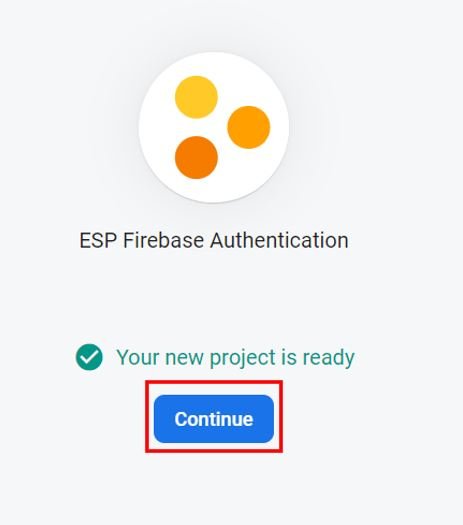
After a few moments, your project will be created.
Click ‘Continue’
Setting Authentication Methods
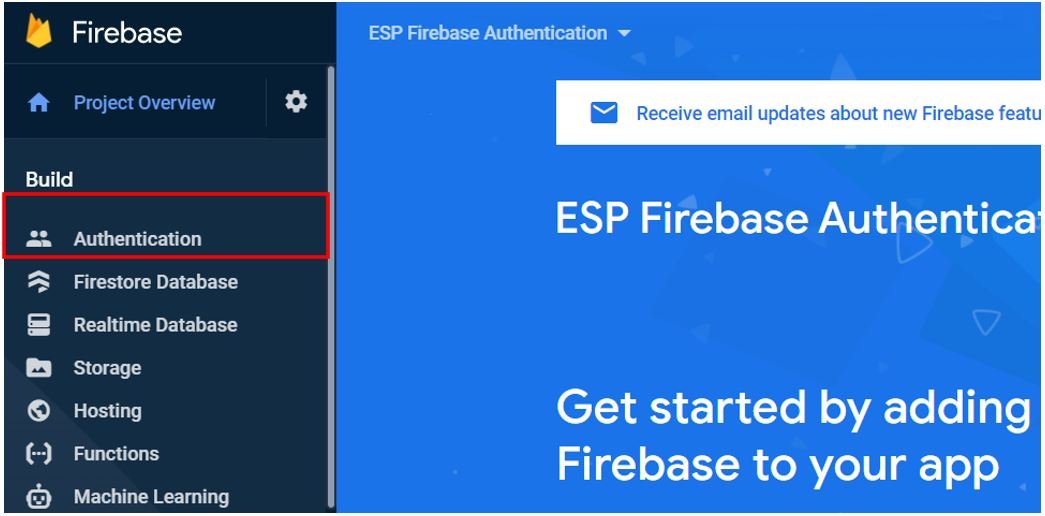
You will be redirected to the page of your newly created project. Go to Build > Authentication.
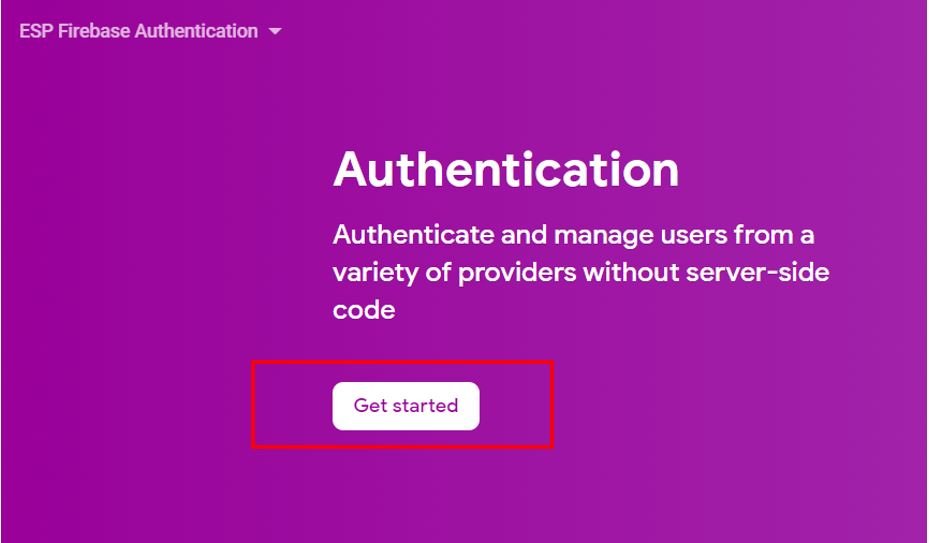
The following will open up. Click ‘Get Started’ to start the authentication process.
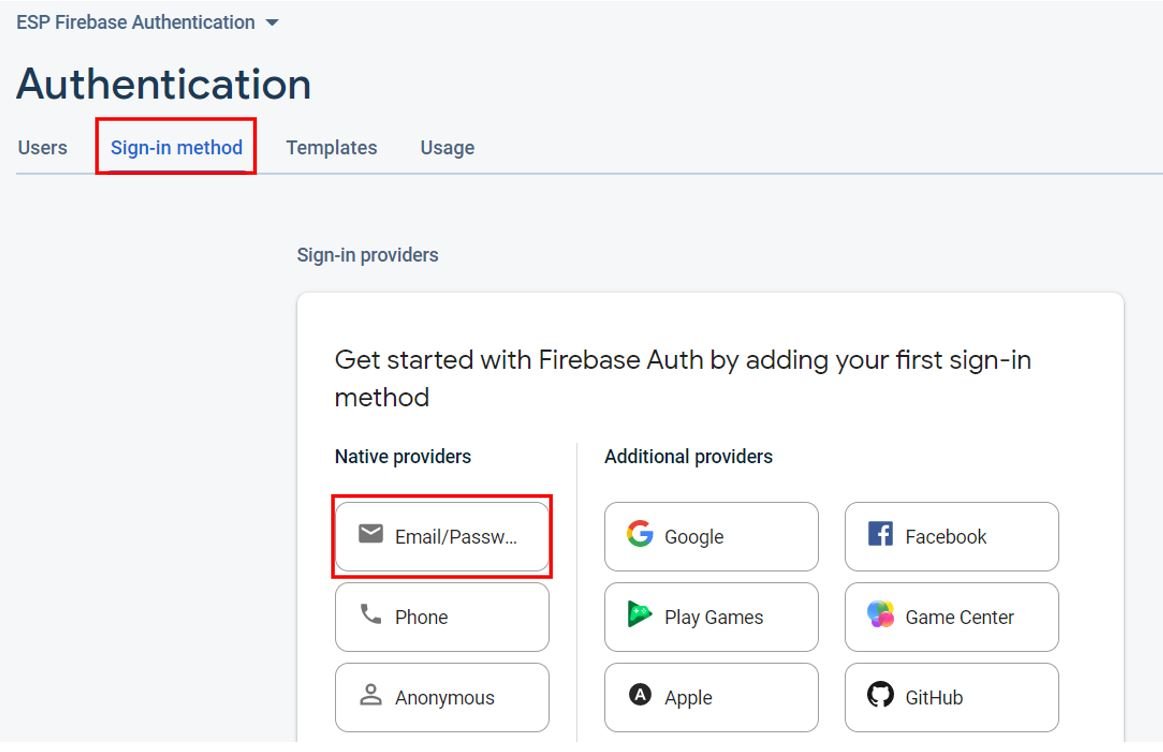
The following page will appear. Here we will head over to ‘Email/Password’ option as the sign-in method.
Enable the ‘Email/Password’ option by sliding the slider to the right. Then save the settings.
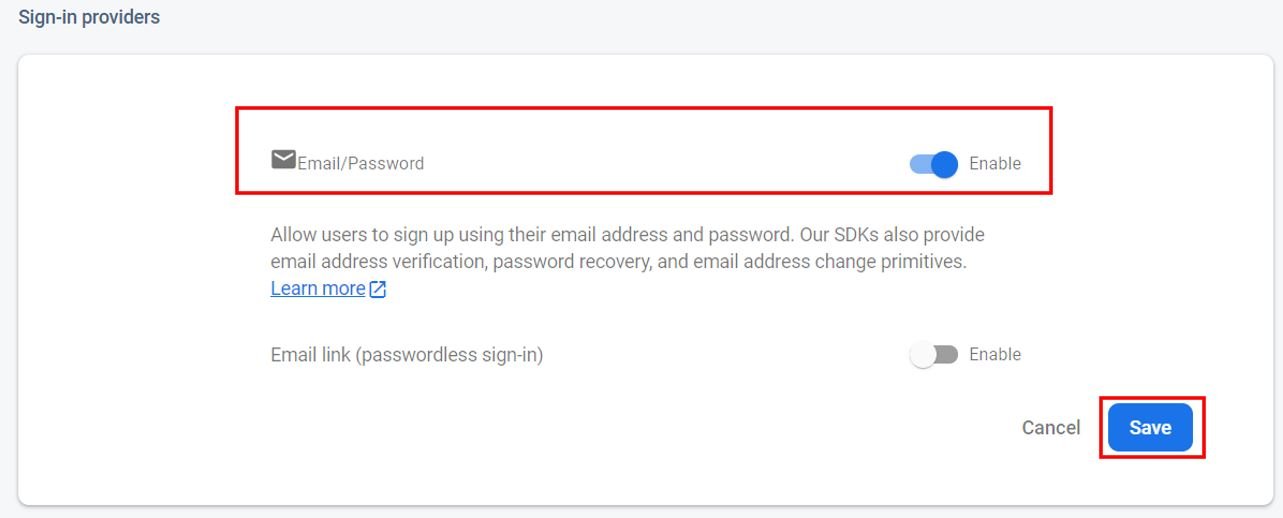
This authenitcation method will now be enabled as seen below:
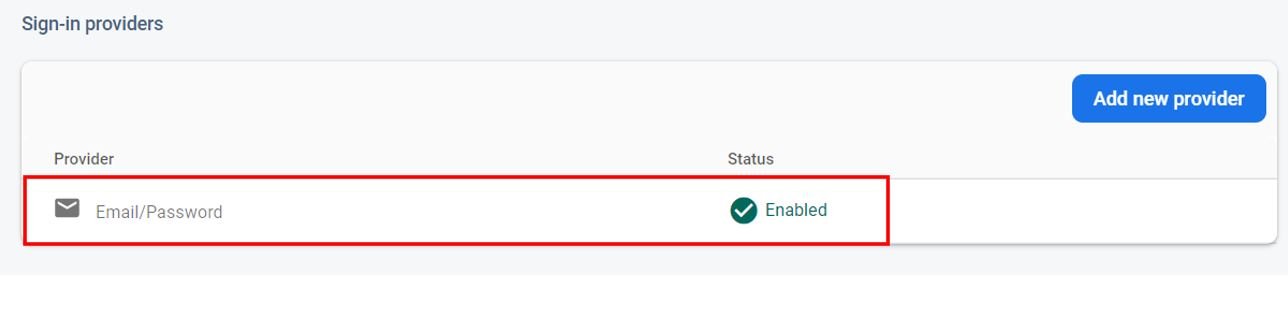
Now, you will have to provide the Email/Password of the user that will have access to the firebase project. First, click ‘Users’ in the tab and then head over to ‘Add user.’

Specify the email and password of the user. Then click ‘Add user.’
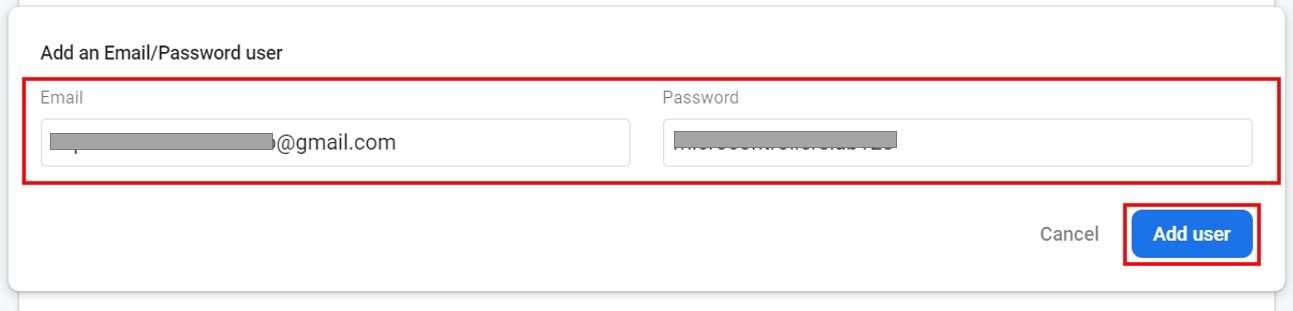
After adding the user, you will be able to view the email, date created and user UUID associated with the user you just authorized. You may notice that the ‘Signed in’ section is empty. This is because this particular user has not yet signed in to the Firebase project.

Obtaining API Key
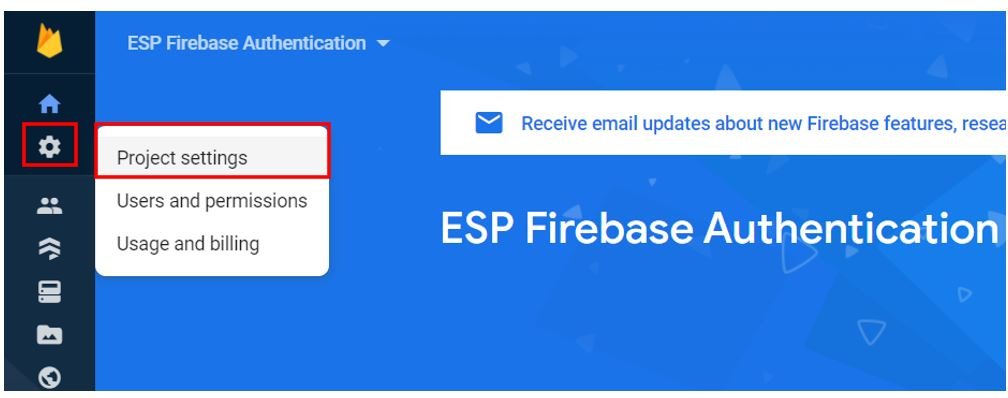
Go to the settings icon and click ‘Project Settings’.
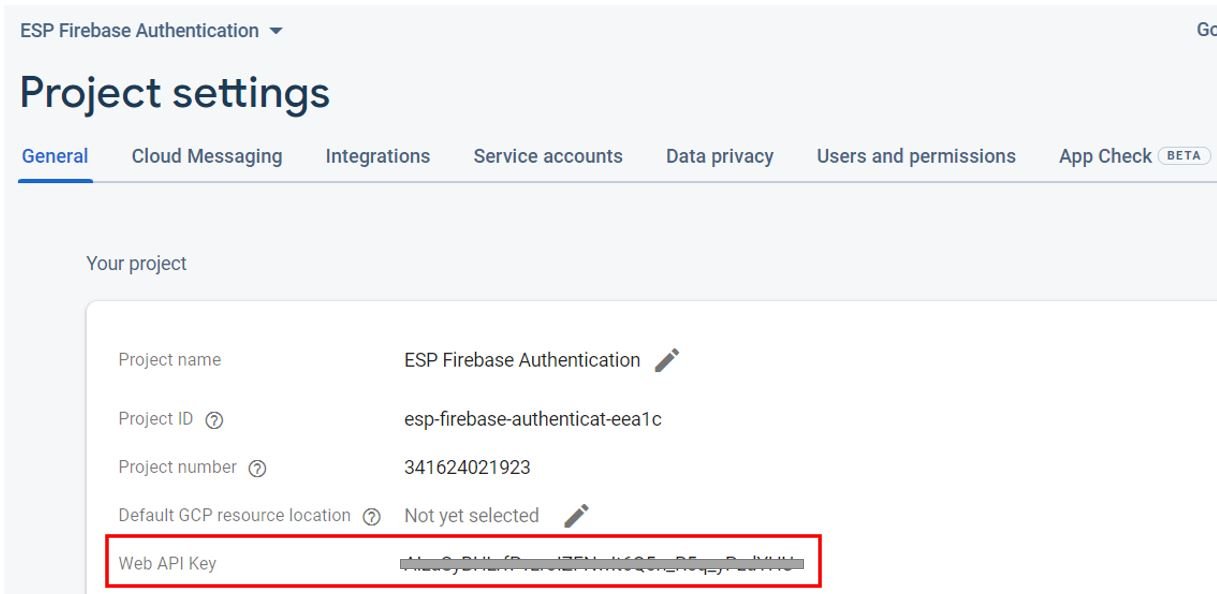
Under the project settings, you will be able to view the API key as highlighted below. This is unique for your project. Keep it safe. We will need it while programming our ESP32/ESP8266 development boards.
We have successfully set up our Google Firebase project with Email/Password authentication. Let us now move ahead and program our ESP board.
Setting up Arduino IDE
We will use Arduino IDE to program our ESP32/ESP8266 development boards. Thus, you should have the latest version of Arduino IDE. Additionally, you also need to install the plugins for the respective boards which you will use.
If your IDE does not have the plugins installed you can visit the links below:
Installing Google Firebase ESP Client Library
We will require the firebase ESP client library for this project. This library is compatible with both ESP32 and ESP8266 development boards. We will use the Library Manager in Arduino IDE to install it succefuuly.
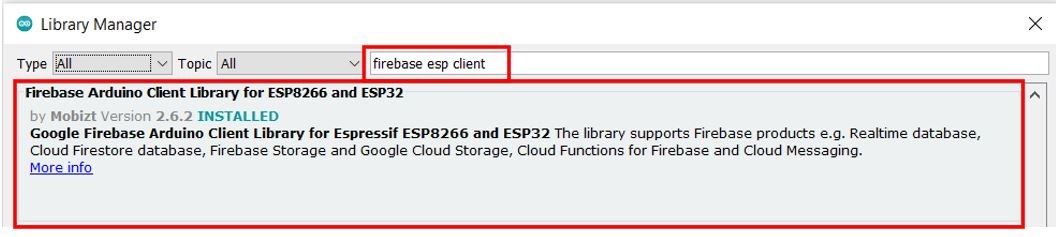
Open Arduino IDE and click on Sketch > Library > Manage Libraries. Type ‘Firebase ESP Client’ in the search tab and install the latest version of Firebase Arduino Client Library for ESP8266 and ESP32 that is shown below.
After installation of the library, restart your IDE.
Arduino Sketch: ESP32/ESP8266 Firebase Authentication with Email/Password
Open your Arduino IDE and go to File > New to open a new file. Copy the code given below in that file. You need to enter your network credentials. You also have to provide your web API key which was saved previously. Moreover, you will have to specify the email and password that you used in Firebase authentication to authorize the user.
#include <Arduino.h>
#if defined(ESP32)
  #include <WiFi.h>
#elif defined(ESP8266)
  #include <ESP8266WiFi.h>
#endif
#include <Firebase_ESP_Client.h>


#include "addons/TokenHelper.h"
#include "addons/RTDBHelper.h"

#define WIFI_SSID "Your_SSID"
#define WIFI_PASSWORD "Your_Password"

#define API_KEY "ENTER_API_KEY"


#define USER_EMAIL "ENTER_THE_USER_EMAIL"
#define USER_PASSWORD "ENTER_THE_USER_PASSWORD"

// Define Firebase objects
FirebaseData Firebase_dataObject;
FirebaseAuth authentication;
FirebaseConfig config;


String uid;

void setup(){
  Serial.begin(115200);
  WiFi.begin(WIFI_SSID, WIFI_PASSWORD);
  Serial.print("Connecting to WiFi ..");
  while (WiFi.status() != WL_CONNECTED) {
    Serial.print('.');
    delay(1000);
  }
  Serial.println(WiFi.localIP());
  Serial.println();

  config.api_key = API_KEY;
  authentication.user.email = USER_EMAIL;
  authentication.user.password = USER_PASSWORD;

  Firebase.reconnectWiFi(true);
  Firebase_dataObject.setResponseSize(4096);
  config.token_status_callback = tokenStatusCallback;
  config.max_token_generation_retry = 5;

  Firebase.begin(&config, &authentication);

  Serial.println("Getting User UID");
  while ((authentication.token.uid) == "") {
    Serial.print('.');
    delay(1000);
  }
  uid = authentication.token.uid.c_str();
  Serial.print("User UID: ");
  Serial.print(uid);
}

void loop(){

}
How the Code Works?
Firstly, we will include the relevant libraries which are necessary for this project.
We will use WiFi.h library for ESP32 and ESP8266WiFi.h for ESP8266. These will be used to connect the module with the local WIFI network The other libraries will be required for the Firebase functionality.
#include <Arduino.h>
#if defined(ESP32)
  #include <WiFi.h>
#elif defined(ESP8266)
  #include <ESP8266WiFi.h>
#endif
#include <Firebase_ESP_Client.h>

#include "addons/TokenHelper.h"
#include "addons/RTDBHelper.h"
Secondly, we will define the network credentials. One for the SSID and the other for the password. These will be our network credentials which will be used to connect to our wireless network. Replace both of them with your credentials to ensure a successful connection.
#define WIFI_SSID "Your_SSID"
#define WIFI_PASSWORD "Your_Password"
Next, we will define the Google firebase web API key which we accessed and saved previously
#define API_KEY "ENTER_API_KEY"The next important step is to specify the user email and password that we used while authorizing the user in our firebase project. Both of these should correspond to the ones you saved while adding the user.
#define USER_EMAIL "ENTER_THE_USER_EMAIL"
#define USER_PASSWORD "ENTER_THE_USER_PASSWORD"
Moreover we will create some objects for some firebase functionalities: data, authentication and configuration.
FirebaseData Firebase_dataObject;
FirebaseAuth authentication;
FirebaseConfig config;
setup()
Inside the setup() function, we will open a serial connection at a baud rate of 115200.
Serial.begin(115200);The following section of code will connect our ESP32 or ESP8266 board with the local network whose network credentials we already specified above. We will use the WiFi.begin() function. The arguments will be the SSID and the password which we defined earlier in the code. After the connection will be established, the IP address of the ESP board will get printed on the serial monitor.
  WiFi.begin(WIFI_SSID, WIFI_PASSWORD);
  Serial.print("Connecting to WiFi ..");
  while (WiFi.status() != WL_CONNECTED) {
    Serial.print('.');
    delay(1000);
  }
  Serial.println(WiFi.localIP());
  Serial.println();
Now, first we will use the firebase data object we created for configuration and set the API key. Then we will specify the user email and password to the frebase authentiaction object.
config.api_key = API_KEY;
authentication.user.email = USER_EMAIL;
authentication.user.password = USER_PASSWORD;
The following lines of code will be used to set the call-back function for long running token generation task. These will be set to the Firebase configuration object as well.
  config.token_status_callback = tokenStatusCallback;
  config.max_token_generation_retry = 5;
Using Firebase.begin() on the configuration and authentication paths, we will initialize the firebase library connection.
Firebase.begin(&config, &authentication);In the following lines of code, we will retrieve the user UID
 Serial.println("Getting User UID");
  while ((authentication.token.uid) == "") {
    Serial.print('.');
    delay(1000);
  }
  uid = authentication.token.uid.c_str();
  Serial.print("User UID: ");
  Serial.print(uid);
Demonstration
Choose the correct board and COM port before uploading your code to the board. Therefore go to Tools > Board and select ESP32 Dev Module or NodeMCU 1.0.
If you are using ESP32, select the ESP32 Dev module as follows:

If you are using ESP8266 NodeMCU, select the NodMCU module as follows:

Then, go to Tools > Port and select the appropriate port through which your board is connected.

Click on the upload button to upload the code to ESP32 or ESP8266 development board.
After you have uploaded your code to the ESP32 or ESP8266 development board, press its ENABLE/RST button.


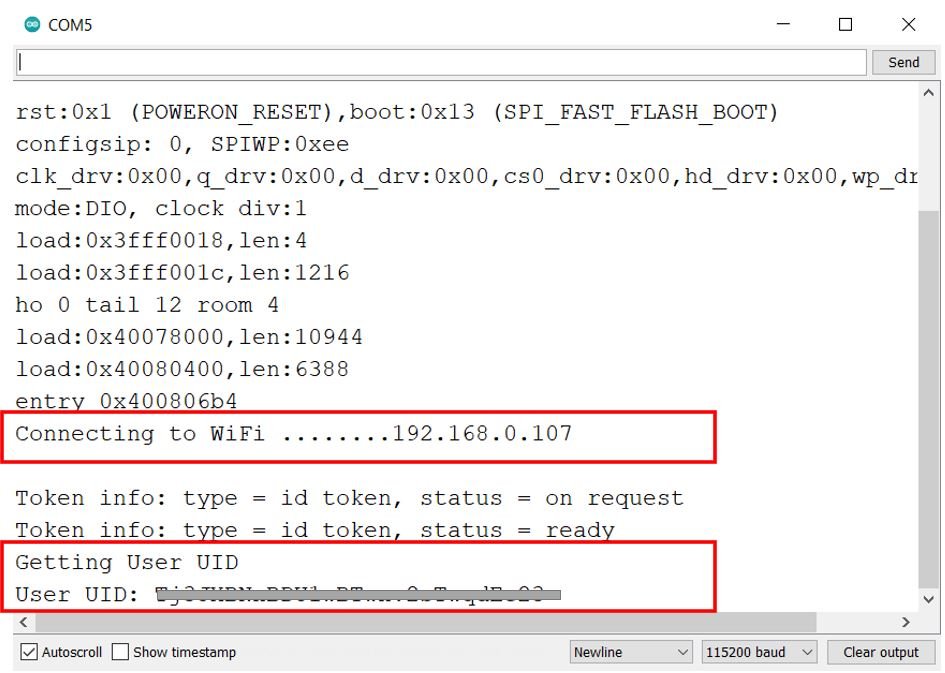
Open your Serial monitor and set the baud rate to 115200. In a few moments, the Wi-Fi will get connected and the user will get authorized successfully. The authorized user UID will b displayed in the serial monitor.
In your Firebase project go to Authentication > Users.
You will be able to view a sign in by the user. To make sure it is the same authorized user, you may check that the user UID displayed in the serial monitor and the user UID displayed in this table are the same.

Thus, we were successfully able to authenticate our firebase project using email/password following a series of steps.