In this article, we will learn how to interface the LM35 temperature sensor with ESP32. LM35 is a very popular temperature sensor in academia, and many students want to integrate it into their ESP32 projects. But due to the issue of ESP32 ADC incompatibility, we cannot interface LM35 directly with ESP32. In this guide, we will show you how to interface it by avoiding this issue and how to send temperature sensor values on a web page by building a web server using ESP32.
Recommended Components
The following components are used in this project or are helpful for building it with the ESP32.
| Component | How it’s used in this project | Buy on Amazon |
|---|---|---|
| ESP32 Development Board (DevKit V1) | Reads the temperature value and hosts the web server. | Check Price |
| Micro USB Cable | Programs the ESP32 and powers it during testing. | Check Price |
| Breadboard | Holds the ESP32 and sensor wiring for the project. | Check Price |
| Jumper Wires | Connect the ESP32 to the sensor and the external ADC. | Check Price |
As an Amazon Associate we earn from qualifying purchases. Prices and availability are accurate as of the date/time indicated and are subject to change.
LM35 Temperature Sensor Introduction
The LM35 is a temperature sensor commonly employed to measure the temperature of various objects or the surrounding environment. It offers a wide temperature range spanning from -55°C to 150°C, making it suitable for both low-temperature and high-temperature applications. One of the significant advantages of this sensor is its high accuracy, boasting a precision of +/- 0.4°C at room temperature.
The output of the LM35 is provided in the form of voltage, and the relationship between temperature and voltage is determined by a scaling factor or resolution. In this case, the scaling factor is defined as 0.01V/°C, indicating that for every 1°C change in temperature, the LM35 temperature sensor delivers a corresponding output voltage change of 100mV. This linear output and straightforward relationship simplify the calibration and integration of the LM35 into various electronic systems and projects.
Technical Features of LM35 Temperature Sensor
Here we have listed some of the technical features of LM35 Temperature Sensor below.
- Calibrated directly in Celsius Scale.
- Accurate up to 0.5°C at 25°C Room Temperature.
- Suitable and Effective in Remote applications and Projects.
- Current drain is less than 60-µA, making it energy-efficient.
- Low self-heating of the sensor, about 0.08°C in normal air.
- Regenerate response
Pinout of LM35

Table provides the details and pinout of this sensor.
| LM35 | Functionality |
|---|---|
| VDD | Connect power supply between 4-30 volt |
| Vout | Provides output voltage proportional to temperature |
| GND | Connect with ground of power supply |
Hardware Components
Here we will discuss the complete list of hardware components required to follow along with this tutorial.
- ESP32 Devkit V1 or any other ESP dev board
- LM35 Temperature Sensor
- ADS1115 External ADC Module
- Jumper Wires
Compatibility Issue of ESP32 with LM35 and its Solution
The scaling factor of LM35 is .01V/°C and the resolution of ESP32 ADC is 3.3V/4095 which is equal to 0.8mV. Therefore, ESP32 ADC should be able to read the 10mV output of the temperature sensor. But, the built-in ADC of ESP32 can not measure temperature fluctuations of LM35 in fraction range or decimal range and so is the output voltage of the sensor.
We have to use an external ADC with higher resolution like ADS1115 I2C based external ADC. ADS1115 can measure 0.1875mV minimum voltage. So the resolution of this external ADC is 5 times better than the scaling factor of LM35. We can use it to measure 10mV per degree centigrade.
You can check this External ADC ADS1115 interfacing with ESP32 to know more about this chip.
Schematic Diagram of LM35 with ESP32

The above Schematic diagram shows the connection between LM35 with ESP32 through external analog to digital converter ADS1115.
Pinout Explanation
Here we will discuss all the connections required to work with ADS1115 and LM35 with ESP32 Devkit.
| Pins | Functionality |
|---|---|
| GND | Connect LM32 temperature sensor and ADS1115’s GND pin to ESP32 GND pin. Also connect the ADDR pin of ADS1115 to the ground of ESP32. |
| VDD | Connect VDD pin of LM35 and ADS1115 to the 3.3V or Vin pin of ESP32. |
| I2C | For I2C connection, we will connect GPIO 22 to SCL and GPIO 21 to SDA pin of ADS1115 external ADC module. |
| A0 | At last we connect the Analog channel zero (A0) of ADS1115 to the output pin of LM35 temperature sensor. |
Code to Measure Temperature with ESP32 and ADS1115 Module
Code used in this guide is similar to the one used in the last tutorial on external ADC interfacing with ESP32, except the temperature measurement part. Upload this code to the ESP32 and check the output on the serial monitor.
#include <Wire.h> // library for I2C communication
#include <Adafruit_ADS1015.h> //Library of external adc

Adafruit_ADS1115 ads(0x48); // define the types of external adc
float temp = 0.0; // variable to store temperature value

void setup(void)
{
Serial.begin(9600); //define the baudrate of 9600
ads.begin(); // start adc to read sensor value over I2C
}

void loop(void)
{
int16_t adc0; // 16 bit interger to store output of analog channel zero

adc0 = ads.readADC_SingleEnded(0); // read AIN0 values
temp = (adc0 * 0.1875)/1000; // convert ADC value into voltage
temp = temp * 100; // converts voltage into temperature 10mv=1C

// this section displays value of adc and temperature on serial monitor
Serial.print("AIN0: ");
Serial.print(adc0);
Serial.print("tTempertaure: ");
Serial.println(temp);
Serial.println();

delay(1000);
}
Explanation of Temperature Measurement Code
Here we explain the above code in simple words and break down each step so it is easy to understand.
#include <Wire.h> // library for I2C communication
#include <Adafruit_ADS1015.h> //Library of external adc
First we include two libraries, Wire.h for serial communication and Adafruit_ADS1015.h for working with ADS1115 ADC Module.
Adafruit_ADS1115 ads(0x48); // define the types of external adc
float temp = 0.0; // variable to store temperature value
Then we define the external ADC type for ADS1115 module, and a float variable to store the temperature values.
void setup(void)
{
Serial.begin(9600); //define the baudrate of 9600
ads.begin(); // start adc to read sensor value over I2C
}
Next we initialize the Serial Monitor with 9600 baud rate and ADC of ADS1115 module using ads.begin() function.
void loop(void)
{
int16_t adc0; // 16 bit interger to store output of analog channel zero

adc0 = ads.readADC_SingleEnded(0); // read A0 values
temp = (adc0 * 0.1875)/1000; // convert ADC value into voltage
temp = temp * 100; // converts voltage into temperature 10mv=1C
In the last part of void loop(void) section, First we create 16 bit integer to store adc value on channel 0, then we read and store the value in the integer ads0. Afterwards we calculate the voltage output on adc0 using the formula and store it in temp. At last we convert Voltage to temperature.
// this section displays value of adc and temperature on serial monitor
Serial.print("AIN0: ");
Serial.print(adc0);
Serial.print("tTempertaure: ");
Serial.println(temp);
Serial.println();

delay(1000);
}
Now we display the output on the Serial monitor using Serial.print() command for all variables.
After uploading the code, open the Serial Monitor. You will see this output on the Serial Monitor. Output contains ADC0 value and temperature value.

LM32 Web Server with ESP32 (Arduino IDE)
Now we will see how to create a Web server to display LM35 temperature sensor’s value on the web page. This HTML file displays the value of temperature in Celsius and Fahrenheit Scale on the web page. Whenever a web client tries to access the web page through an IP address, ESP32 will send this HTML page through HTTP protocol.
<!DOCTYPE html>
<html>
<meta name="viewport" content="width=device-width, initial-scale=1.0">
<body>

<h1>WEB SERVER LM35 SENSOR</h1>
<p style="color: red">Temperature = ----*C</p>
<p style="color: red">Temperature in Fahrenheit = ----*F</p>

</body>
</html>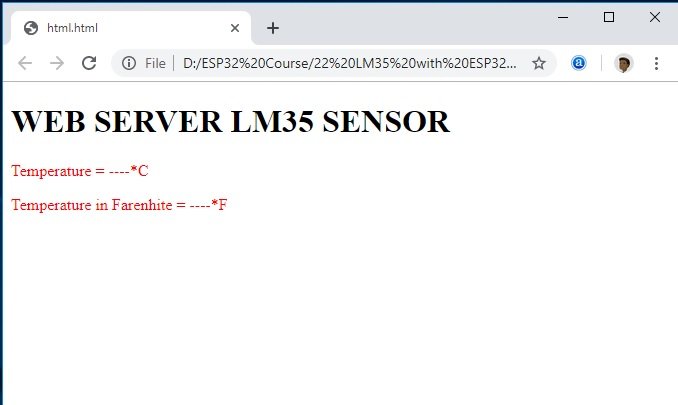
This HTML Page displays the output shown in the above figure. Instead of “—“, we will display the temperature values.
Explanation of HTML Document
Here we will explain the HTML document. First, we need to add an HTML Document Tag.
<!DOCTYPE html>This tag is useful for telling the browser the HTML version used in the HTML document.
<html>Then we add an HTML tag this initializes the HTML document.
<meta name="viewport" content="width=device-width, initial-scale=1.0">Meta tag is useful for SEO purposes and page description.
<body>

<h1>WEB SERVER LM35 SENSOR</h1>
<p style="color: red">Temperature = ----*C</p>
<p style="color: red">Temperature in Fahrenheit = ----*F</p>

</body>
Then we added the body tag. It is important to note that the content in the body tag will be displayed on the web page. So here we added a heading (H1) for the title of the page. Then two tags of paragraph with the color red for temperature in Celsius and Fahrenheit.
</body>
</html>
At last, we close the body tag and finally the HTML tag to mark the end of the document.
Code for Sending Temperature Value to Web Server
Now we will add the given HTML document code inside the above temperature measurement code and send HTML strings through `client.println()` function.
#include <WiFi.h>
#include <Wire.h> // library for I2C communication
#include <Adafruit_ADS1015.h> //Library of external adc

Adafruit_ADS1115 ads(0x48); // define the types of external adc
float temp = 0.0; // variable to store temperature value
const char* ssid = "PTCL-BB";
const char* password = "5387c614";

WiFiServer server(80);

String header;

void setup(void)
{
Serial.begin(9600); //define the baudrate of 9600
ads.begin(); // start adc to read sensor value over I2C
Serial.print("Connecting to Wifi Network");
Serial.println(ssid);
WiFi.begin(ssid, password);
while (WiFi.status() != WL_CONNECTED) {
delay(500);
Serial.print(".");
}
Serial.println("");
Serial.println("Successfully connected to WiFi.");
Serial.println("IP address of ESP32 is : ");
Serial.println(WiFi.localIP());
server.begin();
Serial.println("Server started");
}

void loop(void)
{
int16_t adc0; // 16 bit interger to store output of analog channel zero

adc0 = ads.readADC_SingleEnded(0); // read ANO values
temp = (adc0 * 0.1875)/1000; // convert ADC value into voltage
temp = temp * 100; // converts voltage into temperature 10mv=1C

// this section displays value of adc and temperature on serial monitor
Serial.print("AIN0: ");
Serial.print(adc0);
Serial.print("tTempertaure: ");
Serial.println(temp);
Serial.println();
// This line checks if web client is available or not
WiFiClient client = server.available();
// if client is available 'if' condition becomes true
if (client)
{
Serial.println("Web Client connected ");   //print on serial monitor
String request = client.readStringUntil('r'); // wait untill http get request ends
client.println("HTTP/1.1 200 OK");
client.println("Content-type:text/html");
client.println("Connection: close");
client.println();

// This part send HTML page to web client
// HTML page contains temperature values
client.println("<!DOCTYPE html>n");
client.println("<html>n");
client.println("<meta name="viewport" content="width=device-width, initial-scale=1.0">n");
client.println("<body>n");
client.println("<h1>WEB SERVER LM35 SENSOR</h1>n");
client.println("<p style="color:red">Temperature =");
client.println("*C</p>n");
client.println(temp);
client.println("<p style="color:red">Temperature in Farenhite =");
client.println(1.8 * temp + 32);
client.println("*F</p>n");
client.println("</body></html>");
client.println();
Serial.println("Client disconnected.");
Serial.println("");
}

}
This code demonstrates how to create a web server using ESP32, allowing you to access a web page that displays the value of a temperature sensor. By connecting the ESP32 to a WiFi network, you can access the web page through its assigned IP address. For a detailed step-by-step guide on creating a web server and sending values to a web page, you can refer to the ESP32 web server in Arduino IDE project. Prior to uploading the code to the ESP32 board, make sure to customize the code by replacing the WiFi name and password with your own network’s credentials.
const char* ssid = "PTCL-BB";
const char* password = "5387c614";
Now click on the upload button to upload the code and after you are done with uploading, open the Serial Monitor of Arduino IDE. You will find the IP address of ESP32. 
Now go to any web browser and open the web page through the IP address. You will see the temperature values on the web page as shown below: 
In summary, in this tutorial, we learned how to display LM35 temperature sensor values on a web page by hosting web server files on ESP32. The LM35 temperature sensor’s combination of high accuracy, linearity, wide temperature range, low power consumption, and simple interfacing makes it a popular choice for temperature monitoring and control in various electronic systems and projects.
You can check other ESP32 Web server projects to know more about the workings of the Web server part.
- Create ESP32 Web server in Arduino IDE
- Send temperature and humidity values on web page with ESP32
- BMP180 Web server with ESP32 in Arduino IDE
- Soft access point ESP32 Web server
- Password-protected Web server in Arduino IDE with ESP32
You may also like to read other LM35 temperature sensor articles available on our blog:
hi , thank you for your amazing page , now , I want run a analog fluxgate sensor with this way , it is flc100 sensor , a magnetic field sensor, please help me to run this sensor , pins are 0v,5v,sync,out-,out+, thank you very very much
You indicated that “The scaling factor of LM35 is .01V/°C. Therefore, ESP32 adc should be able to read 10mV minimum value.” If the ESP32 ADC is able to do this, why did you need the external ADC? You did not explain that choice.
The scaling factor of LM35 is .01V/°C and the resolution of ESP32 ADC is 3.3V/4095 which is equal to 0.8mV. Therefore, ESP32 ADC should be able to read the 10mV output of the temperature sensor. But, the built-in ADC of ESP32 can not measure temperature fluctuations of LM35 in fraction range or decimal range and so is the output voltage of the sensor. We have to use an external ADC with higher resolution like ADS1115 I2C based external ADC.