In this tutorial, you will learn about Arduino Ethernet shield . Whenever we come to the selection of development boards Arduino pops up in our mind as they are cost effective, open source hardware and software and most important feature is extensible. We can use Arduino as a standalone project but when it comes to some specific features like connection to internet (wirelessly or wired) or to interface with motors etc. then a comparatively expensive adapter known as shield comes handy. you may also like to read these:
In this article, we are going to discuss a specific shield of Arduino known as ETHERNET shield which provides internet connectivity to Arduino board. We will discuss about its pin configuration with Arduino , requirements , informational LED’s , how to assign addresses to it and last but not least we will list some projects in which this shield is used.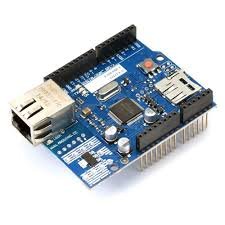
INTRODUCTION TO ARDUINO ETHERNET SHIELD
Ethernet Shield allows internet connectivity to Arduino board by using its Ethernet library. We can use this Ethernet library to write sketches (Arduino program written in IDE) that will help us to configure this shield to connect to internet. This shield is compatible with almost all versions of Arduino boards. It enables our board to receive and send data worldwide by providing it internet connection. SD card option is also available in it and we can write and read this card by using SD library. Endless amount of possibilities are provided by just allowing your project to connect to internet.
This shield relies on Wiznet W5100 chip Ethernet with internal buffer space of 16 KB. It can support up to 4 simultaneous socket connections. This chip provides a network IP stack which is capable of both transport layer protocol of internet i.e. TCP (transmission control protocol) and UDP (user datagram protocol). TCP provides more reliable service of transporting messages as compared to UDP and much more features of these 2 protocols are there but that’s not our concern in this article right now. We are simply focused on providing our board internet connectivity via this shield.
The newer version of this shield relies on W5500 Ethernet chip having 32 KB buffer size, supports auto negotiation and supports I2C , UART interface. By making use of long wire warp headers for connecting Ethernet shield to Arduino board keeps the pin layout intact and other shields can be stacked on top of it.
REQUIREMENTS for ARDUINO ETHERNET SHIELD
We have to plug this shield on our Arduino board but below are some mandatory requirements:
- RJ45 cable for connection to network
- Arduino board (for sure. Because this shield cannot be used as standalone project)
- Operating voltage of 5 V should be provided by Arduino board
- Make connection with Arduino board on SPI port
- Power over Ethernet module required (this module is designed for power extraction from conventional twisted pair Ethernet cable) which should meet following requirements:
- Low output noise and ripple
- Input voltage: 36 V – 57 V
- Over-load protection
- Output voltage: 9V
- The input to output isolation should be of 1500 V
- Highly efficient DC/DC converter
- 3af compliant
One important thing that is to be noted here is that both SD card and W5100 share SPI bus as Arduino communicates via SPI port so we can use only one of them. If we want to use both of them then we have to check their corresponding library.
INFORMATIONAL LEDs on ARDUINO ETHERNET SHIELD
This shield comes up with numerous informational LEDs. Some of which are listed below:
- PWR: For the indication of shield and board powering.
- LINK: For the indication of network link presence and when data is received or transmit it flashes.
- FULLD: For the indication of full-duplex network connection
- 100M: For 100 MB/s network connection presence
- RX: When shield receives data it starts flashing
- TX: When shield sends data it starts flashing
- COLL: Flashes in the case when network collisions are detected
ARDUINO ETHERNET SHIELD ARDUINO CONNECTIVITY
Ethernet Arduino connectivity can be used in two ways:
- SERVER: We can make our Arduino act as server i.e. it can be accessed from the internet and we will send commands from our Arduino board. This server can be used in many ways, for example, to control things in house and it can display information also just like sensor readings and much more.
- CLIENT: Client basically sends data to the server. In case our Arduino is acting as a client then it can posts data to the database that is stored in the server. This type of Arduino client model is used for handling a large amount of data as well as for data logging purposes.
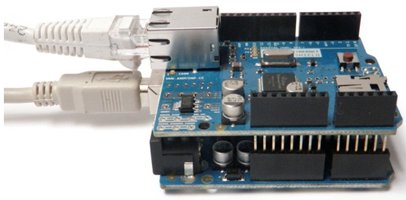
Check this tutorial to know how to interface Arduino Ethernet shield with Arduino Uno
ARDUINO AND ETHERNET SHIELD CONNECTION
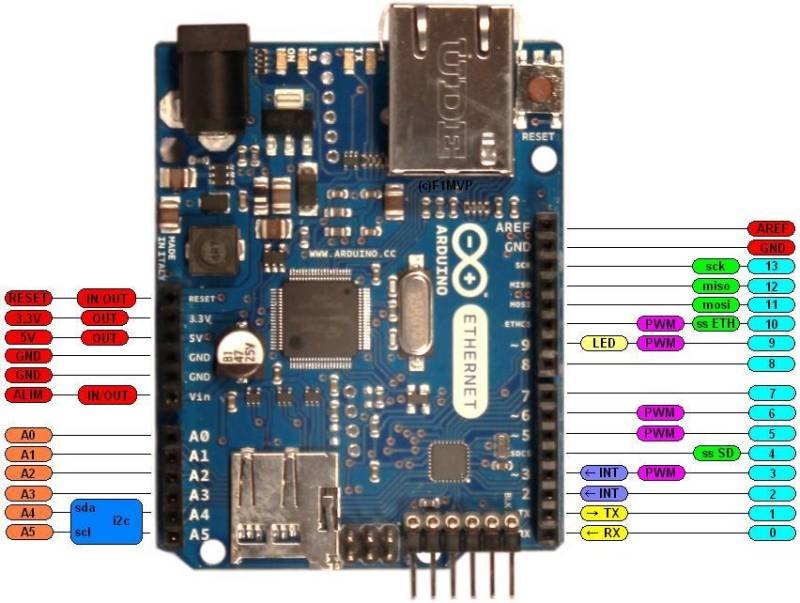
The general pin configuration of Arduino and Ethernet shield is given below. However, it may vary from model to model so a description is also given to avoid confusion.
- Arduino communication is done using SPI bus through ICSP header so pin number D11, D12, D13 on classic Arduino models are used for this purpose and pin D 50 and D 52 on Arduino Mega serves the same purpose.
- For W5100 D 10 pin is used and it’s a general purpose input output pin. So if we are going to W5100 this pin thus cannot be used as input-output pin
- D 4 pin is again general purpose input output pin but it is used for SD card. If we are not using SD card then this pin can be used as general purpose input output pin.
- D 2 pin is named as INT on Arduino board and is connected with INT pin of W5100
There is one precautionary measure that the hardware SS pin i.e. pin D 53 is although SPI pin but it cannot be used to select either W5100 or SD card but it should be kept as an output or our SPI interface will not work.
By keeping all these points in our mind we can mount our shield on top of our Arduino board and then connect it to our computer via USB cable. Once our sketch (Arduino program made in IDE) is uploaded we can disconnect our board from the computer and then power it by using an external power supply.
ASSIGNING ADDRESSES to ARDUINO ETHERNET SHIELD
Each and every device that is connected to the internet has an address known as IP / MAC address which is analogous to our home addresses. As our complete home addresses are unique globally our MAC addresses are also unique. IP addresses are may be fixed or changed depending on how we are going to configure our network. We will not go in the details of these IP / MAC addresses as our concern is only limited to how our Arduino will get an IP address once it has internet connectivity. These addresses help us to identify devices on the network so that data can be received or sent from other devices.
Addresses that are used to identify devices are of two types:
- IP Address:
- MAC Address
MAC address is always unique and is assigned to every device during the manufacturing process. So our device will already be having a MAC address and it will be written on the sticker attached on our board. For IP address assigning we will connect our Arduino board to our router and our router will automatically assign an IP address to our device and it will be fixed unless and until our device is not turned off. Once our device is turned off then when we will repeat the same procedure of assigning an IP address we may or may not get a different IP address. The main purpose of the router is to manage all IP addresses of that particular area and allows them to communicate.
If you want to check the IP address assigned to your device, simply use of the preloaded sketch “DHCP Address Printer” and then open the serial monitor. Your IP address will be printed on that.
PROJECTS ideas with ARDUINO ETHERNET SHIELD
Some of the projects which are done using Ethernet shield are listed below:
- Ethernet-based home automation system using Arduino Ethernet shield
- Chat server
- Homeotic (Home automation system)
- Web client
- Automated Garden
- Web server
- Barometric pressure web server
- Web client repeating
- UDP send receive the string
- UDP NTP client
- DHCP address printer
- Telnet client
- DHCP chat server
That’s all folks. I hope you really like this article. Any suggestion or queries related to this article can be asked in the comment section below.
The topic is very good . I have learn many think of it.
I have a question.
That is can i connection arduino ethernet shield to the internet without any router or computer.if possible how can i do it.
or could we assign IP , subnet musk, getway and dns on arduino ethernet shield to access internet.if possible how can i do it.
Thanks
Waiting for your reply
That’s a good tutorial!!
And if I want to interface a pic microcontroller with Wiznet 5100, what sould I do? Can you give me an example of source code for that?
Thanks
Hi
We do not have currently have any tutorial on pic microcontroller with Wiznet 5100, but we will try to make on as soon as possible.