In this tutorial, we will learn how to interface MQ3 alcohol sensor with ESP32 to design a breathalyzer that can detect alcohol in the human body. This user guide focuses on MQ3 alcohol sensor module that determines the concentration of alcohol in the surrounding environment. We will learn about its introduction, features, pinout, and interfacing with Arduino. Additionally, we will learn how to calibrate the sensor and detect the presence of alcohol in the air using both analog and digital outputs of MQ3 sensor.
Recommended Components
The following components are used in this project or are helpful for building it with the Arduino.
| Component | How it’s used in this project | Buy on Amazon |
|---|---|---|
| Arduino Uno R3 | The main microcontroller board that runs the sketch and reads the sensors/modules in this project. | Check Price |
| Breadboard | Lets you wire the components to the Arduino without soldering for quick prototyping. | Check Price |
| Jumper Wires | Connect the Arduino pins to the module and other parts on the breadboard. | Check Price |
As an Amazon Associate we earn from qualifying purchases. Prices and availability are accurate as of the date/time indicated and are subject to change.
MQ3 Alcohol Sensor Introduction
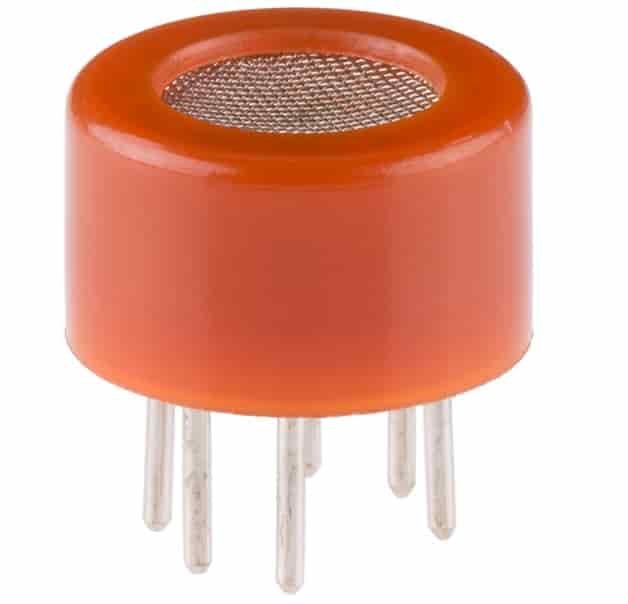
MQ3 Sensor belongs to the MQ series that are used to detects different gasses present in the air. This alcohol sensor detects the concentration of alcohol 25 to 500 ppm in the air. Along with high sensitivity to detect alcohol, it can also detect benzine with a lower sensitivity. It is a metal oxide semiconductor which detects the presence of alcohol vapors in the surroundings by changing resistance. As the concentration of alcohol rises in the air, the conductivity of the sensor becomes higher. This change in conductivity is converted to an output value that indicates the concentration of alcohol. This sensor is very popular and widely used because of its high sensitivity that can be changed via a potentiometer attached to the module and fast response time.
It works on 5V and takes around 800mW to operate. When this sensor comes in contact with alcohol vapours, its resistance is changed as per the concentration of alcohol. This means that when alcohol concentration is high then its resistance would be low and when alcohol concentration is low then its resistance would be high.
MQ3 Alcohol Sensor Module Overview
MQ3 alcohol sensor module features both analog output fetched from its AO pin and digital output fetched from its DO pin. The analog output voltage lies between 0-5V where the output voltage increases relatively with the concentration of alcohol vapours coming in contact with the sensor. Whereas the digital output voltage (0/1) is obtained after passing the analog output from LM393 comparator situated at the backside of the sensor module. The in built potentiometer is manually calibrated to change the sensitivity of the digital output and set a threshold value. This is done with the help of the DOUT LED. When the concentration of alcohol vapours will be greater than the threshold value set, the digital output will be LOW. This will be easily monitored when the DOUT LED lights up. Additionally, rotating the potentiometer clockwise results in a higher sensitivity.
The MQ3 alcohol sensor module’s front side consists of the sensor enclosed in an anti-exposing network and a plastic case. This is to protect the sensor as it gets heated up over time and will eventually come in contact with alcohol vapours that are flammable.
The backside of the module consists of two LEDs: DOUT LED (lights when DO is LOW) and the power LED (lights when the module is powered on), an LM393 comparator, and a potentiometer.

Specifications
The table below shows some key specifications of the MQ3 sensor module:
| Operating Voltage | 4.9-5.1V |
| Detecting Concentration | 0.05-10mg/L |
| Current Consumption | 150mA |
| DO Output | TTL digital 0 and 1 |
| AO Output | 0.1-0.3V |
| Load Resistance | 200kΩ |
| Heater Resistance | 33Ω |
| Heater Consumption | less than 750mW |
| Operating Temperature | -10 to 50°C |
Pinout

The MQ3 sensor module consists of four pins namely VCC, GND, AOUT, and DOUT. The table below gives a brief description of them.
| Pin | Description |
|---|---|
| VCC | Positive power supply pin that powers up the sensor module. |
| GND | Reference potential pin. |
| AOUT | Analog output pin. It generates a signal proportional to the concentration of alcohol vapors coming in contact with the sensor. |
| DOUT | Digital Output pin. It also produces a digital signal whose limit can be set using the in-built potentiometer. |
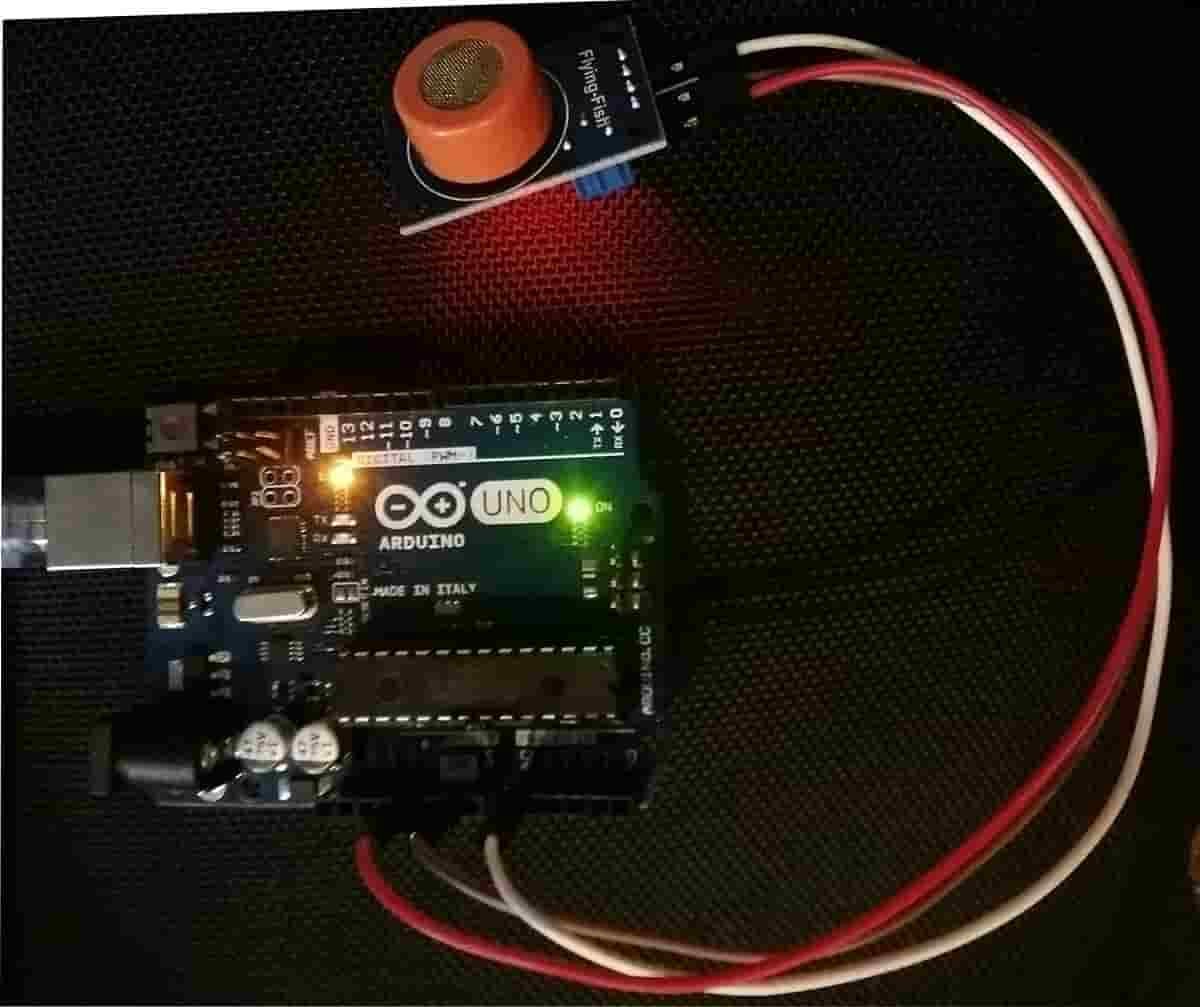
Interfacing MQ3 Alcohol Sensor with Arduino
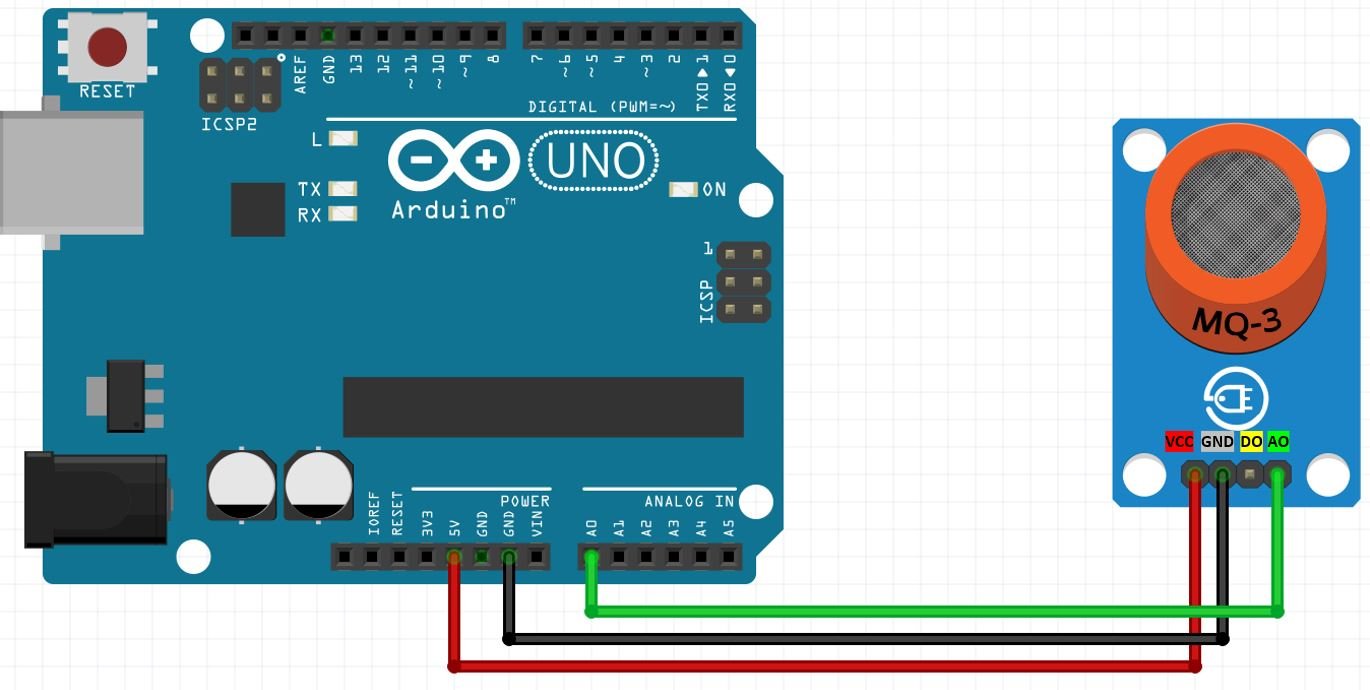
First, we will learn how to use the analog output pin of the MQ3 sensor module to calibrate our sensor properly. The table below shows the connections you need to make between the MQ3 sensor module and Arduino.
| MQ3 Module | Arduino |
|---|---|
| VCC | 5V |
| GND | GND |
| AOUT | A0 |
| DOUT | Not connected |
As you can know that MQ3 module requires an operating voltage of 5V hence we will connect its VCC pin with 5V terminal of Arduino UNO. This will power up the sensor.
Additionally, we will connect the analog pin with the A0 of the Arduino UNO. As we are using the analog output, in this case, DOUT will be left as it is. Both the devices will be commonly grounded.
Follow the connection diagram below, to connect your devices accordingly.
Arduino Sketch to Calibrate MQ3 Sensor
Open your Arduino IDE and go to File > New. Copy the code below in that file. This sketch will help us calibrate our sensor to set a threshold value for detecting alcohol vapours.
#define analog_pin 0
float sensor_value;

void setup() {
  Serial.begin(115200);
  Serial.println("MQ3 is warming up");
  delay(120000);  //2 min warm up time
}

void loop() {
  sensor_value = analogRead(analog_pin);
  Serial.print("Sensor Value: ");
  Serial.println(sensor_value);
  delay(2000);
}
How the Code Works?
Firstly, we will define the AOUT pin connection with Arduino UNO. We have used A0 in this case.
#define analog_pin 0Secondly, we will define a floating variable called ‘sensor_value’ that will save the current analog voltage value.
float sensor_value; Inside the setup() function, we will open the serial communication at a baud rate of 115200. Additionally, we will add a delay of 2 minutes before proceeding further. This will heat up the sensor to the required temperature for operation.
Note: MQ3 has a preheating time of 24 hours which should be provided before using it to get more accurate values.
void setup() {
  Serial.begin(115200);
  Serial.println("MQ3 is warming up");
  delay(120000);  //2 min warm up time
}
In the infinite loop() we will use analogRead() on the A0 pin and save the value in ‘sensor_value.’ This will be displayed in the serial monitor after every 2 seconds
void loop() {
  sensor_value = analogRead(analog_pin);
  Serial.print("Sensor Value: ");
  Serial.println(sensor_value);
  delay(2000);
}
Demonstration
To see the demonstration of the above code, upload the code to Arduino. But, before uploading code, make sure to select the Arduino board from Tools > Board and also select the correct COM port to which the Arduino board is connected from Tools > Port.

Once the code is uploaded to Arduino, open the serial monitor and set the baud rate to 115200. After 2 minutes, the serial monitor will start displaying values. Bring the sensor closer to isopropyl alcohol/ sanitizer/ perfume vapours. The readings will start start increasing. Note down the value where the readings stabilize. This will be our threshold value.

Note: In our case, as we did not have access to higher concentration of alcohol thus the threshold reading we obtained was lesser than the actual values you will get. If there is no alcohol you will get readings closer to 100. If there is alcohol then you will get values closer to 500. These are approximate values.
Now we will proceed further and build an alcohol drunk test for driving purposes using the threshold value we obtained in the above sketch.
Alcohol Detection Arduino Sketch
Open your Arduino IDE and go to File > New. Copy the code below in that file.
#define analog_pin 0
float sensor_value;  //variable to store sensor value

#define notDrunk 10   // Define max value that we consider not Drunk
#define Drunk 44   // Define min value that we consider drunk

void setup() {
  Serial.begin(115200);
  Serial.println("MQ3 warming up!");
  delay(120000);
}

void loop() {
  sensor_value = analogRead(analog_pin);

  Serial.print("Sensor Value: ");
  Serial.print(sensor_value);

  if (sensor_value < notDrunk) {
    Serial.println("  |  Status: Not Drunk");
  } else if (sensor_value >= notDrunk && sensor_value < Drunk) {
    Serial.println("  |  Status: Drinking but within legal limits");
  } else {
    Serial.println("  |  Status: DRUNK");
  }

  delay(2000);
}
This sketch will help us create an alcohol drunk test for driving purposes using the threshold value we obtained in the above sketch.
We have set the maximum not drunk value to 10 and minimum drunk value to 44. Make sure to use your own threshold value as ours are not exact. Your values will be approximately: Less than 100 for not drunk, between 100-400 for within legal range and greater than 400 will be drunk.
Demonstration
To see the demonstration of the above code, upload the code to Arduino. But, before uploading code, make sure to select the Arduino board from Tools > Board and also select the correct COM port to which the Arduino board is connected from Tools > Port.
Once the code is uploaded to Arduino, open the serial monitor and bring the sensor closer to alcohol vapours. Instantly, the serial monitor will display the associated messages according to the concentration of alcohol.

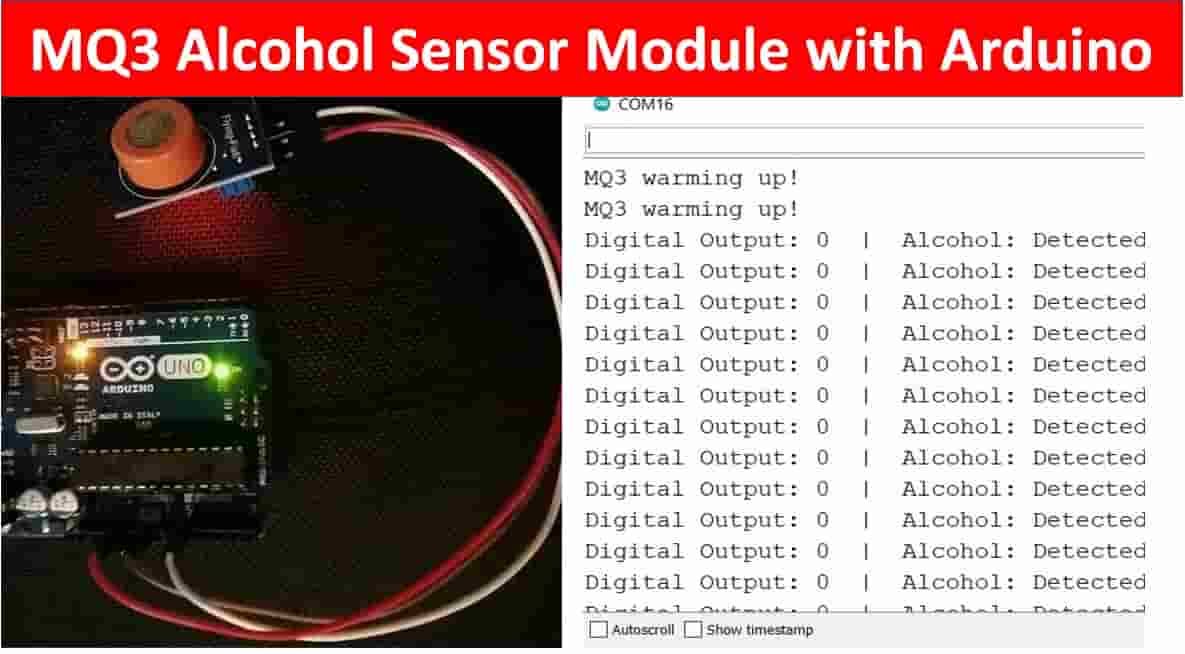
Monitoring Alcohol using Digital Output of MQ3 Sensor Module
Next, we will learn how to use the digital output pin of the MQ3 sensor module with the potentiometer to calibrate our sensor properly. The table below shows the connections you need to make between the MQ3 sensor module and Arduino.
| MQ3 Module | Arduino |
|---|---|
| VCC | 5V |
| GND | GND |
| AOUT | Not connected |
| DOUT | Pin 7 |
As you can know that MQ3 module requires an operating voltage of 5V hence we will connect its VCC pin with 5V terminal of Arduino UNO. This will power up the sensor.
Additionally, we will connect the DOUT with a digital pin of the Arduino UNO. We are using Pin 7 in this case. As we are using the digital output, AOUT will be left as it is. Both the devices will be commonly grounded.
Follow the connection diagram below, to connect your devices accordingly.

Calibrating the module for digital output
Keep the module in the presence of alcohol vapours. Now rotate the in-built potentiometer clockwise till the DOUT LED turns ON. Then rotate the potentiometer in the other direction until the DOUT LED turns OFF. This will set up the threshold value. When the alcohol concentration is higher than the threshold then the output will be HIGH and DOUT LED will be OFF. Likewise, when the alcohol concentration will be lower than the threshold then the output will be LOW and DOUT LED will be ON.
Arduino Sketch Detecting Alcohol
Open your Arduino IDE and go to File > New. Copy the code below in that file. This sketch will help us detect alcohol vapours in the surrounding using the digital output of the sensor module.
#define sensor_pin 7
int sensor_value;

void setup() {
  Serial.begin(115200);
  Serial.println("MQ3 warming up!");
  delay(120000);
}

void loop() {
  sensor_value = digitalRead(sensor_pin);
  Serial.print("Digital Output: ");
  Serial.print(sensor_value);

  if (sensor_value) {
    Serial.println("  |  Alcohol: Not Detected");
  } else {
    Serial.println("  |  Alcohol: Detected!");
  }

  delay(2000);
}
How the Code Works?
Firstly, we will define the DOUT pin connection with Arduino UNO. We have used Pin 7 in this case.
#define sensor_pin 7Secondly, we will define an int variable called ‘sensor_value’ that will save the current digital voltage value.
int sensor_value; Inside the setup() function, we will open the serial communication at a baud rate of 115200. Additionally, we will add a delay of 2 minutes before proceeding further. This will heat up the sensor to the required temperature for operation.
Note: MQ3 has a preheating time of 24 hours which should be provided before using it to get more accurate values.
void setup() {
  Serial.begin(115200);
  Serial.println("MQ3 warming up!");
  delay(120000);
}
In the infinite loop(), we will use digitalRead() on pin 7 and save the value in ‘sensor_value.’ This will be displayed in the serial monitor after every 2 seconds
sensor_value = digitalRead(sensor_pin);
  Serial.print("Digital Output: ");
  Serial.print(sensor_value);
Additionally, to detect alcohol presence in the surroundings, the following lines of code will be used.
if (sensor_value) {
    Serial.println("  |  Alcohol: Not Detected");
  } else {
    Serial.println("  |  Alcohol: Detected!");
  }

  delay(2000);
Demonstration
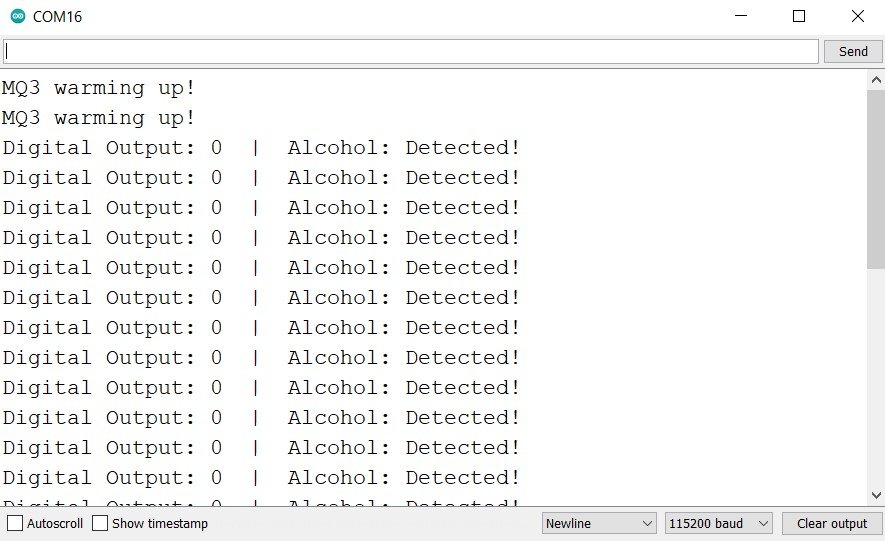
To see the demonstration of the above code, upload the code to Arduino. But, before uploading code, make sure to select the Arduino board from Tools > Board and also select the correct COM port to which the Arduino board is connected from Tools > Port.
Once the code is uploaded to Arduino, open the serial monitor and set the baud rate to 115200. Bring the sensor closer to isopropyl alcohol/ sanitizer/ perfume vapours. After 2 minutes, the serial monitor will start detecting the presence of alcohol vapours.
Conclusion
In conclusion, we have learned to interface MQ3 alcohol sensor with Arduino using both the analog and digital output pins of an MQ3 sensor. Moreover, we also learned how to calibrate the alcohol sensor module using both scenarios (AOUT/ DOUT pins).
For more articles related to MQ sensors follow the links given below:
I am interested in Alcohol testing. Have a breathilizer.