In this tutorial, we will show you how to subscribe to ROS topics using Arduino rosserial. We will see how to set up a ROS node on Arduino that we will receive data on a specific topic from ROS. In a previous tutorial, we introduced you to ROS and how to set it up with Arduino IDE and integrate them together. We demonstrated the basic rosserial publisher sketch in that guide. This time we will move ahead and create a subscriber using the Blink example sketch provided by the Rosserial Arduino Library.
Before we move ahead, make sure you have Arduino IDE and ROS installed on your machine. Moreover, the rosserial package should be installed on your machine as well. You can refer to our previous guide before moving further.
Recommended Components
The following components are used in this project or are helpful for building it with the Arduino.
| Component | How it’s used in this project | Buy on Amazon |
|---|---|---|
| Arduino Uno R3 | Acts as the ROS subscriber node that toggles its onboard LED on messages from ROS. | Check Price |
| Breadboard | Useful for prototyping any external LED or circuitry you add to extend the example. | Check Price |
| Jumper Wires | Connect any external components to the Arduino while testing the subscriber node. | Check Price |
As an Amazon Associate we earn from qualifying purchases. Prices and availability are accurate as of the date/time indicated and are subject to change.
ROS Subscriber Node Introduction
In ROS, a subscriber node is a node that receives data published to a topic by a publisher node. The subscriber node subscribes to a specific topic and listens for messages that are published on that topic. When a message is received, the subscriber node processes the message and performs some action based on the data contained in the message.
Subscriber nodes are a key component of ROS systems, as they allow nodes to communicate and exchange data with each other. They are typically used in conjunction with publisher nodes, which publish data to topics that the subscriber nodes are subscribed to.
In this tutorial, Arduino will act as a subscriber node and ROS running on Ubuntu will act as a publisher node.
Setup Arduino IDE for ROS Subscriber
Open your Arduino IDE in Linux, and go to Sketch > Manage Library > Include Library. This opens the Arduino Library Manager.
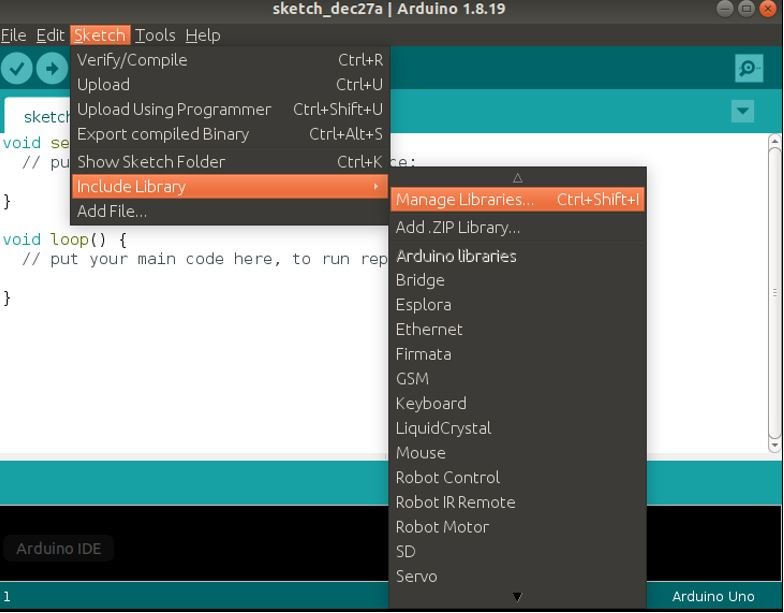
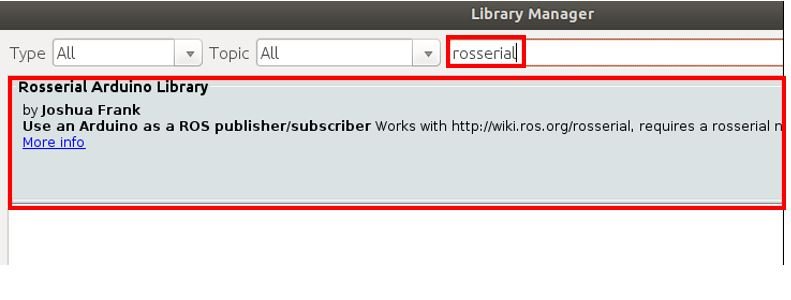
We will install the ros_lib package in Arduino IDE using the library manager. Type ‘rosserial’ in the search bar and press enter.
Install the latest version of the Rosserial Arduino Library by Joshua Frank.
Rosserial ROS Subscriber Node Arduino Example
Let us demonstrate how to create a subscriber using rosserial. As an example, we will use the rosserial subscriber example which blinks an LED on callback.
Go to Files > Examples > Rosserial Arduino Library > Blink. To blink the LED, an std_msgs/Empty message is sent on the toggle_led topic.
This opens the Blink example sketch for Rosserial Arduino Library. In this example, Arduino subscribes to the ‘toggle_led’ topic. An std_msgs/Empty message is published to that topic which toggles the state of the LED.
/*
     * rosserial Subscriber Example
     * Blinks an LED on callback
     */

    #include <ros.h>
    #include <std_msgs/Empty.h>

    ros::NodeHandle nh;

   void messageCb( const std_msgs::Empty& toggle_msg){
    digitalWrite(13, HIGH-digitalRead(13));   // blink the led
   }

   ros::Subscriber<std_msgs::Empty> sub("toggle_led", &messageCb );

   void setup()
   {
     pinMode(13, OUTPUT);
     nh.initNode();
     nh.subscribe(sub);
   }

   void loop()
   {
     nh.spinOnce();
     delay(1);
   }
Working of the Code
The code starts by including the necessary libraries required for this which includes ros.h for ROS and std_msgs/Empty.h for messages.
  #include <ros.h>
  #include <std_msgs/Empty.h>
Then the instance of the NodeHandle is created called ‘nh.’ This will be used later on to create the subscriber and initialize it.
ros::NodeHandle nh;Next, there is messageCb() which is the callback function for the ROS subscriber. It takes in a single parameter which is the constant reference of the message. In this case, std_msgs::Empty is the message type and ‘toggle_msg’ is the message name. Whenever, a message is received, the callback function is called, and the state of GPIO13 is read through digitalRead(13). If the current state of GPIO13 is HIGH then it will be set to LOW and if the current state is LOW then it will be set to HIGH. Note that GPIO13 is connected to the onboard LED of Arduino UNO. Hence, the LED will be toggled.
   void messageCb( const std_msgs::Empty& toggle_msg){
    digitalWrite(13, HIGH-digitalRead(13));   // blink the led
   }
Next, we create an instance of the Subscriber sub() which takes in two parameters. The first parameter is the name of the topic which is “toggle_led” and the second parameter is the callback function. Note that the topic name is “toggle_led” and the type is “std_msgs::Empty.”
ros::Subscriber<std_msgs::Empty> sub("toggle_led", &messageCb );Inside the setup() function, GPIO13 is configured as an output pin, ROS node is initialized and the topic subscription is done.
   void setup()
   {
     pinMode(13, OUTPUT);
     nh.initNode();
     nh.subscribe(sub);
   }
Inside the loop() function, the spinOnce() method ensures that the ROS serial communication is handled appropriately. It will also make sure that messages are sent to the callback function.
   void loop()
   {
     nh.spinOnce();
     delay(1);
   }
Upload Code to Arduino UNO
Plug your Arduino board into the USB port on your computer. Now head over to Tools > Board and select Arduino UNO and Tools > Port and select the Port through which your Arduino is connected. In our case, it is /dev/ttyACM0
Now click the upload button to upload the code to Arduino board.
In order to successfully upload this sketch to your board, we will have to modify the msg.h file. Head over to Arduino > libraries > Rosserial_Arduino_Library > src > ros > msg.h and open it. Change #include <cstring> to #include <string.h> (line 40) and std::memcpy() to memcpy() (lines 68 and 182)
You can get the following error message while uploading the code.
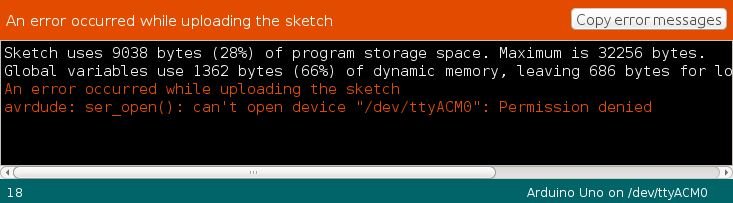
If this happens, open a terminal and type the following command and press enter. This will identify the port and list it in the system.
sudo chmod a+rw /dev/ttyACM0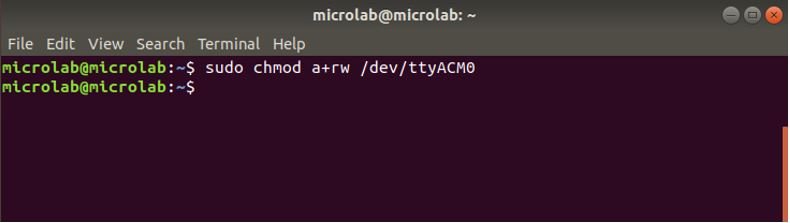
Now upload the code to Arduino again and it will be successfully uploaded.
ROS Subscriber Node on Arduino Demo
After the code is successfully uploaded, open a new terminal. Type the following commands and press enter:

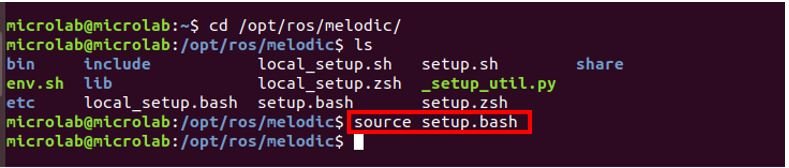
This shows that ROS Melodic is installed on our machine. Now to run any ros commands we have to set up the ROS environment first. We have to source setup.bash script. Hence type the following command and press enter:
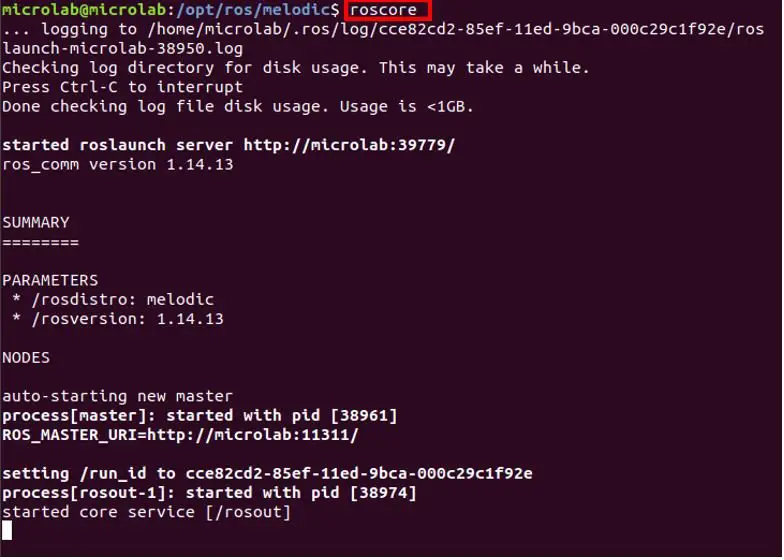
Now to launch the ROS Master, type roscore in the terminal and press enter. It gives the following output as shown below:
Now open a new terminal to launch the ROS serial server. Type the following command in the terminal and press enter. This will ensure the integration between ROS and Arduino. Make sure to enter the correct port through which your Arduino is connected.
rosrun rosserial_python serial_node.py /dev/ttyACM0This is the output that we get. Note that it connects to the serial port, requests the topics and setups the subscriber on toggle_led topic.

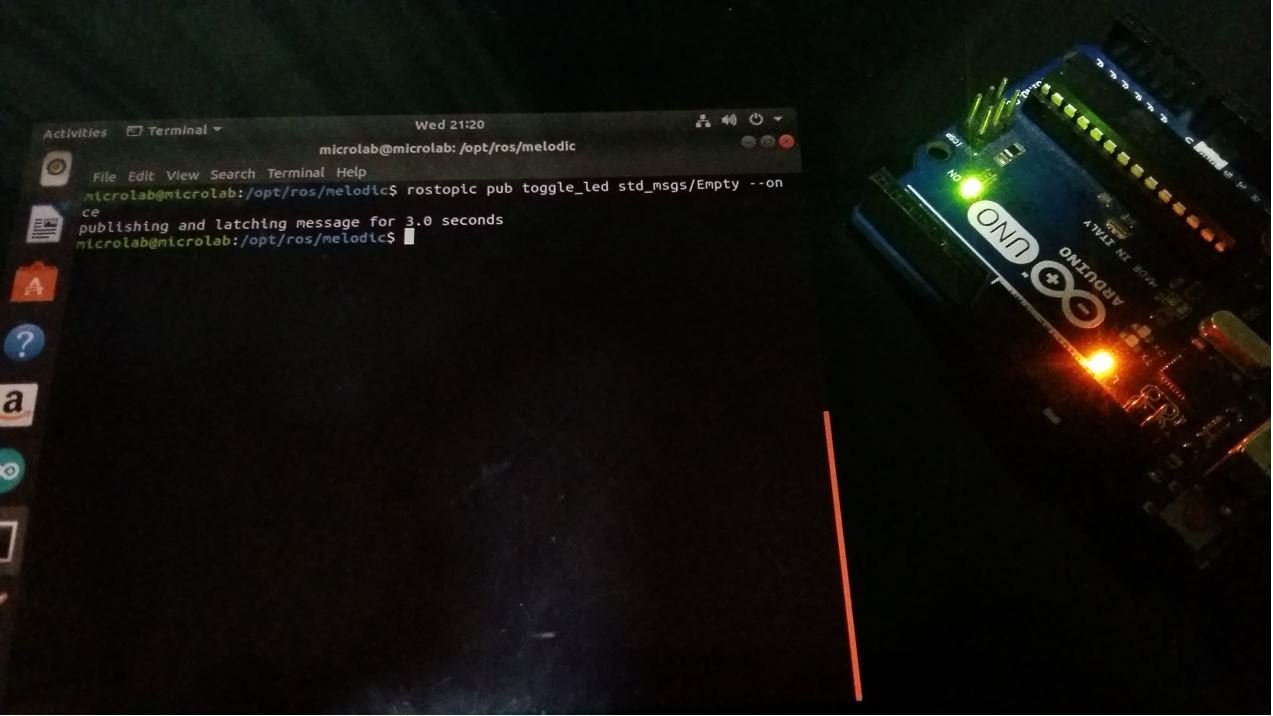
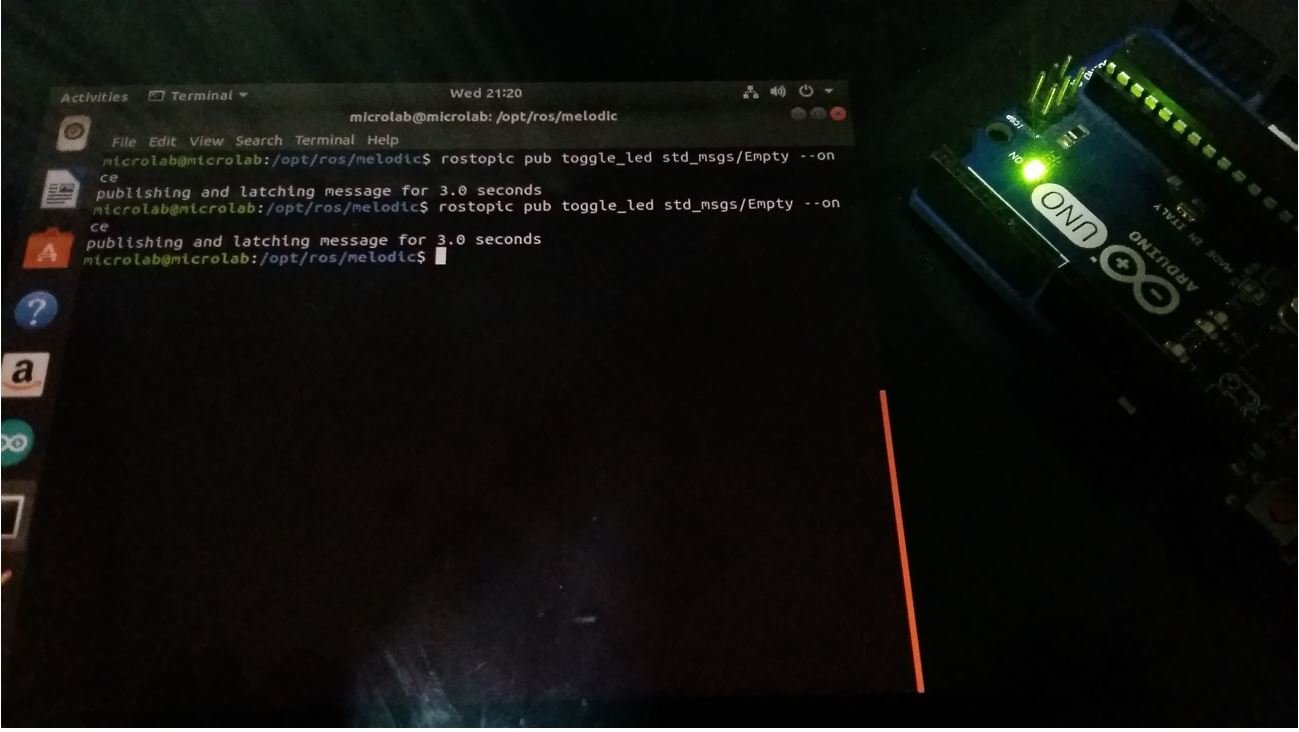
To blink the LED, open a new terminal and navigate to the ROS melodic folder. Then source the setup.bash and type the following command to publish an std_msgs/Empty message to the toggle_led topic.
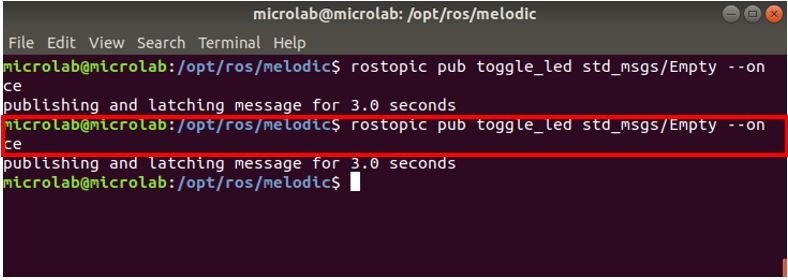
rostopic pub toggle_led std_msgs/Empty --once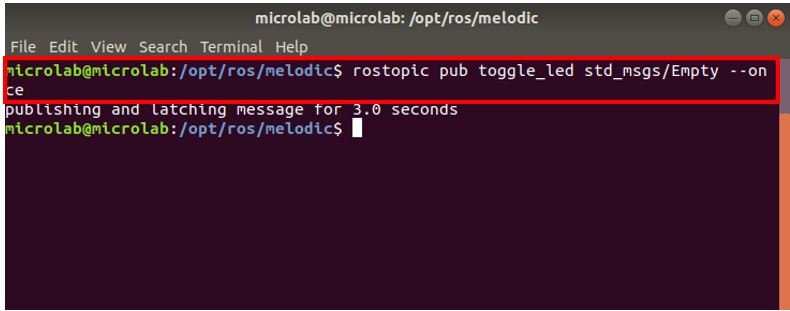
The onboard LED of Arduino UNO will turn ON. Send the empty message again and the LED will turn OFF. Therefore, we are able to toggle the LED by publishing a message to the toggle_led topic.
You can also use the following Python code to publish messages on the toggle_led topic from Ubuntu
# Import the ROS libraries and the message type we will be using
import rospy
from std_msgs.msg import Empty

# Initialize the node and create a publisher
rospy.init_node('publisher_node')
pub = rospy.Publisher('toggle_led', Empty, queue_size=10)

# Create a loop that publishes the message repeatedly
rate = rospy.Rate(1)  # 1 Hz
while not rospy.is_shutdown():
  # Construct and publish the message
  msg = Empty()
  pub.publish(msg)
  rate.sleep()
In the above Python example code, the ROS publisher node constructs an Empty message and publishes it to the toggle_led topic using the pub.publish() method. The Empty message type is used because the rostopic command you provided specifies that the message should not contain any data (i.e., it is empty).
The publisher node runs in a loop and publishes the message at a rate of 1 Hz (once per second). You can adjust the rate by changing the value passed to the rospy.Rate() constructor