In this user guide, we will learn how to log sensor readings acquired from BME280 sensor to a microSD card using Arduino and Arduino IDE. We will create a .txt file in our microSD card through programming our Arduino board and consequently log current temperature(°C), pressure(hPa), altitude(m) and humidity(%) readings to that file after every 20 seconds. Any preferred sensor, such as DS18B20, BME680, and MPPU6050, can be used but for this article, we will use a BME280 sensor which will be used to measure temperature, pressure, altitude and humidity. The sensor readings will be accessed from the BME280 sensor connected with the Arduino UNO. These readings will get saved on the microSD card after every few seconds.
Users can use this tutorial, to learn how to acquire data from the BME280 sensor and store it in a microSD card using Arduino.
For a getting started guide to microSD card with Arduino, read the article: Micro SD Card Interfacing with Arduino using MicroSD Module
This article is divided into these sections:
- Introduction to BME280 sensor and its connection with the Arduino UNO and the microSD card module
- Formatting the microSD card
- Setting up Arduino IDE for BME280 data logging to microSD card (Installing libraries, Arduino sketch and demonstration)
Recommended Components
The following components are used in this project or are helpful for building it with the Arduino.
| Component | How it’s used in this project | Buy on Amazon |
|---|---|---|
| Arduino Uno R3 | The main microcontroller board that runs the sketch and reads the sensors/modules in this project. | Check Price |
| Breadboard | Lets you wire the components to the Arduino without soldering for quick prototyping. | Check Price |
| Jumper Wires | Connect the Arduino pins to the module and other parts on the breadboard. | Check Price |
| BME280 sensor | Measures temperature, pressure, humidity and altitude that get logged to the card. | Check Price |
| MicroSD card module (SPI) | Stores the logged BME280 readings to a file over SPI. | Check Price |
| MicroSD card | The card the data log file is written to. | Check Price |
As an Amazon Associate we earn from qualifying purchases. Prices and availability are accurate as of the date/time indicated and are subject to change.
BME280 Introduction
The BME280 sensor is used to measure readings regarding ambient temperature, barometric pressure, and relative humidity. It is mostly used in web and mobile applications where low power consumption is key. This sensor uses I2C or SPI to communicate data with the micro-controllers. Although there are several different versions of BME280 available in the market, the one we will be studying uses the I2C communication protocol.
I2C means Inter-Integrated Circuit and works on the principle of the synchronous, multi-master multi-slave system. With BME280, the Arduino acts as a master, and the BME280 sensor as a slave because it is an external device, acts as a slave. The Arduino communicates with the BME280 sensor through the I2C protocol to get temperature, barometric pressure, and relative humidity and altitude.
Connecting BME280 with Arduino UNO and microSD card
The connection of BME280 with the ESP boards is very easy. We should connect the VCC terminal of BME280 with 3.3V of Arduino, ground with the ground (common ground), SCL of the sensor with SCL pin (A5) of Arduino, and SDA of the sensor with the SDA pin (A4) of the Arduino.
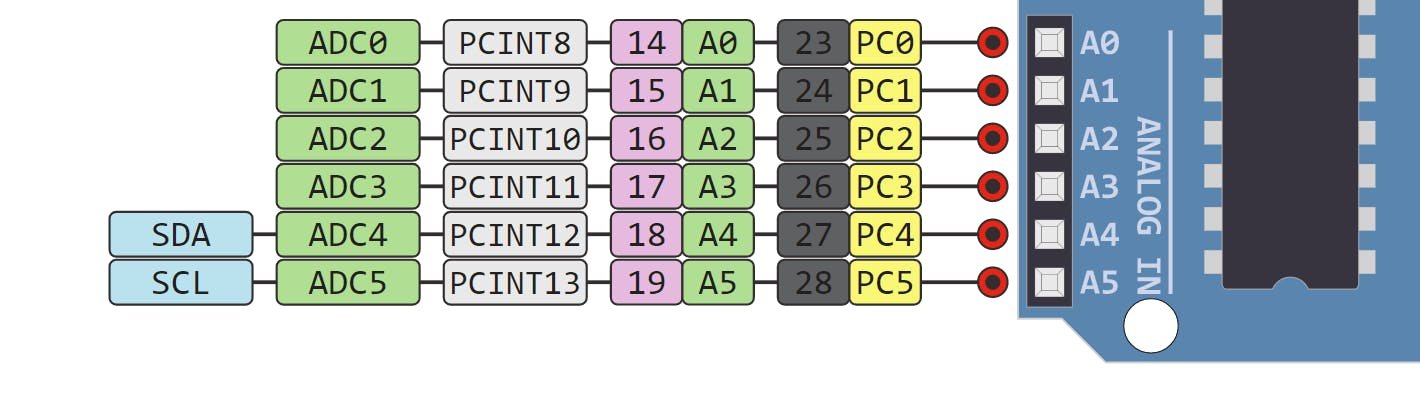
Arduino I2C Pins
The I2C pins stated above are set in default. If we want to change the GPIO pins we have to set them in code. The diagrams below show the I2C pins of Arduino marked with different colour rectangles.
You can learn more about Arduino I2C communication here:
I2C Communication Between Two Arduino Boards
The default I2C pin in Arduino for SDA is A4 and for SCL is A5. The connections between the two devices can be seen in the table below.
| BME280 | Arduino UNO |
| Vin | 3.3V |
| SDA | A4 |
| SCL | A5 |
| GND | GND |
Additionally, we will connect the VCC terminal of microSD card module with 5V of Arduino UNO. Both grounds will be common. The default SPI GPIO pins of Arduino UNO are being used to connect with each of the remaining SPI terminals of the microSD card module. The figure below shows the default SPI pins of Arduino Uno.
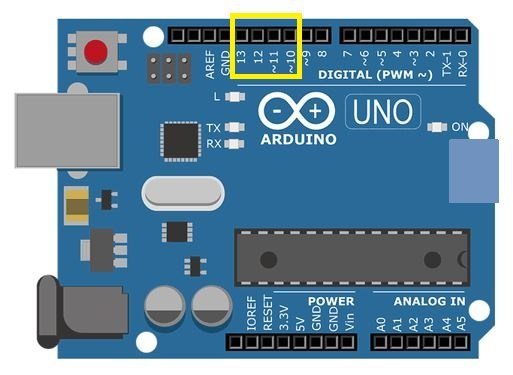
The table below shows the connections between Arduino UNO and the microSD card module:
| Arduino UNO | MicroSD card Module |
| GND | GND |
| 5V | VCC |
| GPIO10 | CS |
| GPIO11 | MOSI |
| GPIO13 | SCK |
| GPIO12 | MISO |
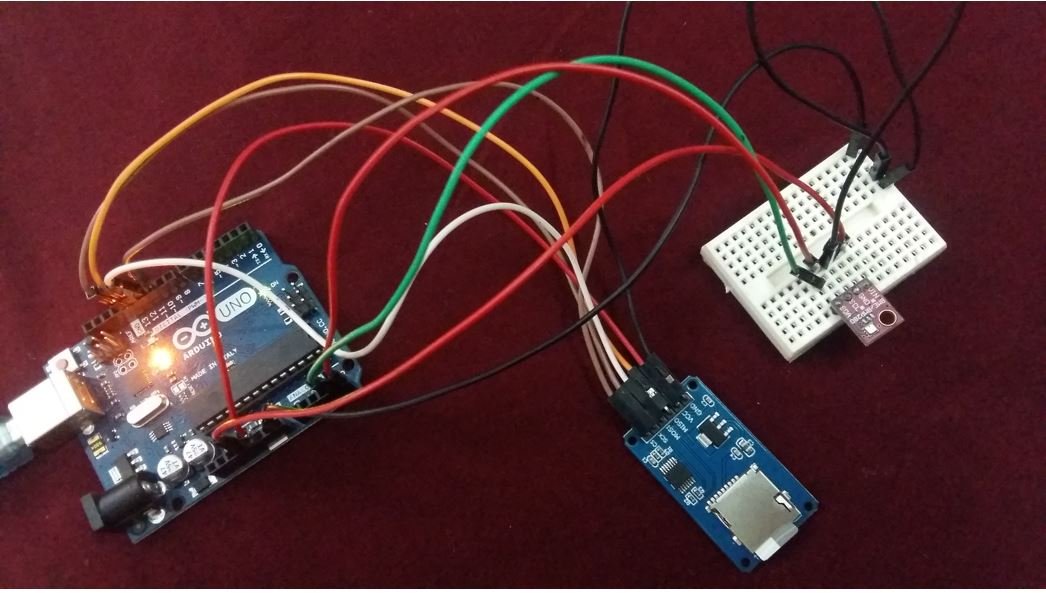
Now follow the connections between the three devices and connect them accordingly. We have used the same connections as specified above. All devices will have their grounds in common.
Schematic
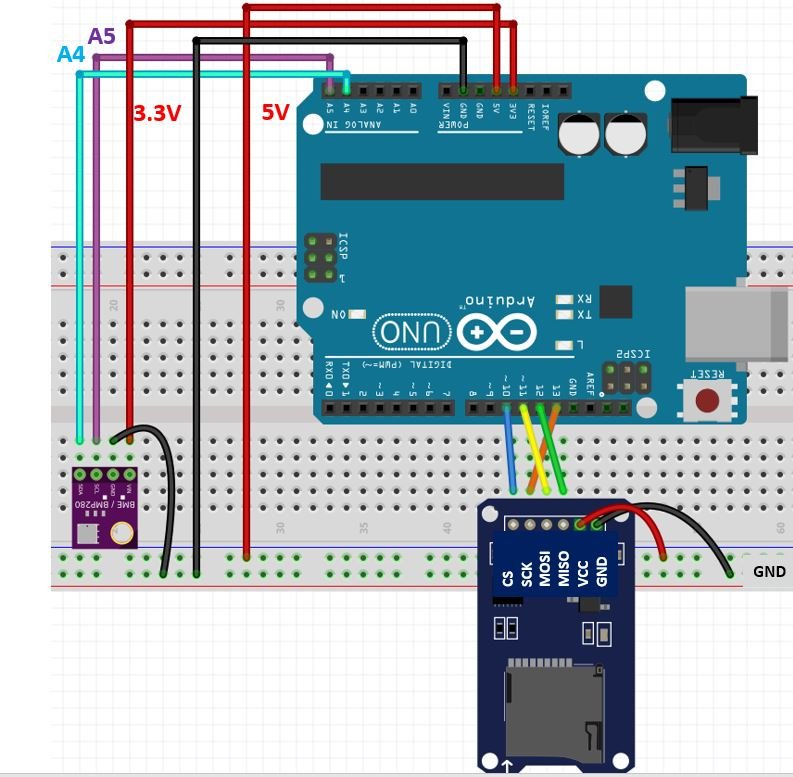
In some BME280 sensors, the SCK terminal means the SCL pin and is connected with its respective pin on the Arduino board. Likewise, the SDI terminal means the SDA pin and is connected with its respective pin on the board. Vin is connected with a 3.3V pin from the board and the rest of the I2C pins are connected with the default I2C pins of the Arduino UNO. Likewise, the microSD card is powered by 5V from the board and its SPI pins are connected with the default SPI pins of the Arduino UNO. All three devices have their grounds in common.
Now, as we know how to interface the microSD card module, BME280 sensor and the Arduino Uno together let us learn how to prepare the microSD card for file handling in Arduino IDE.
Formatting the MicroSD card
As we have to use our microSD card in Arduino IDE so we would have to format it as FAT32. We will have to follow a series of steps to accomplish it successfully.
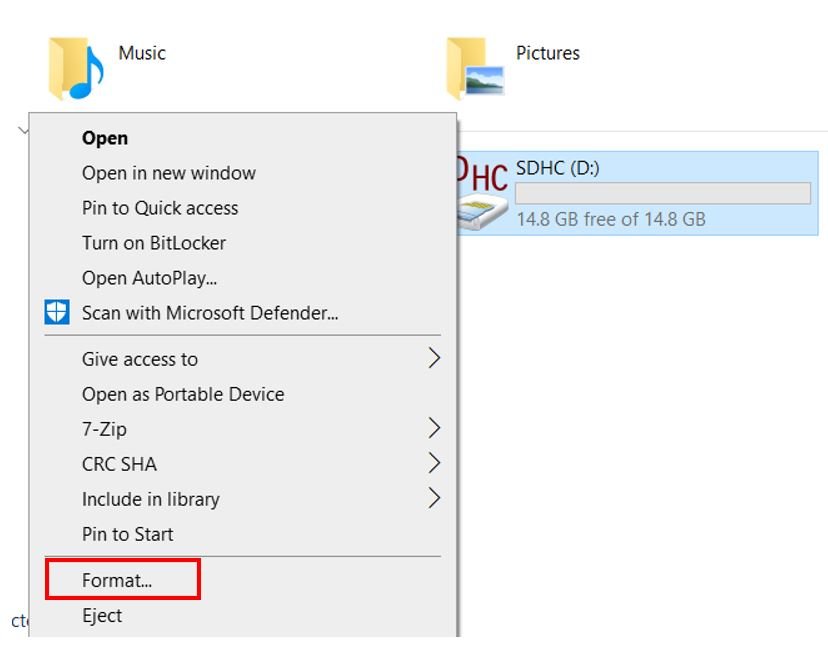
- First, insert your microSD card in your laptop/computer. Now go to ‘This PC’ and click on SD card icon. Then click on Format by right clicking the SD card icon.
- The following window will appear. Select FAT32 from the dialog box of ‘File System’ and click on ‘START.’

- You will receive a warning message that formatting will erase all previous data saved on the microSD card. Click ‘OK.’

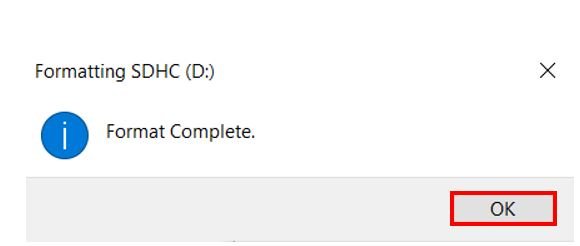
- After a few moments, your microSD card will be formatted successfully. Click ‘OK.’
Setting up Arduino IDE for BME280 Data Logger
We will use Arduino IDE to program our Arduino UNO. To program our Arduino UNO with BME280 we will require two libraries.
Installing BME280 Libraries
Open Arduino IDE and click on Sketch > Library > Manage Libraries
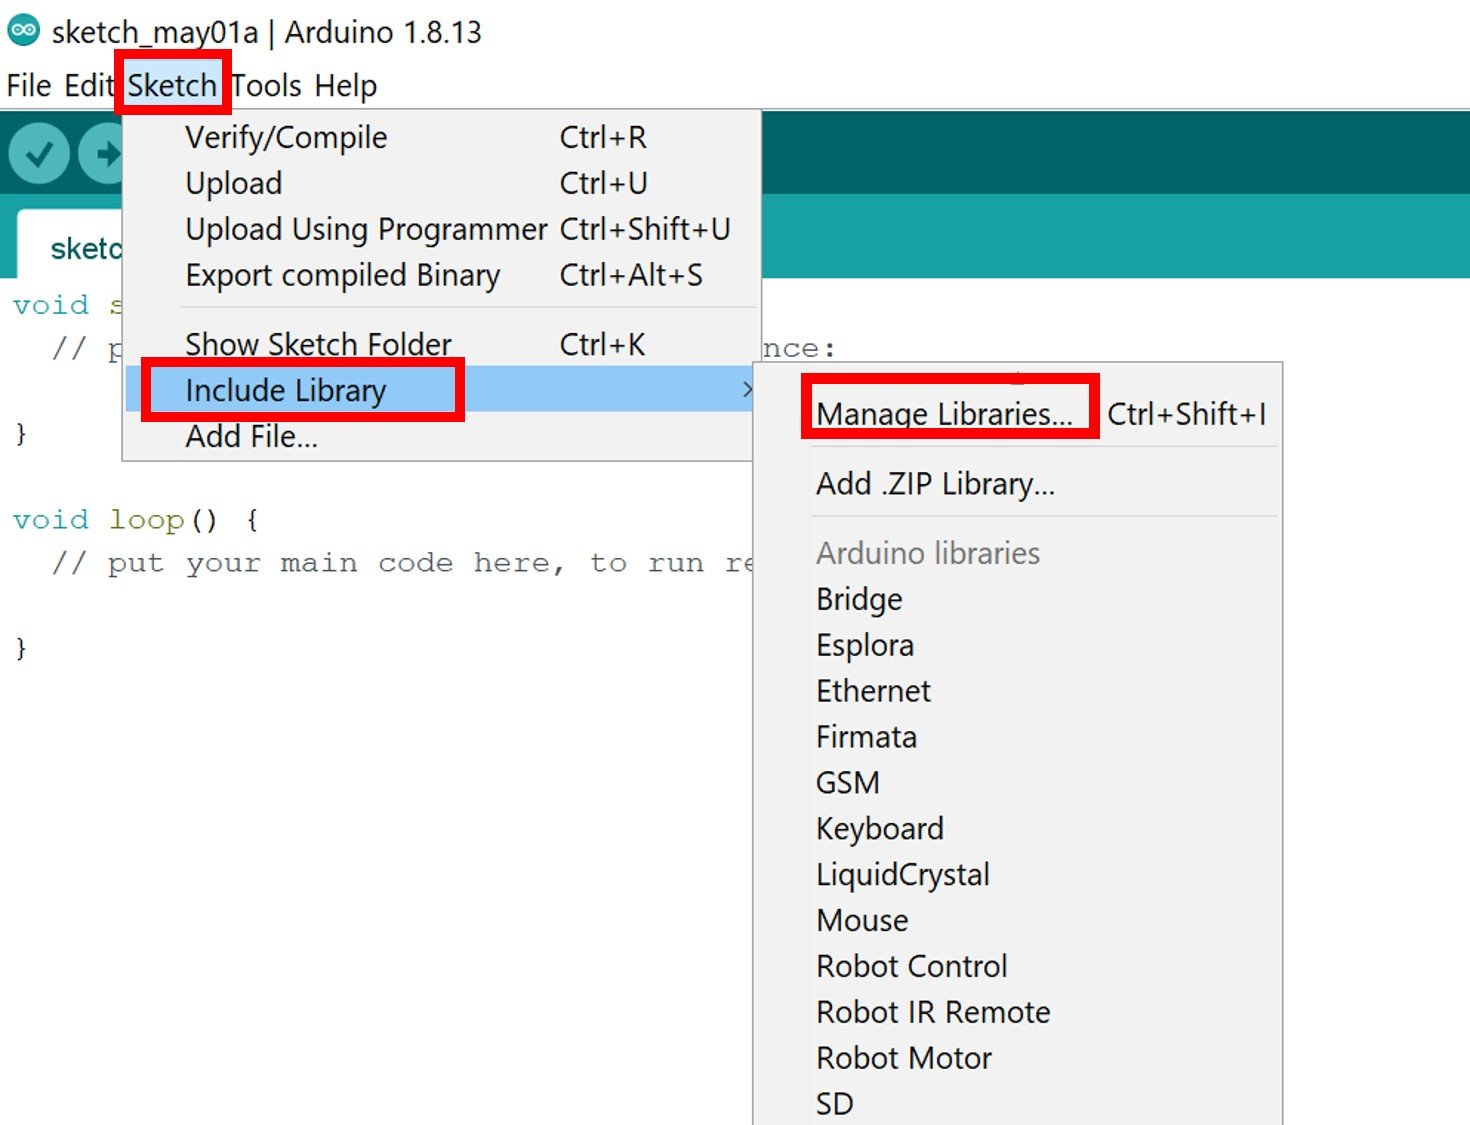
The following window will open up.

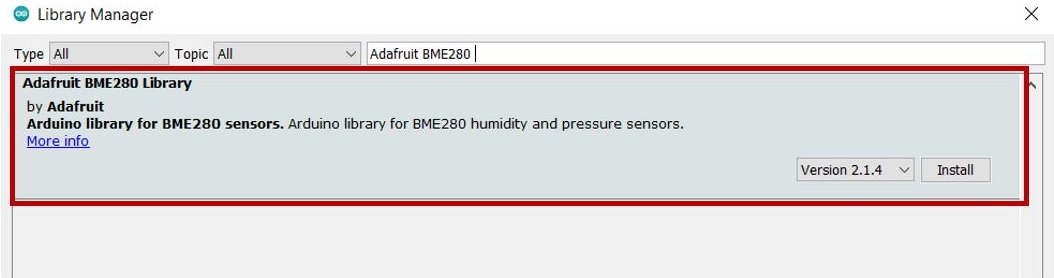
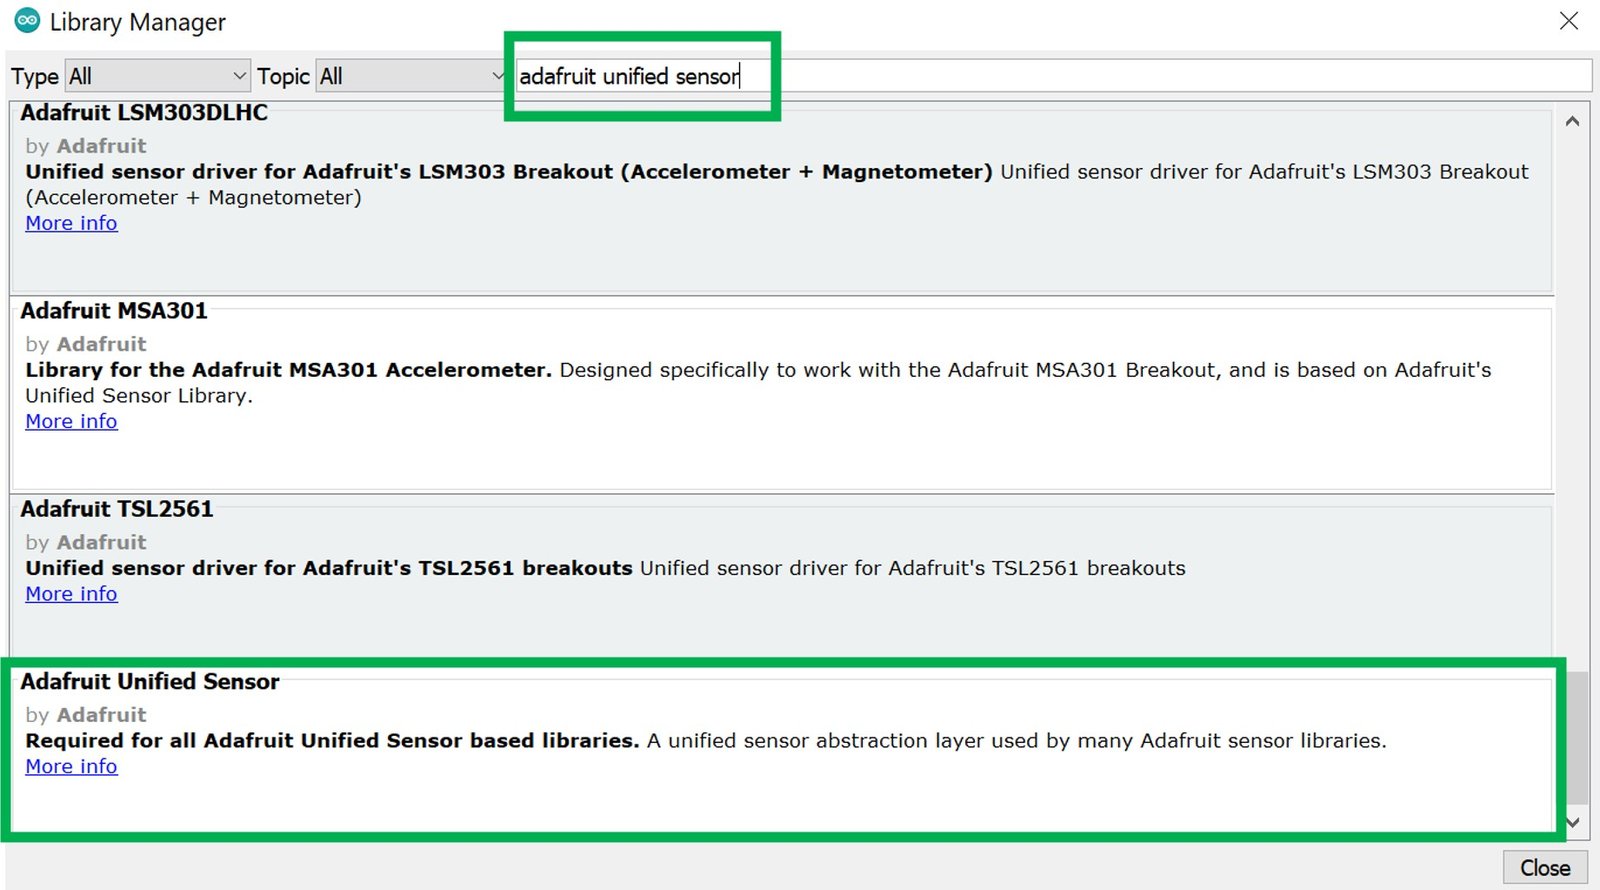
Type ‘Adafruit BME280’ library name in the search bar and install the latest version.
Next, type ‘Adafruit Unified Sensor’ library name in the search bar and install the latest version.
After installing the libraries, restart your IDE.
Arduino Sketch – BME280 Data Logger with Arduino
Open your Arduino IDE and go to File > New to open a new file. Copy the code given below in that file.
This sketch will acquire sensor data from the BME280 and save it in a .txt file on the micro SD card. The sensor data will consist of current temperature in Celsius, humidity(%), atmospheric pressure(hPa) and altitude(m). New readings will be added after every 20 seconds.
#include "SD.h"
#include <Adafruit_Sensor.h>
#include <Adafruit_BME280.h>

#define SEALEVELPRESSURE_HPA (1013.25)
Adafruit_BME280 bme;

File myFile;
String Temperature, Pressure, Altitude, Humidity, Data;

void setup() {
  Serial.begin(115200);
  delay(2000);

  bool status;
  status = bme.begin(0x76);
  if (!status) {
    Serial.println("BME280 not connected properly. Check circuit!");
    while (1);
  }
  Serial.print("Initializing SD card...");
  if (!SD.begin(10)) {
    Serial.println("initialization failed!");
    while (1);
  }
  Serial.println("initialization done.");
  myFile = SD.open("data.txt", FILE_WRITE);
  if (myFile) {
    myFile.println( "Temperature(°C), Pressure(hPa), Altitude(m), Humidity(%) \r\n");
    myFile.close();
  }
  else {
    Serial.println("error opening data.txt");
  }
}


void loop() {
  data_logging();
  delay(20000);
}

void data_logging() {
  String Temperature = String(bme.readTemperature(), 2);
  String Pressure = String(bme.readPressure()/ 100.0F, 2);
  String Altitude = String(bme.readAltitude(SEALEVELPRESSURE_HPA), 2);
  String Humidity = String(bme.readHumidity(), 2);

  Data = Temperature + "," + Pressure + "," + Altitude + "," + Humidity ;
  Serial.print("Save data: ");
  Serial.println(Data);

  myFile = SD.open("data.txt", FILE_WRITE);
  if (myFile) {
    Serial.print("Writing to data.txt...");
    myFile.println(Data);
    myFile.close();
    Serial.println("done.");
  } else {
    Serial.println("error opening data.txt");
  }
  Serial.println();
}
How the Code Works?
Now let us understand how each part of the code works.
Including Libraries
The first step is to include all the libraries that are necessary for this project. The SD library will be used for the microSD card functionality. The Adafruit_Sensor and the Adafruit_BME280 libraries which we installed in Arduino IDE earlier are also included as they are necessary to interface with the sensor.
#include "SD.h"
#include <Adafruit_Sensor.h>
#include <Adafruit_BME280.h>
Defining Sensor Parameters
Next, we define the SEALEVELPRESSURE_HPA by creating a variable by the set name. It takes into account the sea level pressure of your current location and compares it with a given pressure to estimate the altitude. You have to pass your sea-level pressure in hPa according to your location. The 1013.25 is the value that is set in default.
#define SEALEVELPRESSURE_HPA (1013.25)Then, we define the Adafruit_BME280 object named bme by setting it on the default I2C GPIO pins.
Adafruit_BME280 bme; Creating File Object
Secondly, we will create an object of File and name it ‘myFile.’ This is the object which we will use later to write GPS data to our .txt file in the microSD card.
File myFile;Defining Variables
Next, we will define string variables that we will use later on in the sketch to save the useful data.
String Temperature, Pressure, Altitude, Humidity, Data;setup()
Inside the setup() function, we will open a serial connection at a baud rate of 115200.
Serial.begin(115200); Then, the BME280 sensor gets initialized and in case of failure, an error message is printed on the serial monitor.
bool status;
  status = bme.begin(0x76);
  if (!status) {
    Serial.println("BME280 not connected properly. Check circuit!");
    while (1);
  }
We will then initialize the microSD card. sing the begin() function on the SD filesystem using SD.begin(). The begin() function takes in the CS Pin as an argument which we have stated as ’10.’ Thus, it will start the SPI communication using the default SPI CS pin that is GPIO10. To change the SPI CS pin you can pass the pin number as an argument inside the begin() function.
  Serial.print("Initializing SD card...");

  if (!SD.begin(10)) {
    Serial.println("initialization failed!");
    while (1);
  }
  Serial.println("initialization done.");
Next, we will open the data.txt file on the microSD card using SD.open(). If the file does not exist, it will get created.
Using the println() function on the myFile object we will write ‘Temperature(°C), Pressure(hPa), Altitude(m), Humidity(%)’ as the heading in the data.txt file. After that, we will close the file using myFile.close(). This will ensure that the data written on the file gets saved as well. If the file is unable to open the serial monitor will display an error message.
 Serial.println("initialization done.");
  myFile = SD.open("data.txt", FILE_WRITE);
  if (myFile) {
    myFile.println( "Temperature(°C), Pressure(hPa), Altitude(m), Humidity(%) \r\n");
    myFile.close();
  }
  else {
    Serial.println("error opening data.txt");
  }
loop()
Inside the loop() function, call the data_logging() function. This function will acquire the sensor readings and log them in the data.txt file in the microSD card.
void loop() {
  data_logging();
  delay(20000);
}
data_logging()
The data_logging() function will first access the temperature readings through bme.readTemperature() and convert the value to a string using the String() function. We are passing bme.readTemperature() as the first parameter and ‘2’ as the second parameter which corresponds to the number of decimal places of the temperature reading. Likewise, we will access the pressure, altitude and humidity readings similarly using the bme.readPressure()/ 100.0F, bme.readAltitude(SEALEVELPRESSURE_HPA) and bme.readHumidity() functions and converting them in string variables.
void data_logging() {
  String Temperature = String(bme.readTemperature(), 2);
  String Pressure = String(bme.readPressure()/ 100.0F, 2);
  String Altitude = String(bme.readAltitude(SEALEVELPRESSURE_HPA), 2);
  String Humidity = String(bme.readHumidity(), 2);

  Data = Temperature + "," + Pressure + "," + Altitude + "," + Humidity ;
  Serial.print("Save data: ");
  Serial.println(Data);

  myFile = SD.open("data.txt", FILE_WRITE);
  if (myFile) {
    Serial.print("Writing to data.txt...");
    myFile.println(Data);
    myFile.close();
    Serial.println("done.");
  } else {
    Serial.println("error opening data.txt");
  }
  Serial.println();
}
These readings will then get linked together and saved in a string variable named ‘Data.’ We will save the contents of this variable in our data.txt file after every 20 seconds.
Data = Temperature + "," + Pressure + "," + Altitude + "," + Humidity ;We will open our data.txt file using SD.open() and set it up in FILE_WRITE mode. Then we will use myFile.println() and pass the ‘Data’ variable inside it to be written on the .txt file. After that, we will close the file using myFile.close(). This will ensure that the data written on the file gets saved as well.
  myFile = SD.open("data.txt", FILE_WRITE);
  if (myFile) {
    Serial.print("Writing to data.txt...");
    myFile.println(Data);
    myFile.close();
    Serial.println("done.");
  } else {
    Serial.println("error opening data.txt");
  }
  Serial.println();
Demonstration
To see the demonstration of the above code, upload the code to Arduino. But, before uploading code, make sure to select the Arduino board from Tools > Board and also select the correct COM port to which the Arduino board is connected from Tools > Port.

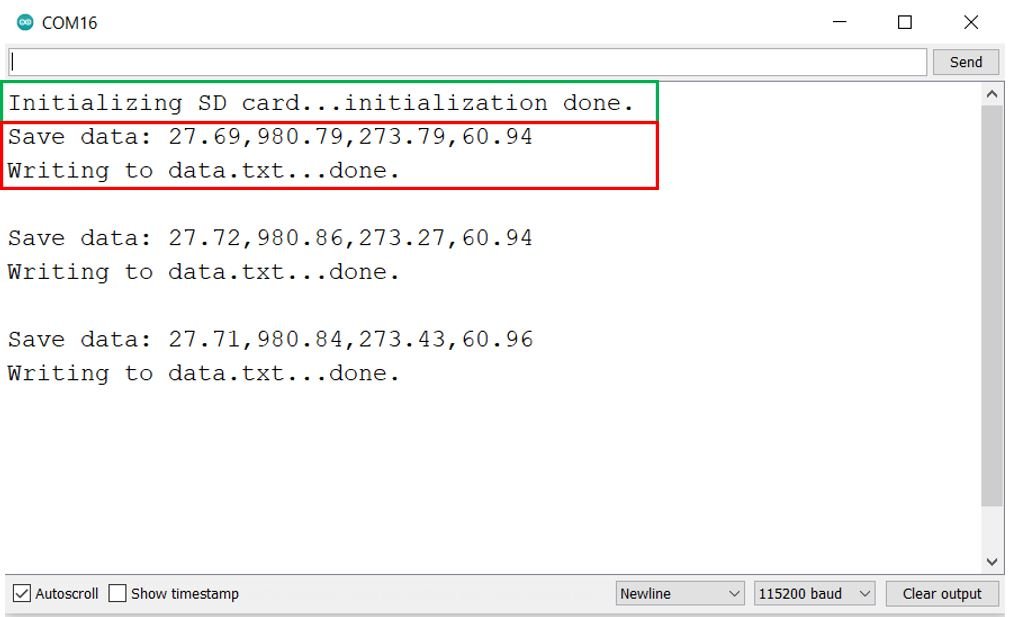
Once the code is uploaded to Arduino, open the serial monitor and set the baud rate to 115200. Instantly the serial monitor will first initialize the microSD card and then start displaying the different sensor readings. We will be able to see them successfully getting saved in our data.txt file.
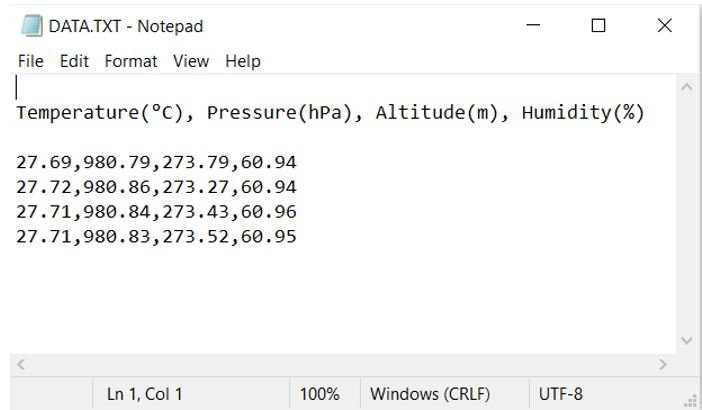
After a few minutes, take the microSD card out of its module and insert it in your system to view the data.txt file.

Inside the file you will be able to view the sensor readings consisting of temperature followed by pressure, altitude and humidity.
Conclusion
In conclusion, we learned how to create a data logger to log sensor readings to Micro SD card using Arduino and BME280 sensor. We used the BME280 sensor to obtain temperature, pressure, altitude, and humidity readings and logged them on our micro SD card after every few seconds.
For more data logging articles follow the links below:
Excelente Tutorial, parabéns!